
Learn how to hem curtains with iron-on tape for the perfect length - no sewing required! This simple step-by-step guide shows you how to shorten curtains easily and give your windows a polished, custom look.
Paid links used in this post. Read more about my link usage policies.
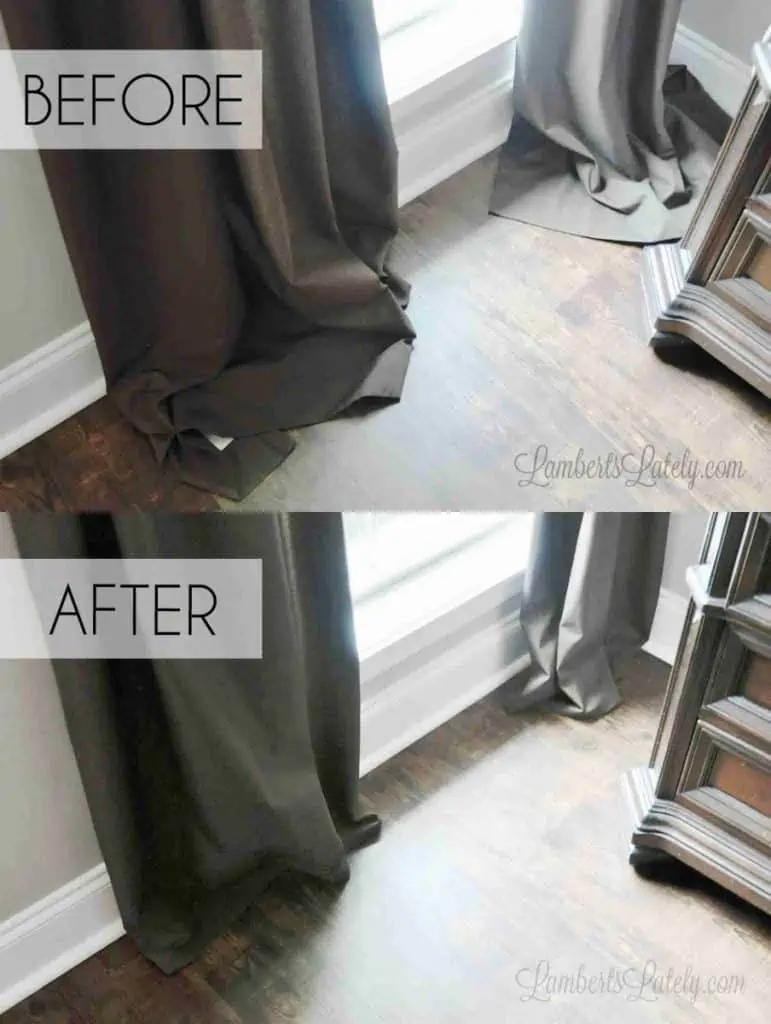
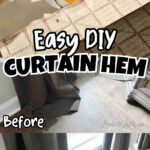
I'm sure we all have those projects on the old to-do list that seem to stay there forever. I try to keep a running list of projects I need to get done around my home - and hemming our living and bedroom curtains had been on there for years.
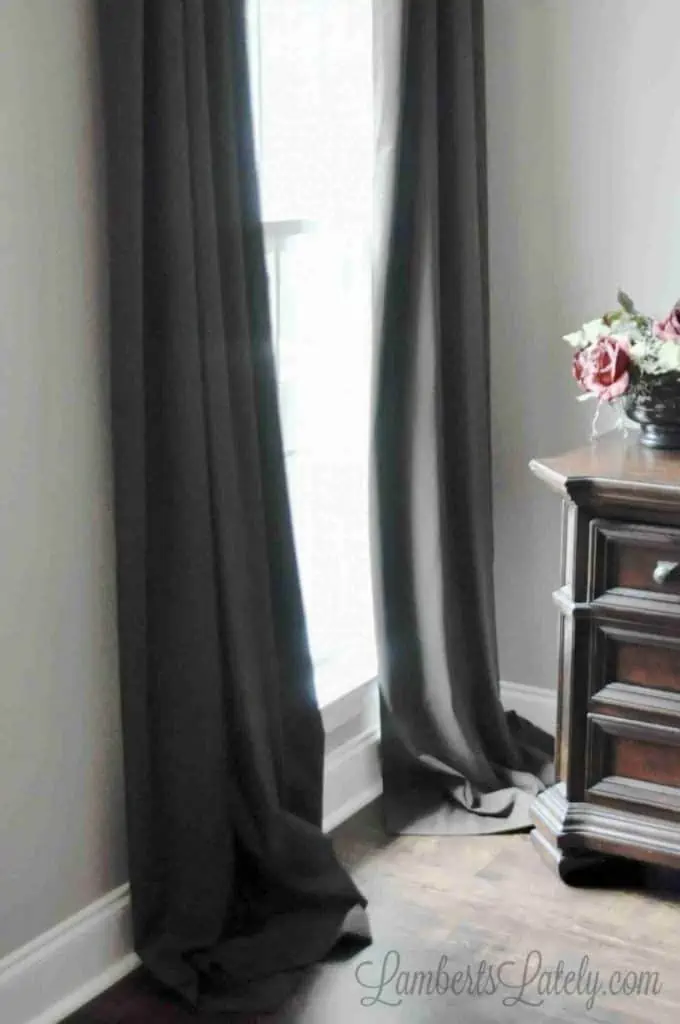
I don't mind long curtains. As a matter of fact, I love the look of curtains just barely pooling on a floor. But these were out of control.
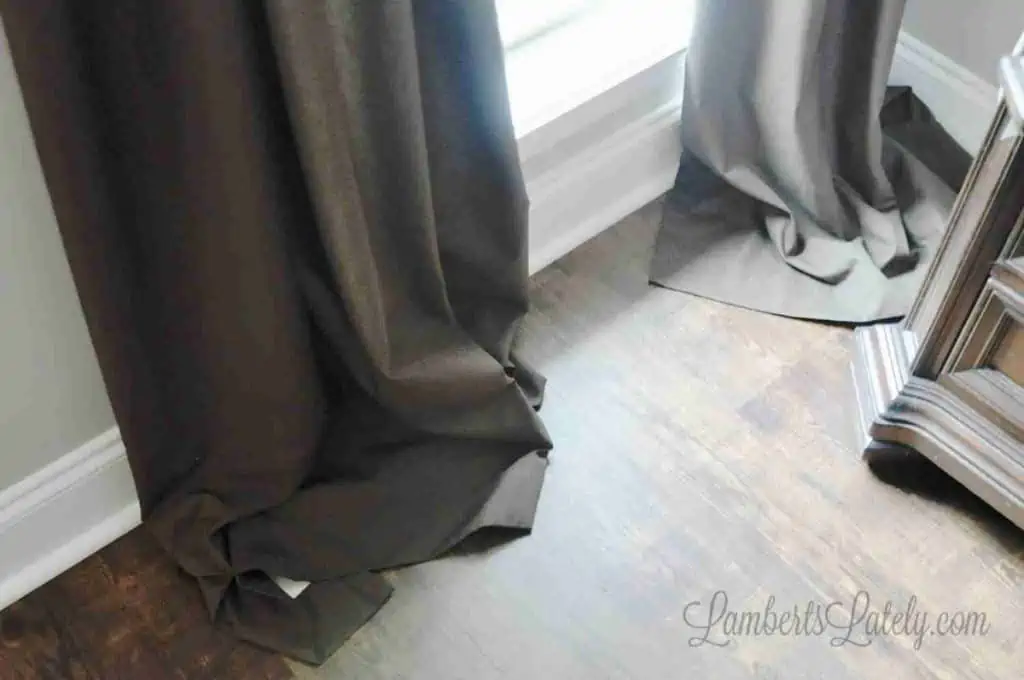
It was almost comical. The white liner constantly showed because the extra on the floor was so extreme. They were so long that our robot vacuum would always catch them.
So when I had a Saturday at home alone to kind of catch up on random projects, this was at the top of the list.
Benefits of Hemming Curtains with the No-Sew Method
For this project, I chose to go with a no-sew hem tape. There are a few great benefits...
- Saves hours compared to traditional hemming - no measuring, folding, ironing, pinning, or sewing required.
- Fewer supplies needed, making the process quicker and easier.
- Creates a cleaner look since there are no visible stitches at the bottom of the curtains.
- Hem tape, when applied correctly, is actually more durable than sewn hems.
Supplies Needed
- Tape measure or ruler
- Cutting Mat, Quilting Ruler, and Rotary Cutter (Note: regular, sharp scissors work if you don't have these; you'll just need to measure and make sure your cuts are straight. These make it much easier!)
- ⅝" Hem Tape
- Iron & Ironing Board
- Fabric Shears
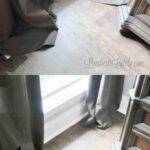
Step 1: Measure the amount of cutting needed.
First, hang curtains and measure the amount of excess material you need to cut off of the bottom edge of the curtain before hemming.
Like I said above, I prefer my own curtains to just drape the teeniest bit on the floor, so I tried to leave about 3 extra inches past where the curtain first hits the floor. I think this is the perfect length for curtains, but your mileage may vary.
You can see above that there are 8 total inches from where the curtains first touch the floor to the end of the curtains - meaning I needed to cut 5 inches off.
Length Estimation Tip
Want your curtains to just barely touch the floor? Leave only about 1.5 inches past where the curtains touch the floor. This gives you a 1" seam allowance plus a little bit of extra to work with.
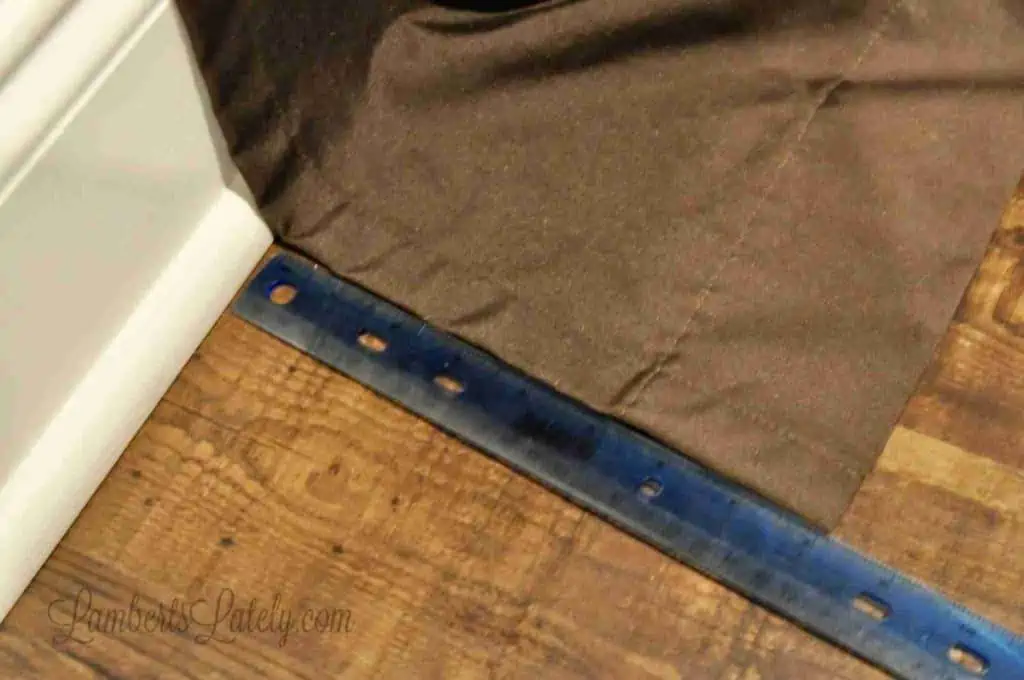
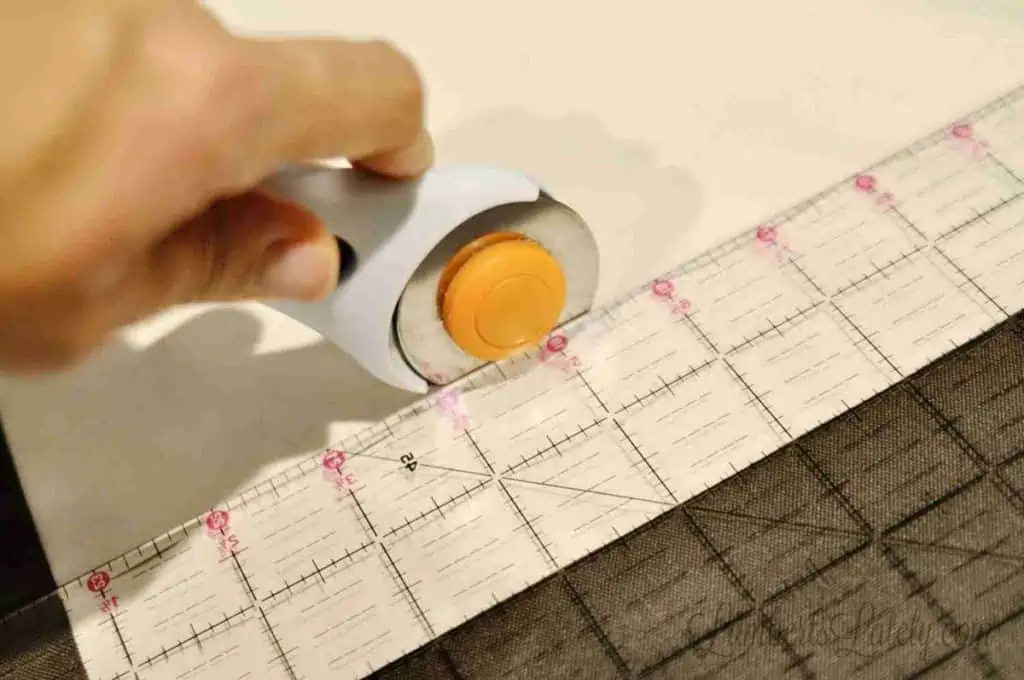
Step 2: Cut straight across the curtain panel.
You can do this part without a cutting mat/quilting ruler/rotary cutter, but the combo makes this process ten times easier. (Plus, I use these all the time for other fabric-based crafts, like my t-shirt quilt. I recommend having them!)
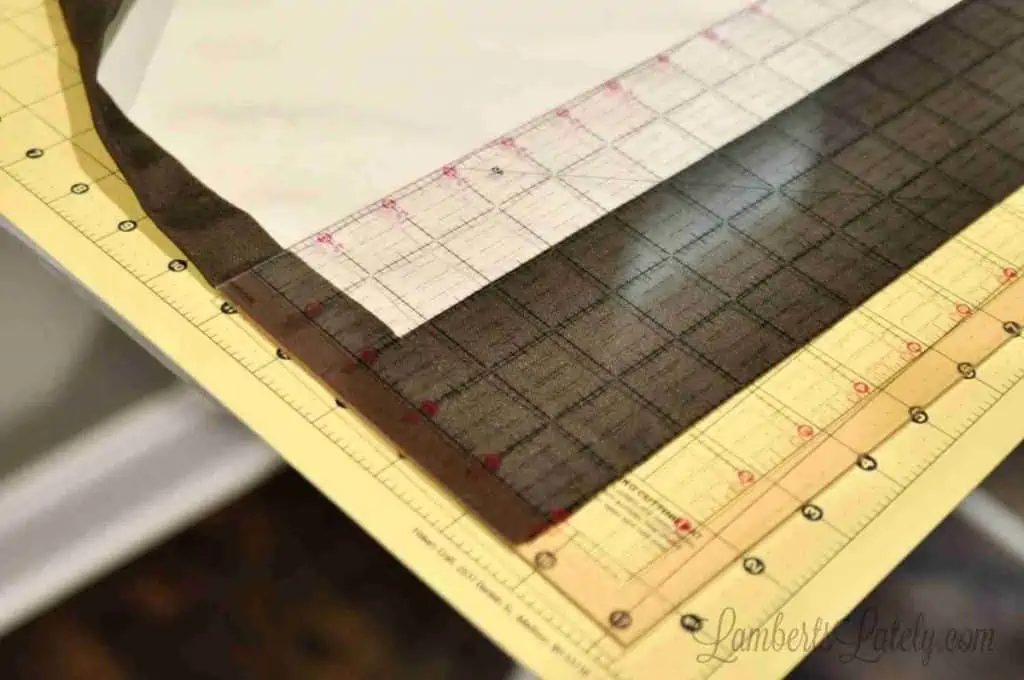
Simply lay the curtain panel on the quilting mat, lining it up straight across using the guides on the mat.
Then, line the quilting ruler straight using the guides and measure what you needed to cut off from step 1. Use the rotary cutter to cut off the amount of excess curtain you measured before.
You will probably have to do this part in small sections to get all the way across the curtain panel. Just go slowly, making sure your curtains and ruler are lined up each time.
Remember, you need to have about 3 excess inches from where the curtain first hits the floor to make your curtains look like mine.
Alternate Cutting Method
No mat/ruler/cutter? No problem!
To do this part with just scissors, take your measurement number from step 1 and divide it by 2. (In my case, this result would be 2.5") Measure that distance from the bottom of your curtain panel and mark the spot with a pencil.
Fold the curtain fabric up at that pencil line and pin. Then, carefully, use scissors to cut all the way across at the spot where the fabric bottom now lands.
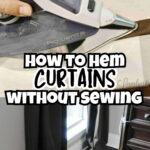
Step 3: Apply iron-on hemming tape.
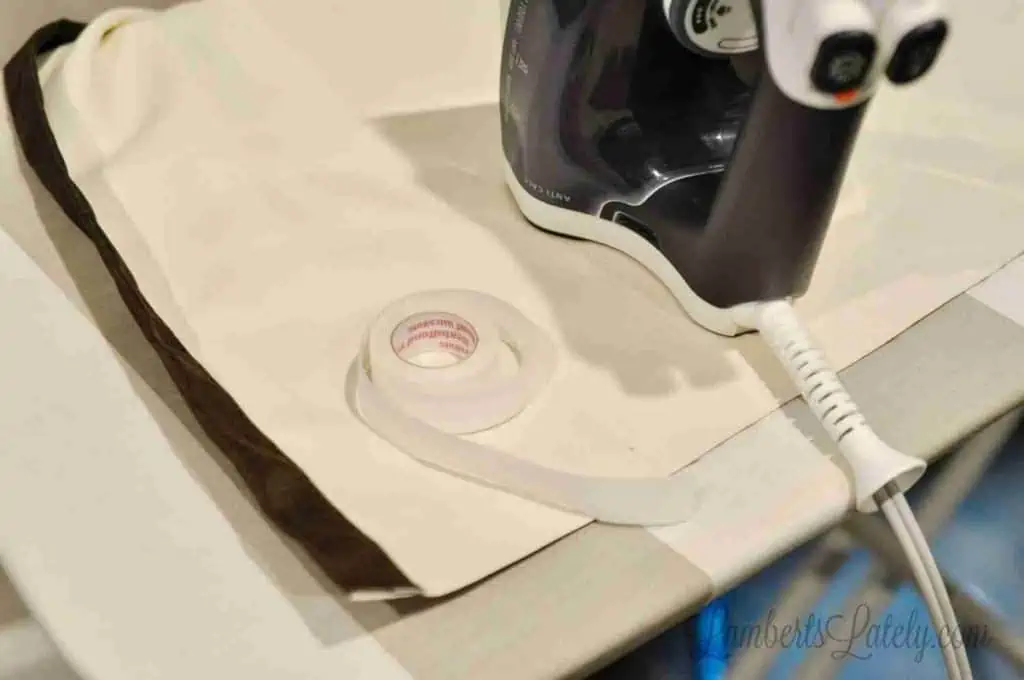
Now that the excess is cut off, break out the hem tape and iron. My curtains are pretty heavy, so I used ⅝" iron-on tape with great success.
Use the medium setting (with no steam) on your iron to apply the tape (sticky side down) onto the raw edge of the back/bottom of the curtain. You'll need to really press in with the iron and go slowly with this step.
There should be the tiniest bit of excess fabric below the hem tape (under ¼").
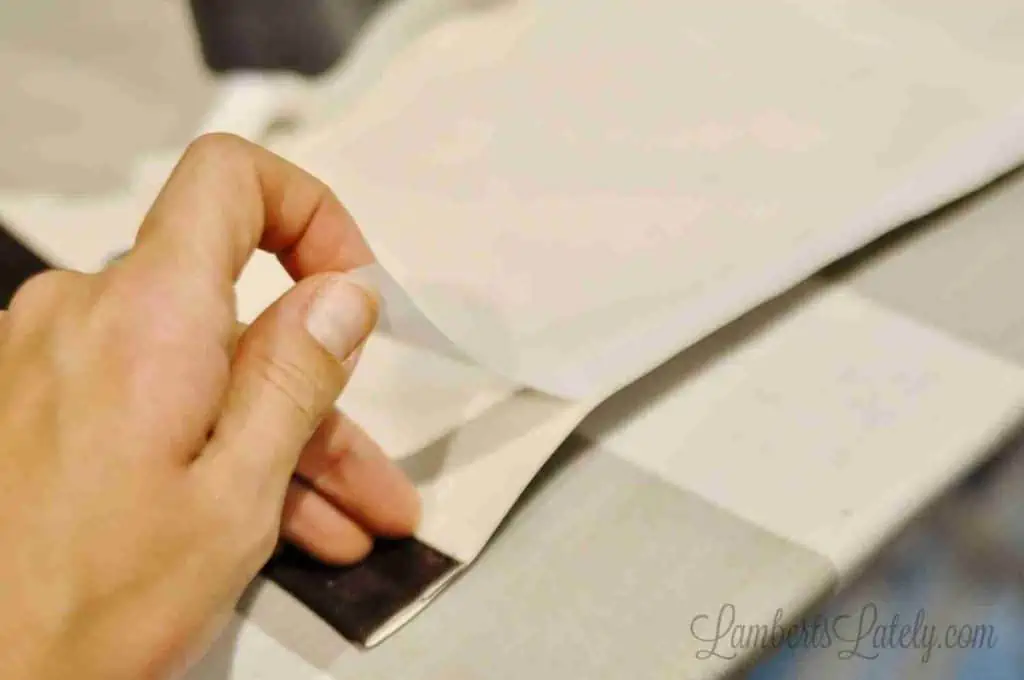
Then, take the paper backing off of the top of the tape. You should have a clear residue that remains stuck to the curtain.
Liking this tutorial so far? You'll also love my Faux Crown Molding and Blanket Ladder tutorials!
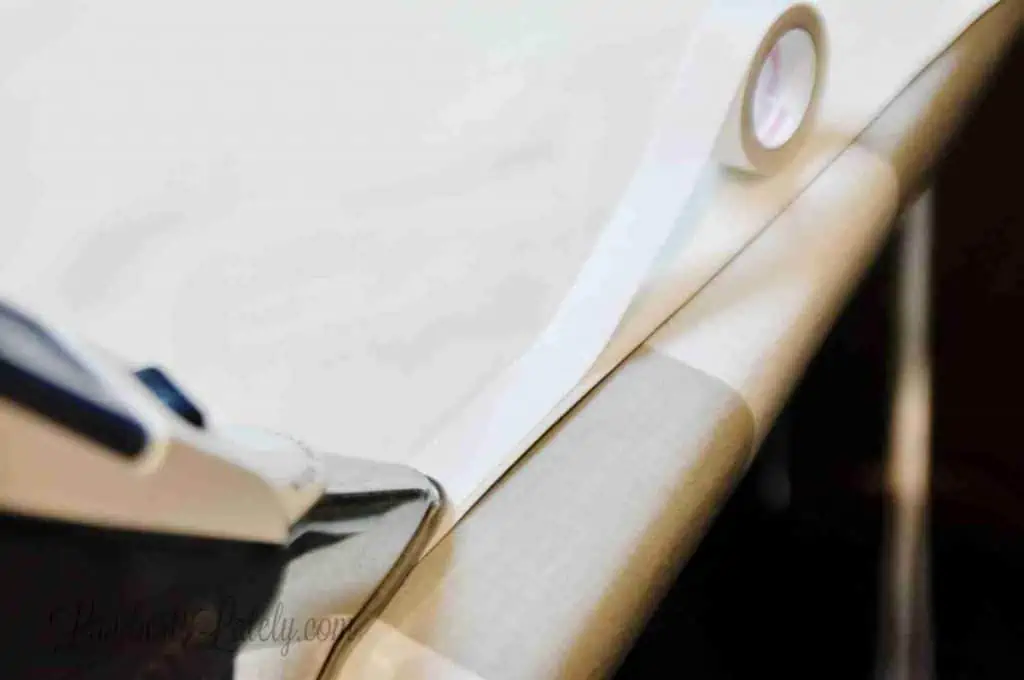
Step 4: Fold the hem and iron.
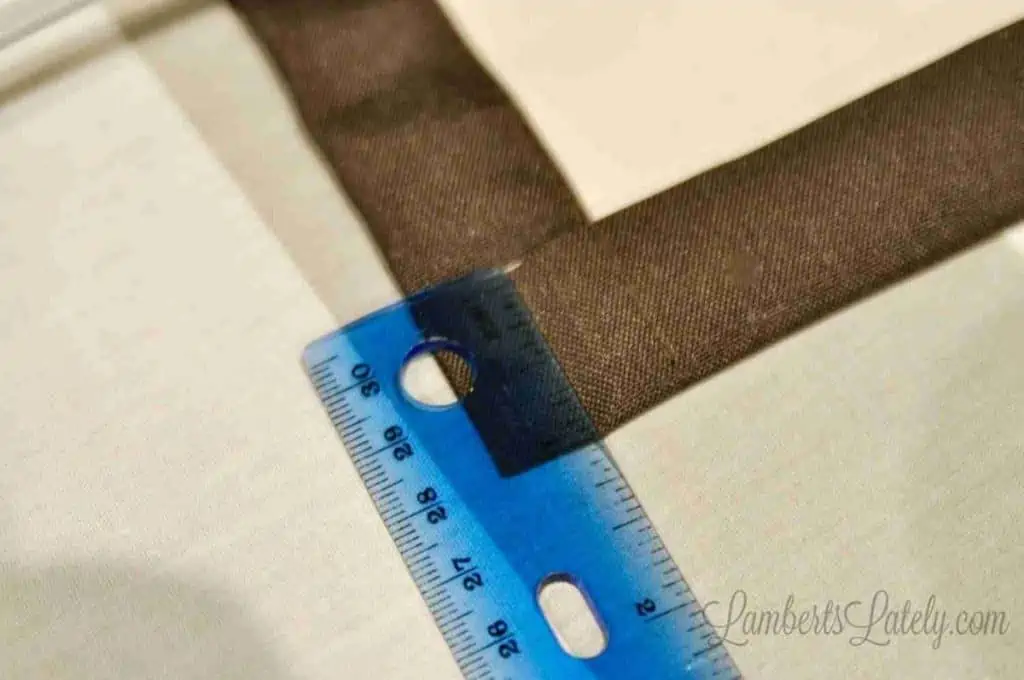
After applying the hem tape to the bottom of the curtain, measure 1" of the raw edge and fold up, basically making a sandwich with the layers of fabric on the outside and the hem tape in the middle.
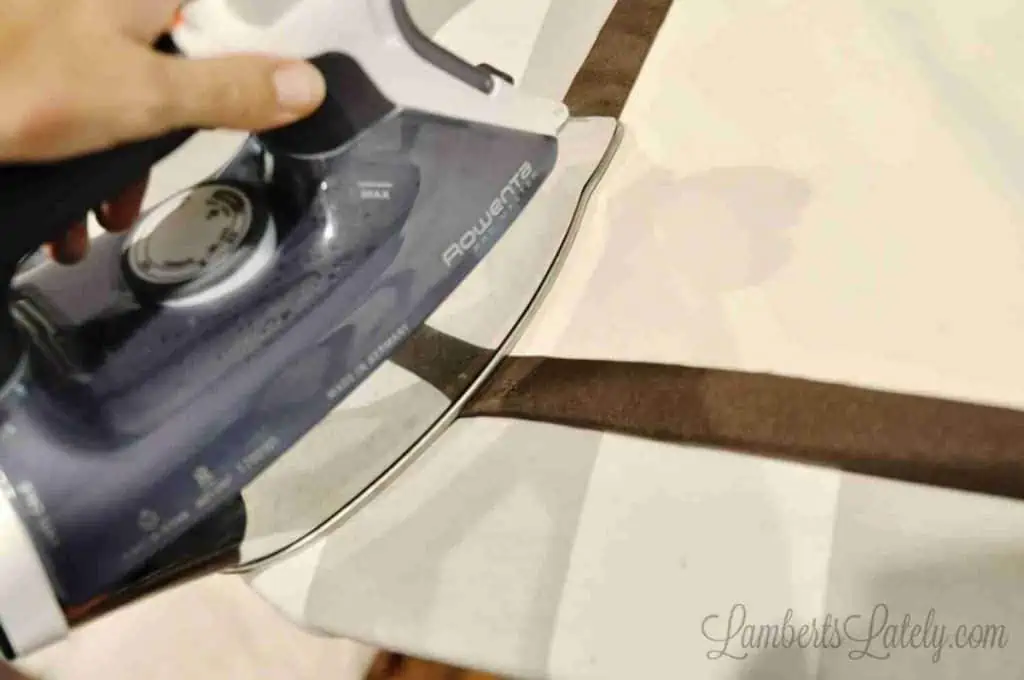
Turn the heat on the iron almost all the way up (for polyester curtains - might vary with other materials) and begin to iron that seam down. Slowly go over the entire edge. In this step, you're fusing the fabric by melting the hem tape to hold that folded-up hem in place.

Again, you'll want to press down with your iron and go slowly. It takes a few seconds for that hem tape to melt enough to stick. And, remember: no steam!
As an added bonus, this step irons down the crease at the bottom of the hem, making for a really nice, crisp bottom edge.
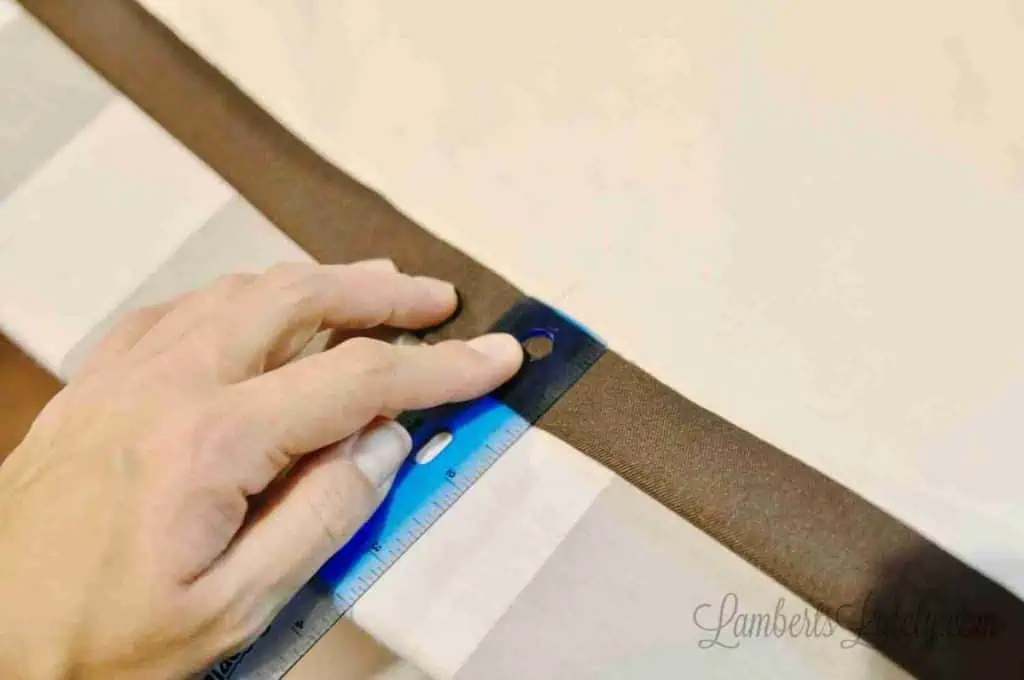
Every foot or so I like to measure and make sure my seam stays at about 1". If it gets a little off, it shouldn't be super noticeable, but try to stay as close to that 1" seam as possible.
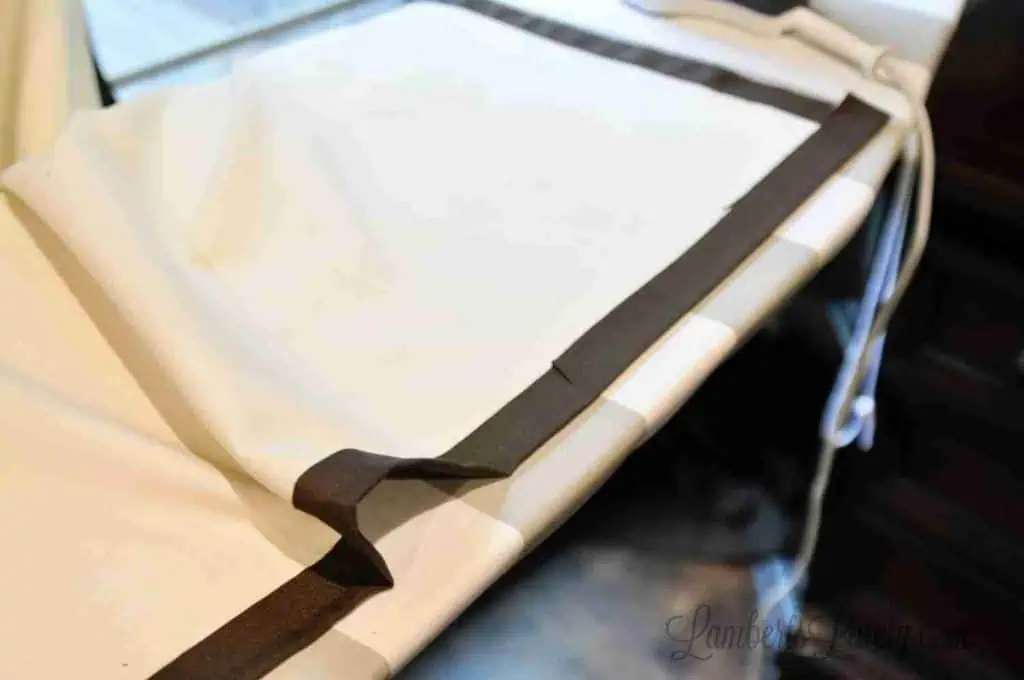
Step 5: Finish the curtain's corners.
One last step!
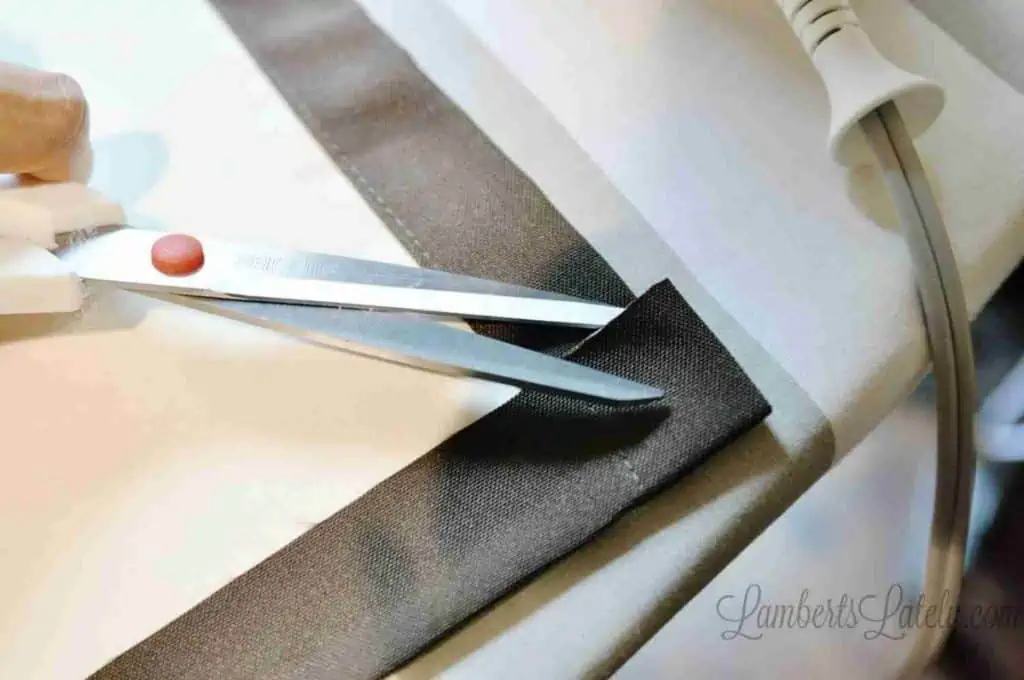
Once you get to the end of your curtain seam, there will probably be a little bit of a corner poking out from each side. Use your fabric shears to cut it down at an angle, just so it doesn't hang out from the back of the curtain.
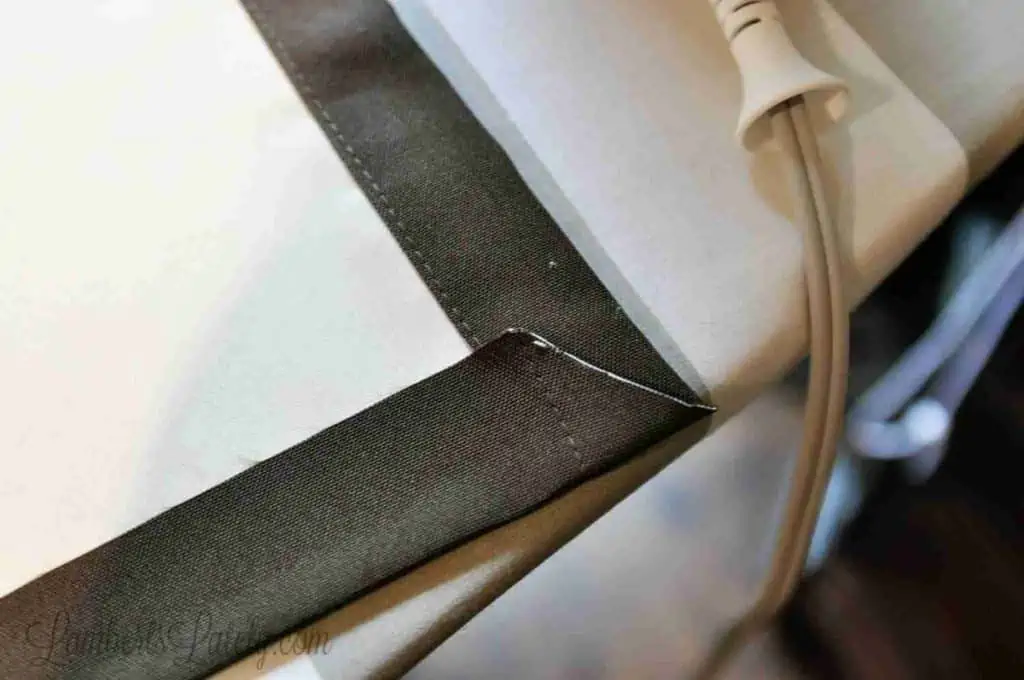
You'll never see the back of the curtain, but this will make sure there isn't any overhang on the ends.
Final Result

As you can see above, this length gives you the perfect little pool of curtain that's hitting the floor. If you want curtains to just brush the floor, I'd go with closer to a 1-1.5" excess in that first step.
Remember: it's better to go longer and take off extra if needed. You can always re-hem, but you can't add back once it's gone.
Helpful Tips & Tricks
- Use a sharp cutting tool. Whether it's fabric scissors or a rotary cutter, make sure the blade is sharp. A clean cut gives you straight edges and helps prevent fraying.
- Measure curtains while they're hanging. Before marking or cutting, hang your curtains on the rod exactly as they'll be used. This ensures the most accurate length.
- Check each panel individually. Don't assume all curtain panels are the same length. Measure the bottom edge of each one to avoid uneven hems.
- Test on a scrap first. If you've never used hem tape, practice on a leftover fabric piece so you're confident in how much heat and pressure you'll need.
- Choose the right tape. Heavier fabrics (like blackout curtains) may require stronger or wider hem tape, while lightweight sheers do best with lighter-weight tape. I have heavier blackout curtains in this project, and ⅝" tape worked perfectly.
If you've been putting this project off, trust me, it's not complicated! You don't have to know how to sew a thing to know how to hem curtains this way.

Have you used hem tape to hem curtains in your home? I'd love to see your results! Tag me on social media 📸 @lambertslately with your results. You can also let me know how it went in the comments. 💭

Leslie Lambert is a lifestyle writer and content creator specializing in home organization, family recipes, and intentional living. With 17 years of experience in blogging and digital storytelling, she helps busy women create calm, purposeful homes they love.


Hi Leslie, sorry if I missed this, but if you're going to end up folding the hem up an inch after you apply the tape, then shouldn't the amount you cut off be reduced by an inch? So if you want your curtains 8" shorter, you'd cut off 7" and fold it up an inch when the tape is applied? Thank you for letting me know!
I recommend going a little longer than your want your seam to be. So, if you're using a 1" seam and need them 8" shorter, I would cut to 6.5" (and that would get you to barely brushing the floor). You can always go shorter, but you can't add back! If you want a little bit of a pool of fabric on the floor (what I prefer), I recommend a 3" seam allowance - so in that example above, I would cut off 5".
I bought a curtain liner to help with sunlight and it’s longer than my grommet drapes by about 1inch. I’m going to use iron on tape to shorten them.