
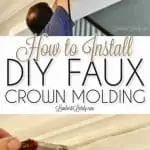
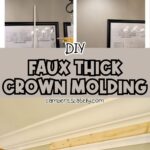
Dreaming of chunky, designer crown molding but stuck with a 'DIY budget'? I'm sharing my favorite faux crown molding hack that gets you that high-end, 6-inch architectural look for under $100. No contractor, no complex miter cuts, and - I promise - zero DIY tears. Let's fake it until we make it!
Paid links used in this post. Read more about my link usage policies.
Why This "Faux" Hack is a Total DIY Game Changer

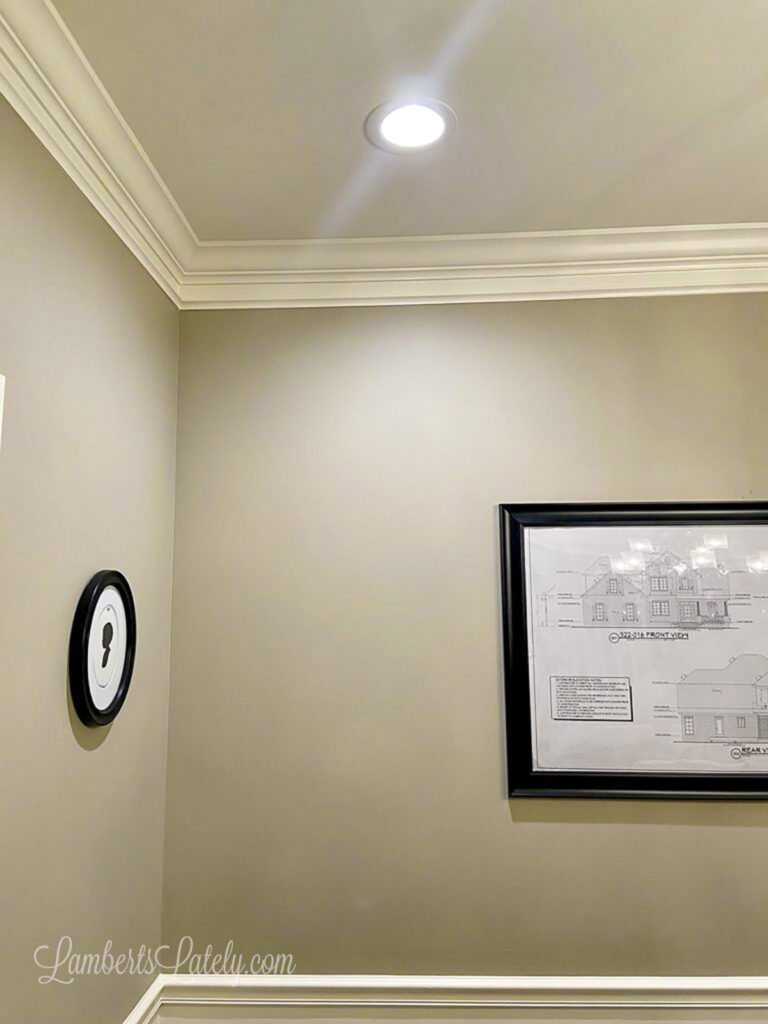
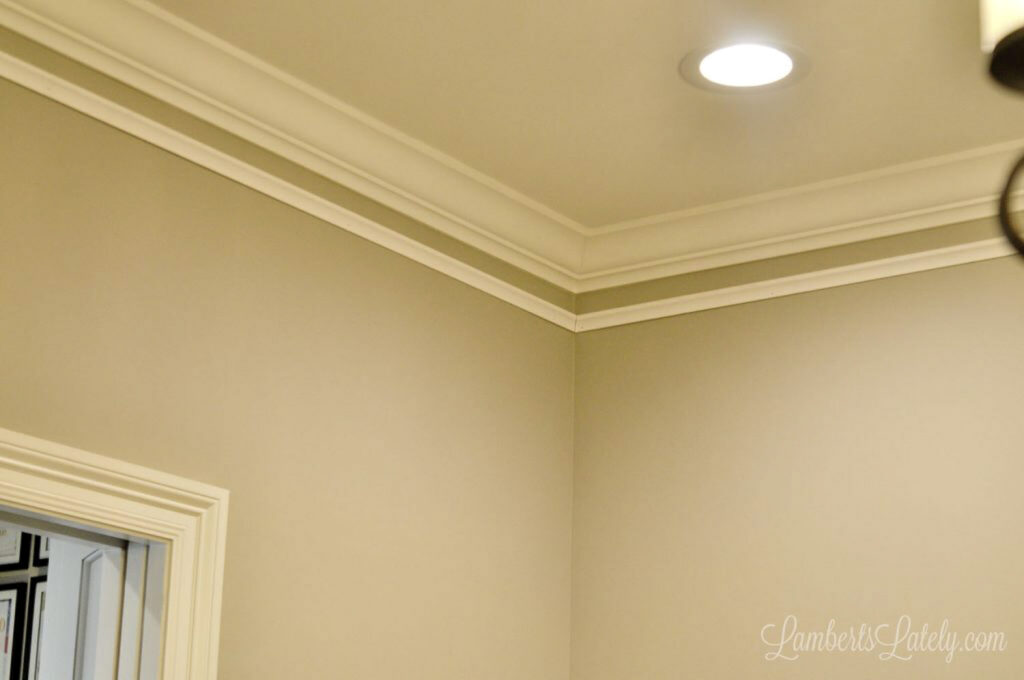
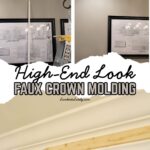
Have you ever walked into a high-end model home and just gasped at the crown molding? It's thick, it's architectural, and it makes the whole room look like a million bucks. Then you go to the hardware store, see the price of 5-inch solid wood trim, and think...well, my plain walls are fine.
Stop right there! You don't need a contractor's budget (or a degree in geometry) to get that look. Today I'm sharing my favorite faux crown molding hack. We're going to "cheat" our way to gorgeous, thick, expensive-looking trim using a few simple boards and a whole lot of DIY magic.
If you've ever tried to install traditional crown molding, you know it's basically a nightmare of compound miter cuts, wasted wood, and tears. It's one of those projects that makes even seasoned DIYers want to hire a pro.
But this method? It's the ultimate "work smarter, not harder" project.
I can't wait to show you how easy it is to transform simple crown molding into something really special. Let's get going!

Supplies Needed
- Thin bottom molding (I can't find the particular style we used for some reason - it's from Lowe's, and it was 1 ⅛" thick and 8ft long. You can use many different types for this; just make sure the back is flat instead of angled on the back like traditional crown molding.) For our 11x12' room, we needed 7 pieces.
- Miter saw
- Painter's tape
- Interior caulk/caulk gun
- Trim paint (most builders leave behind extra trim paint after building; check your garage before buying new paint!) Our trim paint is Snowbound by Sherwin Williams in a semi-gloss finish.
- Thin trim brush
- A 1 to 2' scrap of 1x2" wood
- Pneumatic nail gun (This can be done with standard nail/hammer - but I recommend the nail gun for ease and minimal molding damage.)
- Phillips screwdriver/hammer
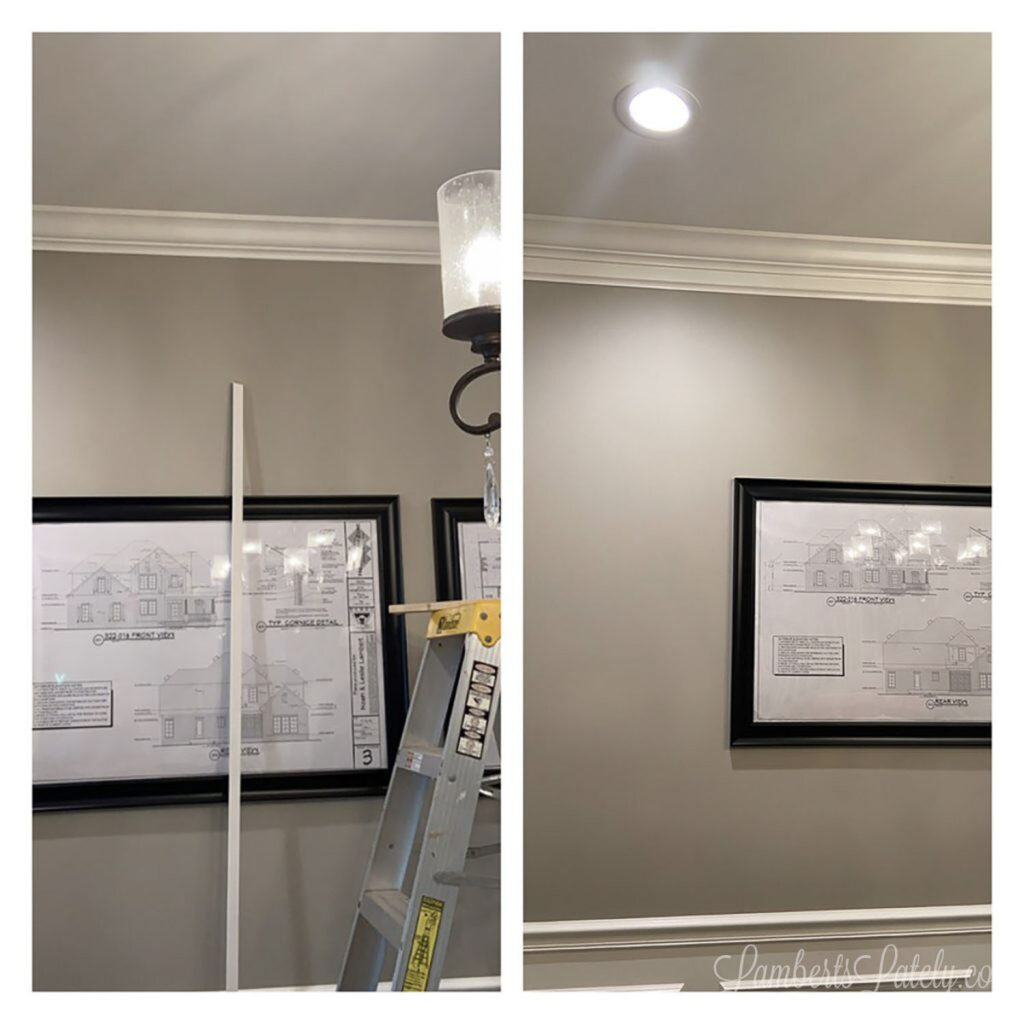
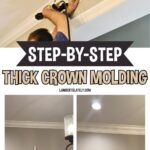
Step 1: Cutting and Attaching Your Faux Molding
This is the most effective part of the project: physically adding that "visual height" to your walls.
Note: This hack works best if you already have a small standard crown molding installed at the ceiling. If you're starting with a totally blank slate, you can still do this - just know that the "finished" look comes from that layered effect!
The "Spacer" Trick for a Level Install
Instead of measuring and marking a thousand tiny pencil dots around the room, we're going to use a spacer block to make spacing our molding super simple. I used a scrap piece of 1x2" wood to create a consistent gap between the existing ceiling molding and my new lower trim.
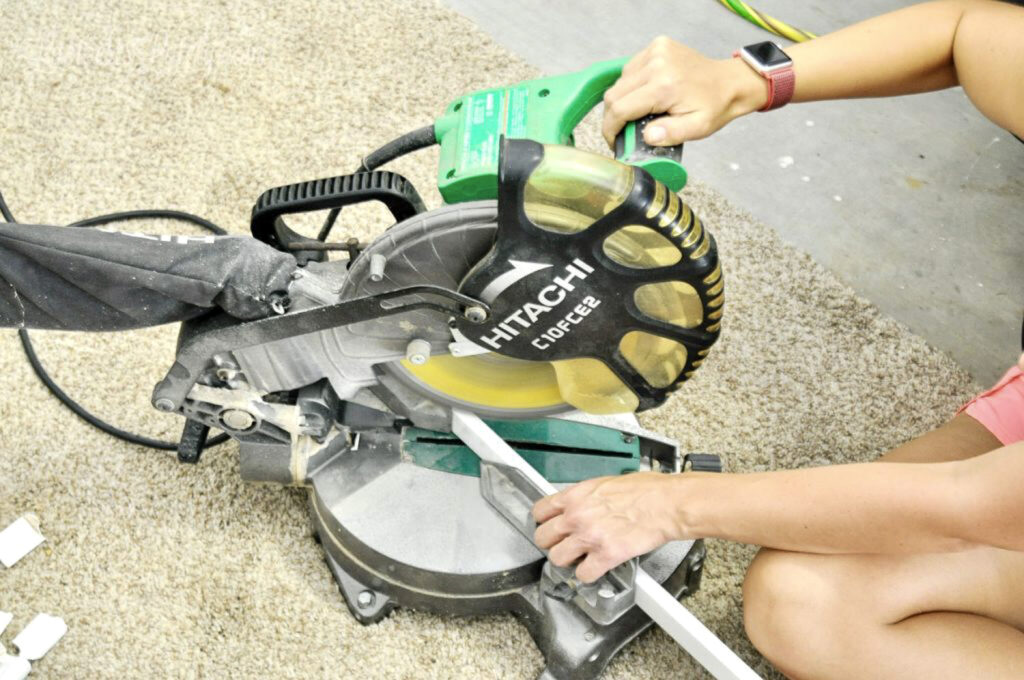
Cut Your First Corner: Take your bottom molding and cut a 45-degree miter angle. One side needs to fit snugly into the corner (the angle will face you on the saw).
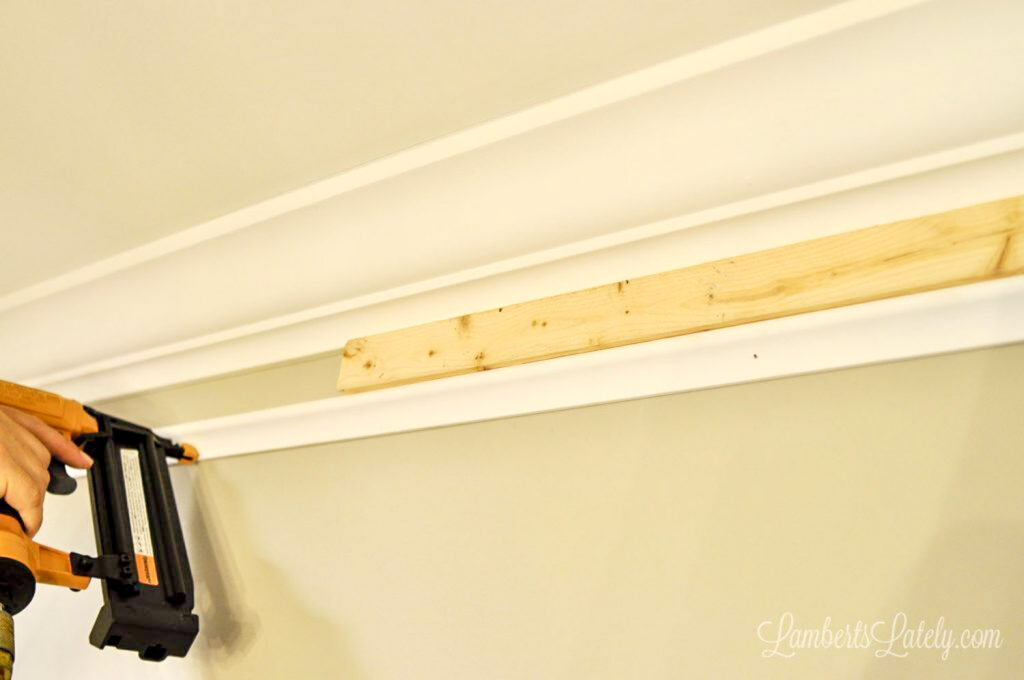
- Position with the Spacer: Hold your scrap wood spacer against the bottom of your existing molding. Slide your new piece of trim up until it hits the spacer.
- Tack it in Place: Use your brad nailer to put 2-3 nails into the center of the board to hold it.
- Remove the Spacer: Slide the scrap wood out before you finish nailing.
- Tip: Don't nail too close to the spacer, or it might get pinched against the wall!
Joining Long Runs: If your wall is longer than your trim board, use a scarf joint. Cut the end of your first board at a 45-degree angle (facing the wall), then cut the start of your next board at a 45-degree angle (facing you) so they overlap like a puzzle piece. This makes the seam almost invisible once painted.
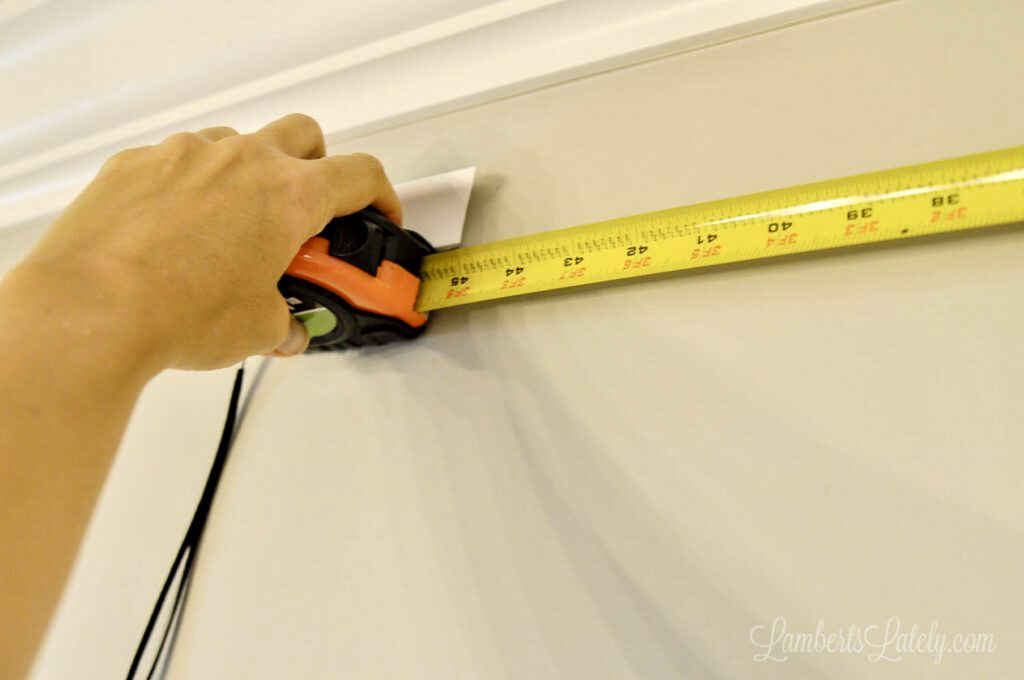
Work your way around the room until this step is done; I recommend going in a circle to avoid having to make too many correction cuts and re-measures later on.
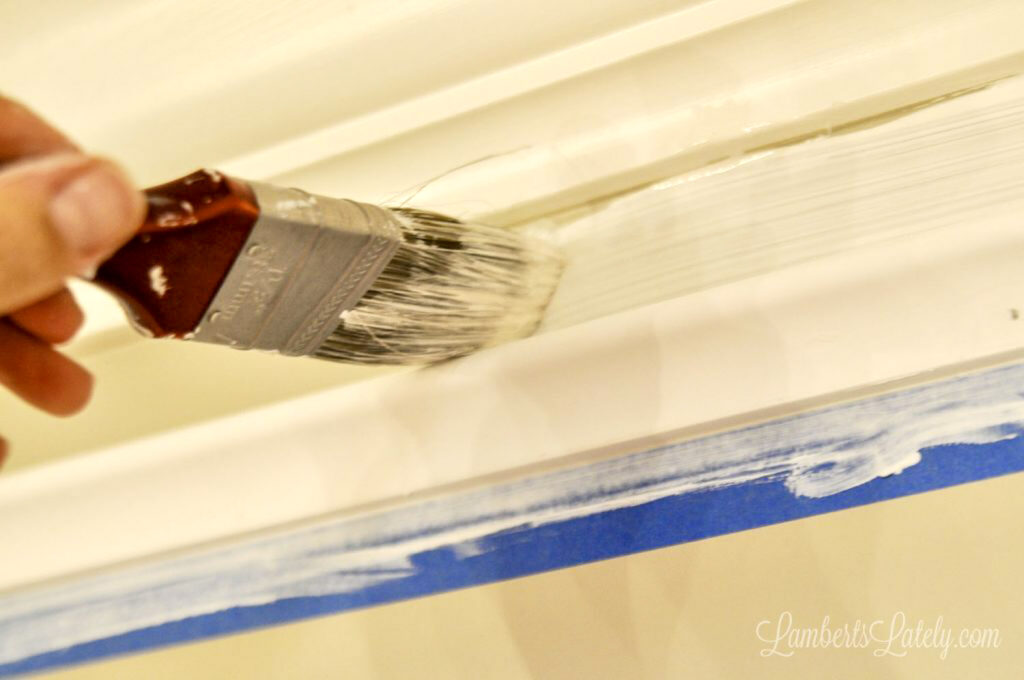
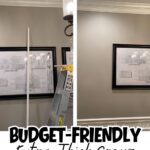
Step 2: Prepping for Paint (The "Magic" of Caulk)
If you look at professional millwork, you'll notice you can't see any gaps where the wood meets the drywall. That's because of caulk! This step is the difference between a "DIY project" and "custom architecture."
Pro Prepping Tips:
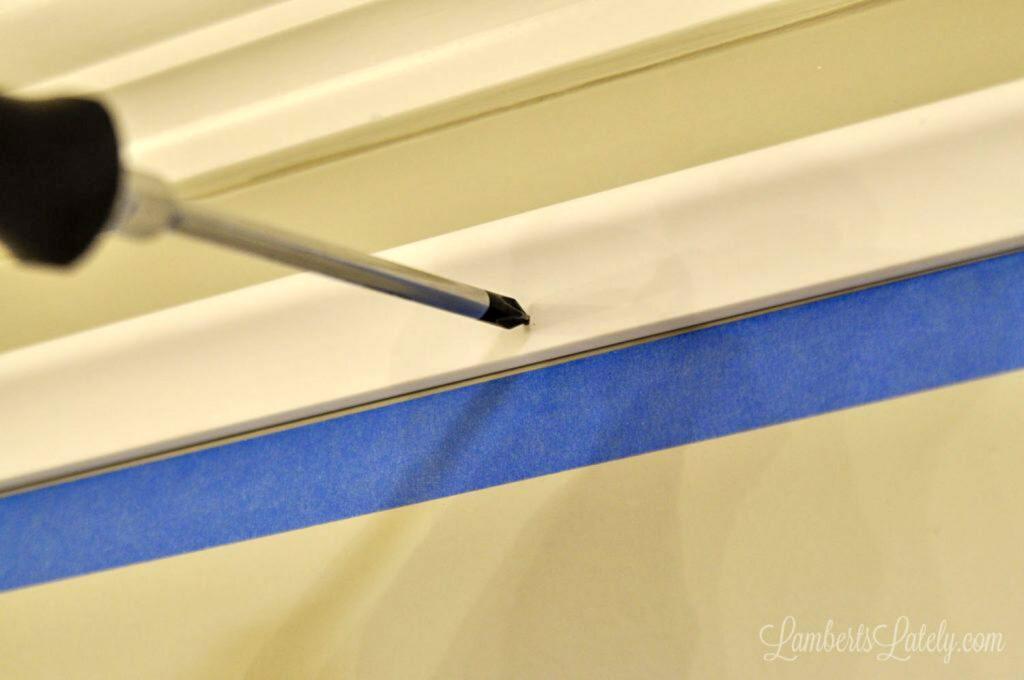
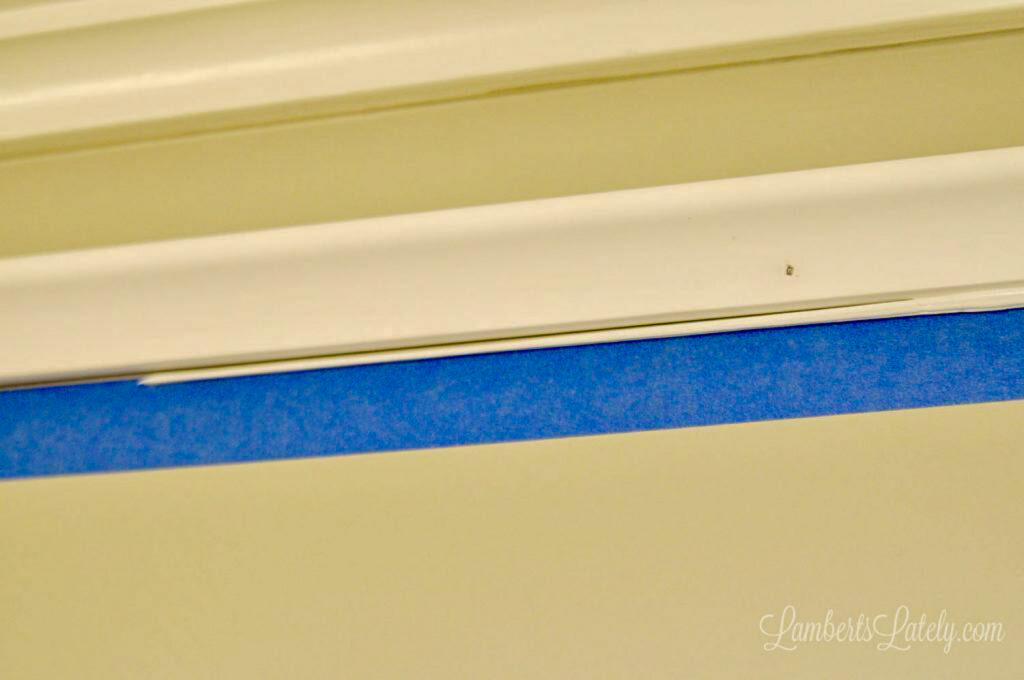
- Counter-Sink Your Nails: Before caulking, take a Phillips head screwdriver and lightly tap any nail heads that are sitting flush or sticking out. You want them slightly recessed so the caulk can hide them completely.
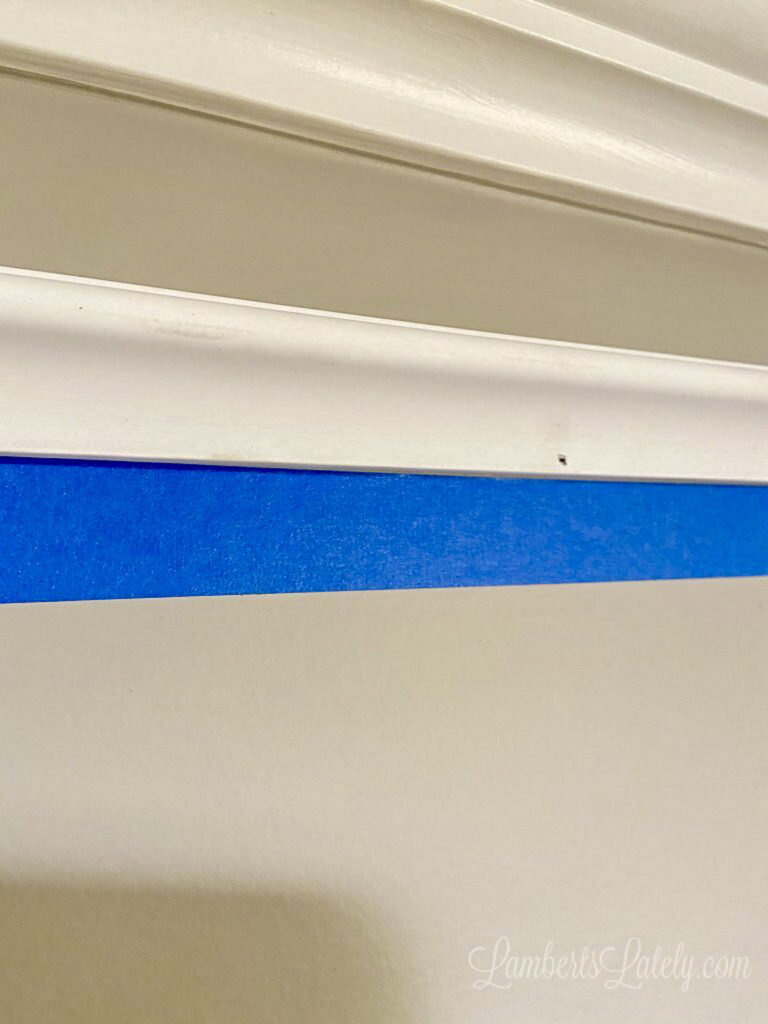
- The Tape Method: For a crisp line, run painter's tape along the wall directly under your new molding. Leave the tiniest sliver of wall showing - we're talking 1/16th of an inch - so the caulk can "seal" the wood to the wall.
How to Get a Smooth Bead:
Apply a thin bead of paintable caulk along the bottom of the molding. Now, for my oh-so-high-tech tool: my finger! Run your finger along the bead to smooth it out. Keep a damp paper towel handy to wipe off the excess.
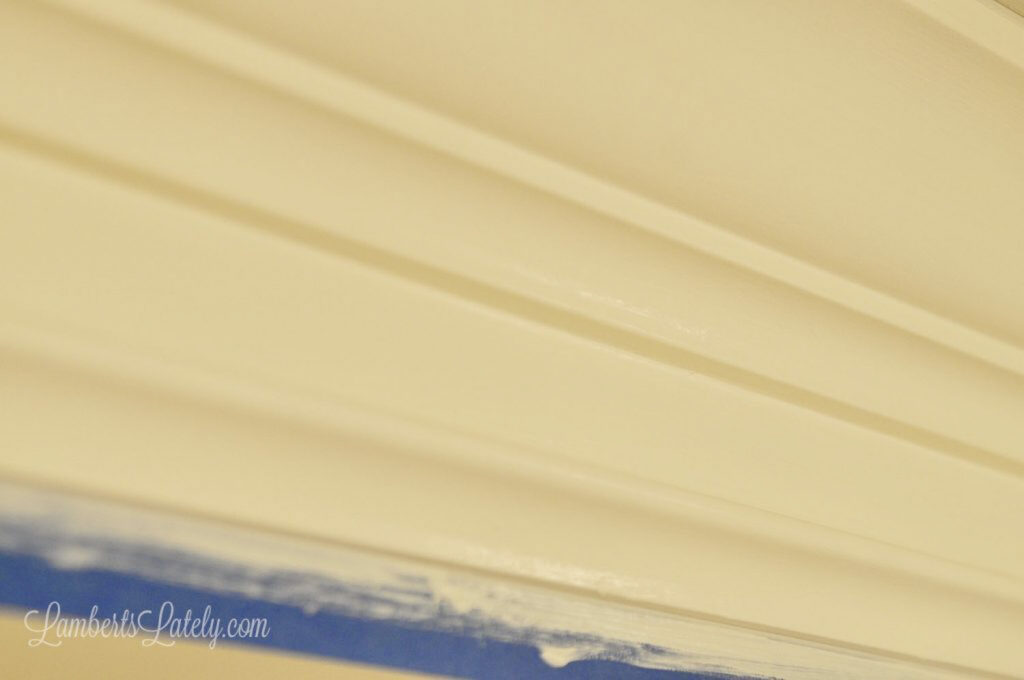
Note: You don't need to caulk the top of this lower board since it's hidden by the "gap," but definitely check for any gaps at the corner joints!
Step 3: Painting the Gap (The Transformation)
This is that "Aha!" moment in the project. By painting the molding and the strip of wall between them the same color, the eye stops seeing "two boards" and starts seeing "one massive crown molding."
The Reveal: Since the area is small, each coat dries in about 20 minutes. By the time you finish the last wall, the first one is usually ready for another round!
Prime if Necessary: If your walls are a dark or bold color, do not skip the primer! You want the whites to match perfectly.
Match Your Sheen: Use the same paint and sheen as your existing trim (I used Sherwin Williams Snowbound in Semi-Gloss).
Apply Multiple Thin Coats: Because you're painting onto drywall, it might soak up the paint. We ended up doing five light coats to get that perfectly smooth, "built-in" look.
Design Variations: Make it Your Own!
One of the reasons I love this hack is how customizable it is. Depending on your home's vibe, you can tweak the "recipe":
- The Modern Farmhouse: Use two squared-off 1x2s for a very clean, chunky look.
- The Traditionalist: Use a small "cove" molding for the bottom piece to add a bit of a curve.
- The Bold Look: If you have 10-foot ceilings, go even bigger! Increase that gap to 8 inches for a really grand feel.
Troubleshooting: What If My Walls Aren't Perfect?
Let's be real here - house projects are never as "perfect" as they look on Pinterest. Here's how to handle the common hiccups:
- The "Wavy" Wall: If your drywall has a bump and your wood won't sit flush, don't force it. Nail it where it's flat, and use your caulk to fill the "smile" gap behind the board.
- The 90-Degree Lie: Almost no corner is a perfect 90 degrees. If your miter cuts have a gap, fill it with caulk. Once it's painted, nobody will ever know.
- Popcorn Ceilings: Yes, you can still do this DIY! You might just need a slightly thicker bead of caulk along the top edge to create a clean line against the texture.
FAQs
Final Results
If you've ever thought about doing this kind of project - even if you don't think you're crafty, even if you don't think you're capable - give this one a try. For maybe $100 worth of materials, we added so much value to the look of the dining room. I can't recommend DIY faux crown molding enough!
Check out more of my easy DIYs below...
More Home Improvement Projects

Leslie Lambert is a lifestyle writer and content creator specializing in home organization, family recipes, and intentional living. With 17 years of experience in blogging and digital storytelling, she helps busy women create calm, purposeful homes they love.


Hi leslie! We just did a basic moulding in my office (yet to post) and just love the look! We did it on a blank wall that needed a little something. Great tutorial.
Happy Wednesyay! laura in CO
My friend had this in her old condo and it looked great. We have builder grade 3 inch base molding. Do you think this could be done with base molding or is it too close to eye level and you'd see what has really been done?
You definitely could use it for base molding!
What a great idea! It came out fabulous! We don’t have any mounding yet but when we do, I’ll be sure to remember doing this.
Wow! It looks so impressive. Great trick!
I absolutely loved this tutorial! The step-by-step instructions were super clear, and I can't believe how easy it looks to create a beautiful faux crown molding. Can’t wait to give this a try in my living room. Thank you for sharing such a great idea!
I loved this tutorial! The step-by-step instructions were super helpful, and I appreciate the tips on picking the right materials. I can’t wait to try this out in my living room! Thanks for sharing!
This is such a fantastic guide! I love how you broke down the steps and made it seem so achievable. Can't wait to try this out in my own home—faux crown molding will really elevate the look! Thanks for sharing your tips!
I loved this DIY guide on faux crown molding! The step-by-step instructions were super clear, and the tips on choosing the right materials really helped me feel confident about my project. Can’t wait to see how it transforms my living room! Thank you for sharing!