
Find out how to make an inexpensive DIY Blanket Ladder with simple 2x4 cuts of wood. Includes free plans and step-by-step instructions.

Paid links used in this post. Read more about my link usage policies.
Let me introduce you to the absolute easiest, most inexpensive DIY project you'll see all day. I'm telling you, it doesn't get much more simple than this.
If you want to try a woodworking project but you're a beginner, this is a great one to start with. And the best part? You'll probably spend under $15 for the supplies to complete this gorgeous, rustic blanket ladder!
Why You Should Build This DIY Blanket Ladder
- It's Inexpensive. - You'll only need to spend about $15 for the main elements of this ladder. That's a fraction of the price you're going to pay for the completed version.
- Easy Weekend Project - This project can easily be completed in a weekend (maybe only a day if you time it correctly).
- Great Beginner Project - There are very few cuts, you're not using expensive wood (so it's easy to replace if needed), and there are no complicated methods to making this blanket ladder. It's as simple as cutting and drilling!
DIY Blanket Ladder Project Supplies
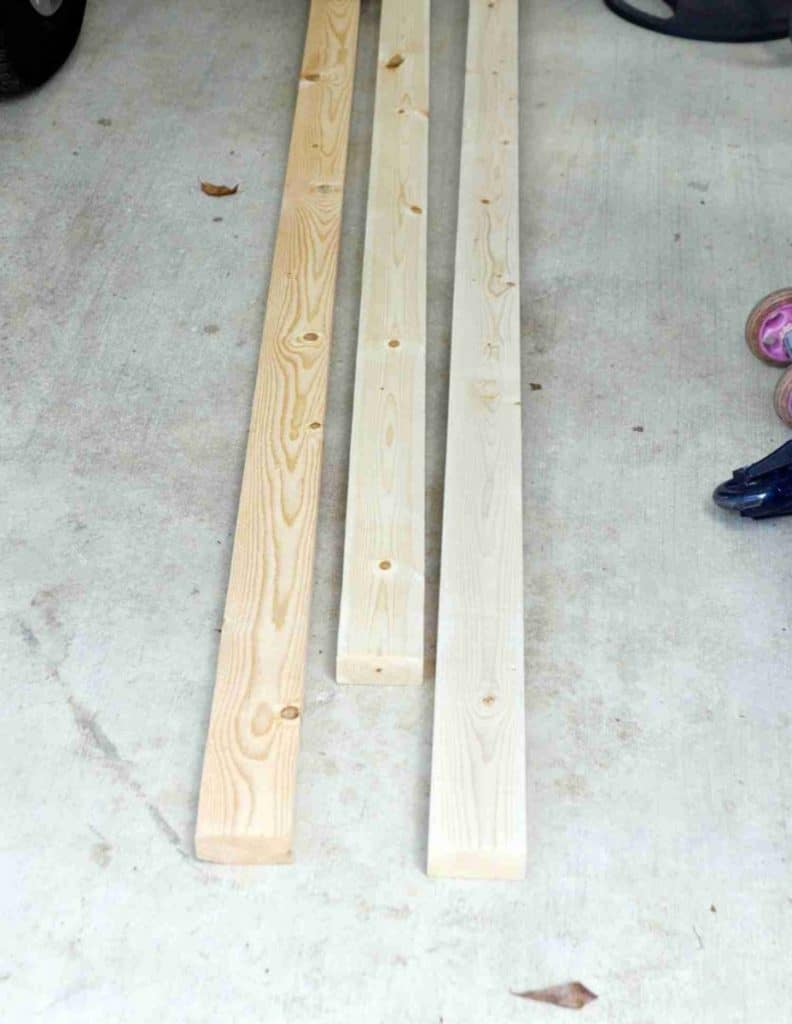
three 8' 2x4" studs (usually just a few dollars each at home supply stores)
hammer, larger screw, and flat-head screwdriver for distressing wood
miter saw
hand sander
a power drill and 20 3" self-tapping wood screws
wood filler
drop cloth
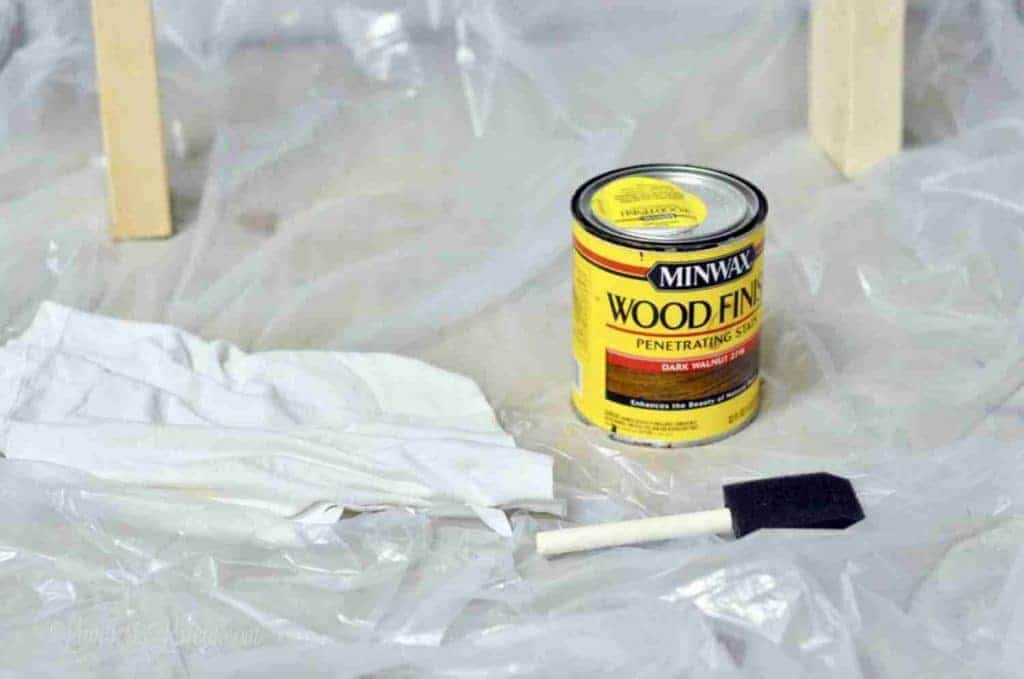
stain (I used Minwax Dark Walnut...my favorite!)
sponge brushes
old rags, towels, or scrap pieces of fabric that you're willing to throw away
polyurethane (this is my favorite)
Note: you're going to use maybe 8oz of both the stain and polyurethane, so get the smallest container you can find [usually ½ pint]. If you get a bigger one, it can always be saved for another project.
NOTE: This ladder is not meant to be for climbing - only blanket storage. Please don't hurt yourself by using this to climb something!
Step 1: Distress 2x4 cuts of wood.
(Excuse the mess that is my garage throughout this post. We were working on this while we had a hurricane threat, so eeeverything in my backyard had to be stored).
Start with three 8' 2x4's...any type of wood will do, mine were just plain whitewood.
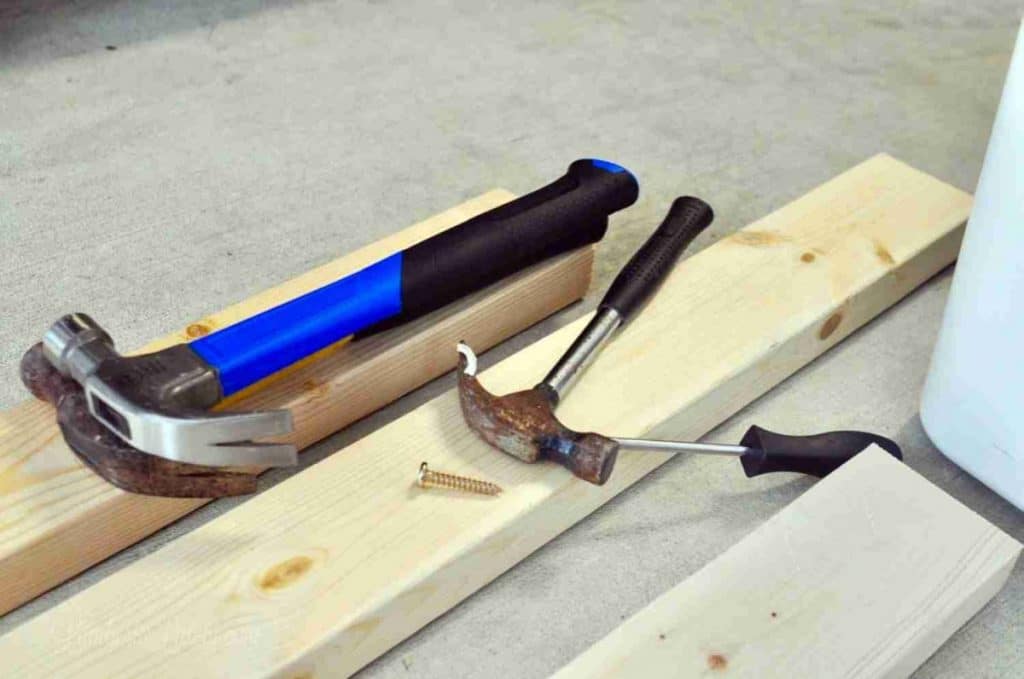
We're going to start off by beating the absolute snot out of them. 😉 This will give the wood a distressed, worn look that really makes the stain pop later on.
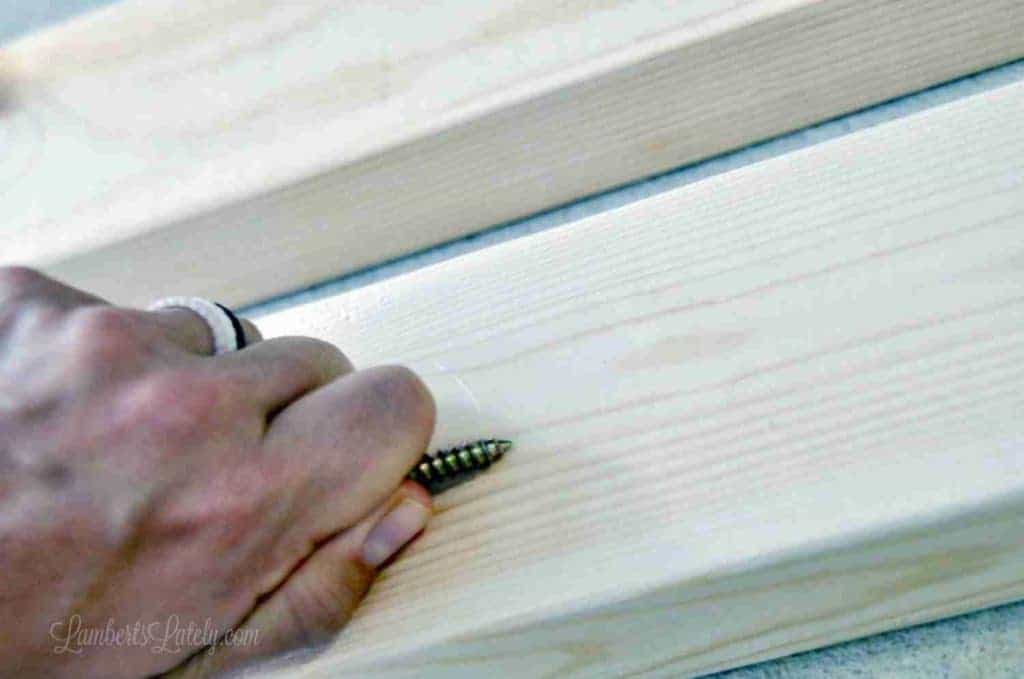
Use a larger screw to scrape sideways across the wood.
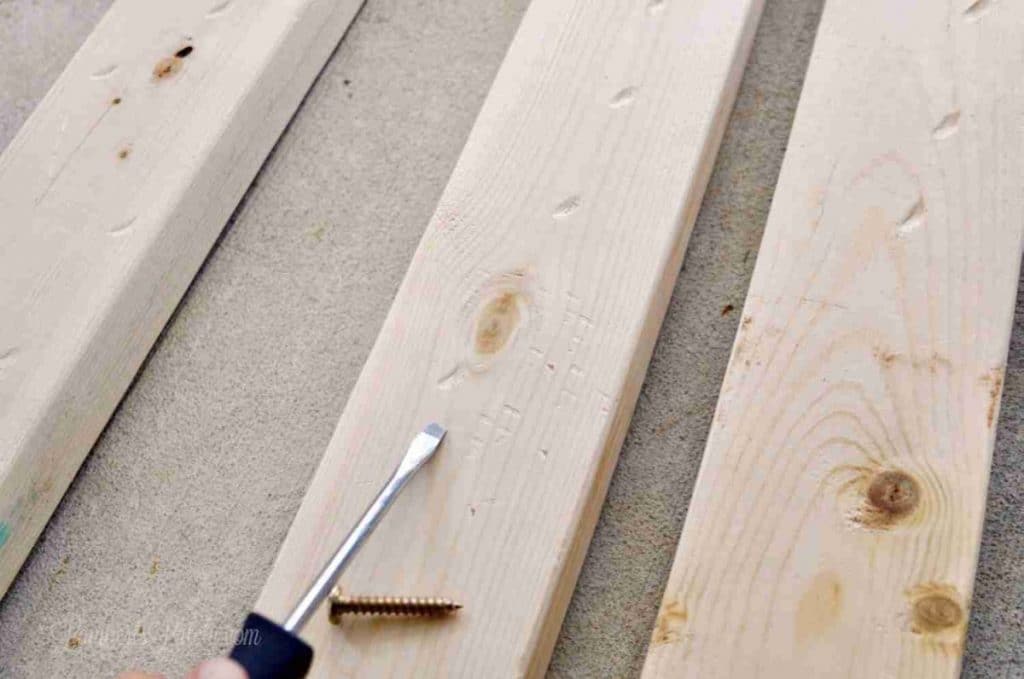
The screwdriver is good for giving the wood little clusters of marks...these look great when stained.
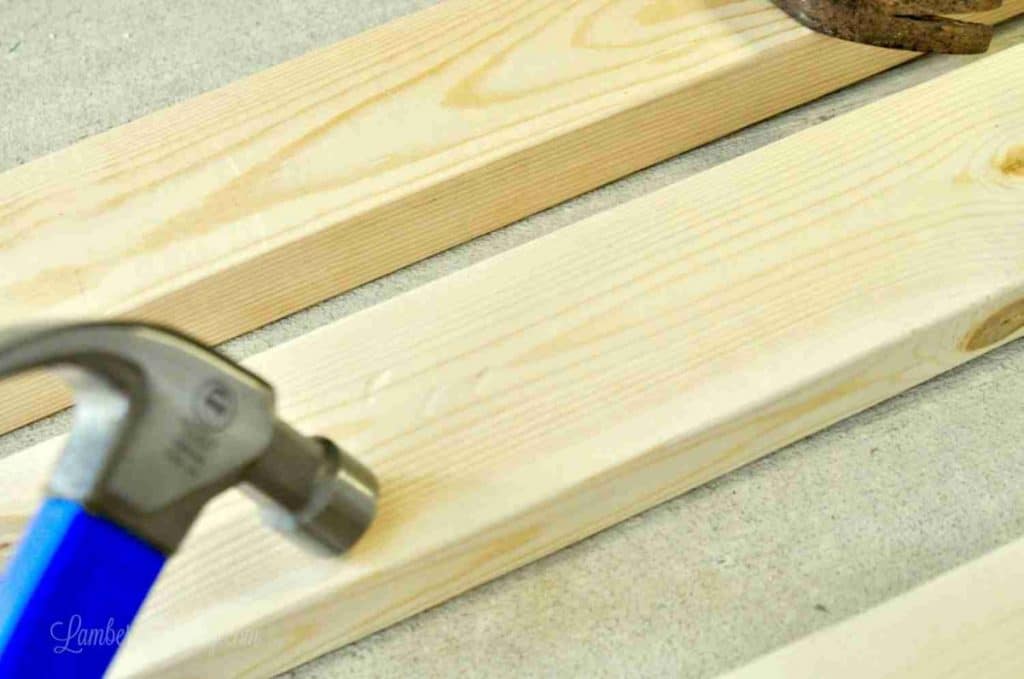
Using a hammer, give the wood larger pockmarks. I did these in little bunches.
Step 2: Make cuts in the distressed 2x4s.

Next, make your cuts. For my ladder, I made each side 72" tall and the ladder rungs 18" wide, just to keep it simple. So, you'll need two 72" pieces and five 18" pieces.
The ladder rungs will be straight 90-degree cuts at the ends. I wanted the ladder to lean up against the wall (but still have feet flat on the floor), so I cut each end of the 72" pieces at 6-degree angles so the ladder would lean slightly against the wall.
Just make sure you cut each end of the 72" pieces with the angle facing the same way. That way, the ladder will sit flat on the floor and the top will be flat when leaning against the wall. (Of course, a miter saw is pretty much required to make these cuts.)
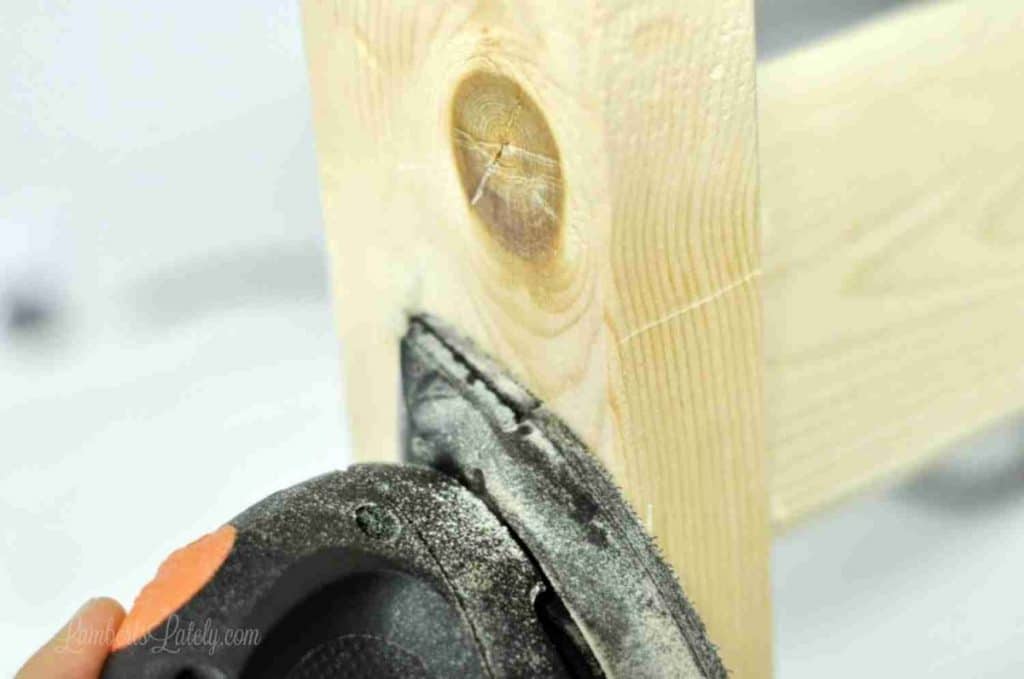
Step 3: Sand corners on wood pieces.
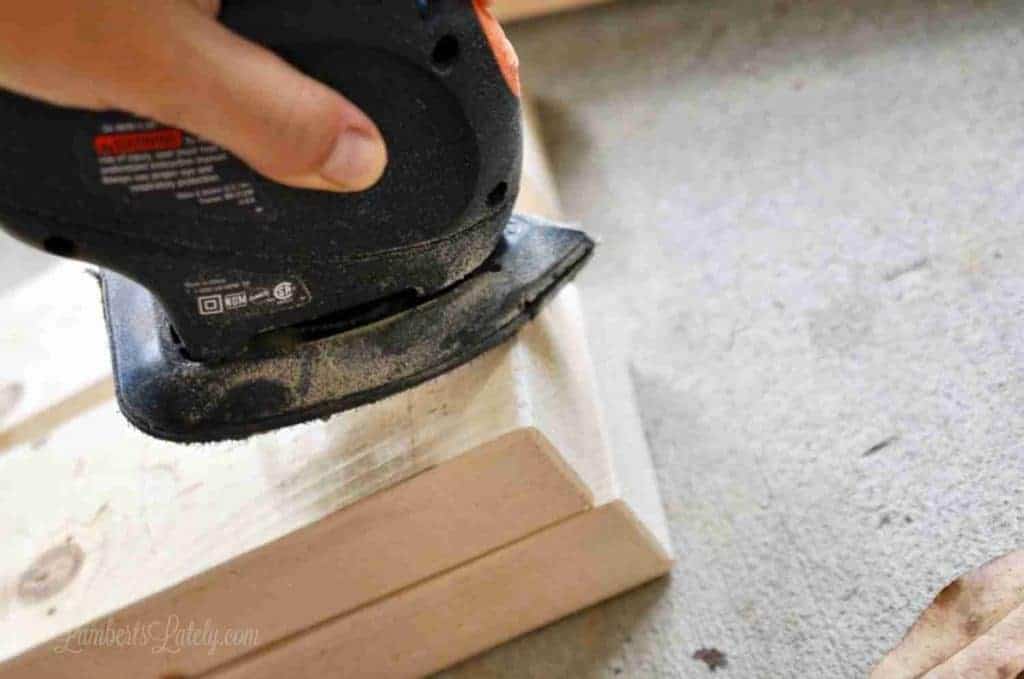
To give the wood even more of a distressed/old look, I took the sharp edge off of each corner after cutting. This is easily done with a smaller hand sander or a piece of sandpaper. While you have it out, you can also lightly sand off any stamps from the 2x4s so they don't show on the final product.
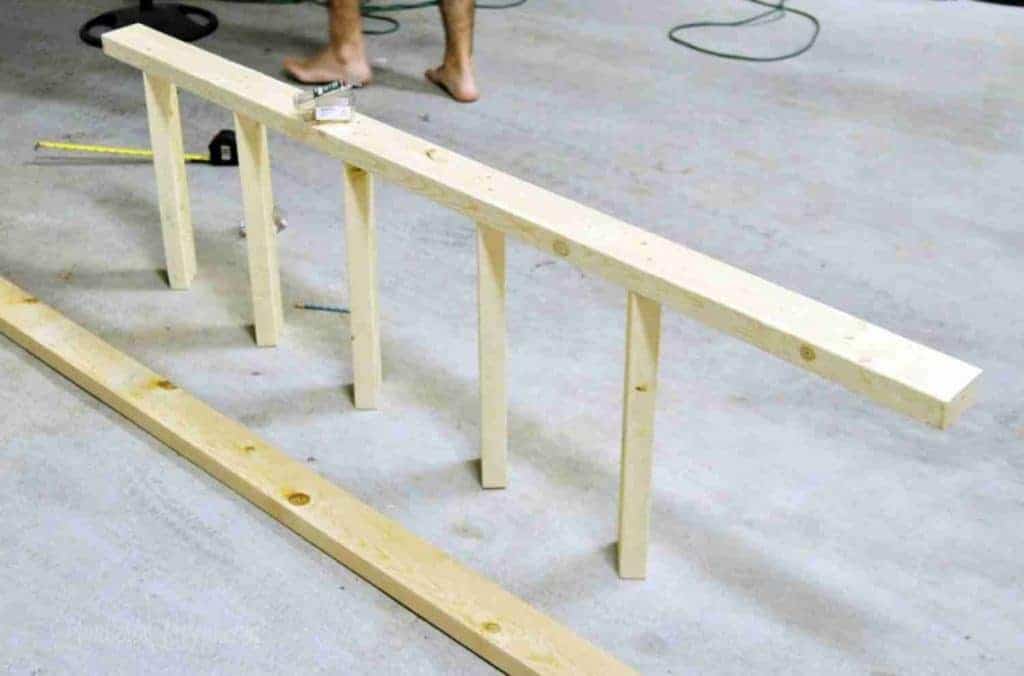
Step 4: Mark where the rungs will be on the ladder's end pieces.
Go down one of the 72" end pieces with a measuring tape (making sure your 6-degree angle is slanted towards you at the top) and mark off your measurements with a pencil.

I left a 5" gap at the top and spaced the rungs out 12" each. Mark off your first measurement 5" from the top of the end piece and mark 4 more rungs at 12" apart, going down the end piece. Make sure to complete this on both end pieces.
Step 5: Attach rungs to the first side.
Now, it's time to assemble!
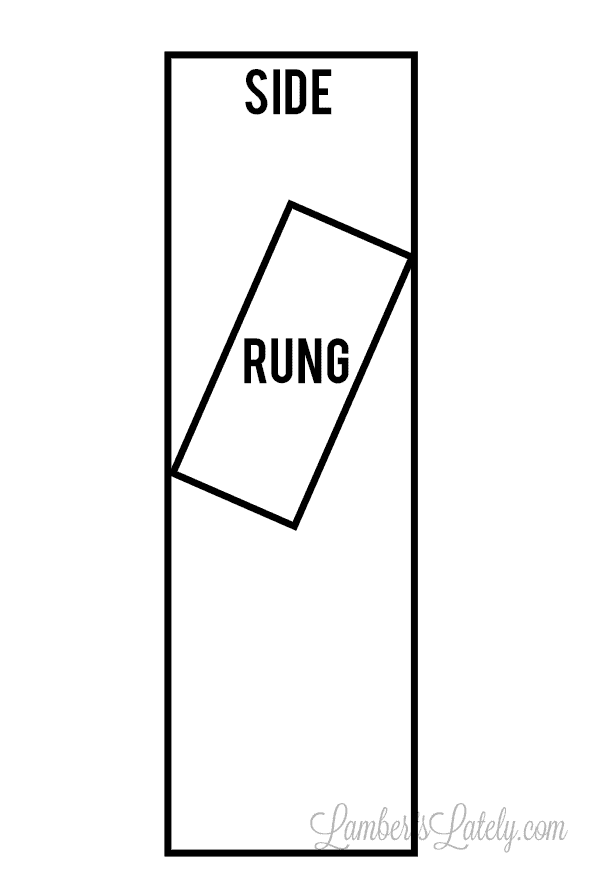
To attach the ladder rungs, I placed them in between the end pieces at an angle, with two of the opposite corners of the rung touching each end of the side. It's hard to explain with words...easier to look at the picture below.
This made sure the blankets lie nice and flat but still have some dimension to them.
So, to do this, I placed the top back corner of each rung piece at each mark I made on the end pieces.
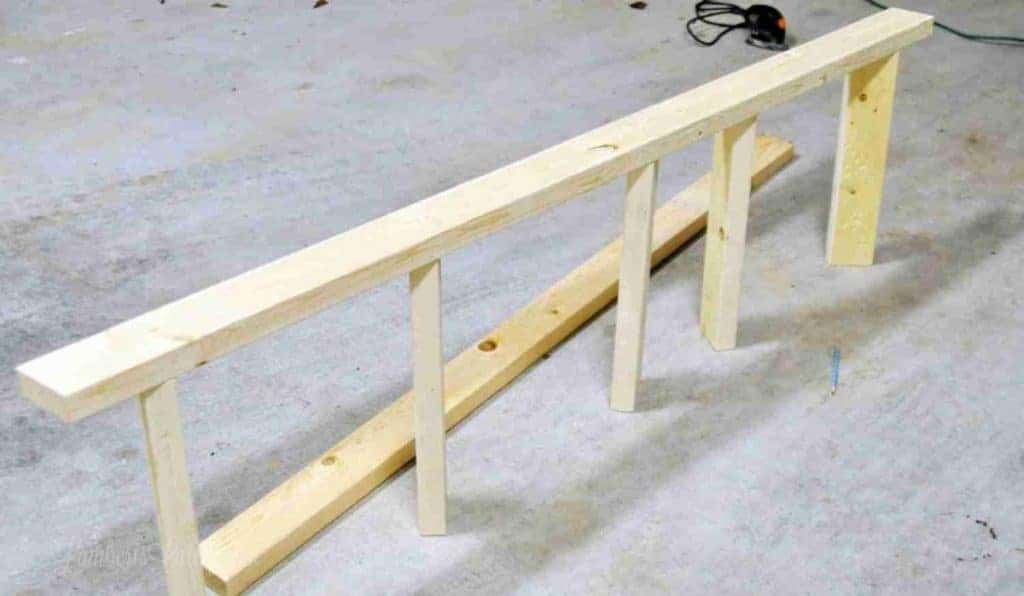
Position your first (top) rung piece in the right place for drilling (using that angle in the diagram above, with the top back corner of the rung at the mark), and position the other 4 rungs (that haven't been positioned yet) all along the end piece to hold up the remainder of the side piece. They don't have to be perfectly in place at all...this is just to hold the rest of the end piece up while you attach the first rung.
Use 2 self-tapping screws to attach the first rung, through the outside of the 72" end piece and into the rung.
Note: You could always use non-tapping screws if you have them on hand, but it's kind of a pain to have to drill pilot holes for each hole and then go back and put the screws in. Self-tapping made it so much easier!
Once your first rung is in place, correctly position the second rung (just like you did with the first one, top back corner at the mark on the side piece) and drill in the 2 screws to secure it.
Keep going until all 5 rungs are in drilled place on the one side piece.
Step 6: Attach the second end piece to the rungs.
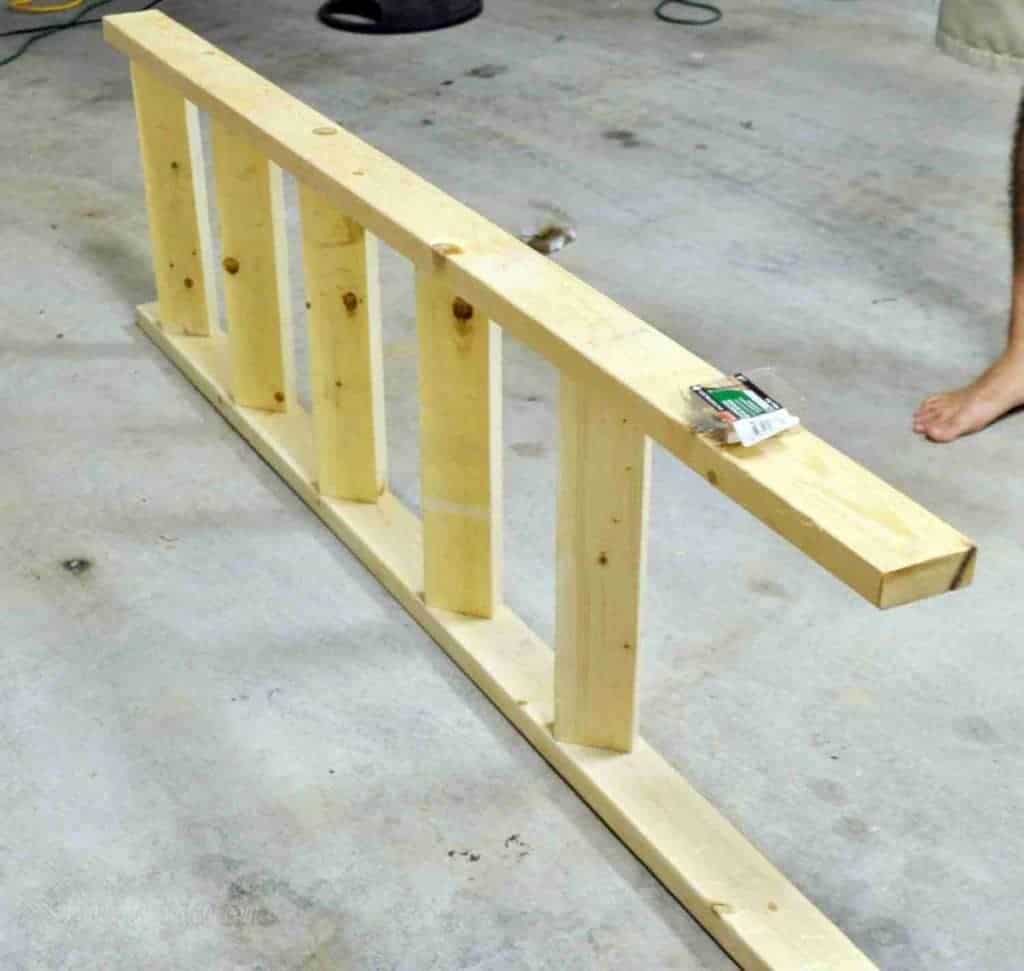
Now, flip the ladder onto the other side, with the side piece you just attached the rungs to lying flat on the floor. Position your second side piece on top (making sure the marks line up perfectly with the rungs) and add 2 screws through the end piece and into each rung.
Make sure you don't mistake the top and bottom angles of the ladder before attaching! All angles should slant the same way on the end pieces, and they should be lined up evenly.
Step 7: Patch screw holes.

I made sure to drill the screws in a little past the wood so I could fill the holes and leave no screws showing. I used this wood filler to do that.
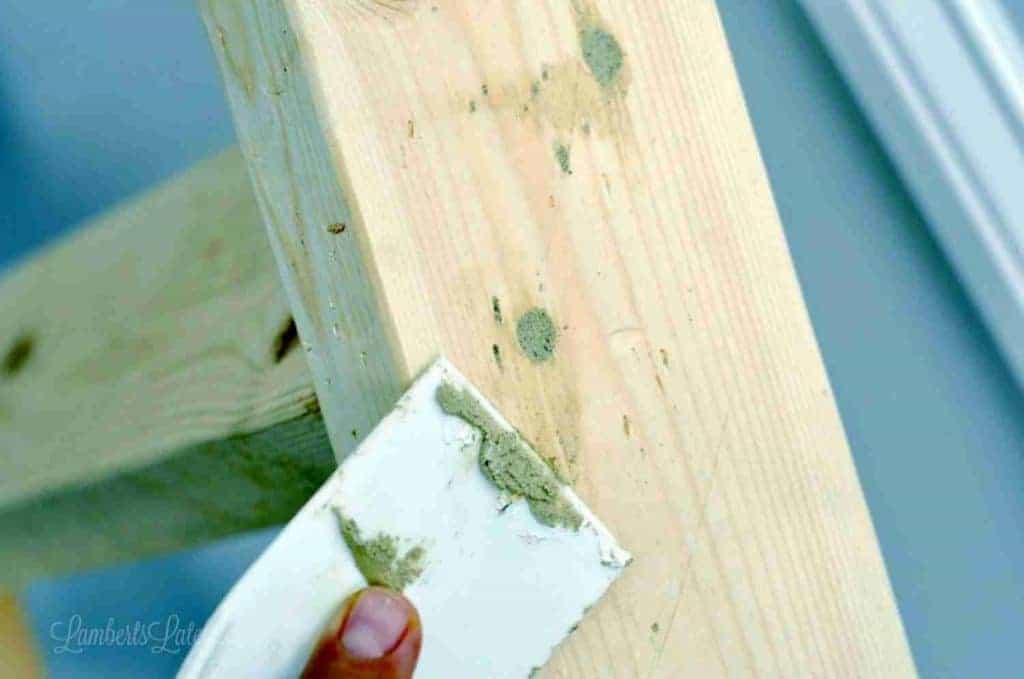
Simply patch your holes (I used a putty knife, but you could totally just dab a little in with your finger), allow it to dry...
...and sand the patched holes down. Easy as that.
Step 8: Stain the finished blanket ladder.
Now the really fun part...staining! This is where you get to see all of those pretty distressing marks you made on the wood earlier.
For this, my go-to is Minwax Dark Walnut Stain. I used it when we stripped and stained our dining table and our behind-the-couch table. It's a super versatile wood stain (can go anywhere from a really dark, almost painted look to a lighter, but deeper stain) and is so pretty with so many home decor colors.
You'll also need a sponge brush (I like using these because your brush gets so gross with wood stain - you can just throw them away after using it), a drop cloth, and an old rag that can be thrown away after use. I saved the leftover pieces from my t-shirt quilt tutorial and just use those as needed. You also might want some gloves if you have them on hand.
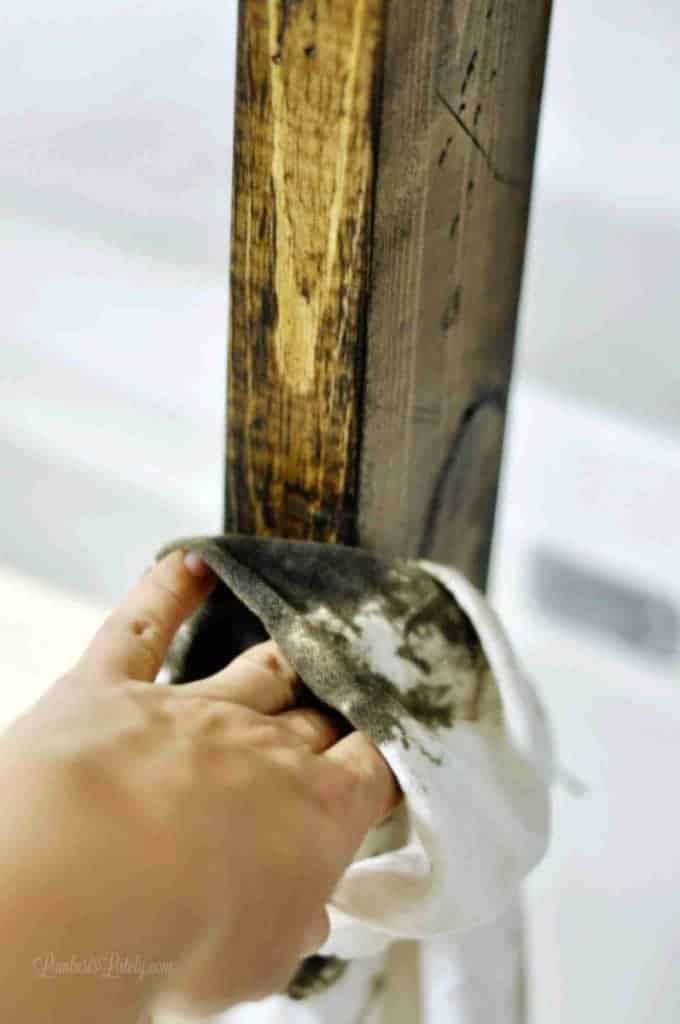
Use the sponge brush to brush on just enough stain to coat the wood, let it set for a minute or two, and wipe off the excess with your old rag. You can leave it longer if you want a darker look, but I wanted the distressed marks to stand out.
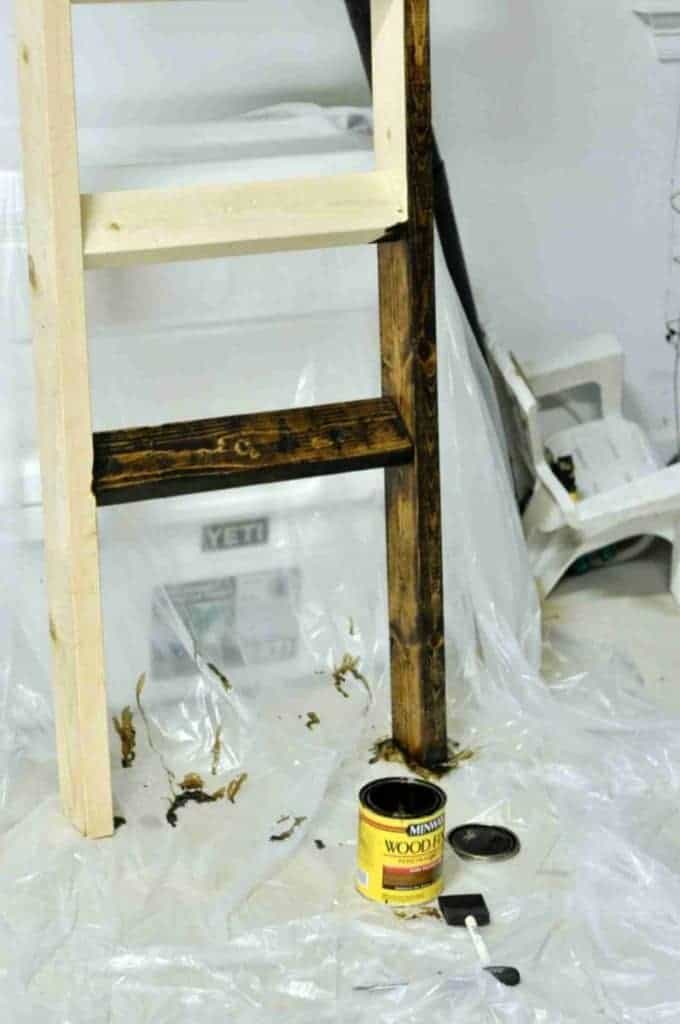
It's best to work in sections so your stain doesn't get too dark. I did maybe ⅕ of the ladder at a time, then wiped it off.

Let the stain dry overnight, then apply 1-2 coats of polyurethane to the ladder to protect it. This is my go-to poly and has proven to be incredibly durable over the years! Make sure you apply polyurethane to the tops and bottoms too.
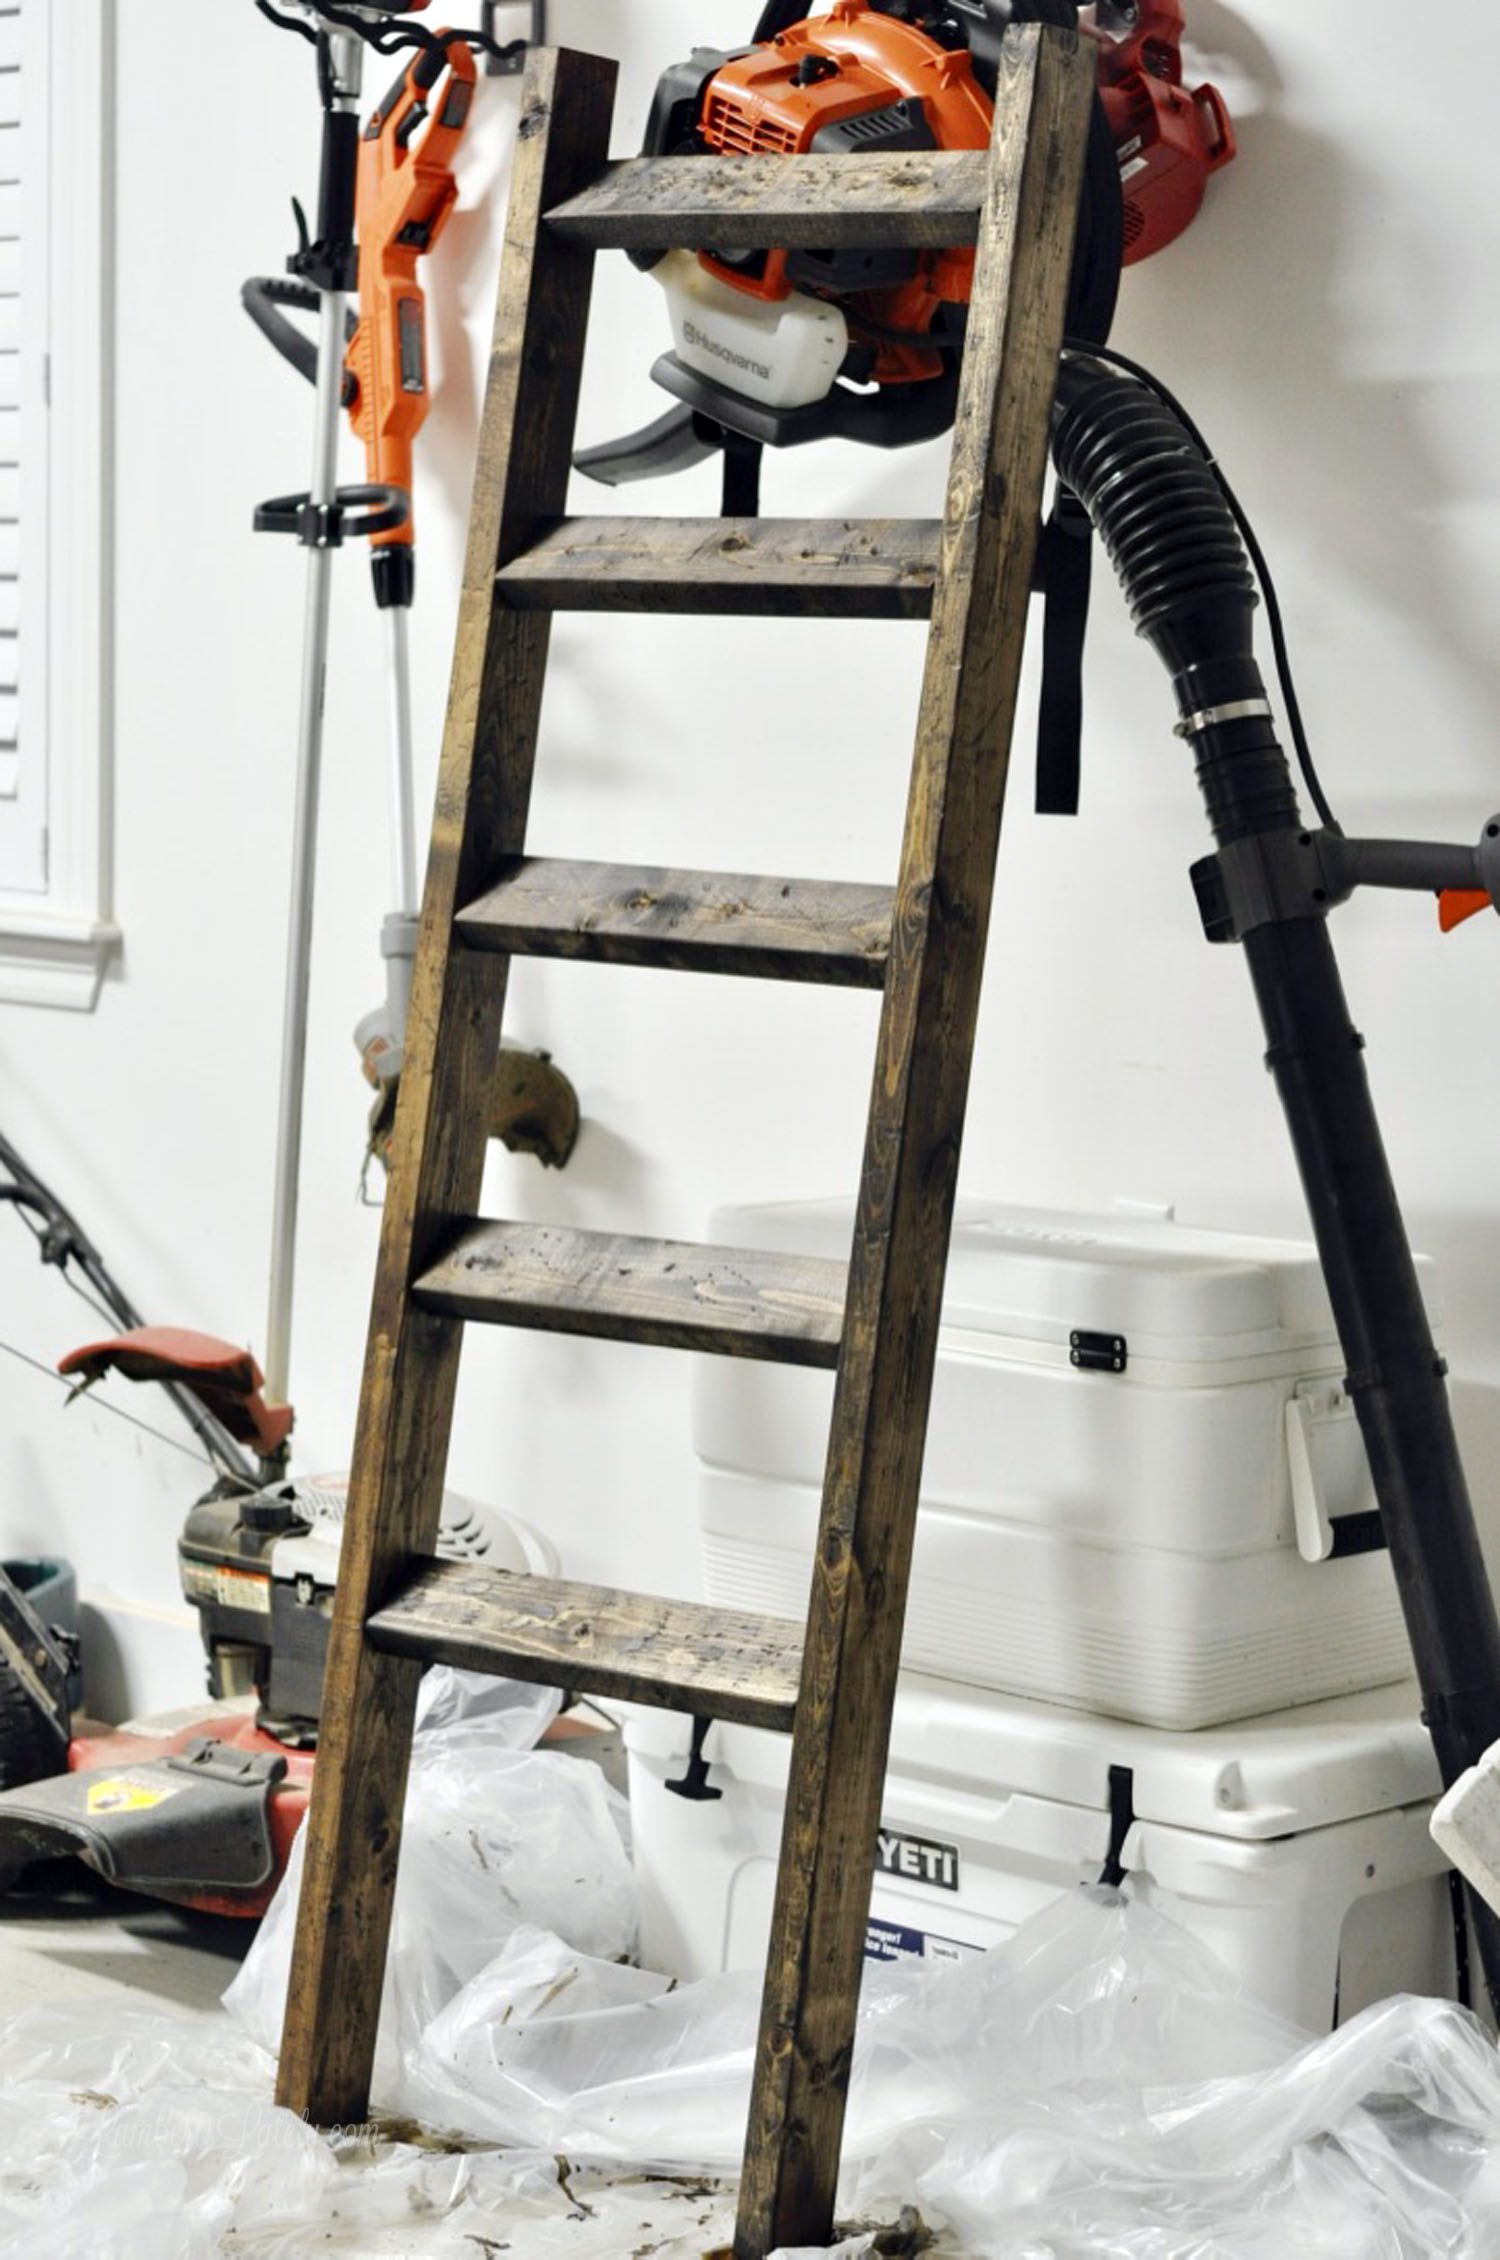
Finished Product
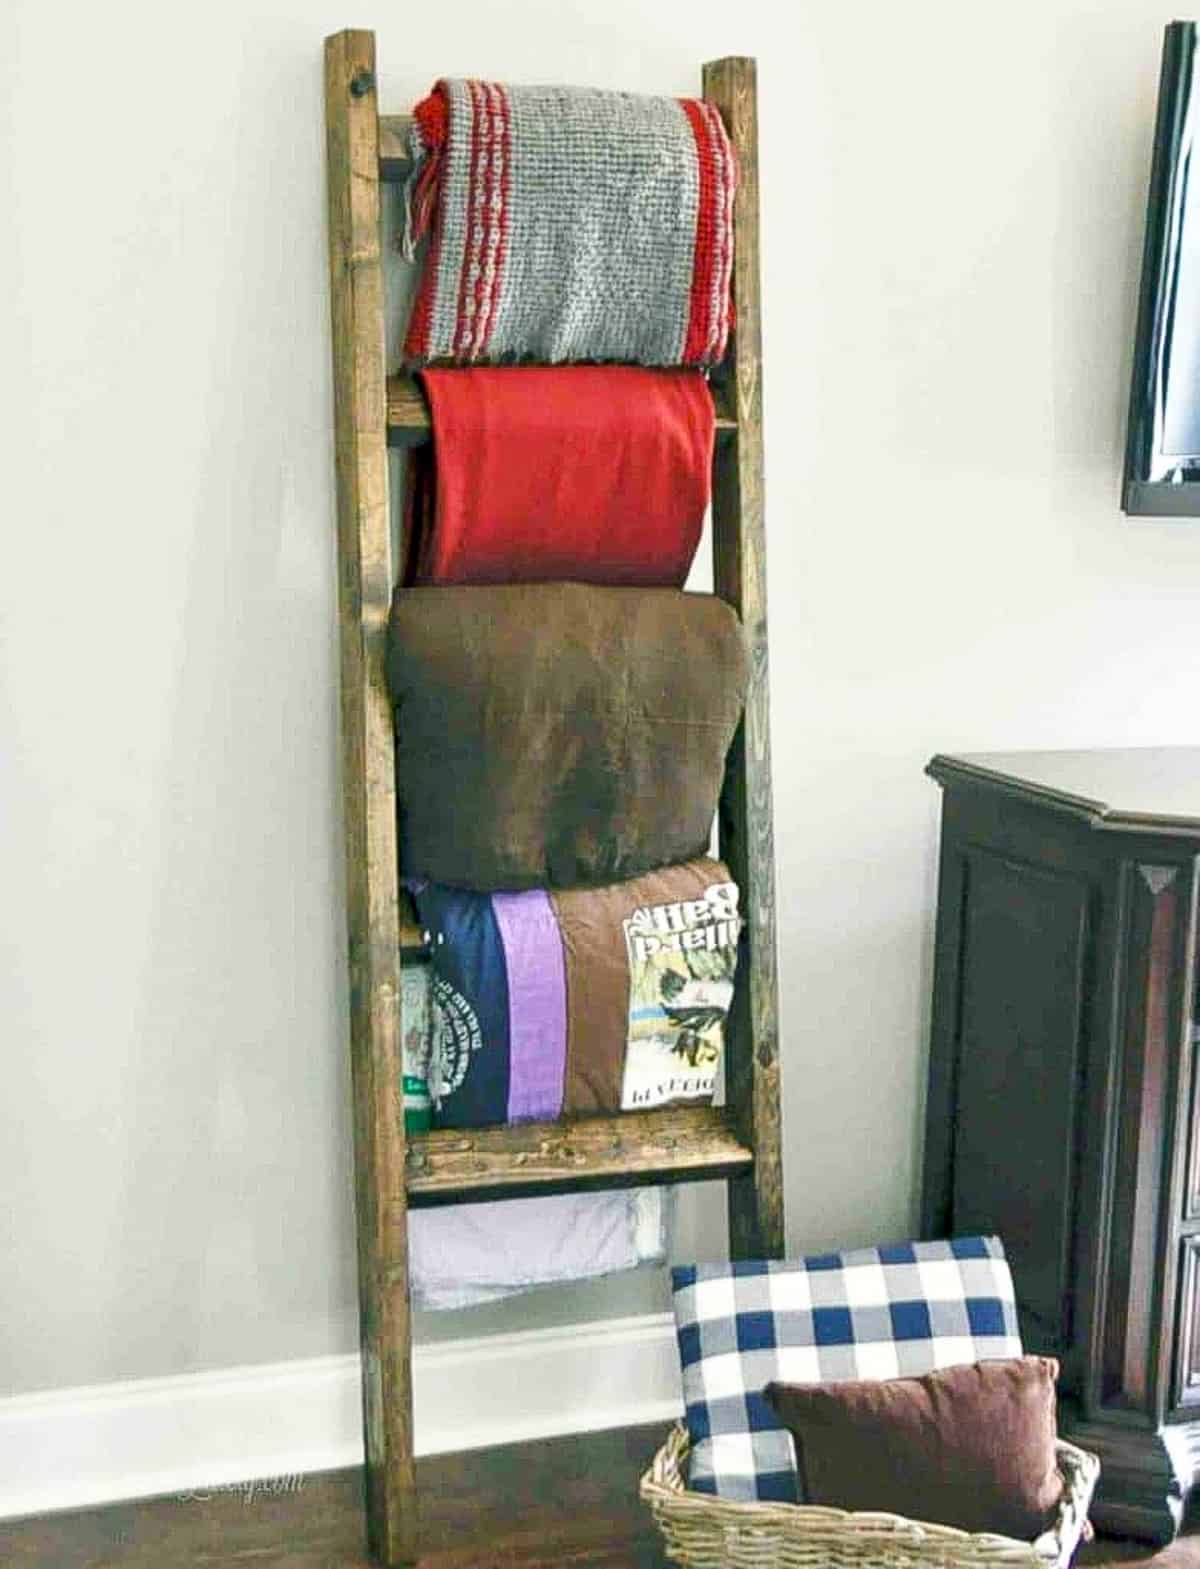
Easy as that! This little weekend project turned out to be so perfect for this space in our bedroom.
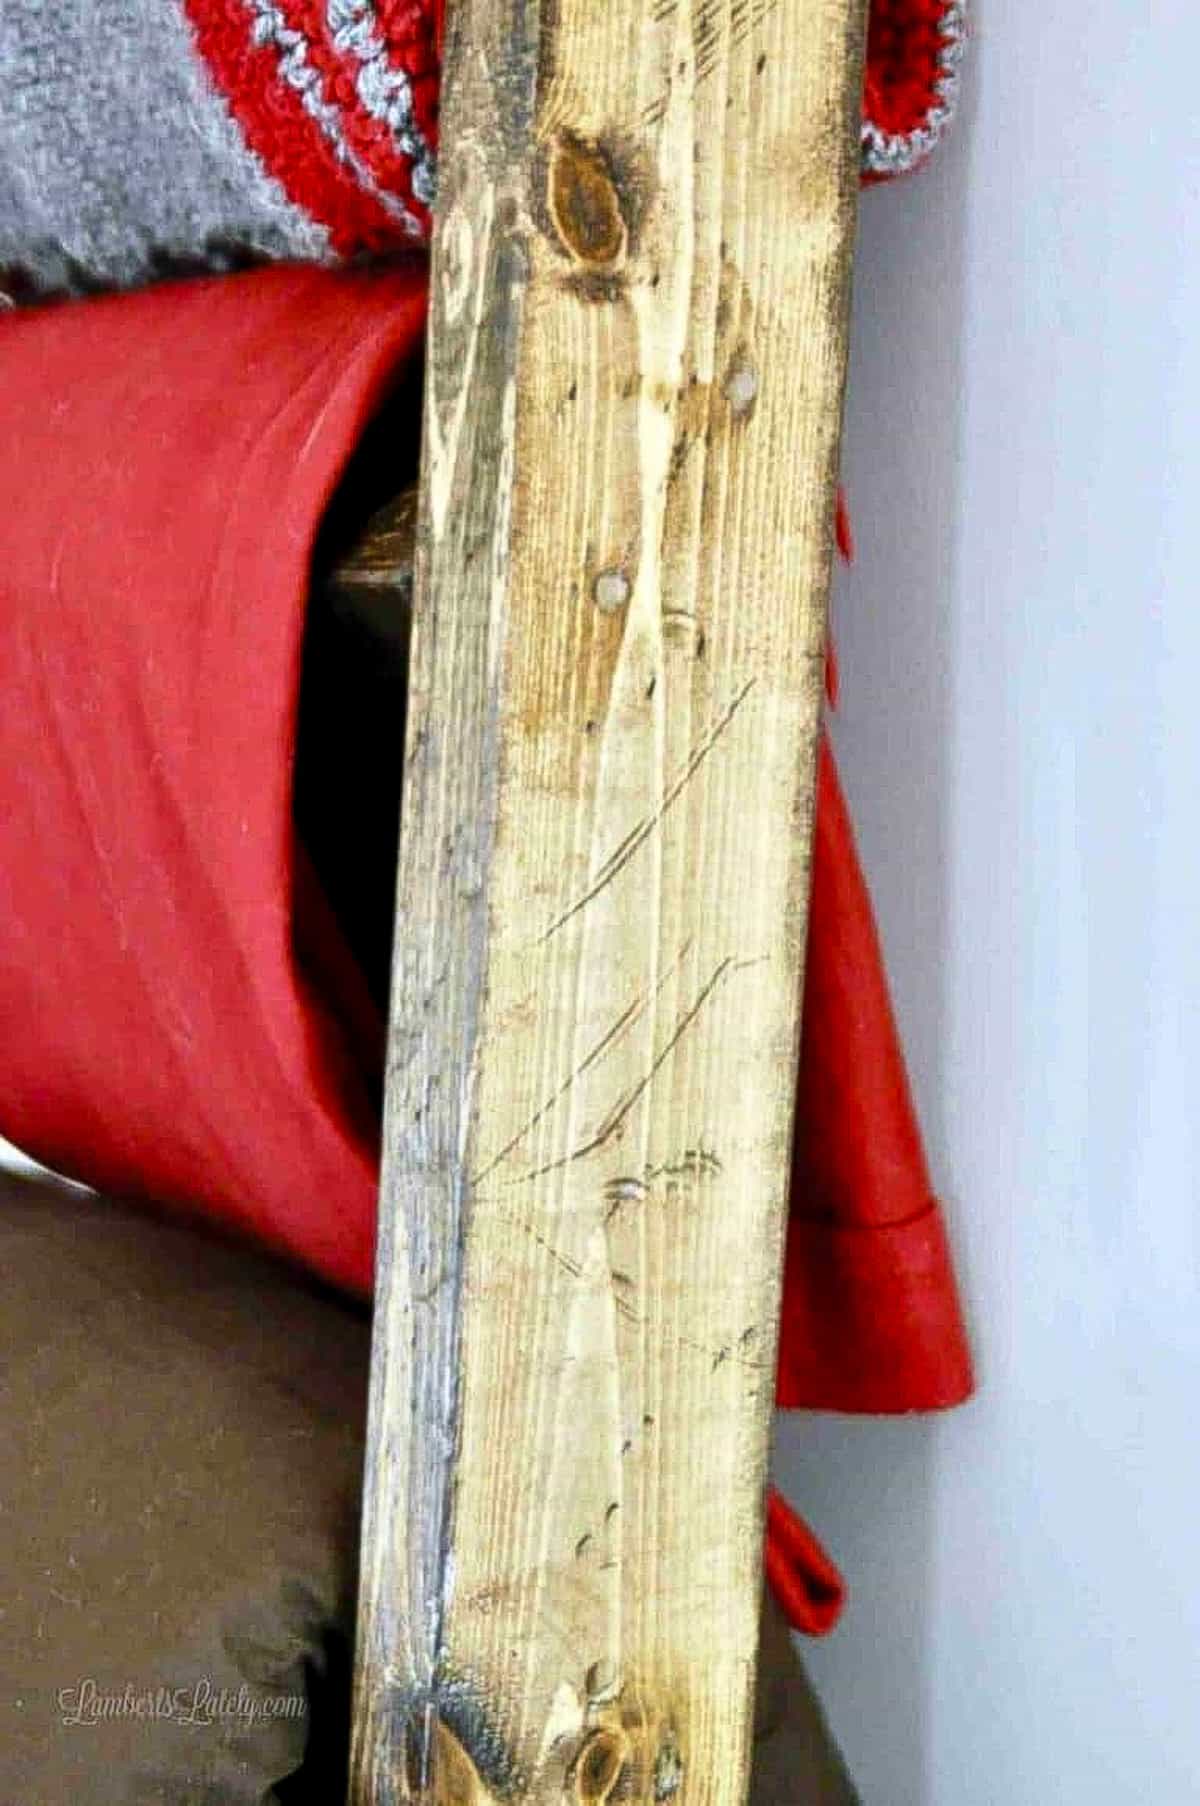
The distressing gives it just the perfect little amount of character.
In addition to being so pretty, it's actually really functional - we were able to replace a storage ottoman that was taking up space in our bedroom with this. We now display everything from quilts to throw blankets on this ladder, and everyone in the family knows where to find a blanket when needed.
Got to love when you can combine functional and beautiful!
Helpful Tips & Tricks
- All in all, plan for 3-4 hours of work and a few hours of drying time for this project. It can easily be done in a weekend.
- After the DIY blanket ladder was complete, I added a couple of little non-skid tabs to the bottom of my ladder. This gives my floor a little extra protection. You can get these at the Dollar Store.
DIY Blanket Ladder FAQs


I hope you love this easy but big-impact DIY - we've enjoyed our DIY blanket ladder for years now! If you make this piece, I'd love to see it - just tag me @lambertslately on social media. And, make sure to follow along for my latest projects!

Leslie Lambert is a lifestyle writer and content creator specializing in home organization, family recipes, and intentional living. With 17 years of experience in blogging and digital storytelling, she helps busy women create calm, purposeful homes they love.


Hi Leslie, I love this! I love a blanket ladder and I totally get by the time you add shipping it's not worth it. I am sharing this on my Week-Ending post on Saturday! And, if I get my act together I will link back to you when I make it! xo laura in CO
Can't wait to see yours...thanks for sharing!
Your directions were so easy for me to understand. Thank you!
You are so welcome, Ivy!
I’m loving this quilt ladder!
Why did you place the rungs at an angle? Does it help the blankets lay over and then tuck nicely?
It does; the angle lets them lay forward a little more, making it easier to grab if needed.