
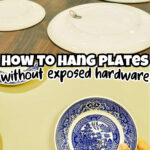
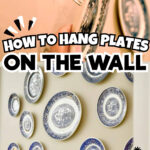
Decorating with plates & platters on the wall is an easy way to display sentimental items. This tutorial shows how to hang plates on the wall with a super simple trick!
Paid links used in this post. Read more about my link usage policies.
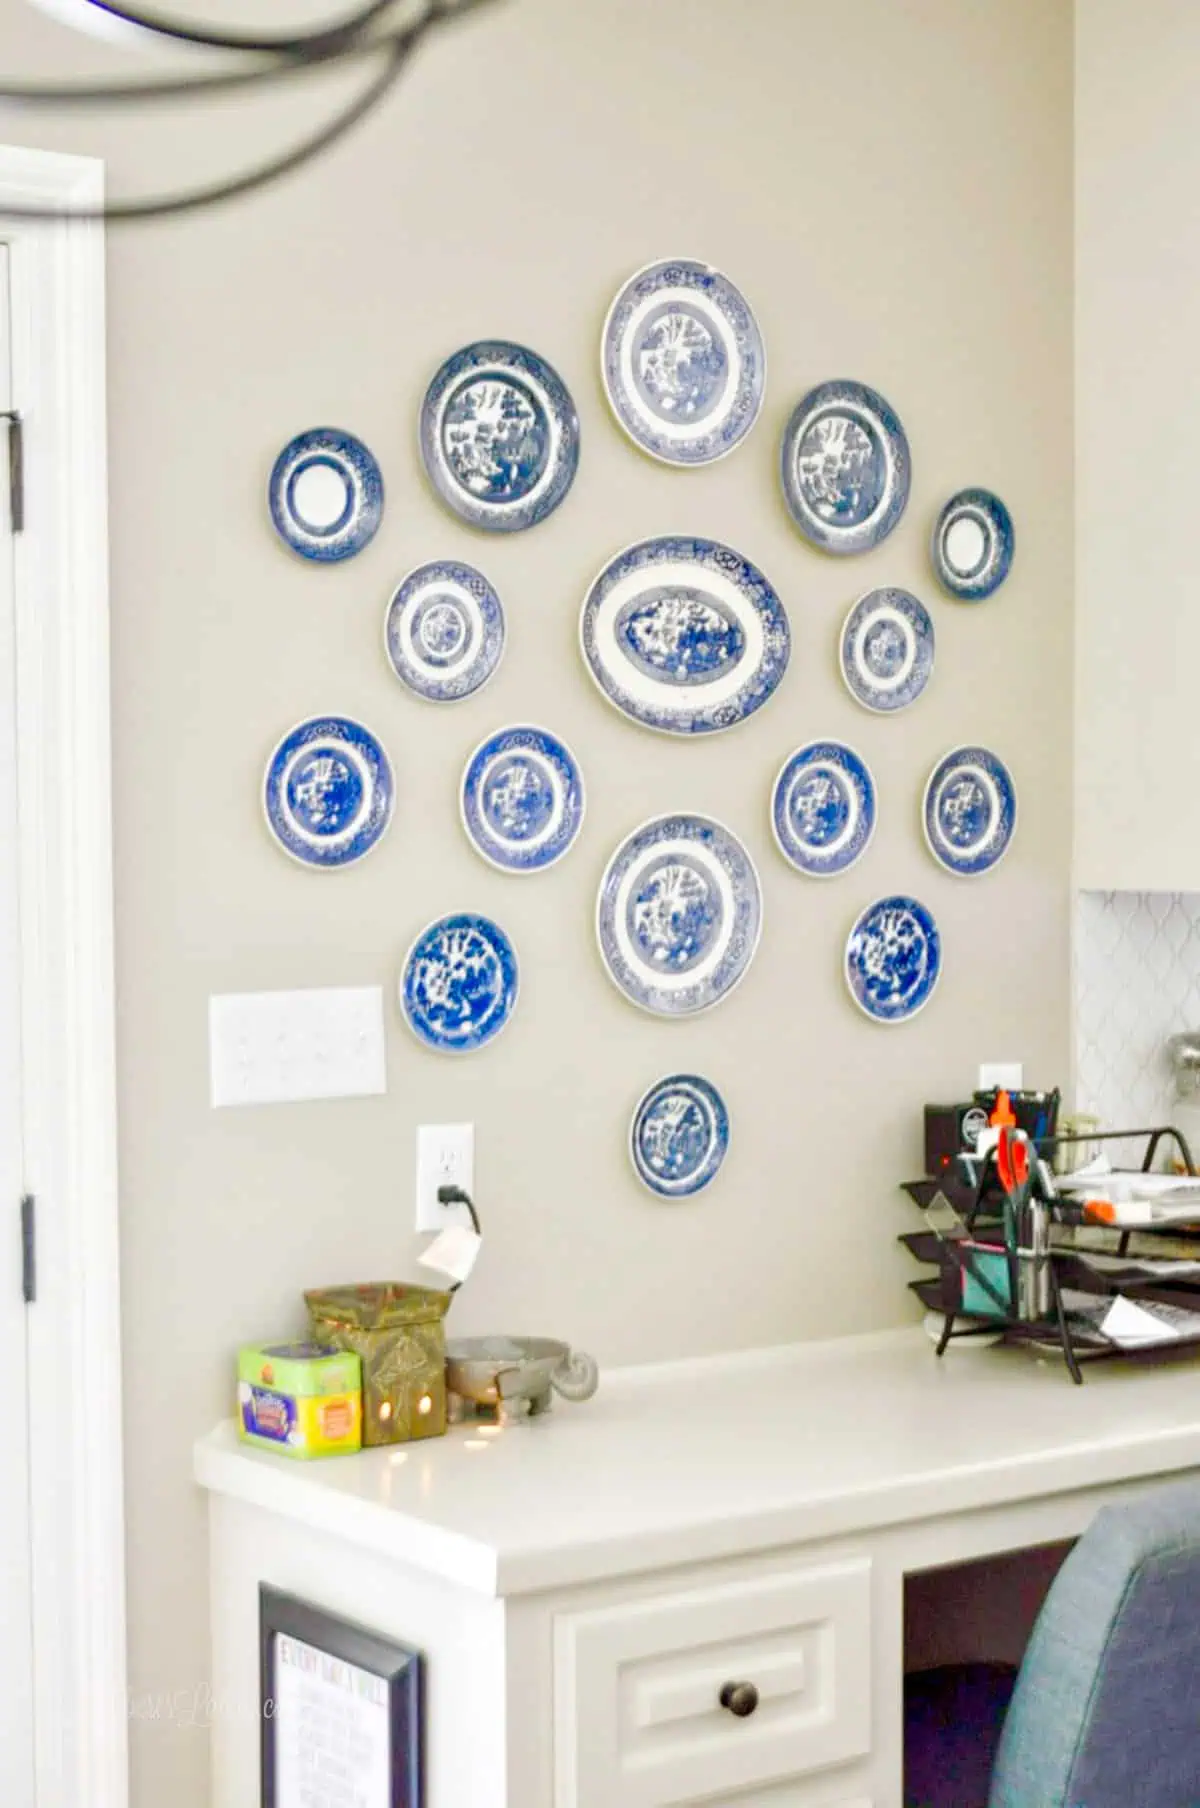
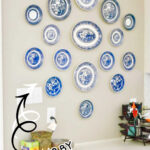
Probably the favorite decor I have in our whole house is my decorative Blue Willow plate gallery wall. I love decor with meaning behind it - and these plates have some of the best stories.
The platter in the center and the plates around it were my grandmother's. I remember eating off them as a child, and the tiny chips and marks from years of use make me love them even more. They're full of character and always remind me of her.

I wanted a simple way to display my collection, so I created a decorative plate wall in our kitchen. The plates just kind of speak for themselves - no bulky hangers or exposed hardware, just the beauty of each piece.
It started with my grandmother's plates, but I've added more over the years, usually finding Blue Willow china at our local antique sale. With this method, I've been able to grow the wall without a single drop or break in seven years.
Every time I share this wall on Instagram, I get asked how I hang them - so today I'm sharing the quick and easy steps. Honestly, it's so simple I almost feel silly writing it out, but it makes one gorgeous statement on your wall.
Supplies Needed
- Piece of kraft paper or wrapping paper (the size of your display wall)
- D-ring picture hooks 1 per plate/platter
- E6000 adhesive. This is the strongest craft adhesive I've ever found. I've used this stuff for anything and everything since high school. Trust me, if you let it cure correctly, this stuff can bond just about anything!
- Pencil
- Hammer
- Small picture-hanging nails
Step 1: Make a Plate Template.
I haven't necessarily followed this because I've put my plates up a little bit at a time. But, if you're hanging lots of plates at once, I'd recommend figuring out placement first. You can do this by making makeshift templates of the plates.
Measure the amount of space you have to display your plates. Mark those dimensions on a piece of kraft paper or wrapping paper. Then, lay out the plates within those dimensions. Once you figure out placement, trace the rim of the plates with a pencil.
Remove plates and secure this paper to your display wall with a little bit of painter's tape. With a pencil, make a small, light mark at the top of each plate on the wall (you might have the cut through the paper a little to do this).
Now, take the paper template off the wall. You can reference this as you hang your plates, using the light pencil marks on the wall to determine where each plate needs to be.
Step 2: Glue D-Rings to the Back of Plates.
Wipe the back of the plate with a dry cloth to remove any dust or lint. This will allow the glue to stick well. Turn the plates over on a flat surface face-down, making sure you face the top of the plate pointing away from you.

Use the E6000 to attach D-ring picture hooks to the top of the plate. The flat part of the D ring should sit on the top of the tallest part of the plate (see picture above). It only takes a tiny dot of glue - don't use too much or the D-ring will slide!
Step 3: Allow Glue to Cure.
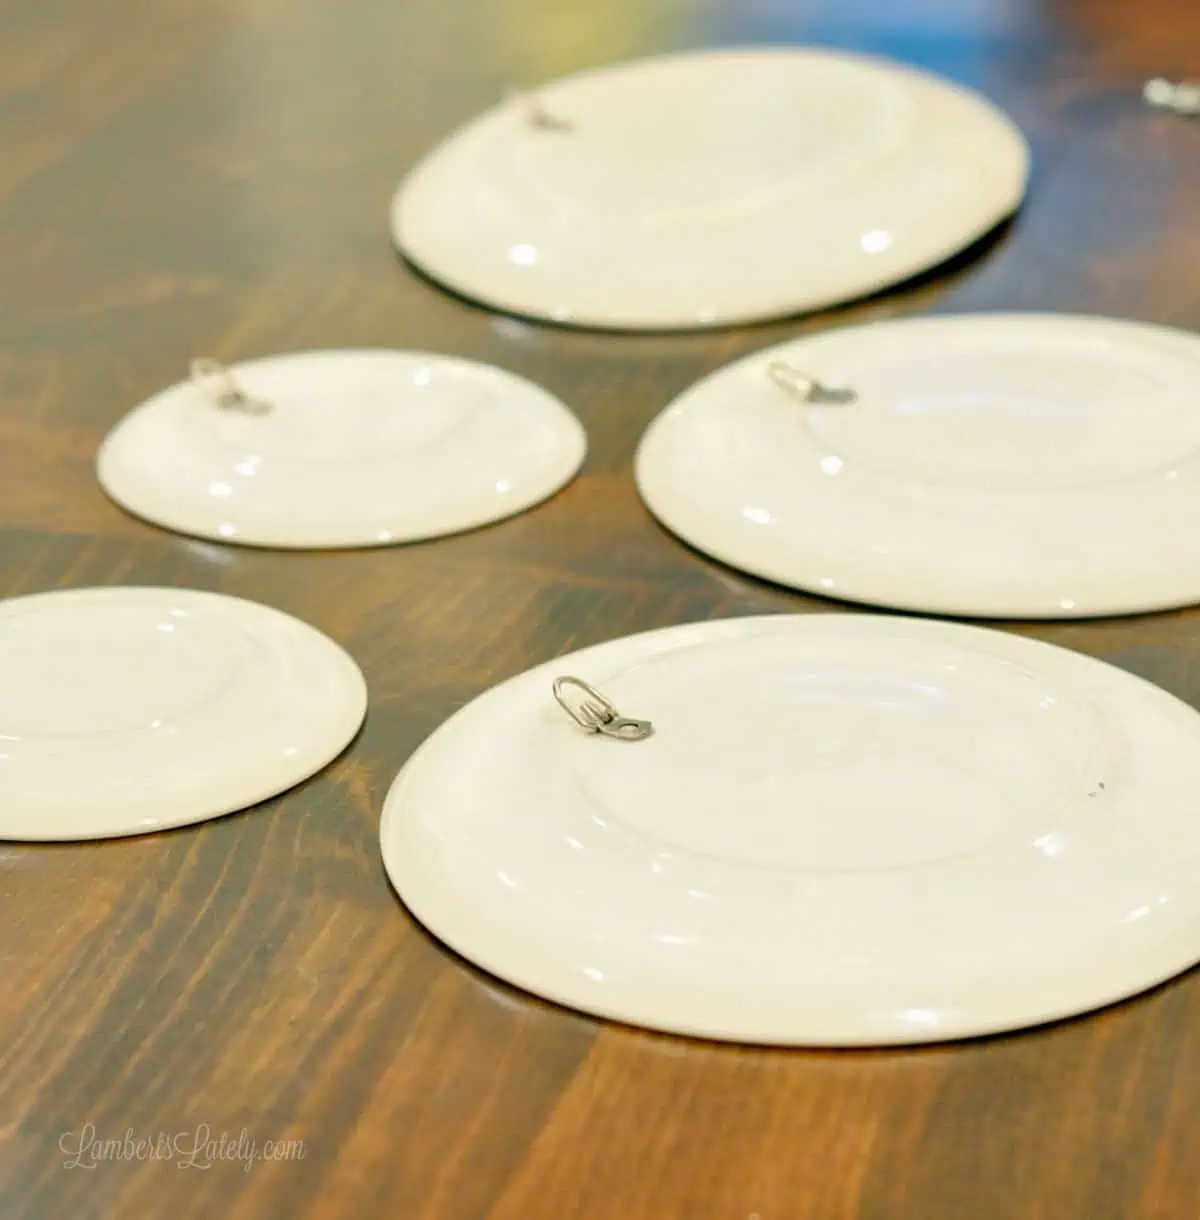
Once the D-rings are glued on, it is super important you allow the glue to cure for 24 full hours. I've tried to skip this before and it makes the glue so much less effective.
Once you let the glue fully dry, it's time to hang the plates.
Using Adhesive Discs/Strips
I've seen a few tutorials online that use adhesive discs or Command Strips to hang the plates. It looks easy, but I don't recommend this.
The adhesive on those discs/strips breaks down over time, meaning your plate could eventually become un-glued. Trust me, this little bit of work is worth not breaking your precious plates! Plus, nails leave much less of a mark on your walls than adhesive.
Step 4: Mark the Wall.

Here, you'll use those marks you made on the wall in Step 1.
Take the first plate and position it at its pencil mark on the wall. I like to go about ½" above that pencil mark so I don't have to worry about erasing a bunch of marks - the plates will just cover them up!

(Sorry, my camera settings were weird for this picture.) Once the plate is in position, take a pencil and place it through the D-ring to make a mark where your nail hole needs to be.
Step 5: Place Nail and Hang Plate or Platter.

Use a hammer to place a small nail in the spot you marked. No need to find a stud as long as it's a small plate or platter. I used fairly small picture-hanging nails for this - they should hold the weight of your plates well.

Once your first plate is in place, repeat the process and use the other plate on the opposite side. Easy peasy. Give the plate the "eyeball test" to make sure it looks symmetrical before marking that nail spot.
Related: Want to see more DIY Projects? Check out our organized craft room or this baby outfit display!
Final Result
I am a huge believer in decorating with things that have meaning in your home - this is a perfect example of that. This is such a great way to incorporate history and character in any room, but it's perfect for the kitchen or dining room.
Helpful Tips & Tricks
- Mix sizes for balance. Pair large platters with smaller saucers to keep your wall looking intentional instead of cluttered.
- Use symmetry as a guide. Even if your plates are all different patterns, arranging them around a center line keeps the display cohesive.
- Check your lighting. Plates with metallic rims or glossy finishes catch the light - make sure your wall isn't in a glare-heavy spot.
- Test placement with painter's tape. Instead of tracing, you can tape cutouts or paper plates to the wall to preview your layout.
- Keep a few extras handy. If you're collecting plates over time, buy one or two more plates than you need. This gives flexibility as your gallery wall grows.
- Use paper clips. No D-Rings? No problem! I've seen people use paper clips (glued using E6000) in a similar method to this tutorial with great results.
More DIY Decor Projects


Have you used this method in your home? I'd love to see it! You can tag me 📸 on social media (@lambertslately) with your gorgeous gallery walls. I'd also love to hear your tips in the comments!

Leslie Lambert is a lifestyle writer and content creator specializing in home organization, family recipes, and intentional living. With 17 years of experience in blogging and digital storytelling, she helps busy women create calm, purposeful homes they love.

Your plate wall came out so beautifully! I'd luv to invite you to share it with us at Wall to Wall DIY Wednesday! Best, Ann
Like this idea! We are currently using the plates you have on display. Looking forward to more ideas!
I love this idea. Thank you.
I love this tip for hanging plates! I was wondering if you had any suggestions for how to hang colorful/clear plates? Do you think this would look inconspicuous? Or do you have another idea of how best to hang a clear plate on the wall?
You would definitely see through the back to the hardware for clear plates, so you're right, this might not be the best solution. I would look into a decorative plate hanger that simply holds the plate in place, kind of like a shelf (example here: https://www.amazon.com/Sumnacon-Hangers-Holders-Displaying-Decorative/dp/B0CN3FL2TX/).
Wondered if you ever have hung Gutherz oyster plates on a wall. They have a wavy back so the usual ways won't work (not a flat surface).
I haven't, I wish I could be more help!