
You can make this functional, beautiful DIY sofa table for around $30! This is a great project for beginners - an easy, narrow behind-the-couch table that's as simple as cutting and attaching.
Paid links used in this post. Read more about my link usage policies.
A few weeks ago, we finished a DIY I've wanted to do for a while now! It wasn't difficult at all (we knocked it out in a weekend) and, all said and told, you can build this table for under $30.
We've had this sectional sofa in our living room for a few years now. We love it, but one of the big downsides to having such a large pit couch is the lack of table access.

If you're sitting in the middle section of the couch, there was really no accessible table, making it kind of a pain to have drinks. We also didn't have access to a plug on the couch, so if anything needed to be charged we were out of luck.
But as always, social media to the rescue! 🙂
I came across a picture of a long, narrow sofa table with a built-in outlet last year and immediately sent a screenshot to my husband. I knew it wouldn't be difficult to build, and as much as we love to DIY we knew we could make it much cheaper than buying it on Etsy.

And I was right! With just a few hours and a couple of simple steps, we built this behind-the-couch console table for under $50 (including an outlet, which is totally optional). If you leave out the outlet, this project is easy to build for under $30.
Let's take a look at how we did it.
Supplies Needed for the DIY Sofa Table
Materials
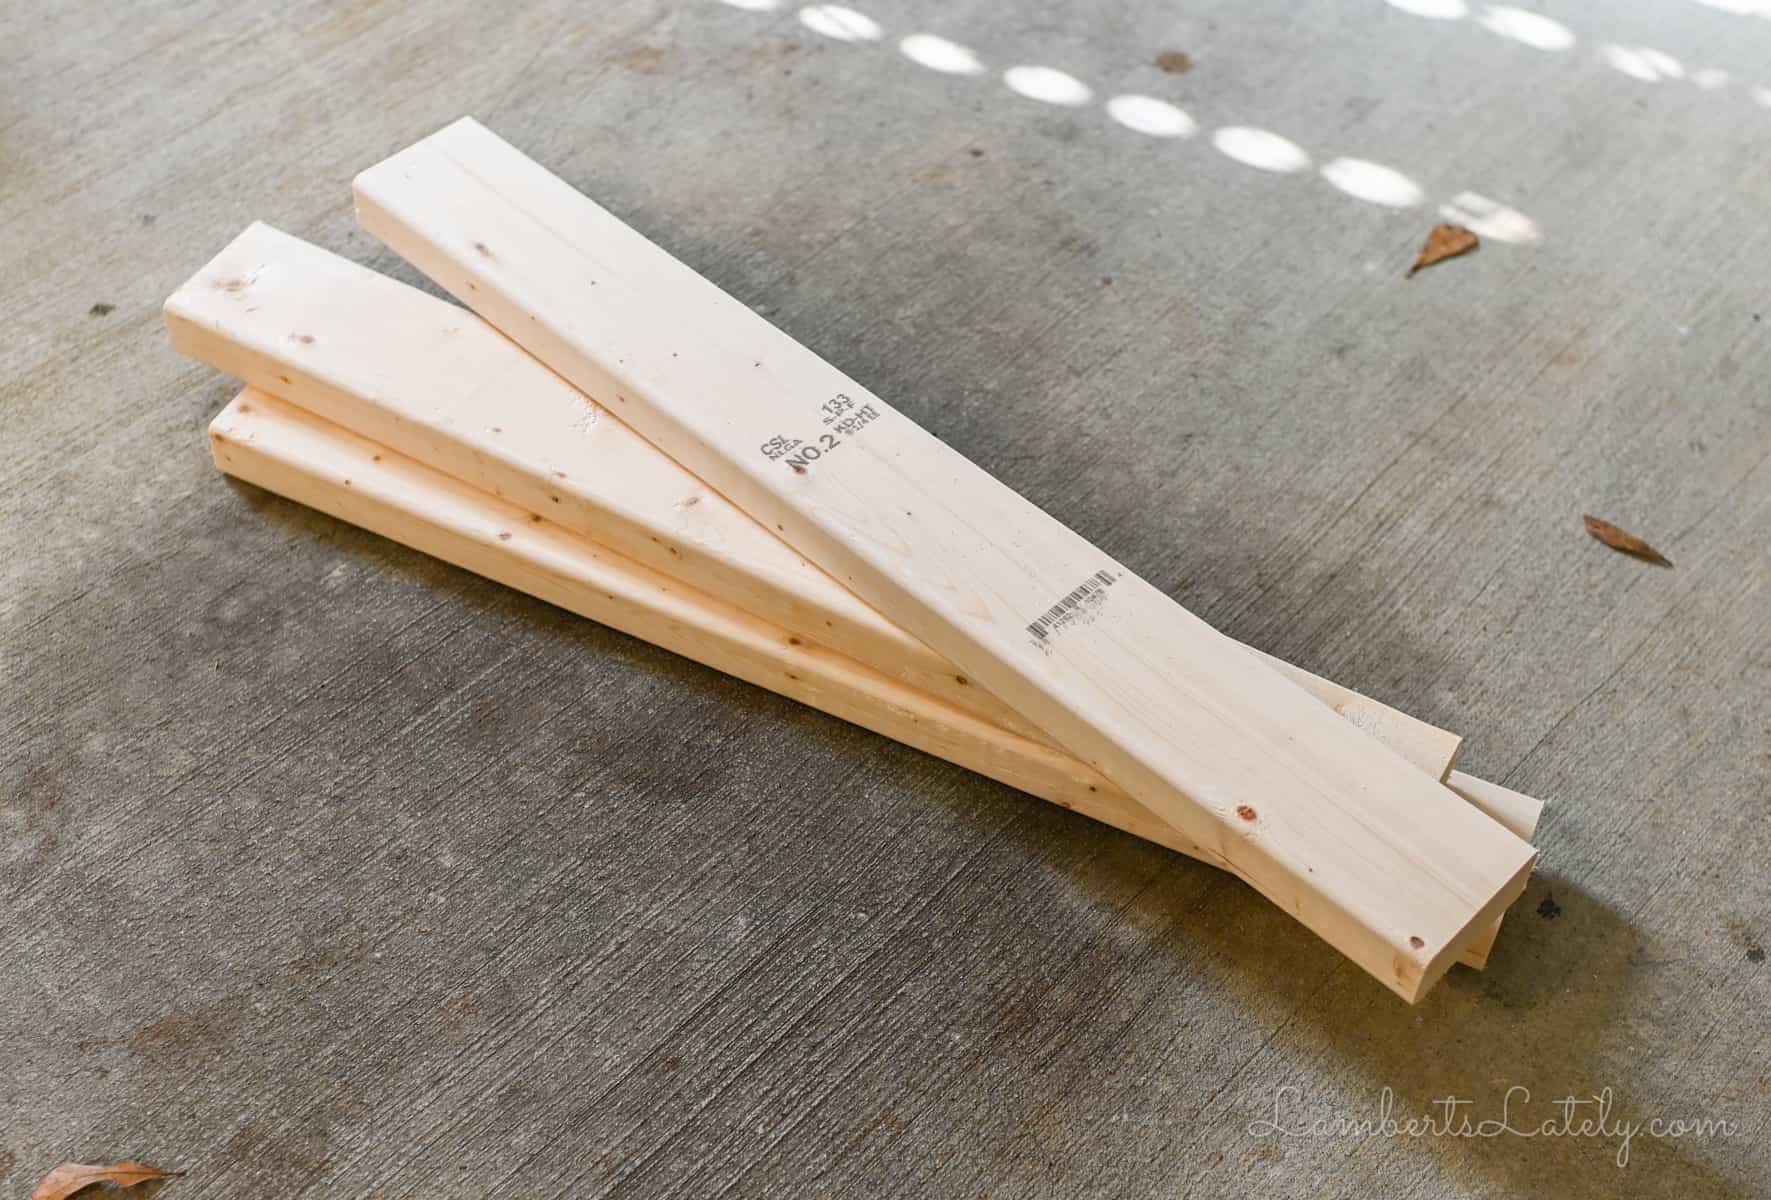
One 1x6" wood board (the length is going to depend on the width of the back of your couch. Mine was 110" wide, so we had to go with a 10' board.)
One 8' 2x4" wood stud
6 nails and a hammer (a pneumatic nail gun is great, but not necessary)
8 Corner Brackets (nobody is going to see these, so it really doesn't matter what they look like)
Wood stain of your choice (I used Minwax Dark Walnut - my favorite stain!)
Polyurethane (I love this one.)
6 Felt Pads
Old rags or t-shirts
Optional: Outlet box
Tools
Saw of your choice (We like using a miter saw, but it's not necessary for this - you're just making a few 90-degree cuts.)
Sandpaper or orbital sander
Note: this is not meant to be a free-standing table. The legs aren't wide enough to balance the tabletop on their own. To use this table, it needs to be wedged in between a wall and a couch - as long as the couch stays in place, it should be really secure.
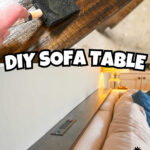
Step 1: Cut the legs & tabletop.
The cuts in this table are incredibly simple - there are only 4 cuts you need to make, and they're all 90 degrees.
Before buying your supplies, you need two main measurements: the height and width of the back of your couch. Get as close as you can to the height of the actual couch (without any cushions) - this measurement is important to ensure your table is flush with the couch.
Throughout this tutorial, I'll use my measurements. My sofa is 30" tall and 110" wide.
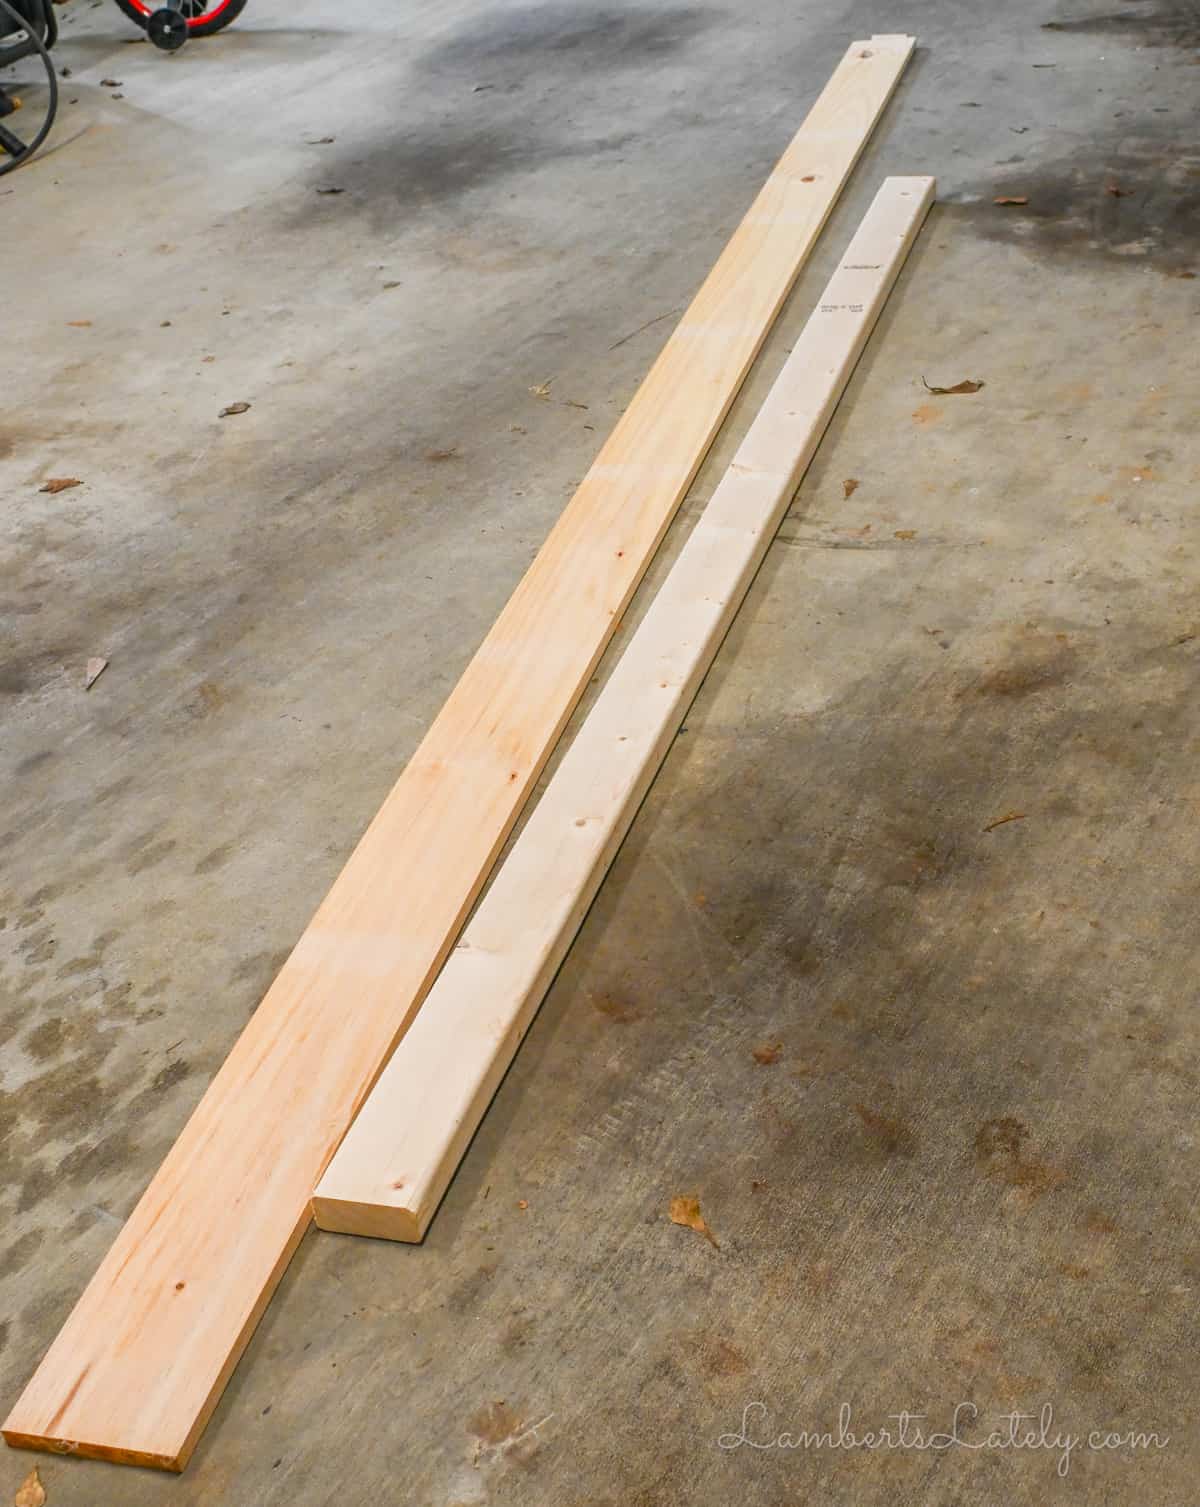
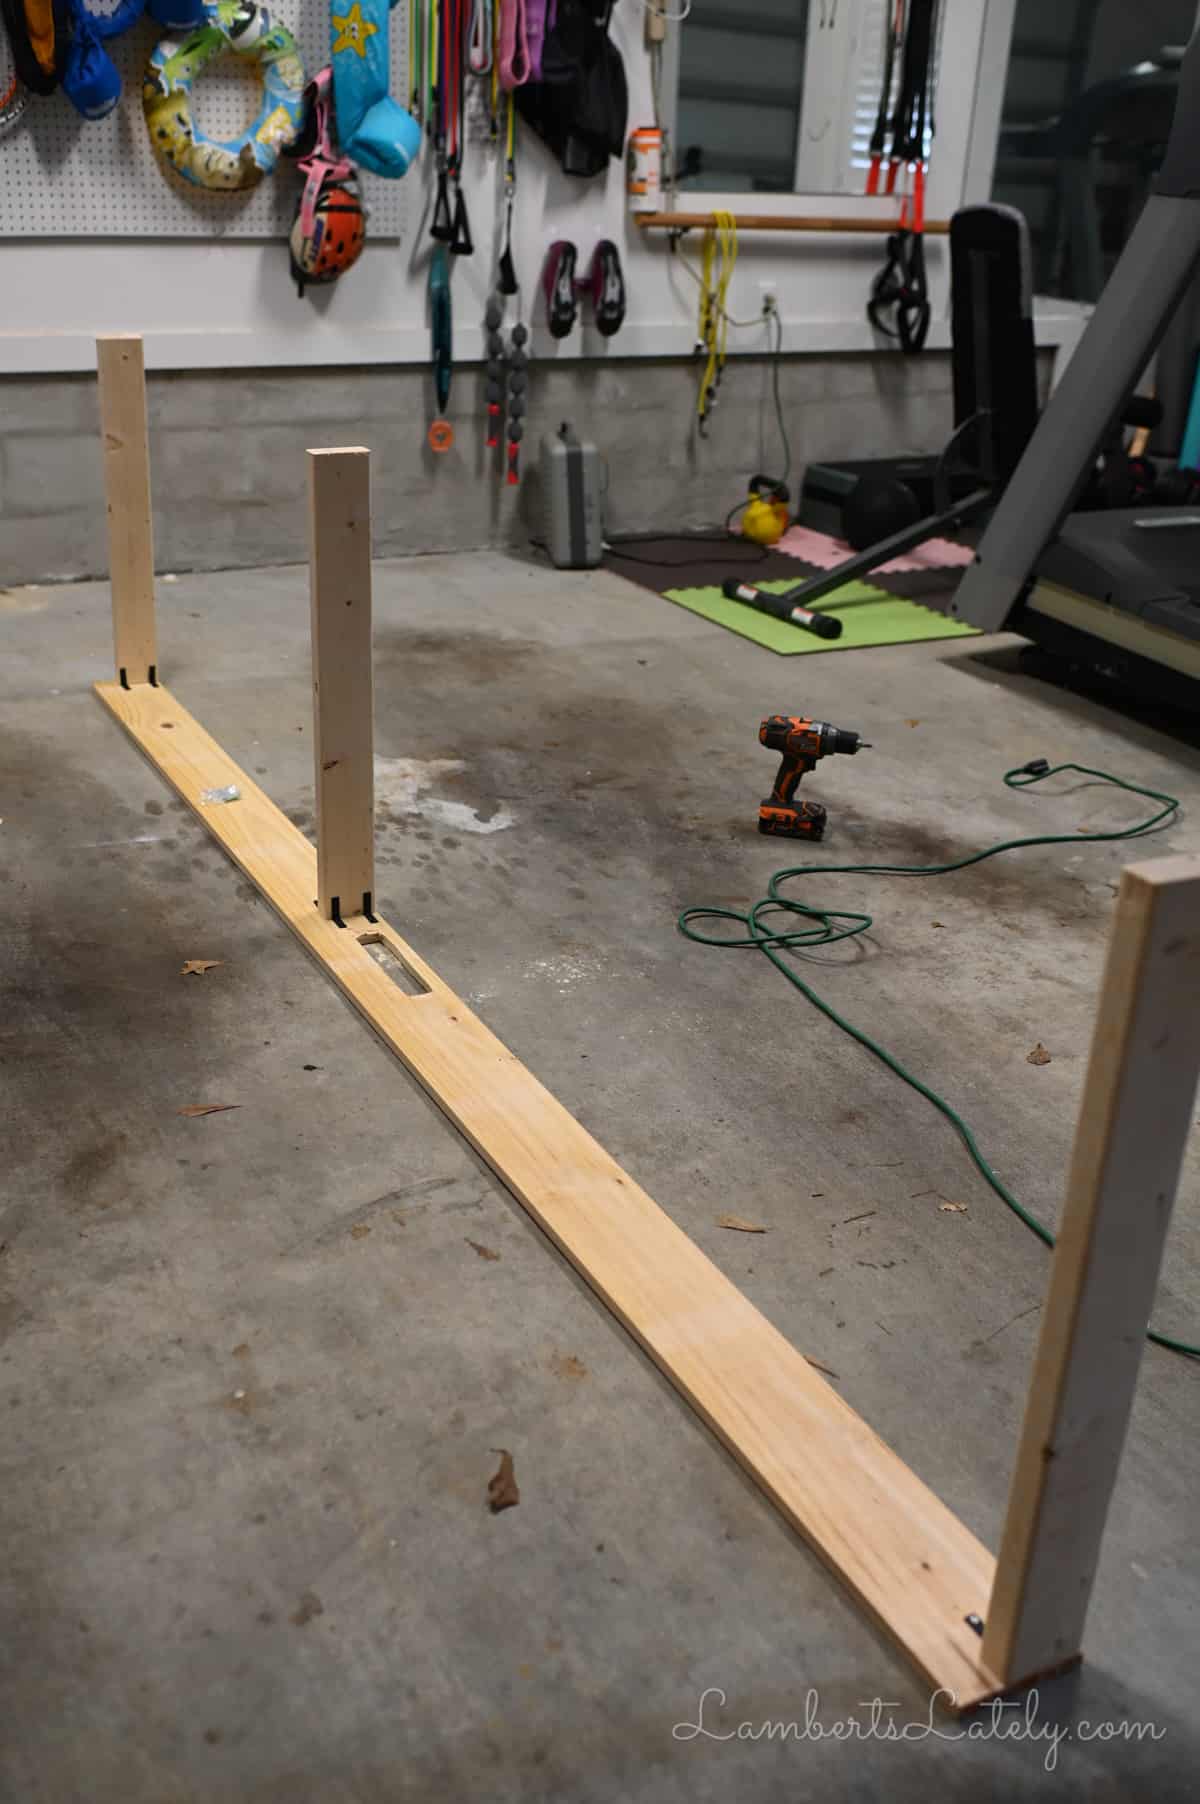
You will likely only need 2 pieces of wood for this project - a 1x6" for the tabletop and a 2x4" to make the legs. You might need an additional 2x4" if your couch is really tall, but chances are you can fit all 3 legs in one piece of wood.
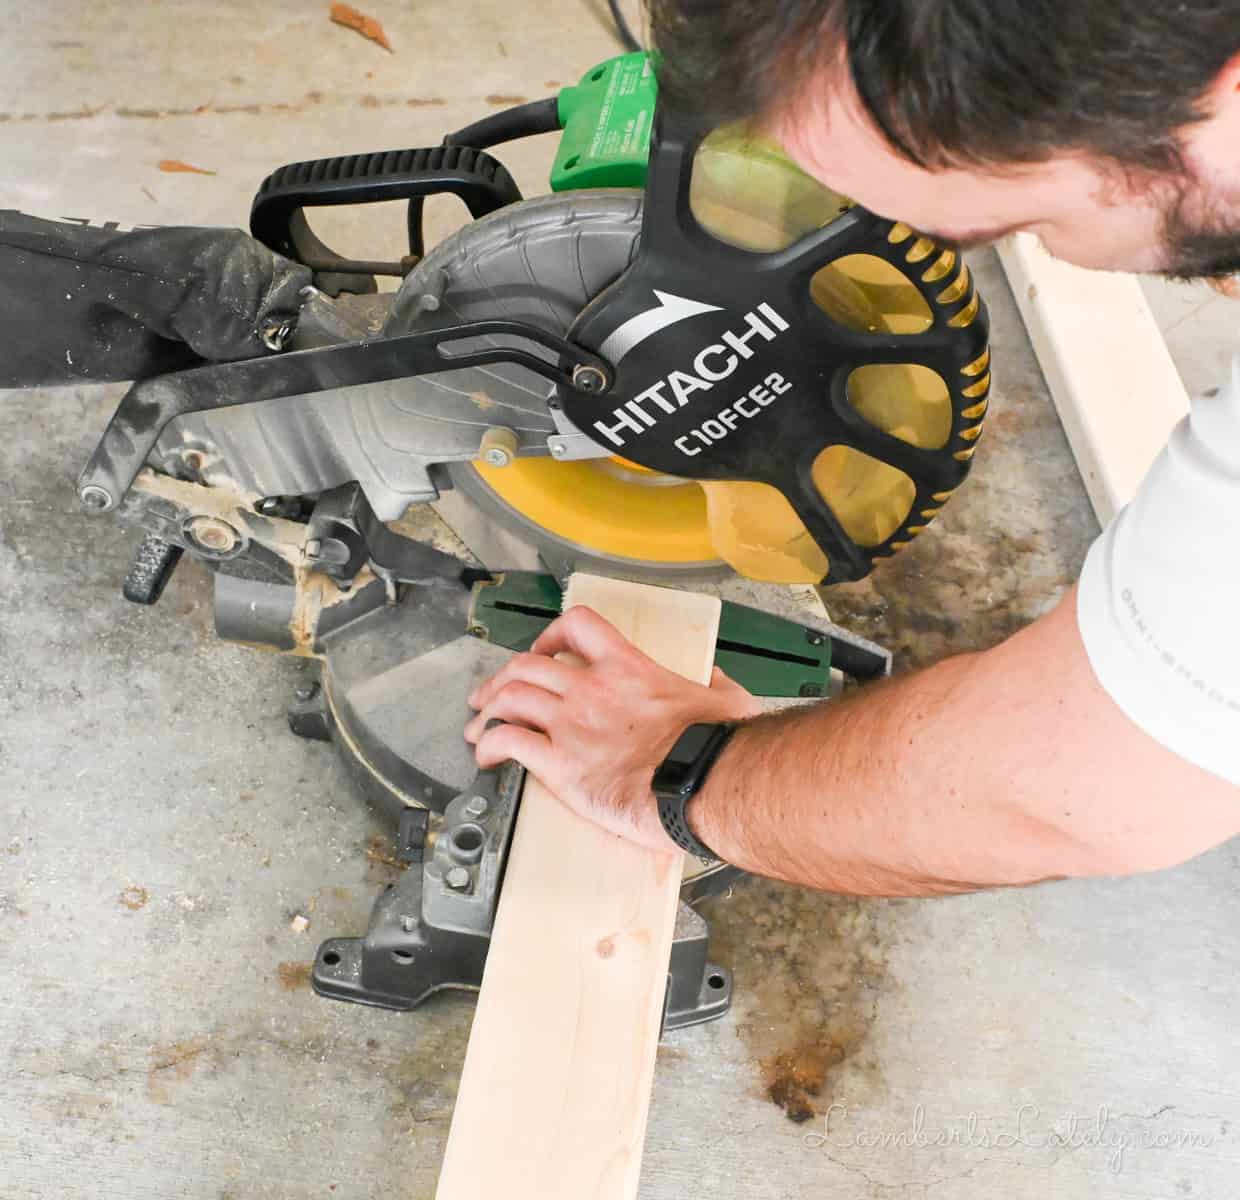
Make 3 legs out of the 2x4" that match the height of your sofa. When placed against the sofa, these should pretty much perfectly match the height of the back, maybe just slightly taller.
You will cut the 1x6" to 2 inches longer than your couch width. My couch is 110" wide - we went with a 112" cut. This is to give your table a little wiggle room...it looks much better if it's a little long than if it's a little short.
Important Tip
Before we move on, there is something really important I need you to keep in mind throughout this project: you won't be able to see most of this after you're finished with it.
It's really hard to make some of the cuts in this project perfect, but that is totally ok - we'll either cover it up or it will be hidden behind a couch. Some of my cuts are downright ugly, but I haven't noticed them at all since completing this project because they're all hidden.
Don't worry if it's not perfect!
Step 2: Attach the outside legs.
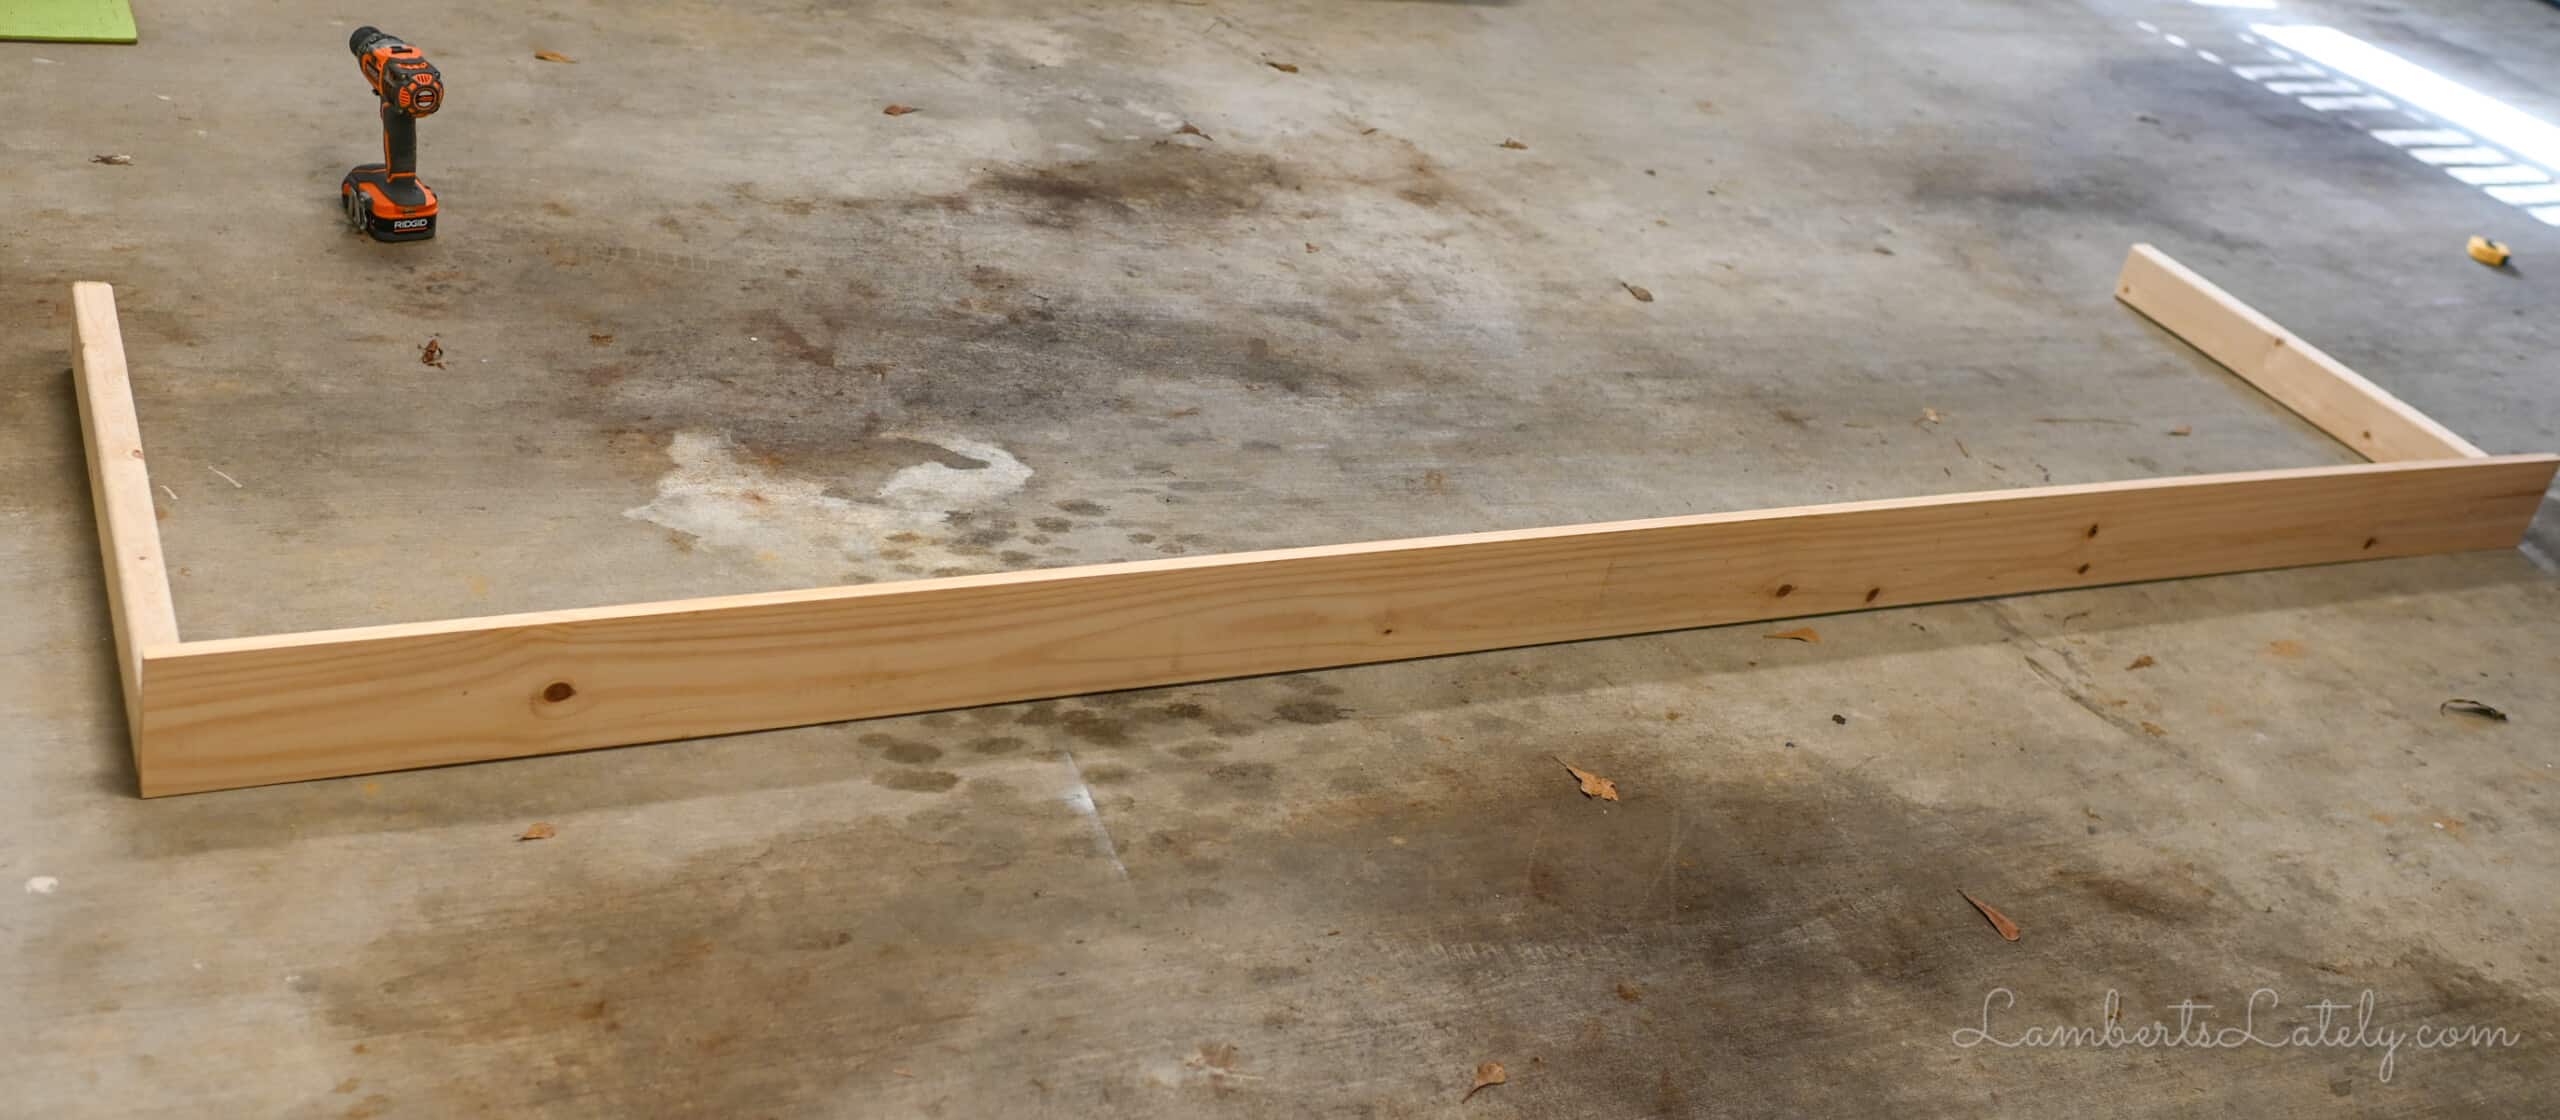
Attach the two outside legs to sit flush against the outside of the 1x6. These should also sit flush against the back of the 1x6, leaving a lip on the front of the table. This is what will sit slightly over the top of your couch after building, leaving no gaps.
Nail the legs to the tabletop by driving 2 nails through the top of the 1x6, into the top of the 2x4s. Then, secure 2 L brackets on the inside of each leg.
Your legs will probably be wobbly at this point. This is not a big deal at all if you're using it the way it's intended to be used (wedged between the wall and the couch). These legs are really just to brace it and hold a little bit of the tabletop's weight.
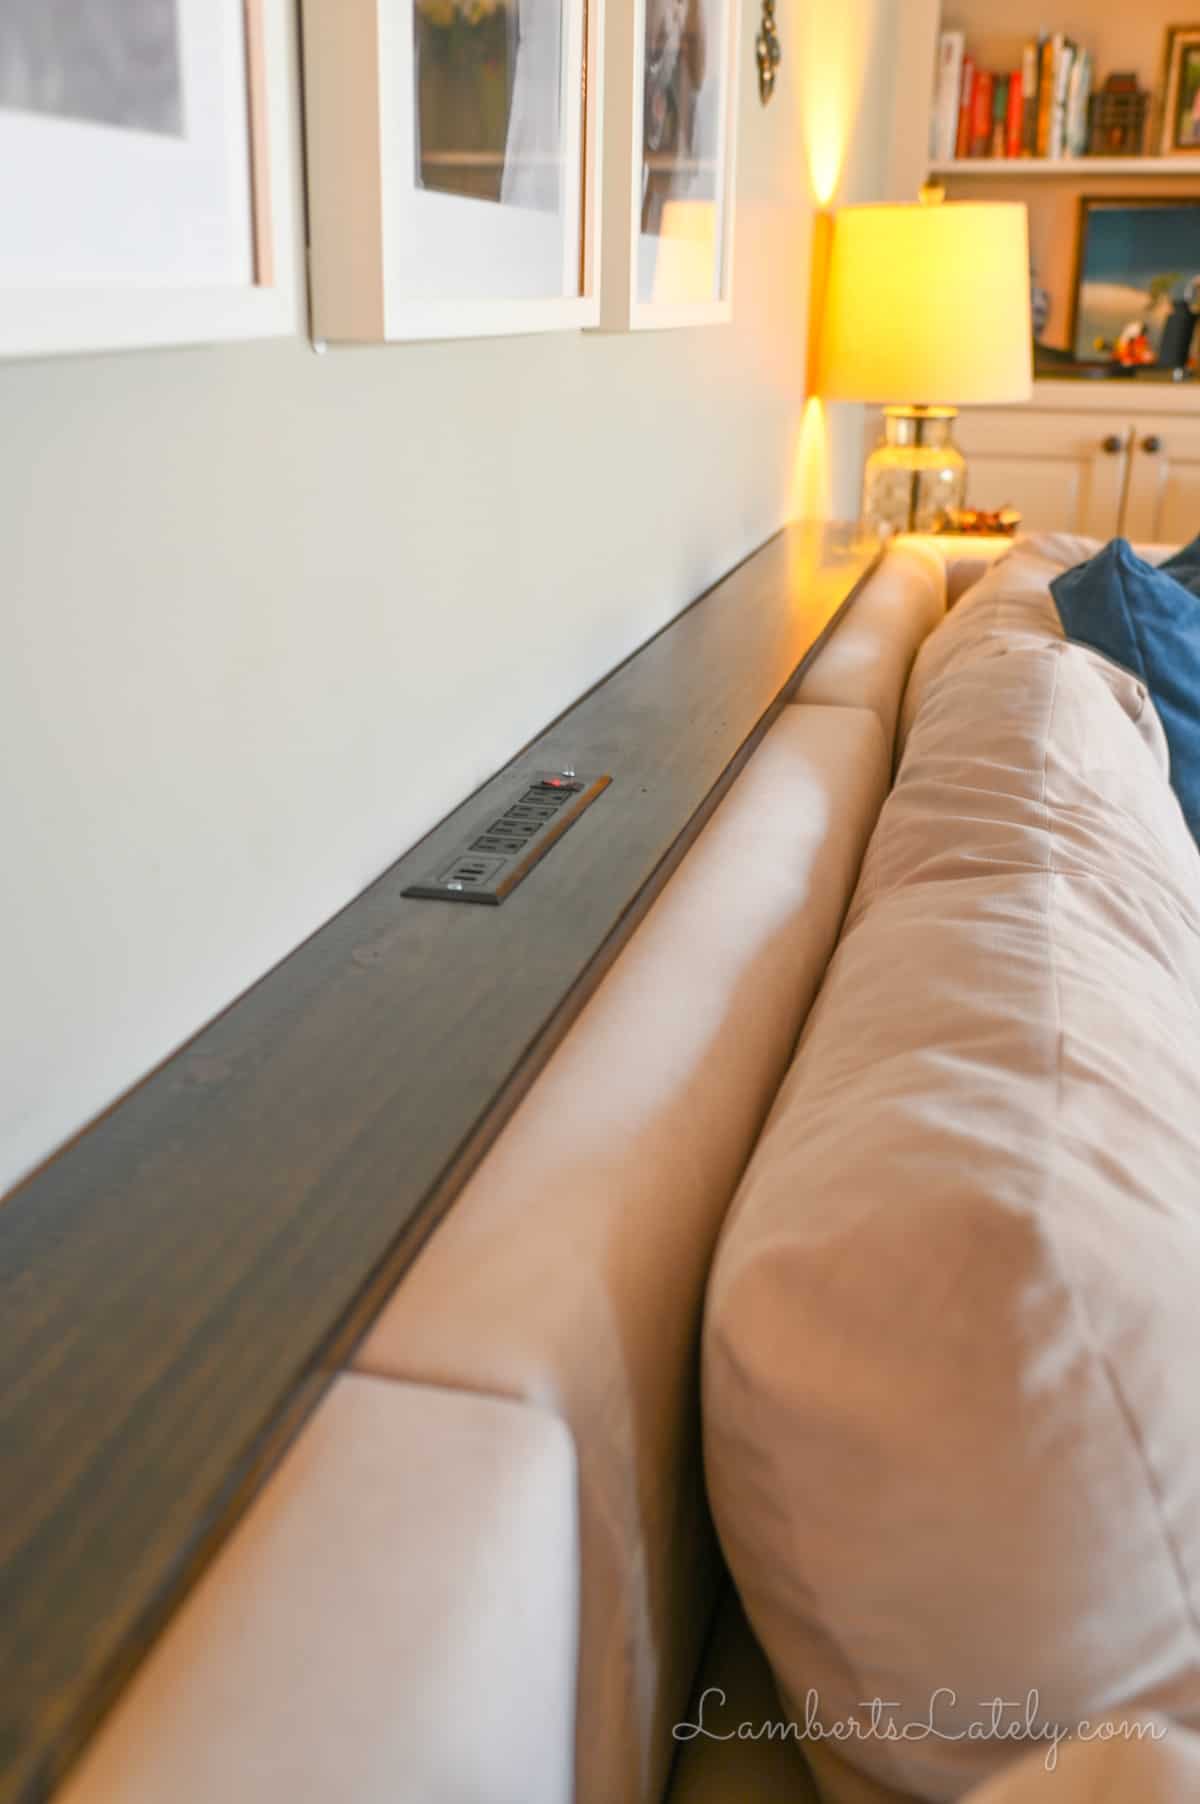
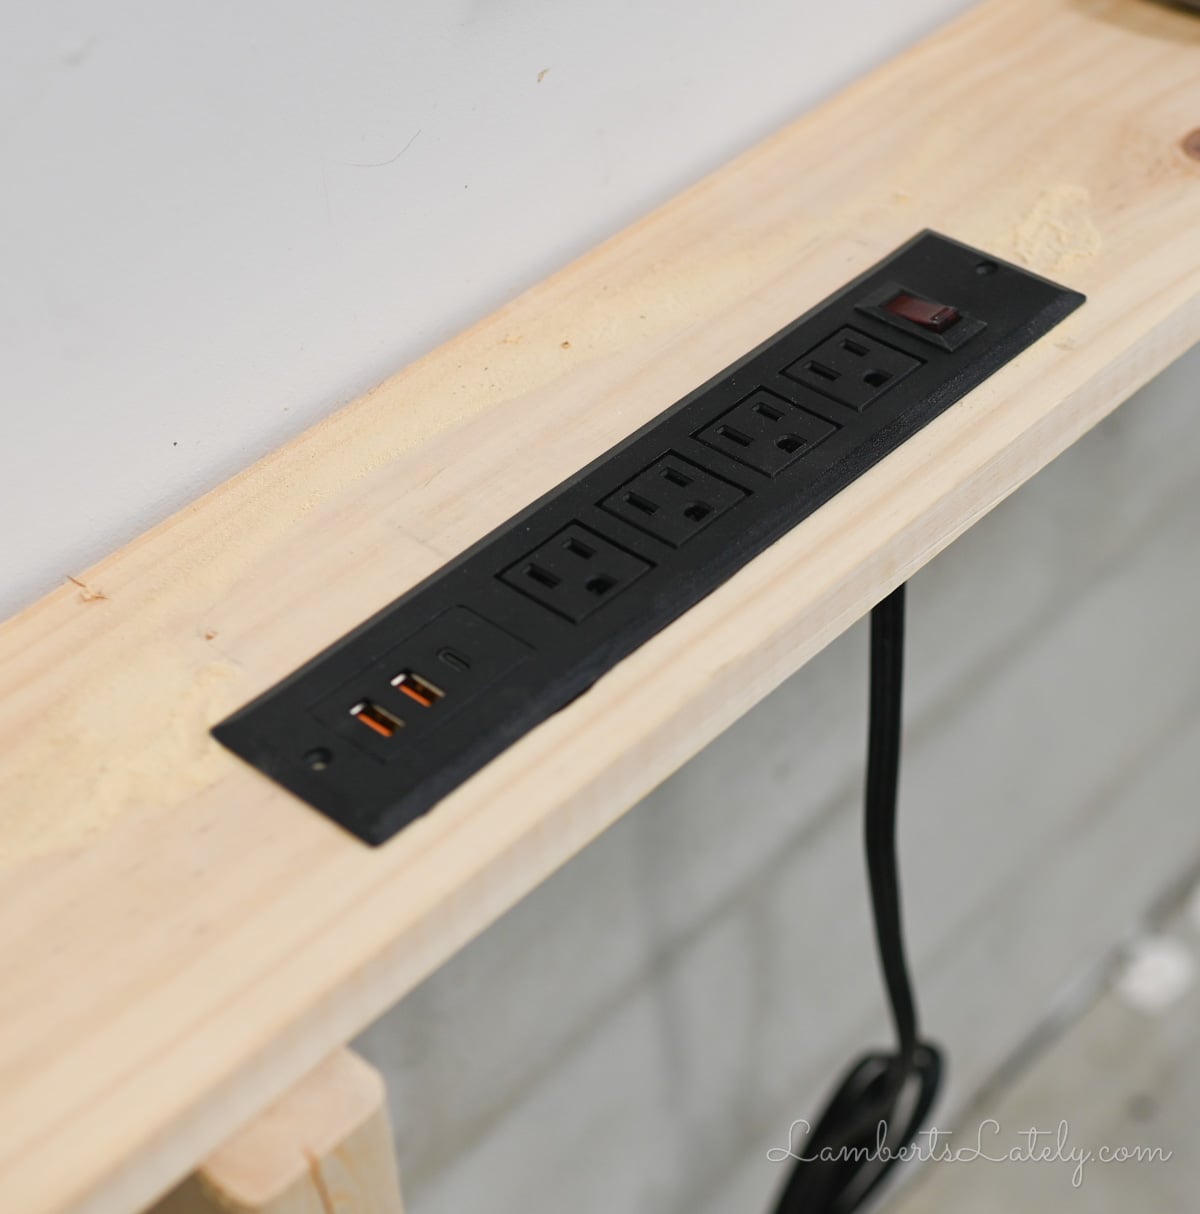
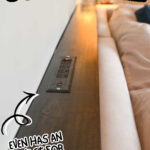
Step 3: Add the optional outlet.
Do not feel like you have to add this outlet if you're trying to cut costs on this project. It's totally optional, but I will say that we've loved having an outlet built into the table!
It helps to brace the table against a wall to do this step - this will give you more support as you cut. You can also temporarily place that third leg under the middle of the table for more support.
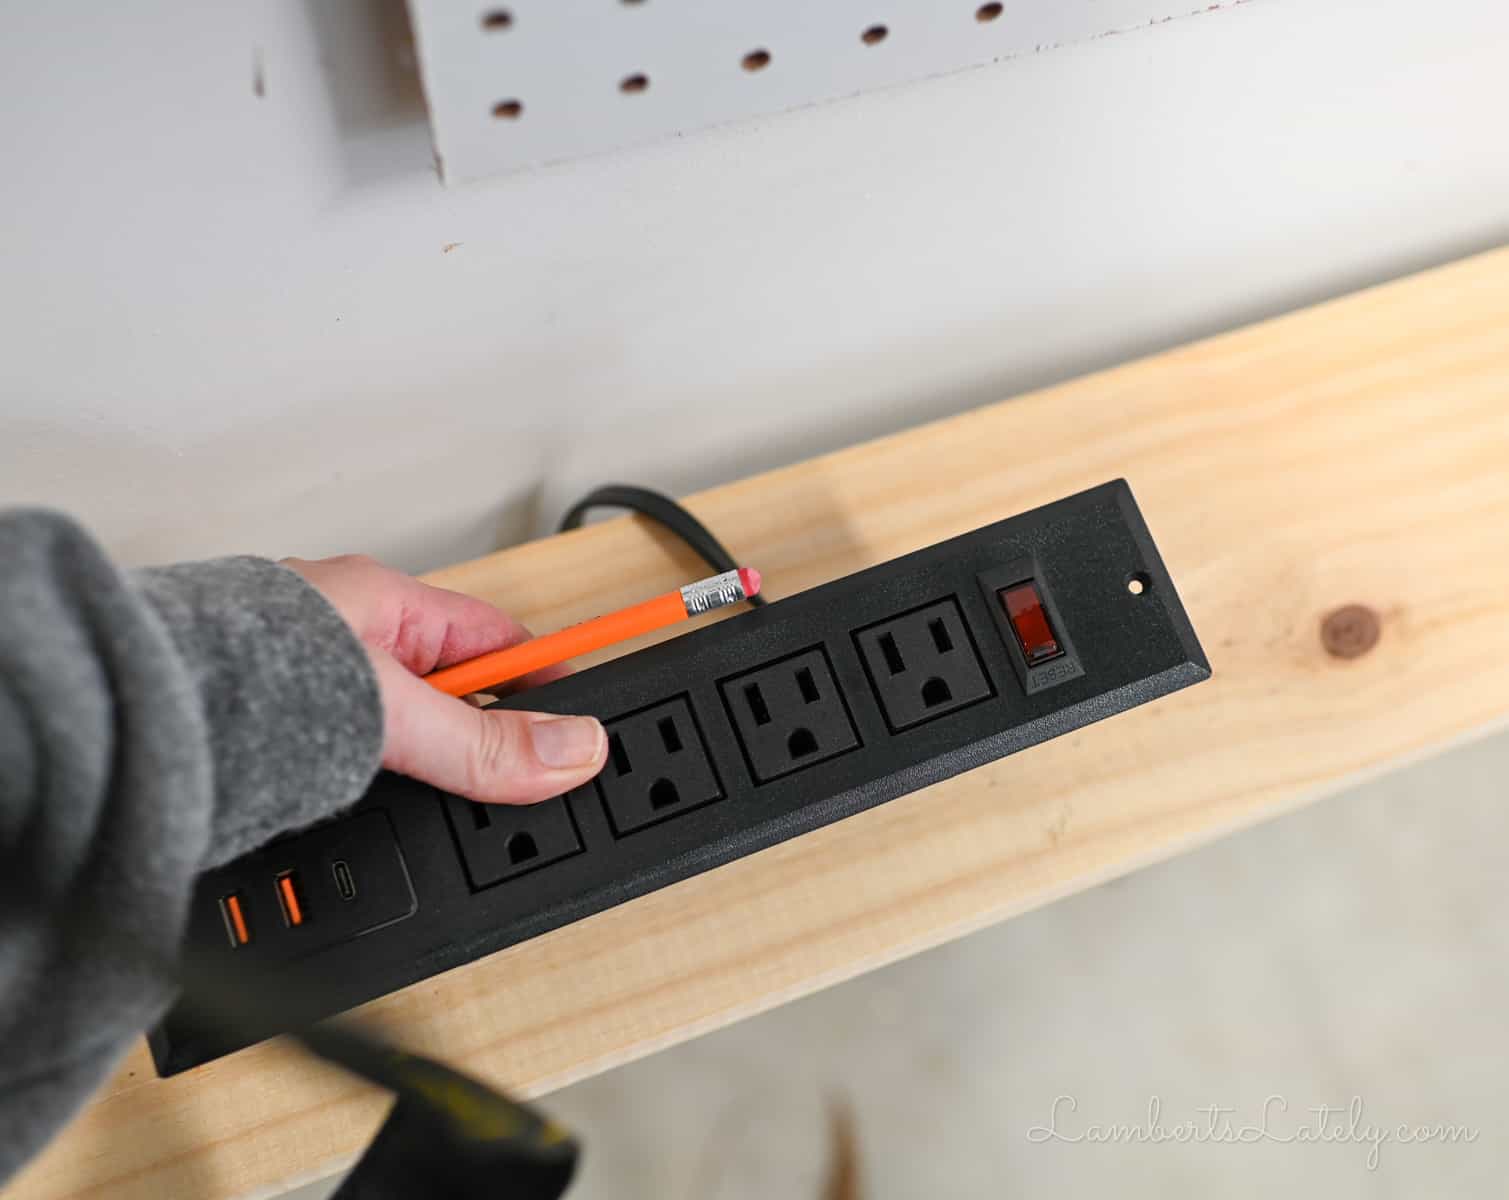
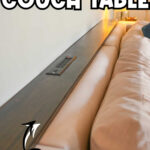
Hold the outlet box where you'd like it to be on the table. If you use the outlet I linked, there's a smaller outlet box that will sit inside the tabletop with a wider cover on top to hold it in place and hide the cuts.
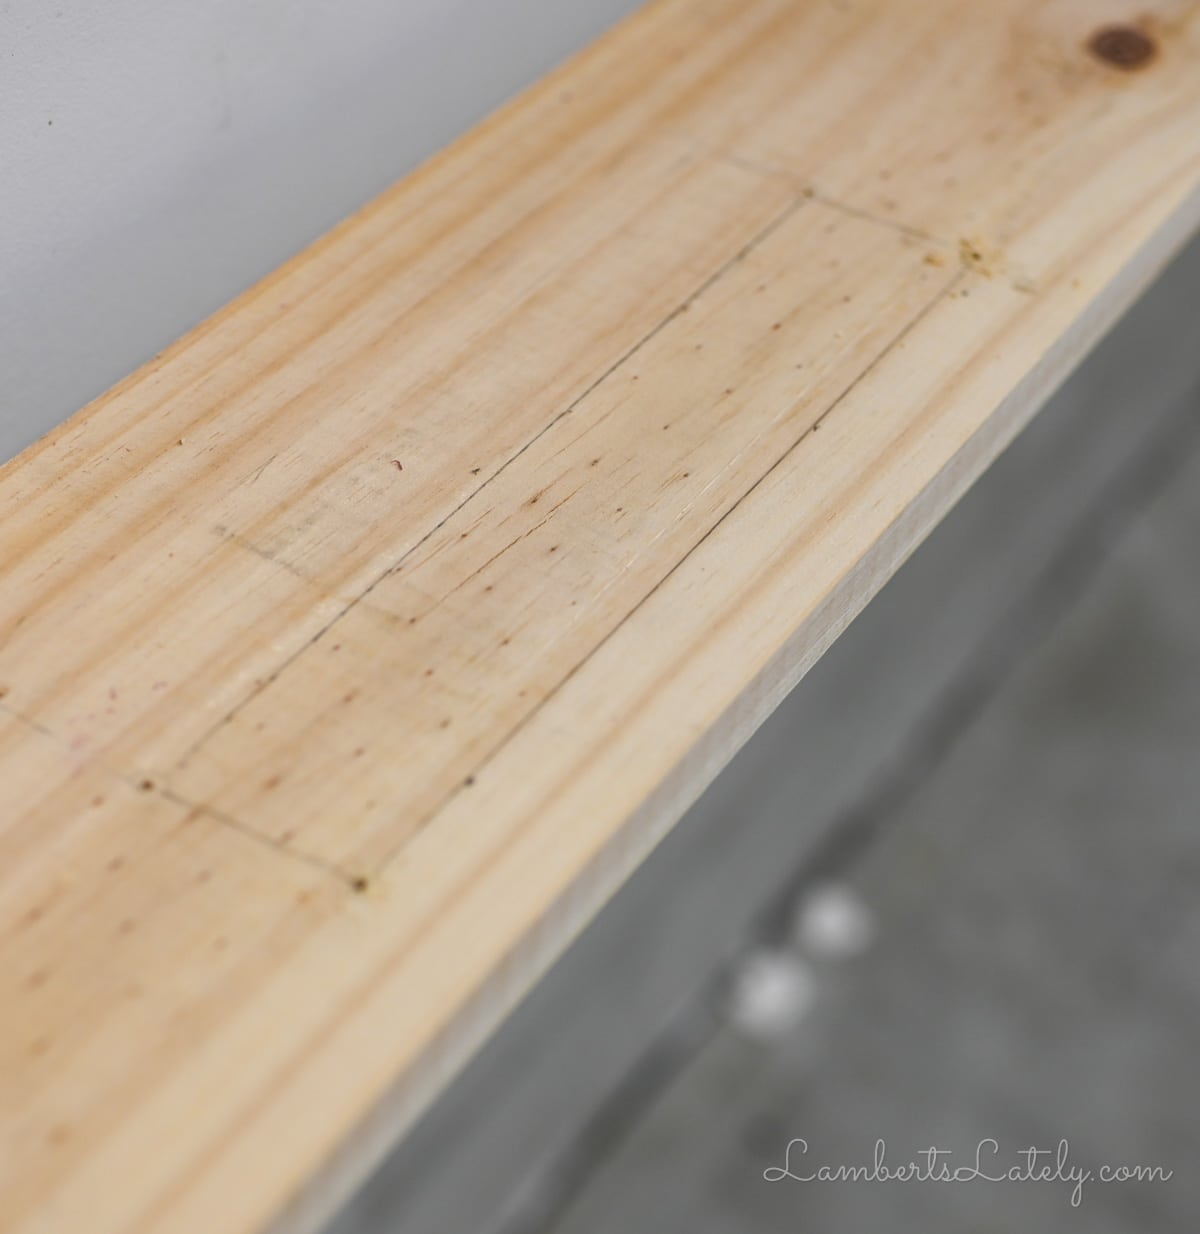
Trace the outside of the smaller bottom of the outlet box onto your table, making sure it's square with the 1x6.
When placing your outlet box, keep in mind where the nearest plug is behind your couch. You'll also want to think about where the outlet box is in relation to the couch. You don't want it to sit too far forward on the table...it will run into that lip we made that overhangs onto the sofa.
This outlet can be on one end of the table if you'd like it to be. We just chose the middle for convenience.
This is probably going to be one of those ugly cuts I talked about earlier. Don't worry - these cuts will be completely hidden once you drop the outlet box in. This hole just needs to be wider than the outlet box but smaller than the cover on top.
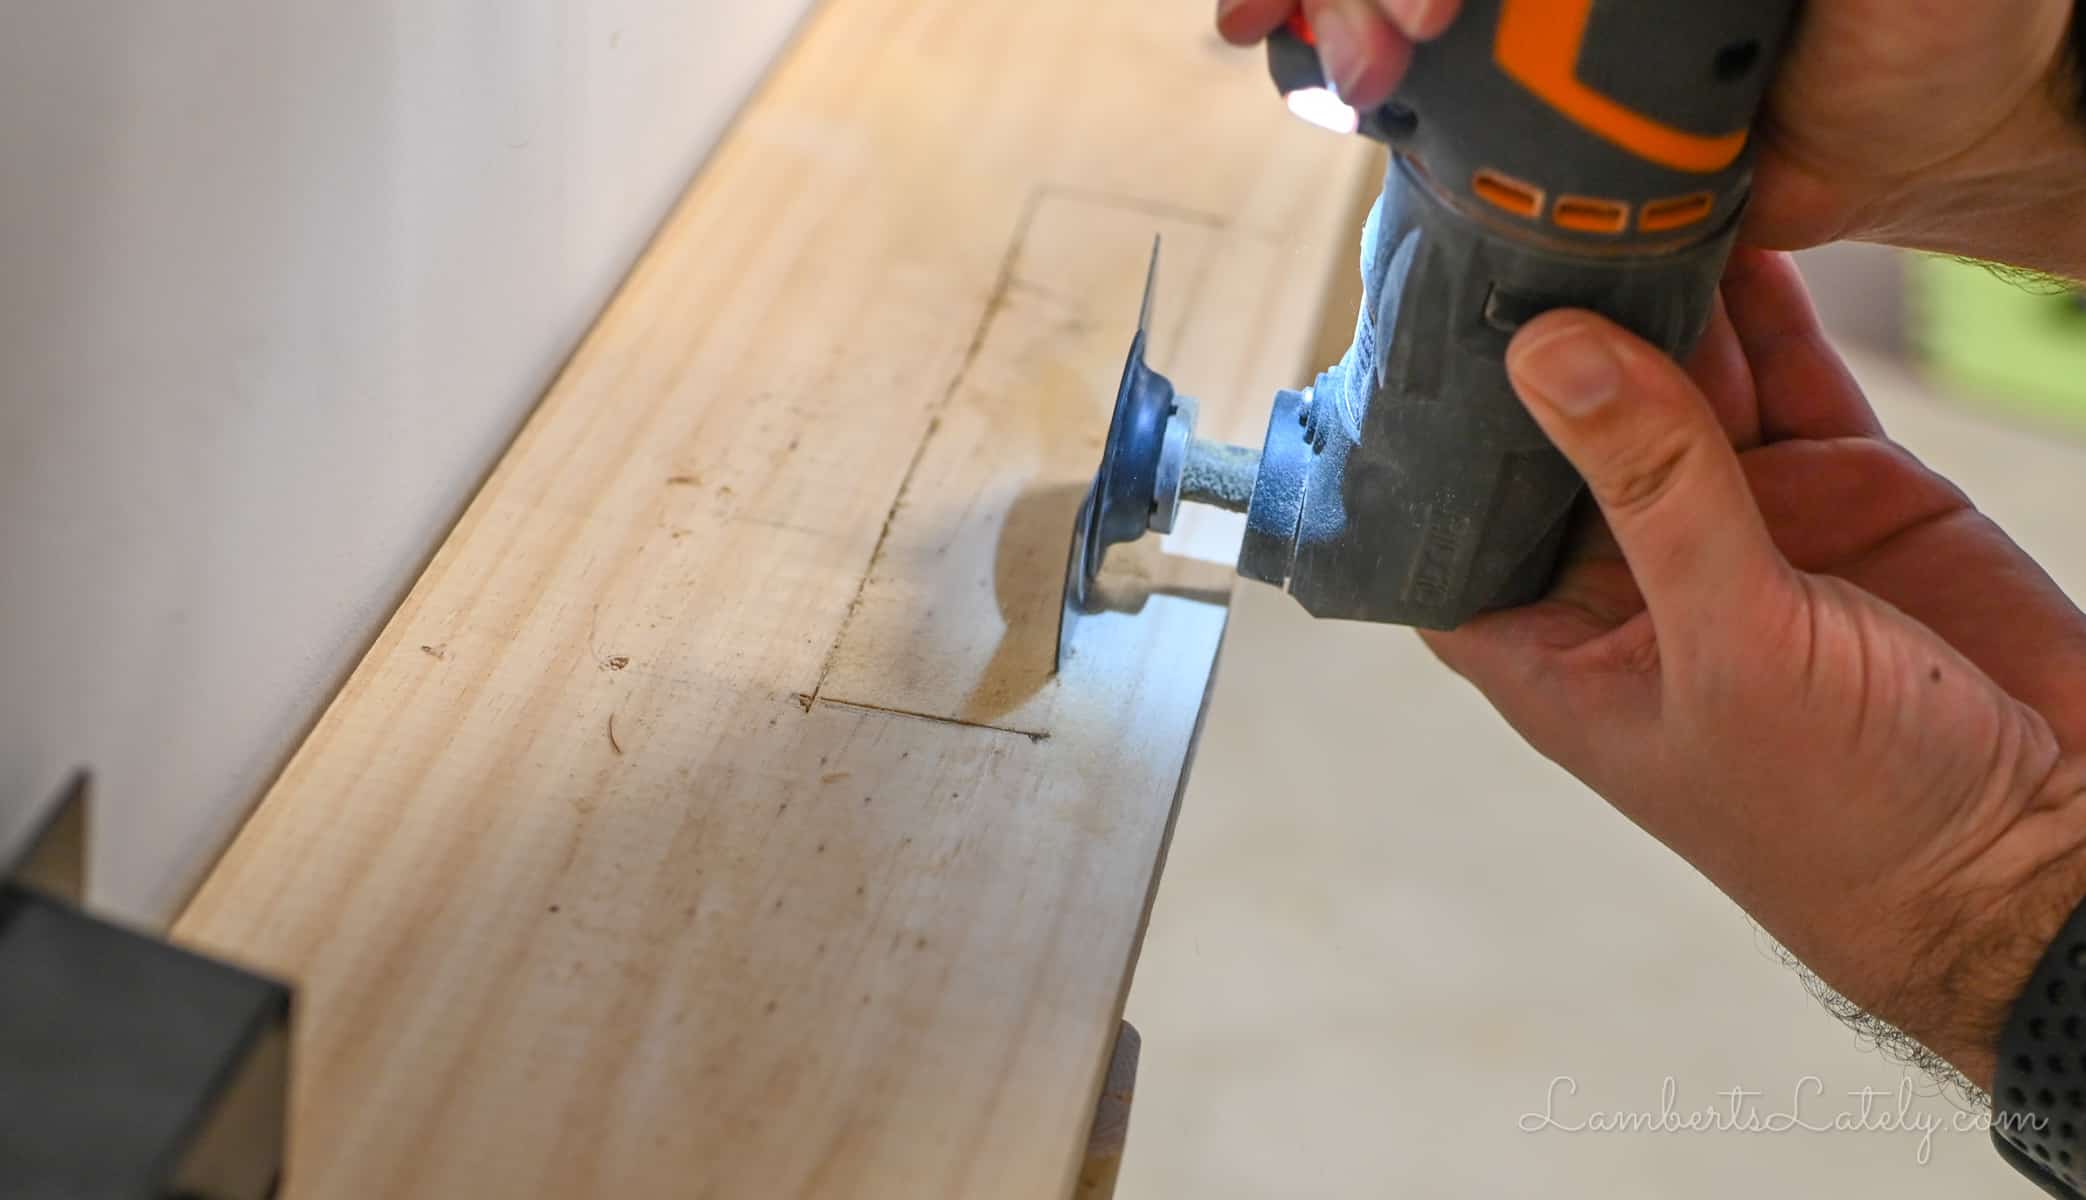
Use the oscillating tool to get as close to that traced outline as you can.
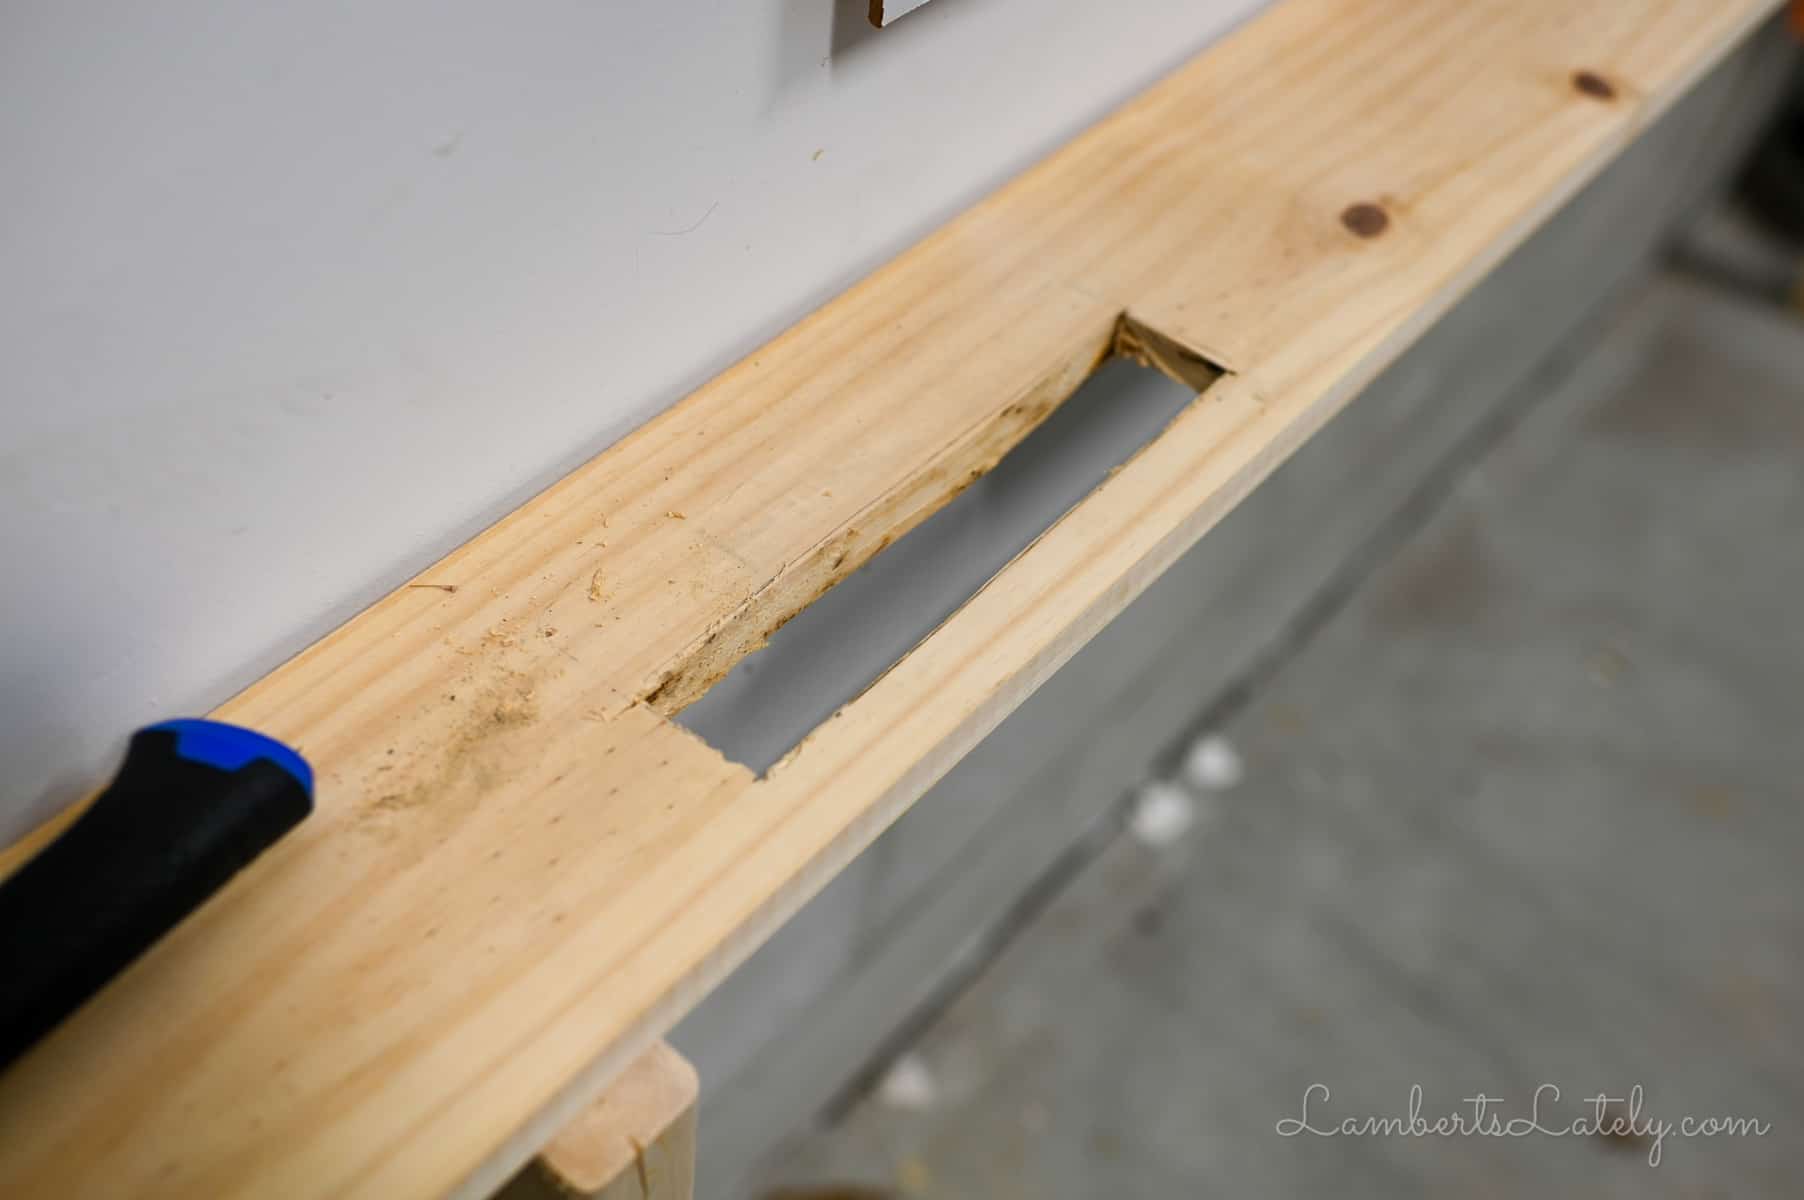
Make sure the outlet fits before moving on - you might need to shave a little extra off of the rectangle to make it work.
After making sure it fits, set the outlet to the side - we'll attach it later.
Step 4: Attach center leg.
I waited to attach the center leg so we didn't run into the outlet box. This center leg does not have to sit perfectly in the middle of the table - it just needs to be somewhat close so it can support that center weight.
Attach the center leg the same way you attached the outside legs, with 2 nails through the top of the 1x6 and 2 corner brackets on each side of the leg. Make sure it sits at the back of the 1x6, just like the other 2 legs.
This leg will probably also be wobbly - trust the process here! Again, these legs aren't meant to balance the table...the couch will do that. They just need to support the weight.
Step 5: Notch out for baseboards.
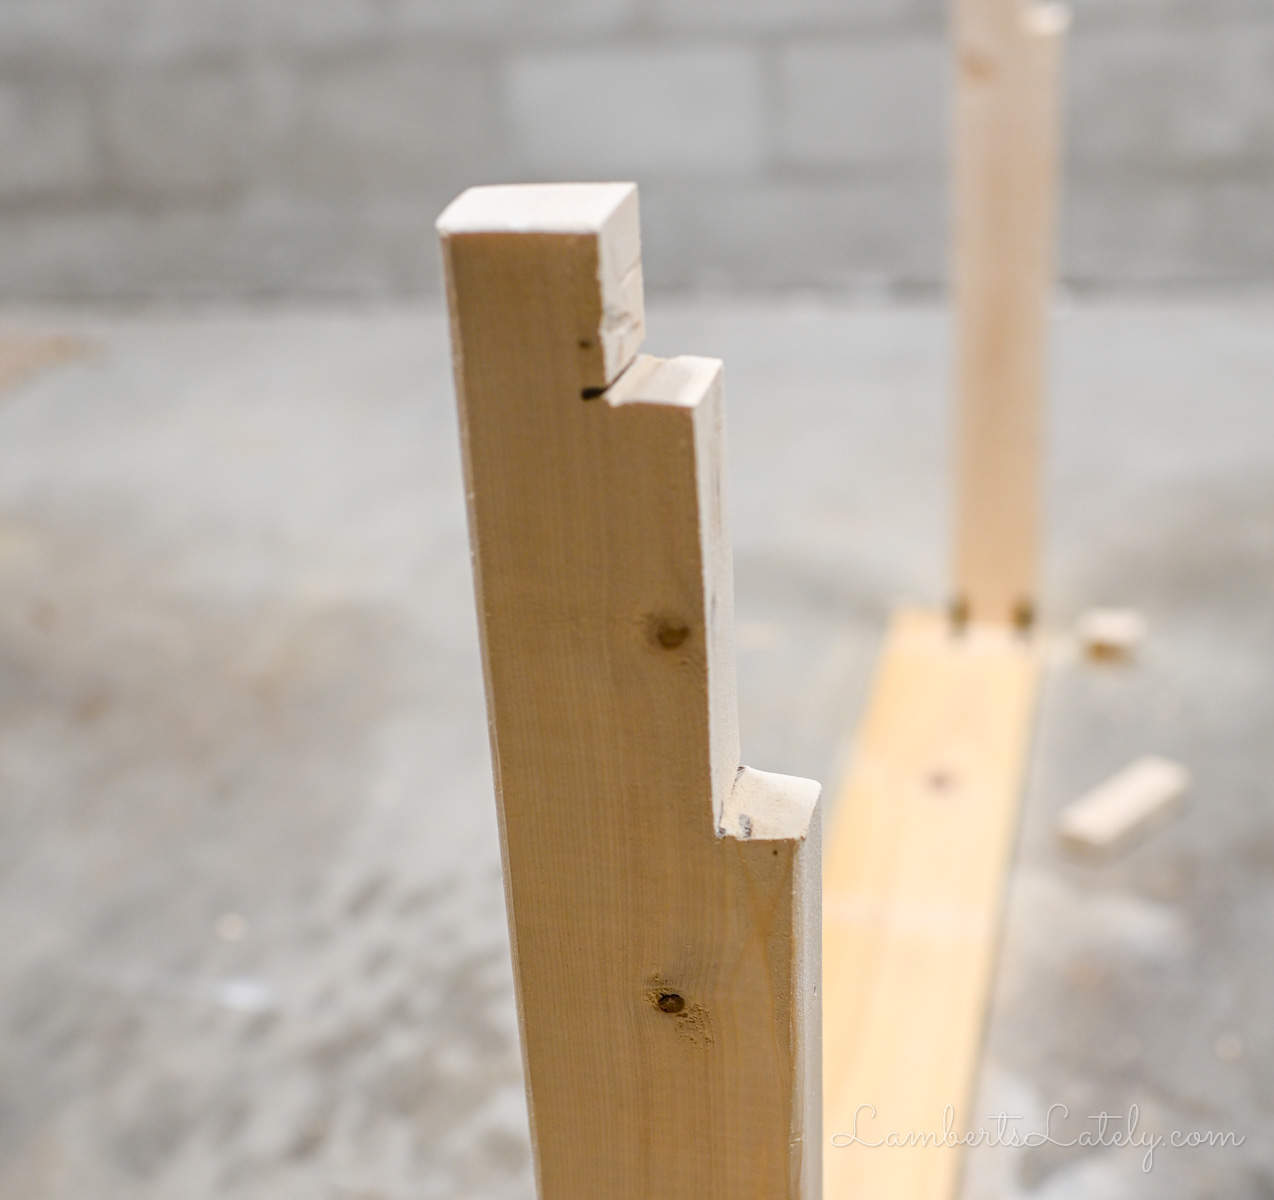
If you want your table to sit flush against the wall, you need to make sure there is a gap for baseboards. In our home, we have 6" tall baseboards with quarter-round at the bottom. So we made 2 notches - one at about 6.5" to account for the big baseboard and an additional 1" notch to accommodate the quarter-round.
Use your oscillating tool to notch out each leg. This is going to be another one of those ugly cuts. It's really hard to make this one pretty - don't sweat it! This will sit behind the couch, so it's barely noticeable after the project is over. Even better if you have end tables - nobody will see these notches at all.
Don't skip this step if you want your table to be flush to the wall. A gap behind the table would be really annoying!
Step 6: Sand and fill.
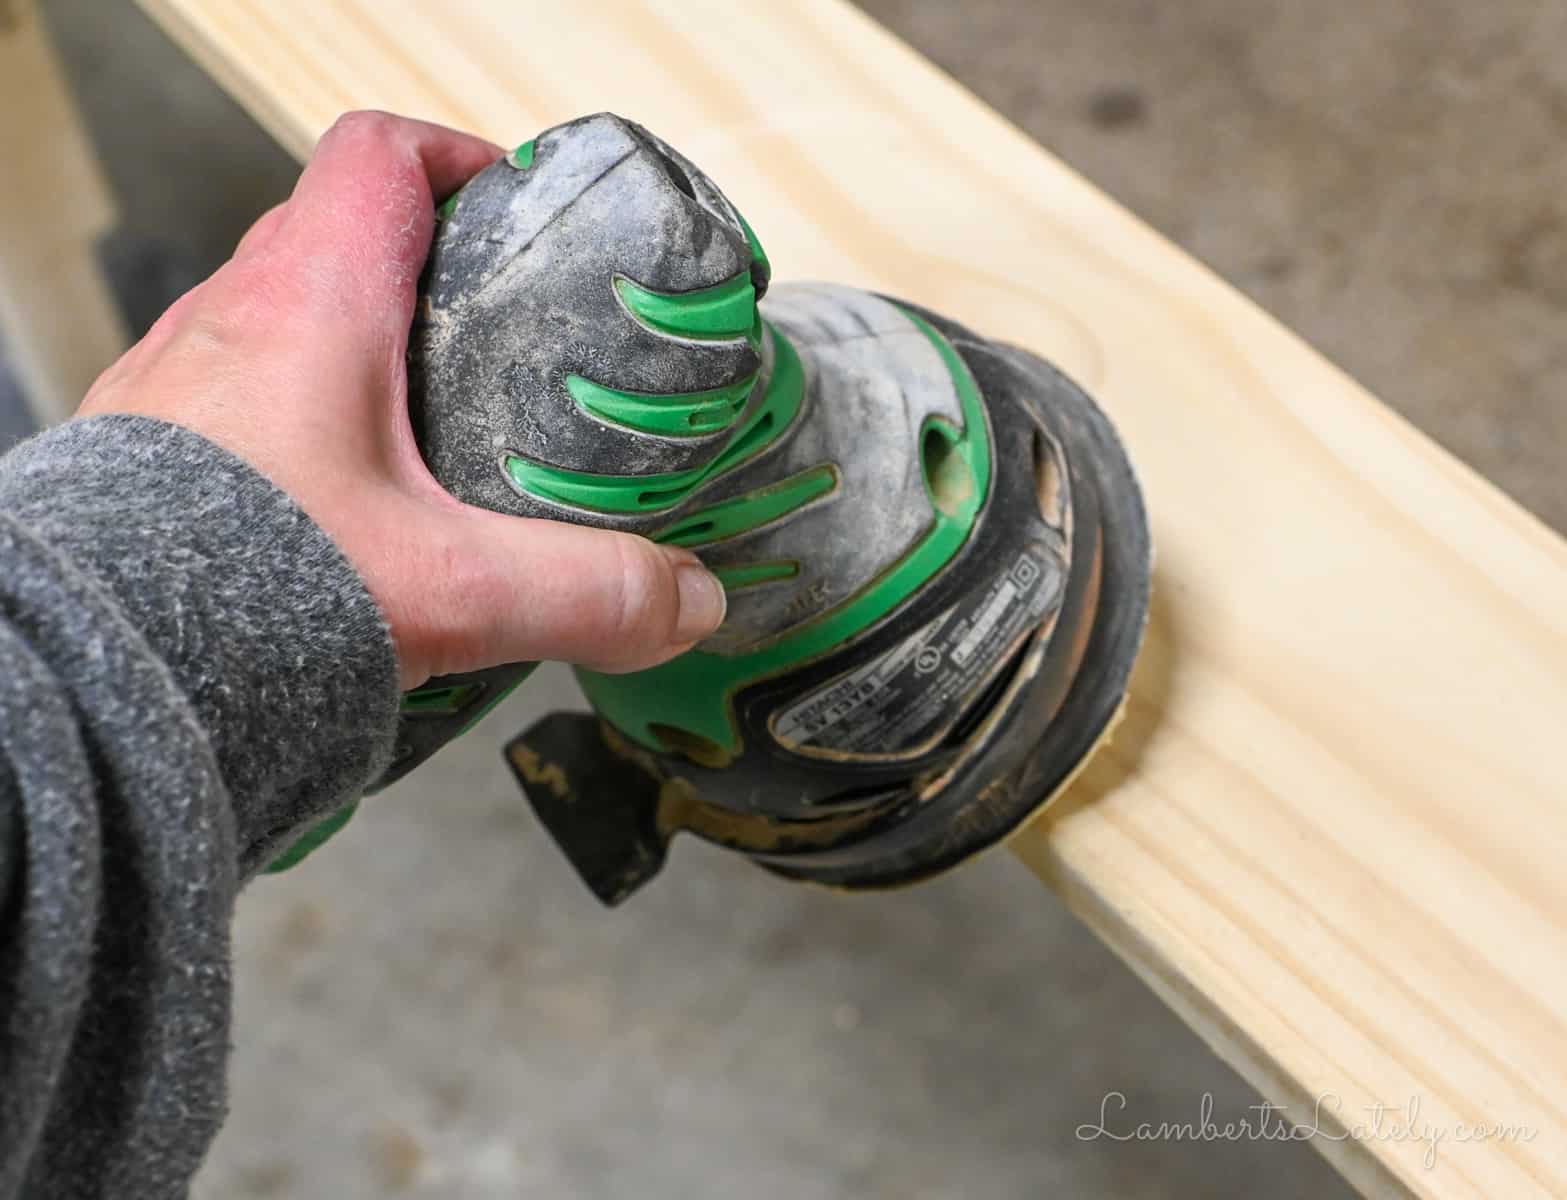
Using an orbital sander (or even sandpaper), take the sharp corners off of the tabletop and legs. Not only will this give the table a little bit of a weathered look, but it will make it safer.
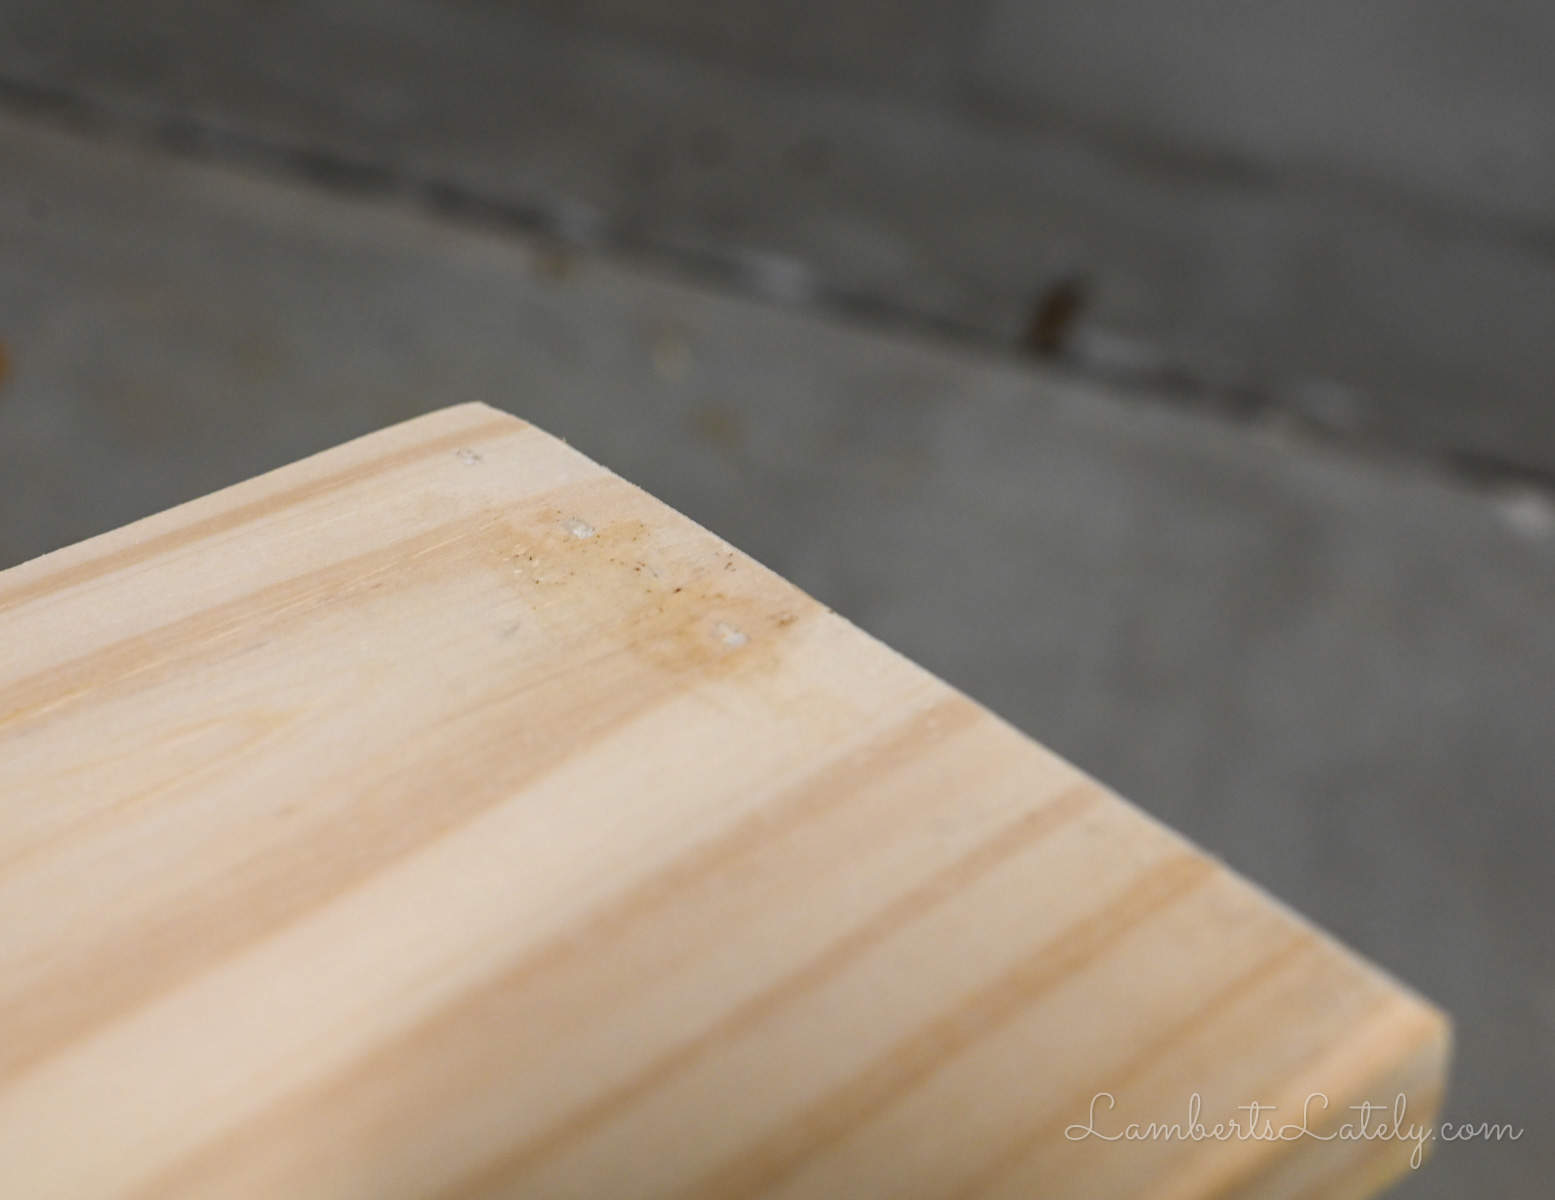
This is also a good time to fill in those nail holes. If you used a pneumatic nail gun, the nails should already be driven in a little past the wood's surface. If they aren't, drive them in a little more and use wood filler to cover the hole. Let this dry and sand the patches before staining.
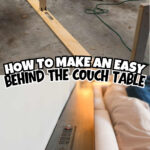
Step 7: Stain the sofa table.
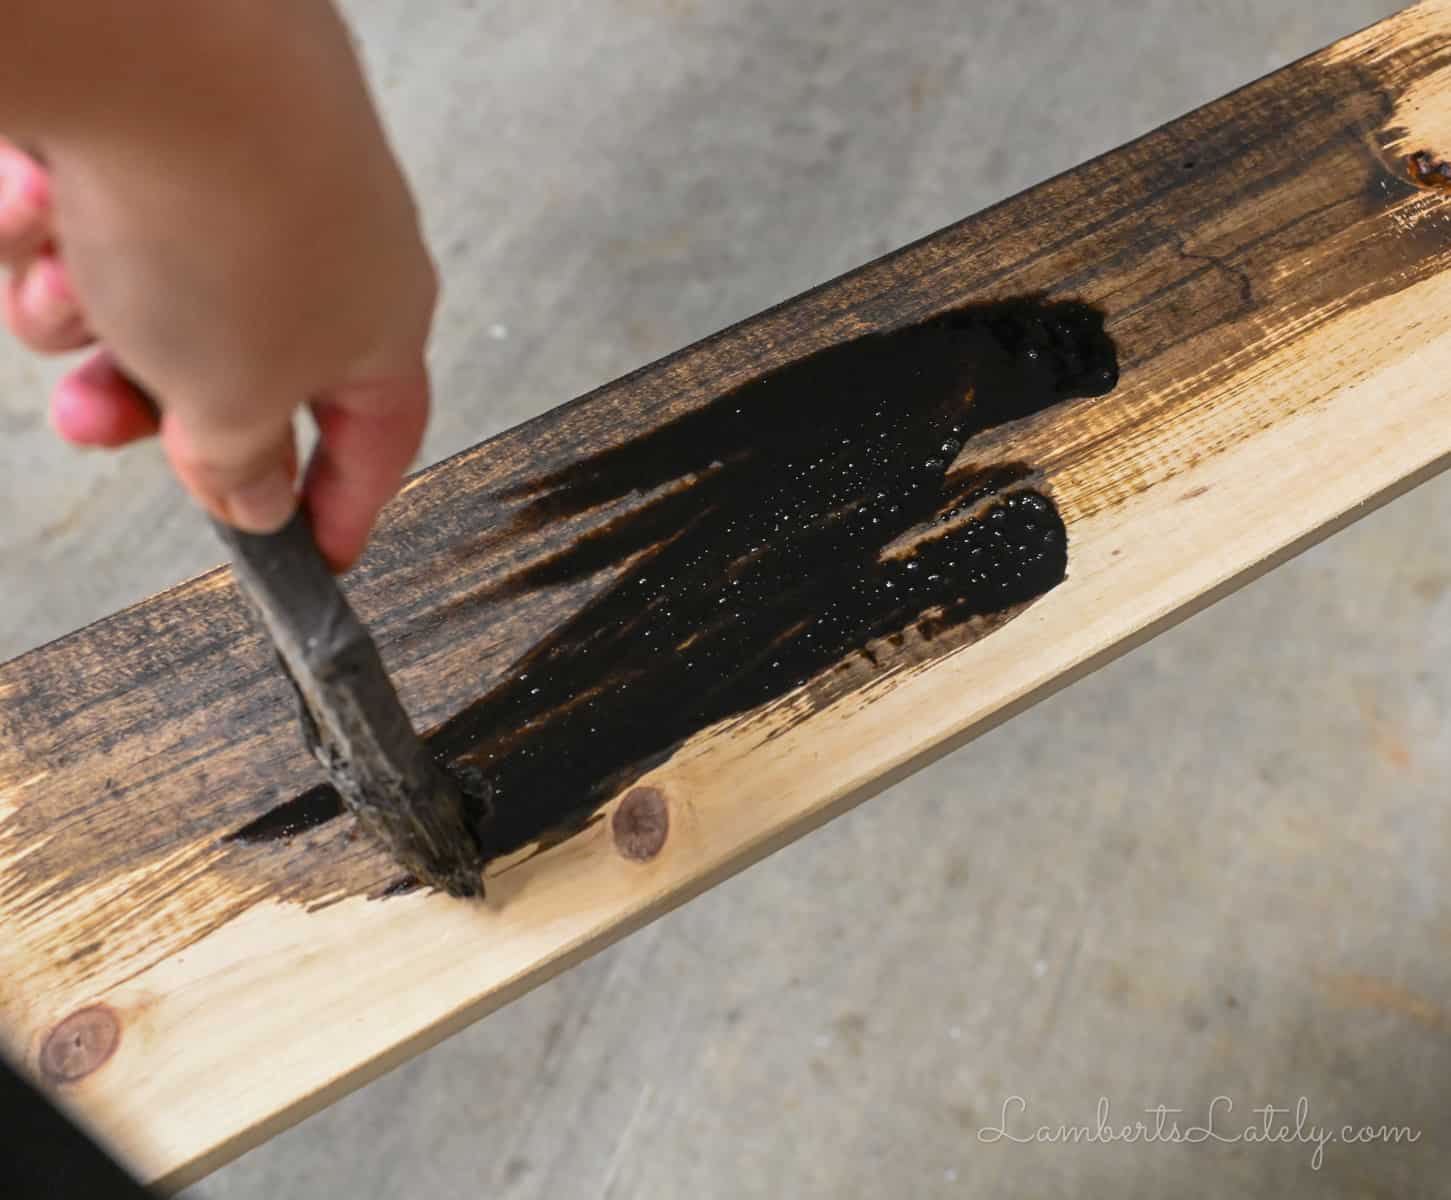
Now the fun part - staining! Use a paintbrush or sponge brush to rub the stain over the table's surfaces, brushing with the grain of the wood in even strokes.
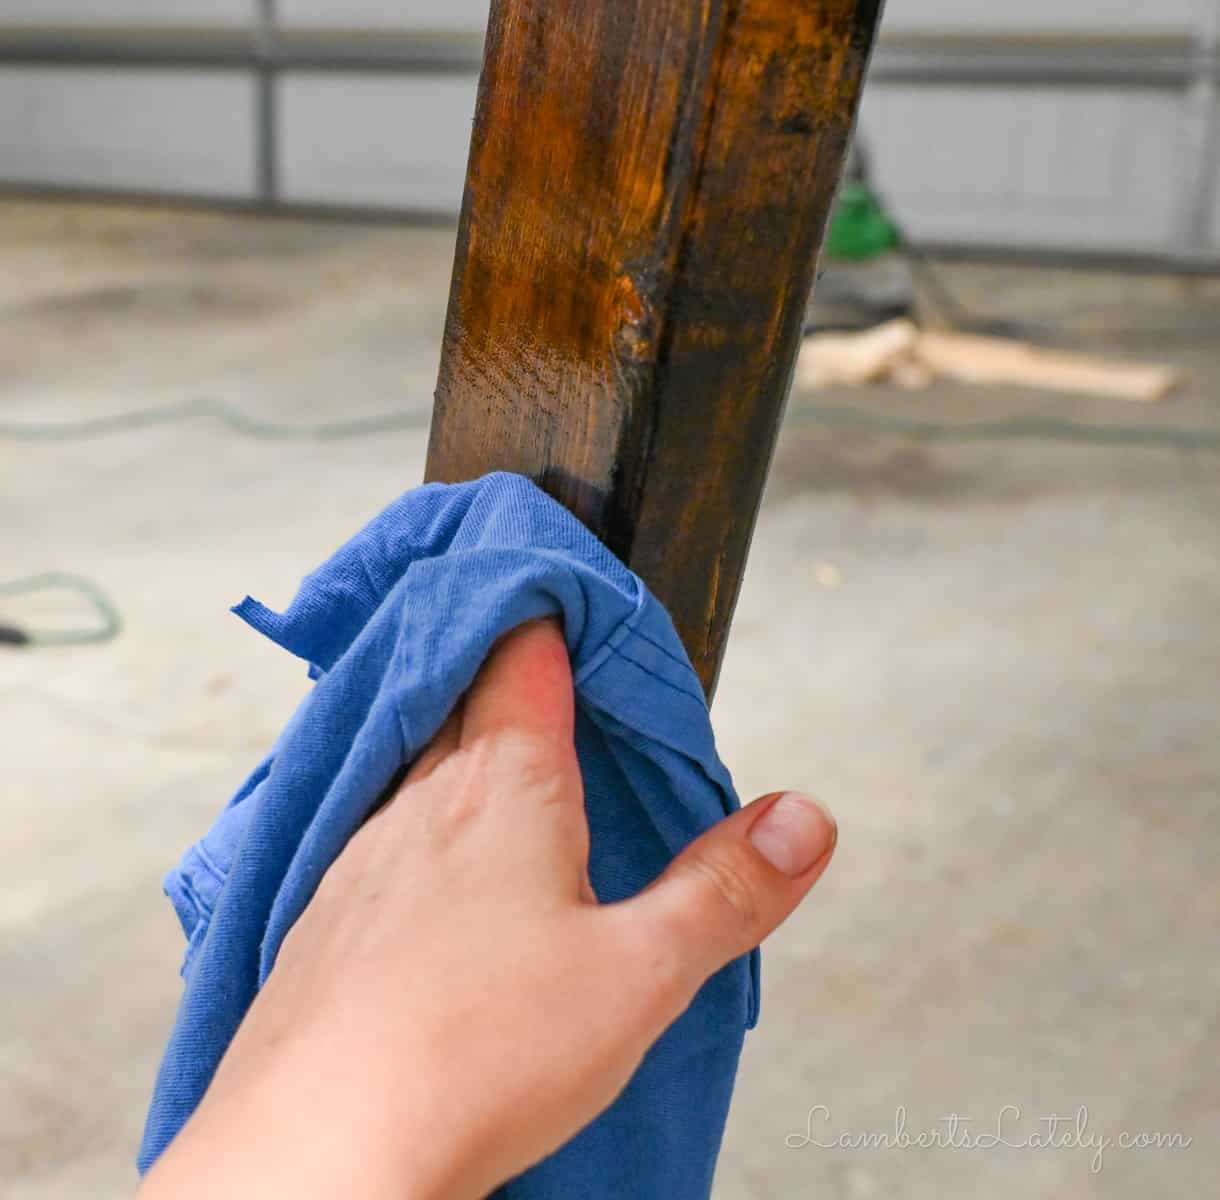
Let the stain sit for 10 minutes to an hour (depending on how deep you want the stain), then wipe off any excess with a scrap piece of fabric. I like using old T-shirts for this, but old rags work too. Just be prepared to throw whatever cloth you use away.
Repeat the process until the stain is as deep as you'd like it to be. Let this dry overnight.
Step 8: Finish with polyurethane.
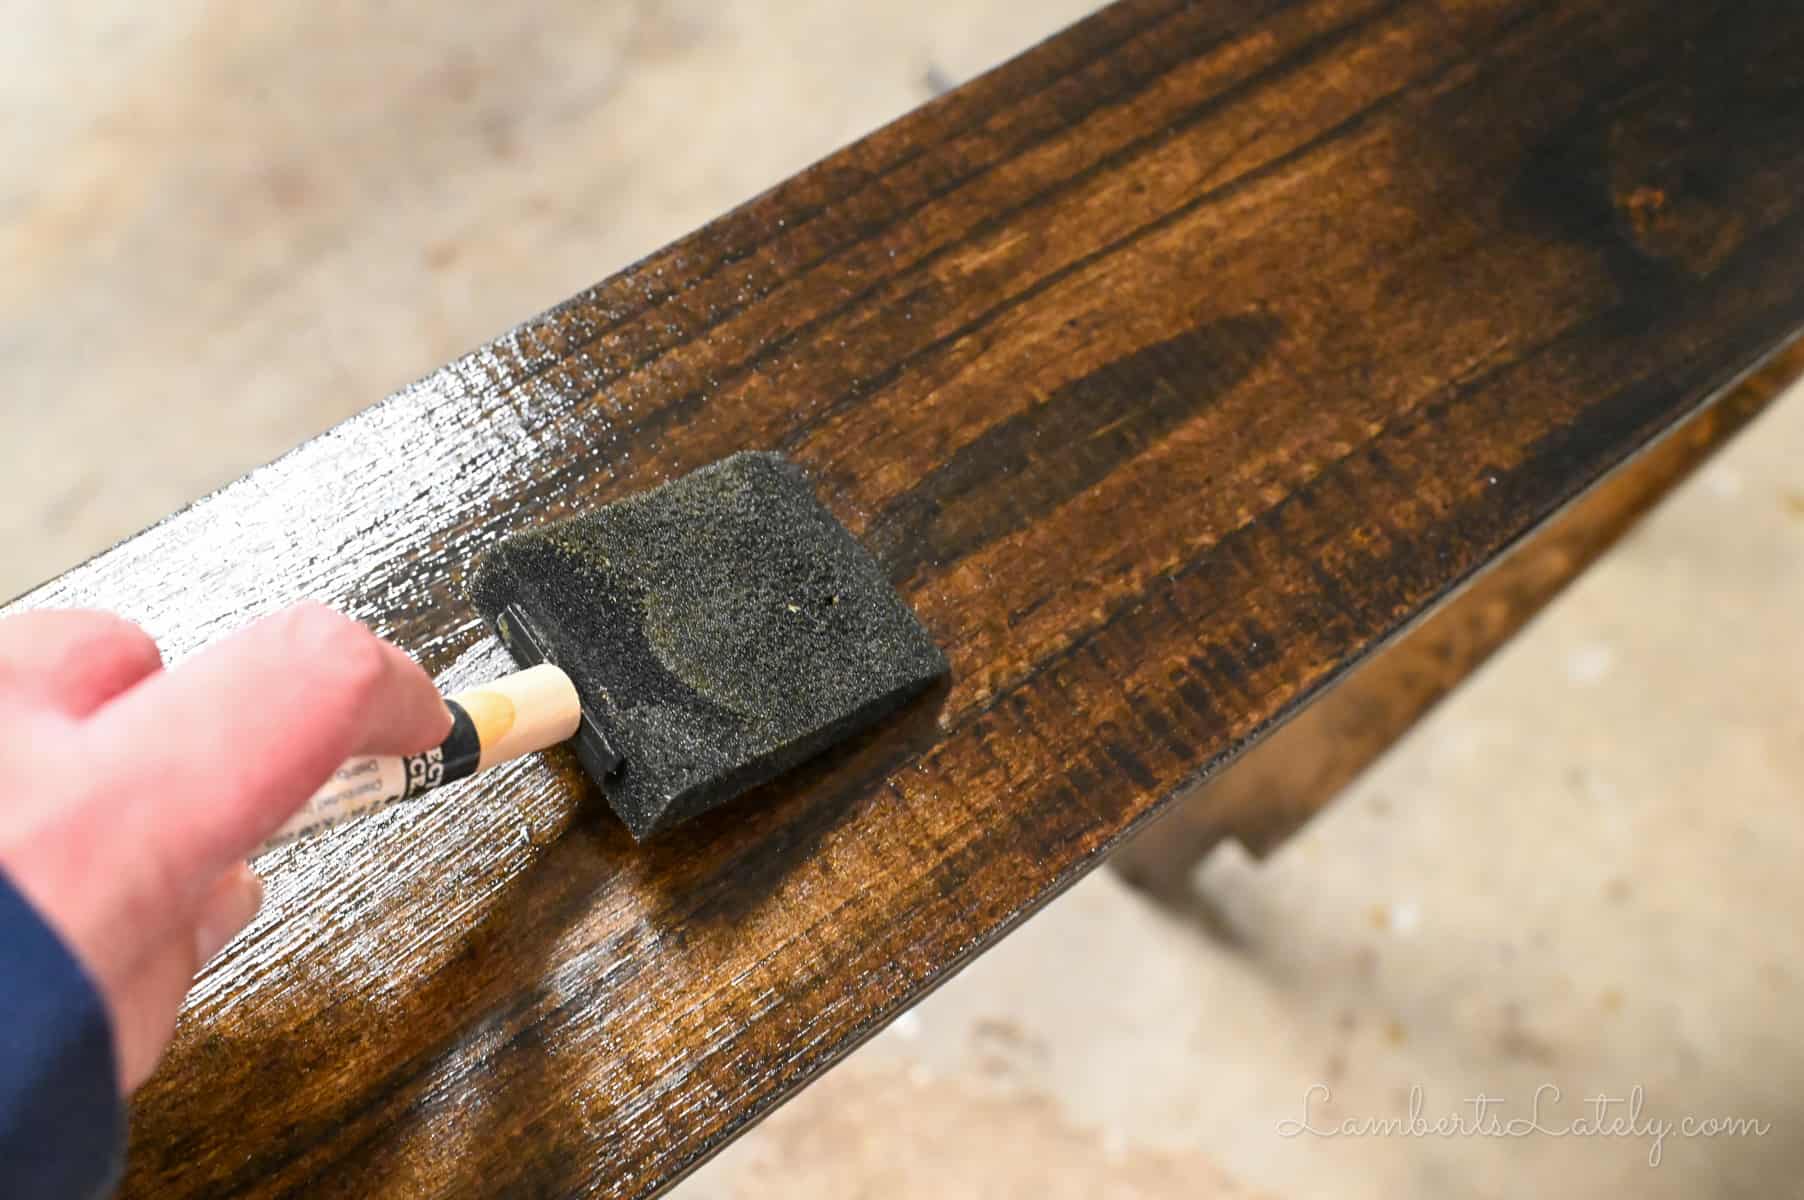
Once your stain has dried, protect it with a couple of coats of polyurethane. I like using a sponge brush to apply this - it coats evenly and they're inexpensive, so you can throw it away after you're done.
Allow this to dry for at least 6-12 hours, preferably overnight.
Once it's dry, you can add the outlet.
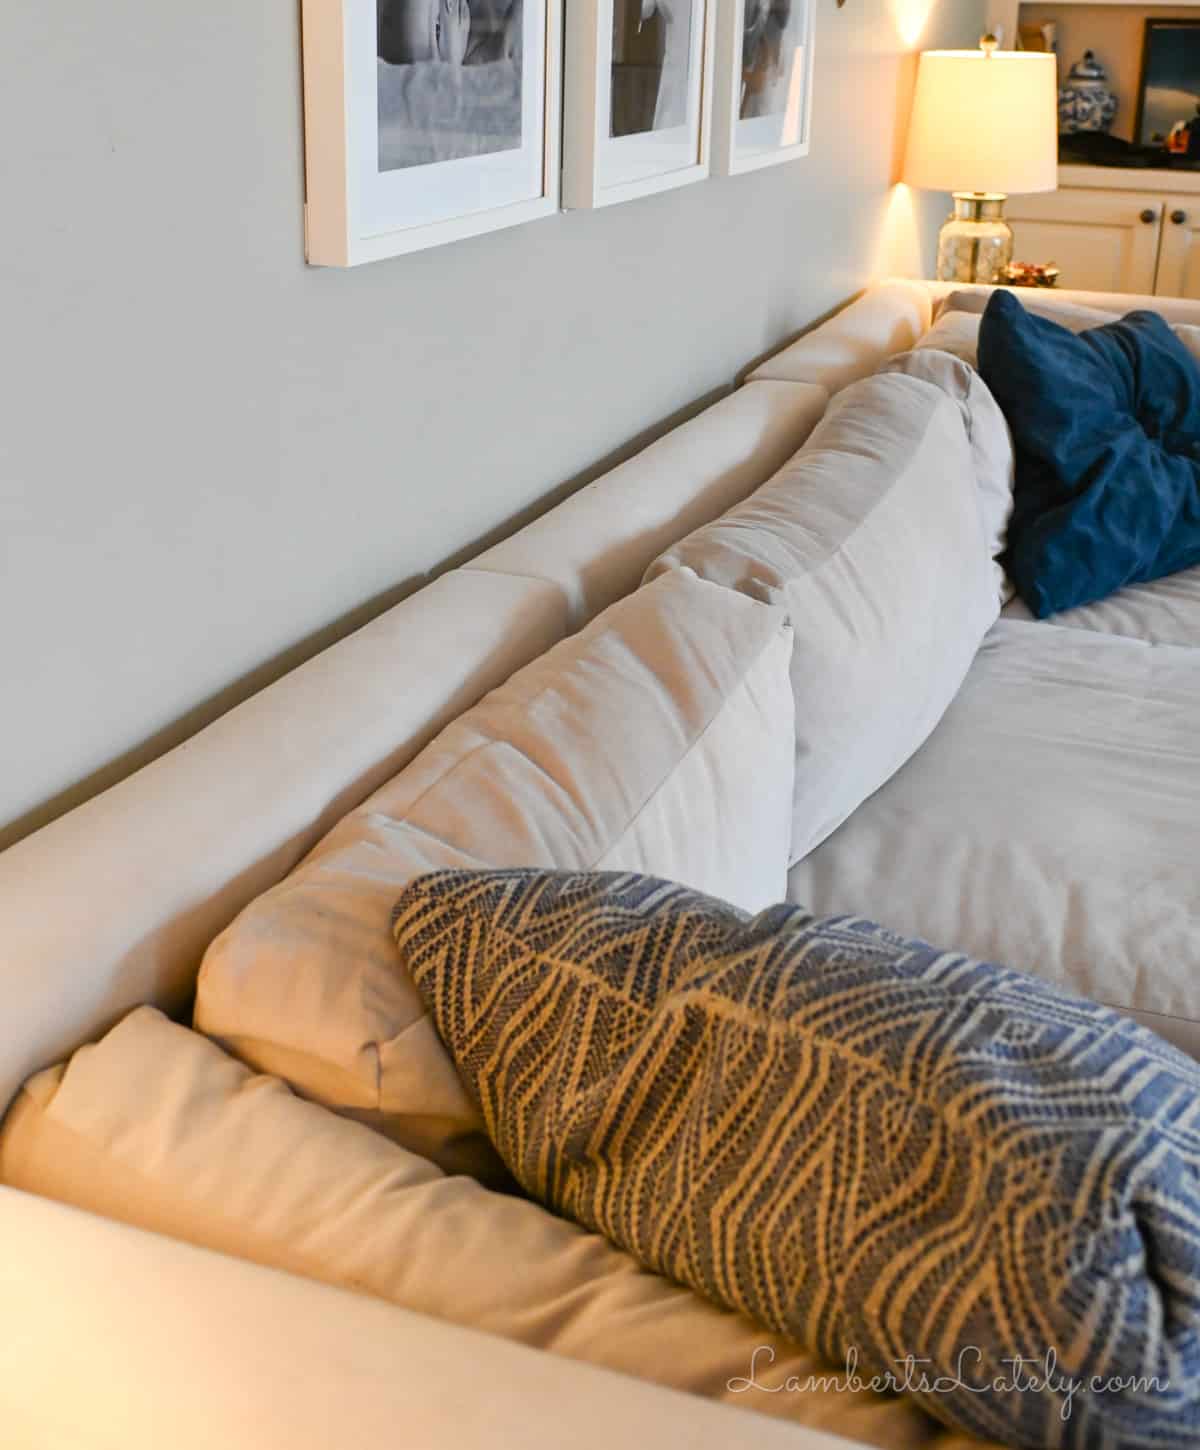
Step 9: Move table behind the couch & use pads to protect the wall/floor.
The DIY sofa table is finished! All you need to do is move it into place and add a little protection for the surfaces around it.
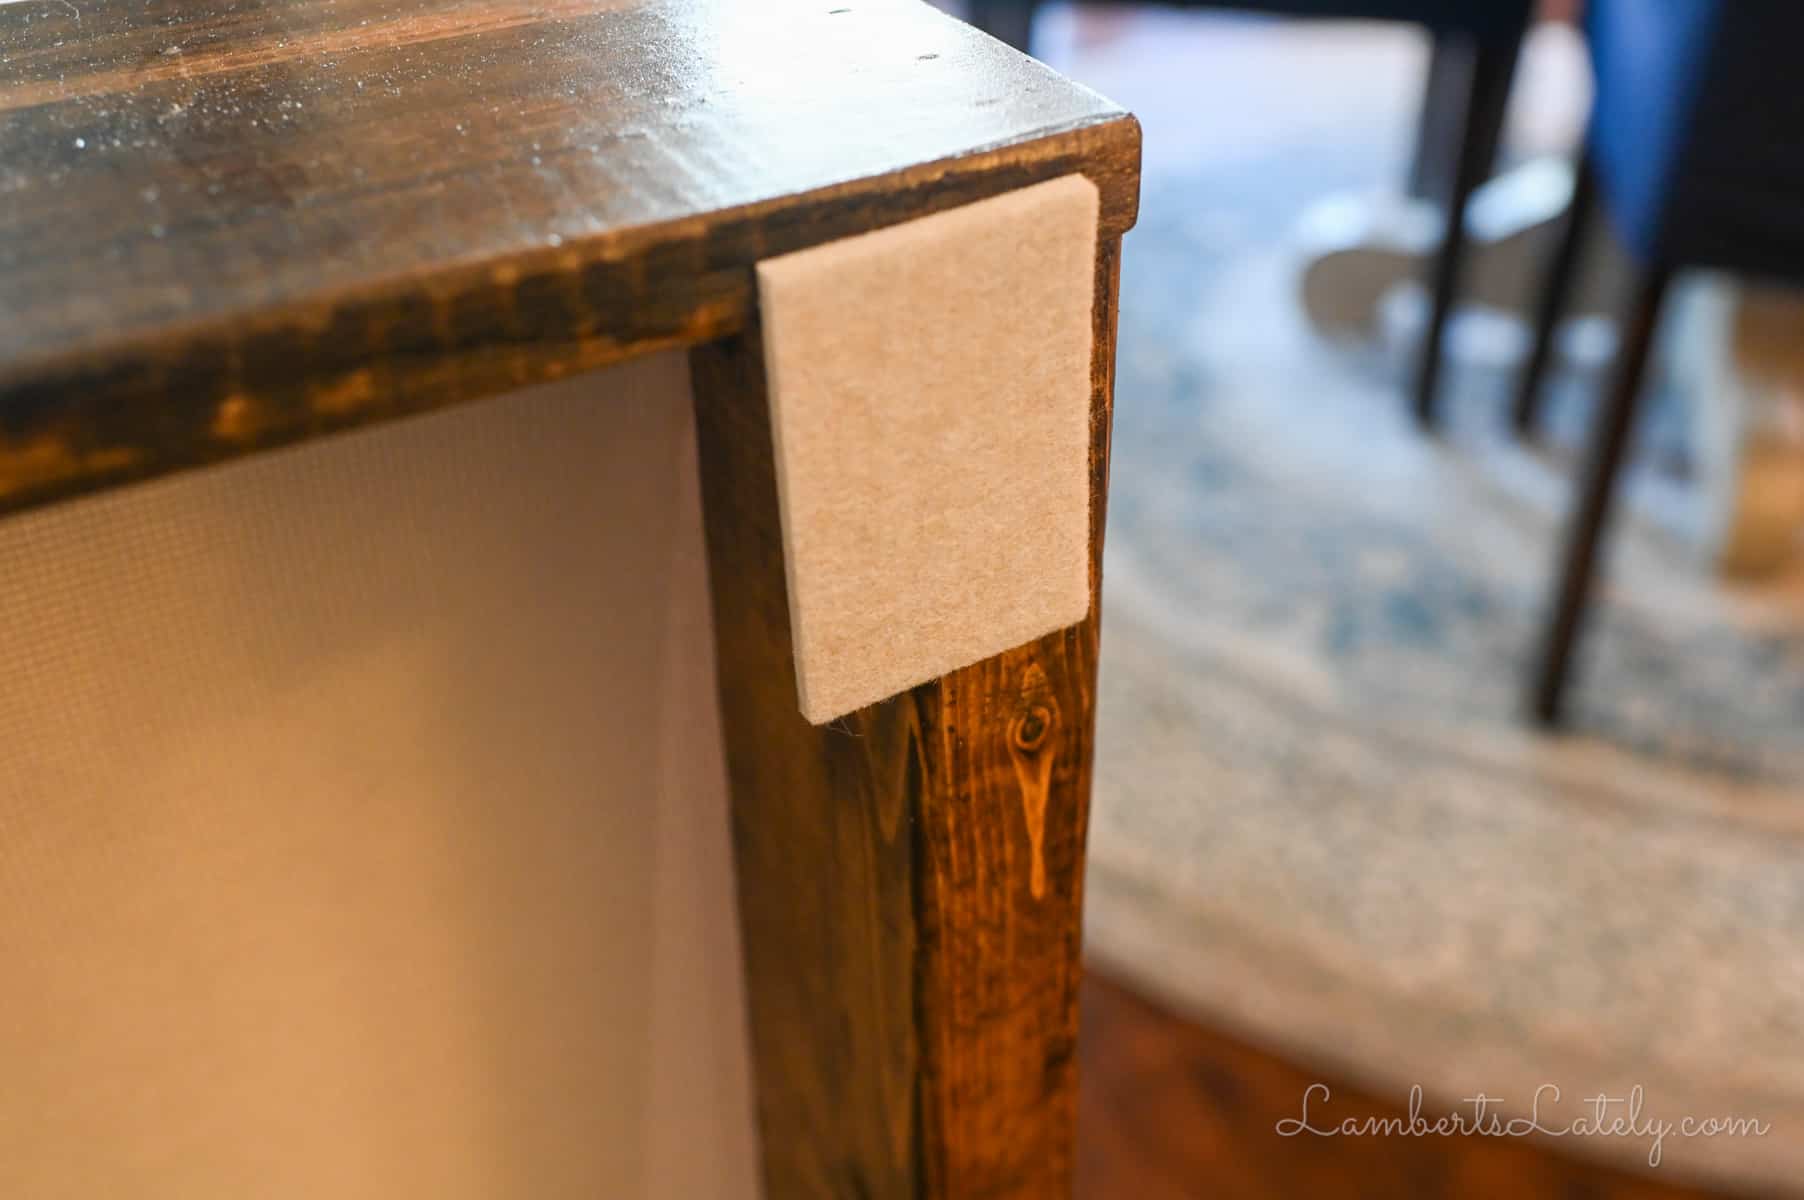
I put a felt pad on the back and the bottom of each leg. This will protect that table from rubbing against the wall. These are usually available at the Dollar Store.
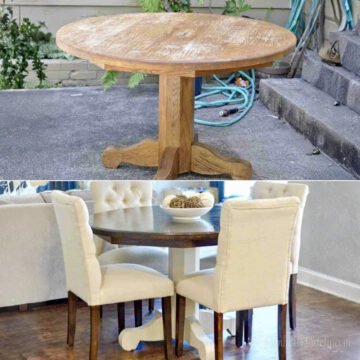
Final Result
I cannot tell you how convenient and needed this project was! If I had known how much use we would get out of this sofa table, I would have made it years ago.

Remember those ugly cuts? They're entirely hidden now. They don't look bad at all if you don't have anything beside the couch, but we have 2 side tables that camouflage any rough edges.
You can also see how the table overhangs the top of the couch in the picture above. I did this so there would be no gaps between the couch and the table for crumbs, drinks, or toys to fall into. It's worked wonderfully so far.

This has given us some much-needed storage and a great place to charge any devices. It's the perfect solution for a large sofa that doesn't allow for coffee tables or trays.
More Helpful Tips & Tricks For Your DIY Sofa Table
- Get the smallest cans of polyurethane and stain you can find. You can always buy more if you think you'll need it for another project, but the surfaces you're covering with this table are really small. Even a half-pint of each should work for this project.
- If you're really concerned about the table not being secure, you can always wood glue the legs in place and/or use wood screws instead of nails...we just didn't think this was necessary.
- Only buy as much wood as you need. There's no sense in buying a 10' 1x6 if your couch is only 7' wide. Measure before you buy to cut costs!
- If your table ends up being a little too short for your couch, you can add an additional felt pad to the bottom of the legs to give it more height.
- I used pine boards for this project because they were the most cost-effective.
- If there are any stamps on your lumber, make sure to turn them to the inside so they won't show on the final table. You can also sand them off before staining.
I hope you love your new DIY sofa table! If you complete this project, I'd love for you to leave your thoughts in the comments below. And make sure to follow along for the latest posts on the blog!

Leslie Lambert is a lifestyle writer and content creator specializing in home organization, family recipes, and intentional living. With 17 years of experience in blogging and digital storytelling, she helps busy women create calm, purposeful homes they love.


This is sooooo awesome!!! You didn't have any heating vents behind I assume??
Thank you! No, our vents are in the ceiling. That's definitely something to account for if you do have them in the floor.
Thank you for posting this! My wife and I love the idea, particularly with the addition of electrical/USB outlets. We will be building very soon. My only input to anyone reading comments is to sand the wood with 220 grit before staining. It doesn't take much time, but makes a big difference in preventing the stain from looking blotchy, especially if using soft woods like pine!
This DIY sofa table is such a fantastic idea! I love how budget-friendly it is too. The step-by-step instructions make it feel achievable, and I can't wait to try this out in my living room. Thanks for sharing!
This DIY sofa table is such a brilliant idea! I love how affordable it is, and the step-by-step instructions make it look easy to follow. I can't wait to try this project for my living room. Thanks for sharing!
Love this! From the final picture, it looks like you stained or painted the outlet box cover to match the wood?
I didn't! It's black, so it just kind of blends in.
I love what you did but I'll be needing one where there is no wall to make it more stable. I'll just do a little messing around with it more. But this is my template.
Thank you