
Get a step by step tutorial for how to make a t-shirt quilt out of old sorority or high school shirts. The free pdf pattern, layout, and assembly instructions make it so easy, even for beginners!
Paid links used in this post. Read more about my link usage policies.
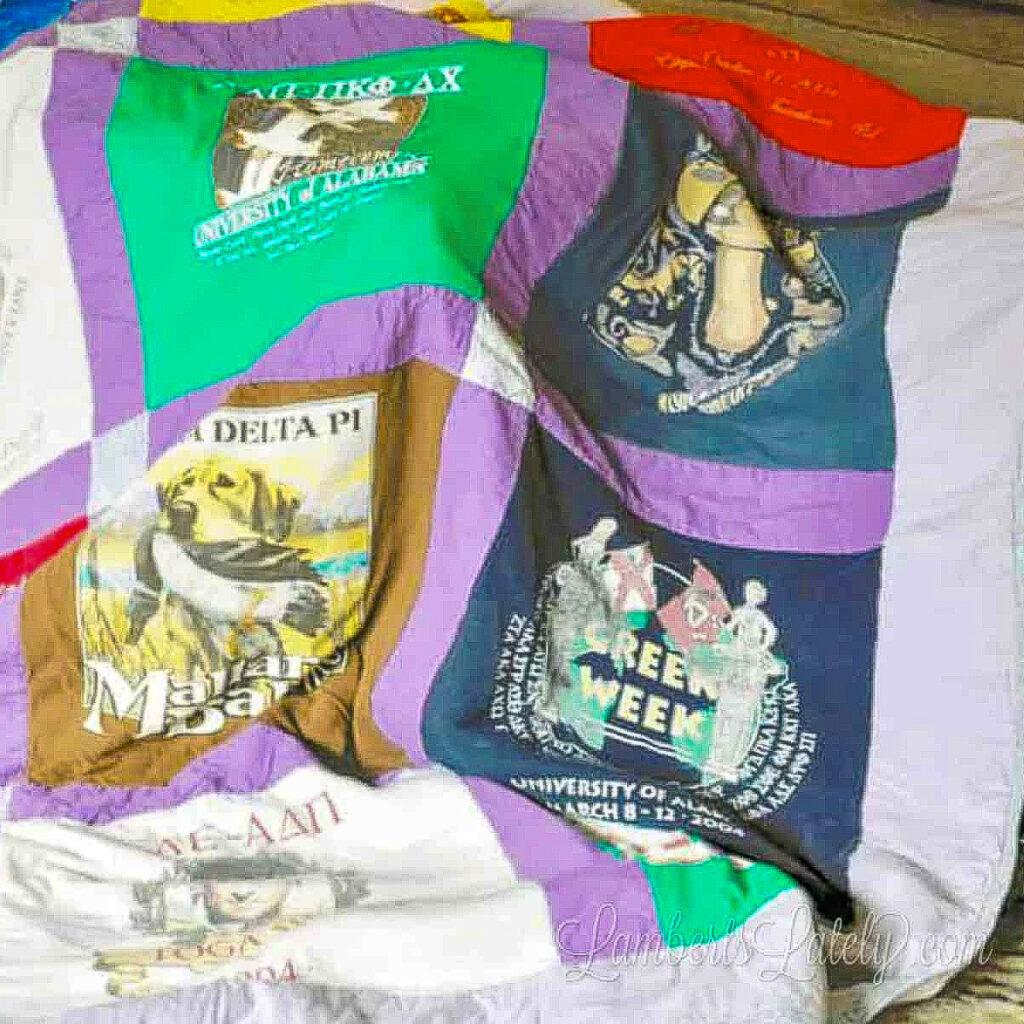
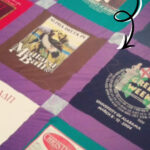
For years, I had a pile of old t-shirts from my sorority days sitting in the corner of my closet that I just swore I was going to make a quilt out of one day.
Well, y'all know the story…life happened. I got pregnant, had a baby, and proceeded to take care of that baby through her newborn stage. Once I got a little bit of "breathing room" and was able to start doing fun, hobby-like things again, this was the first DIY project I completed!
I knew it was probably a big undertaking to learn how to quilt, but I was committed to it. I think I've mentioned before that my grandmother taught me how to use a sewing machine…I regard this skill as the best gift she ever gave me. But quilting is a whole new ballgame.
I was shocked to find out it's not hard at all! You just need a little bit of patience and a couple of additional supplies.
Ready to try to make your own t-shirt quilt? Here's how I completed my quilting project!
Supplies Needed
- Rotary Cutter*
- Self-Healing Cutting Mat*
- Large Acrylic Quilting Ruler*
(*I was able to find all three of these in a set…by far the cheapest way to buy them that I could find.) - Straight Pins
- Sewing Machine
- Good, sharp pair of scissors
- New sewing machine needle (so it's nice and sharp)
- Fabric (see below for measurements on my quilt)
- Quilt Batting
- Quilt Back (I used a twin-sized flat sheet I found at a local discount store for $3!)
- T-Shirts (Nine would be minimum. See size chart below to estimate how many you'll need.)
- Big Safety Pins
- Bias Tape Maker
Here are a few things that would probably make it easier, but aren't essential.
- Walking foot (This is a foot for your sewing machine that helps feed the fabric through easier. I did fine without it, but have purchased one since and love it.)
- Nylon Thread (I loved using this - it's very thin, so kind of hard to work with, but it can be used on any fabric when quilting because it's so thin and see-through.)
Step 1: Print pattern and make basic fabric cuts.
First, I sat down and drew out a "blueprint" for my quilt.
Really, it all comes down to how big you want the blanket to be and how many t-shirts you have to put in the quilt. Here's a rough guide for how many t-shirts is appropriate for the size of the quilt.
| Size | Dimensions | # of Shirts | Arrangement |
| Throw | 48"x64" | 6 | 2x3 |
| Twin | 64"x82" | 12 | 3x4 |
| Full | 82"x96" | 20 | 4x5 |
| Queen | 96"x96" | 25 | 5x5 |
| King | 110"x96" | 30 | 6x5 |
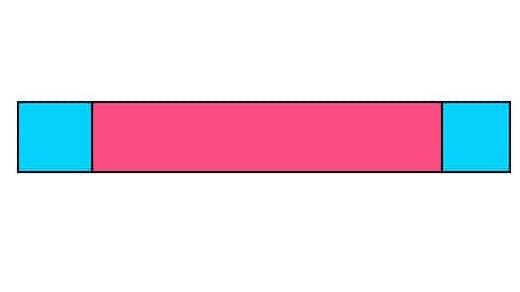
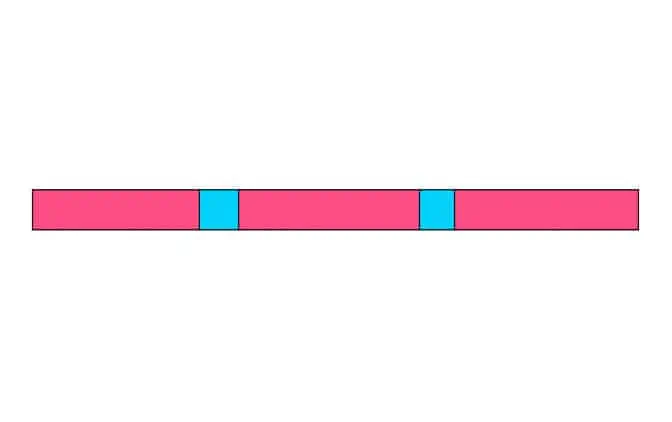
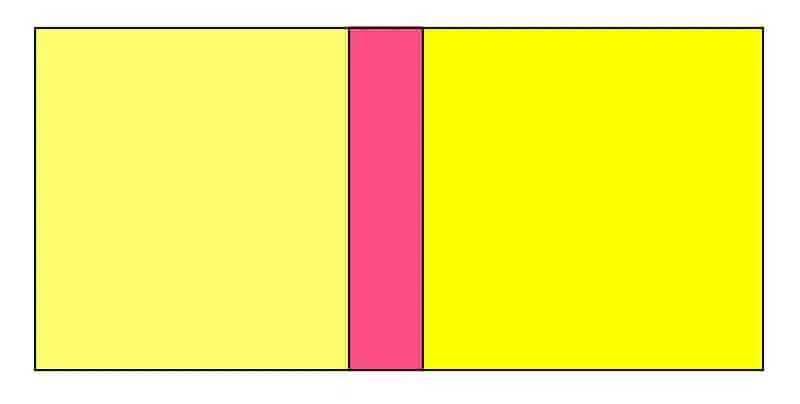
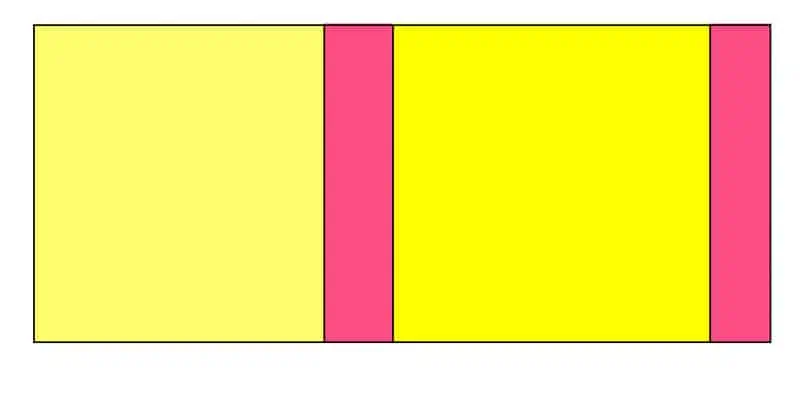
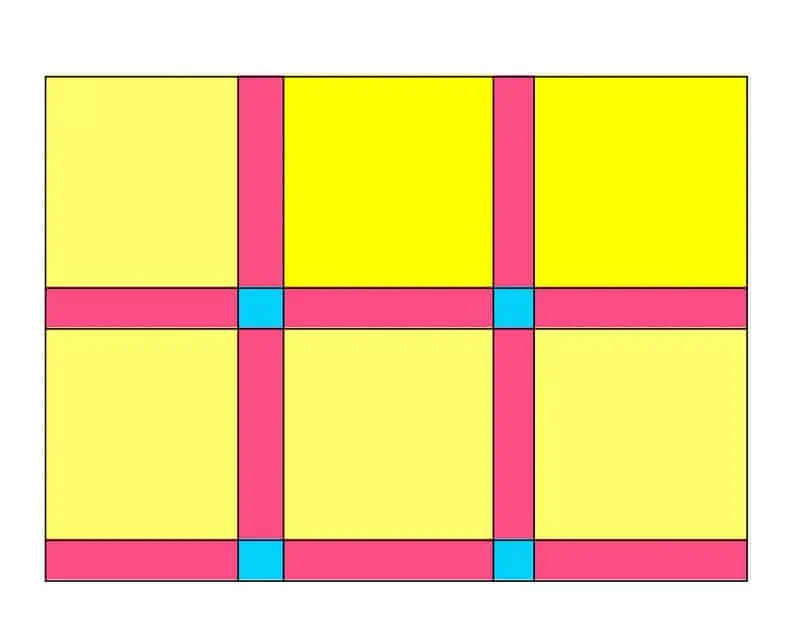
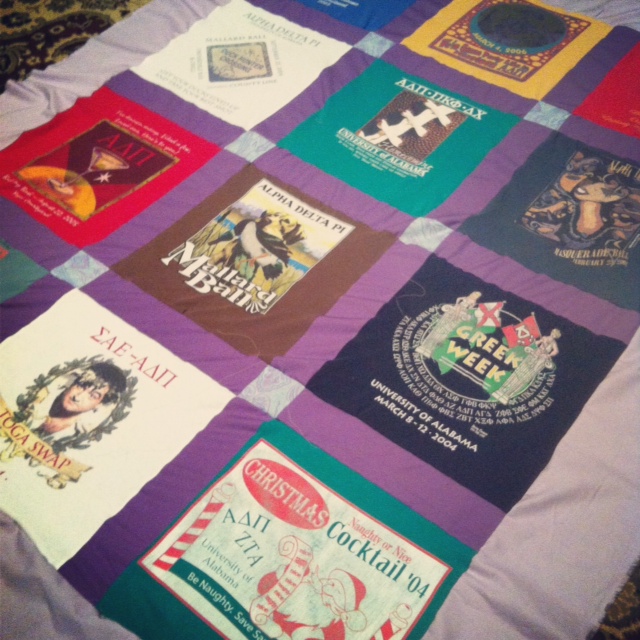
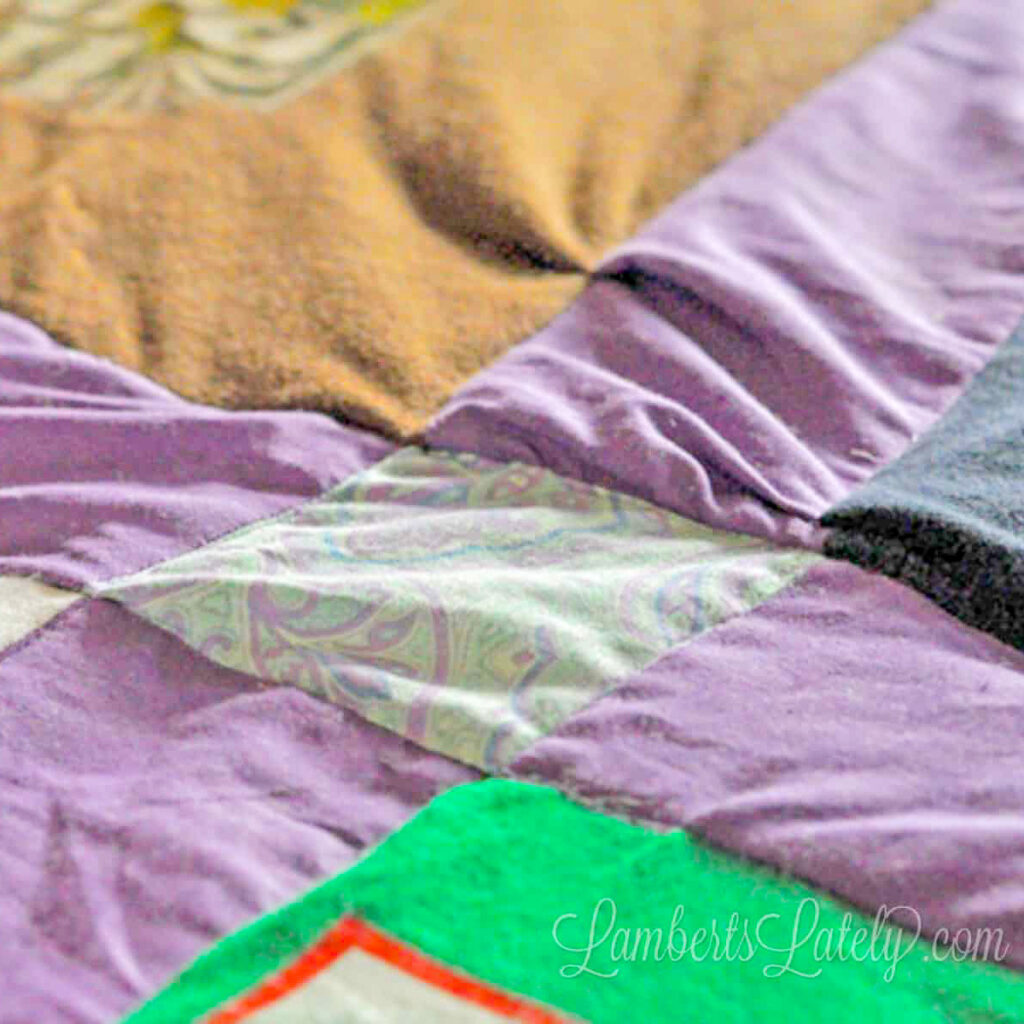
This is including something called a sash in between each t-shirt square - that's just a thin piece of fabric that provides a buffer between each shirt. (See pink pieces in the diagram below.)
Those sashes are optional; you can always just sew the t-shirts directly together for your quilt. Just know that you might require more shirts if you don't use sashes between your t-shirt squares.
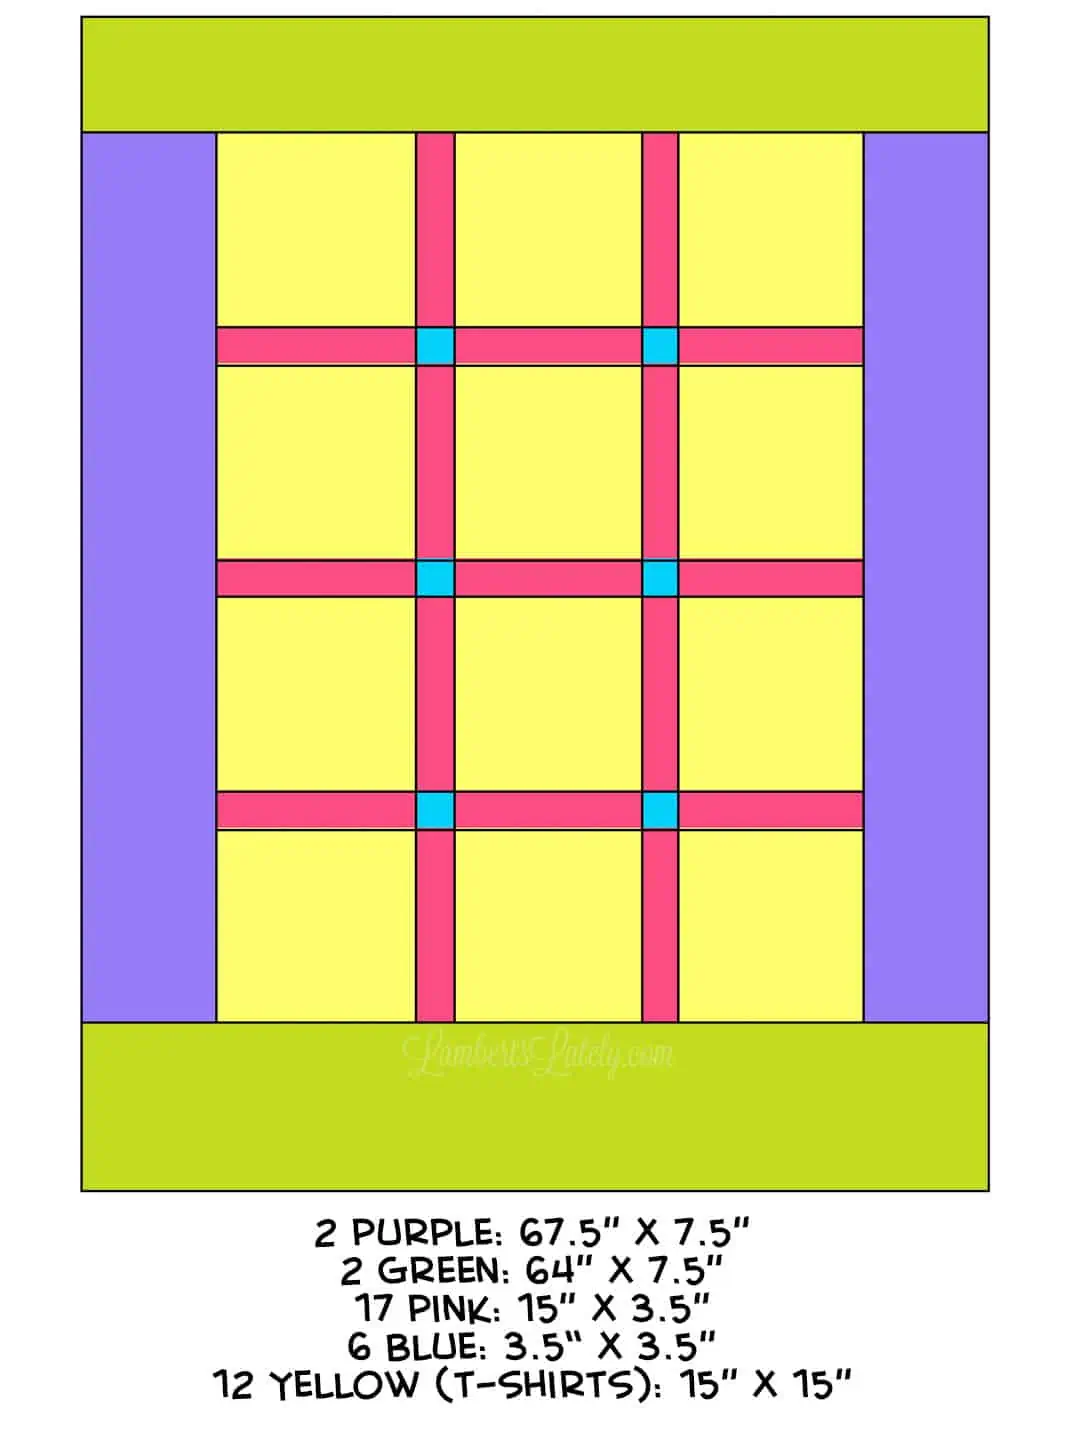
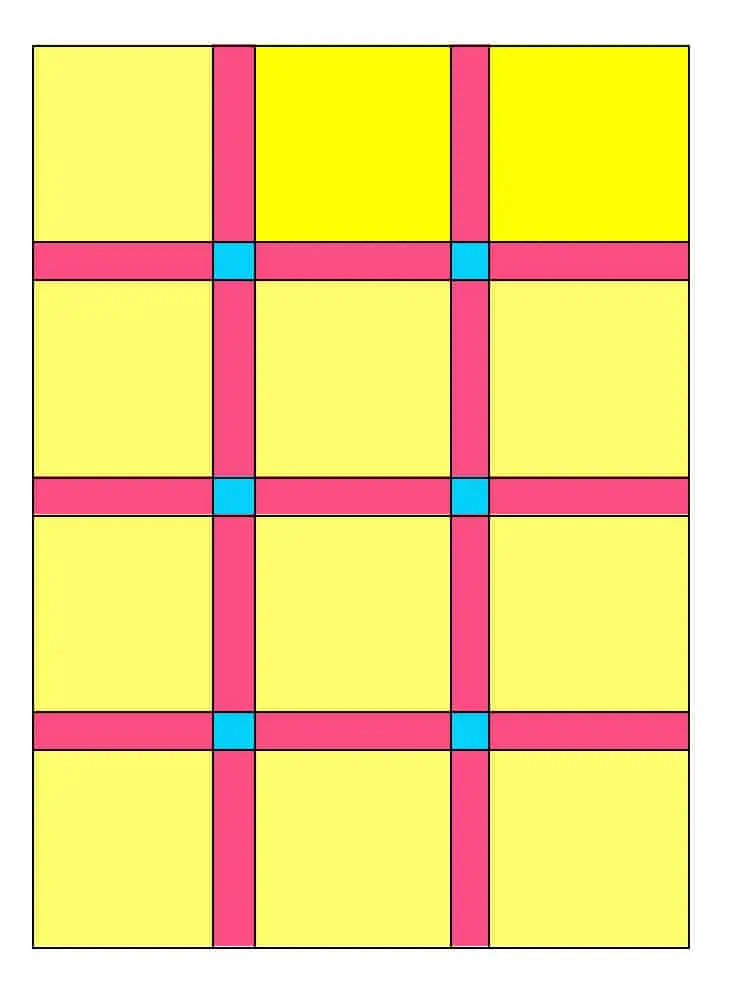
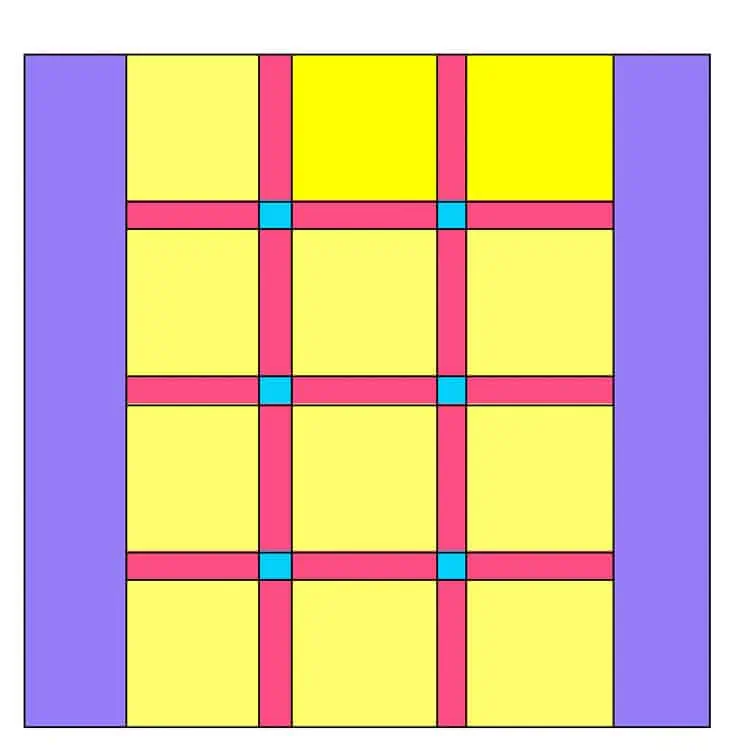
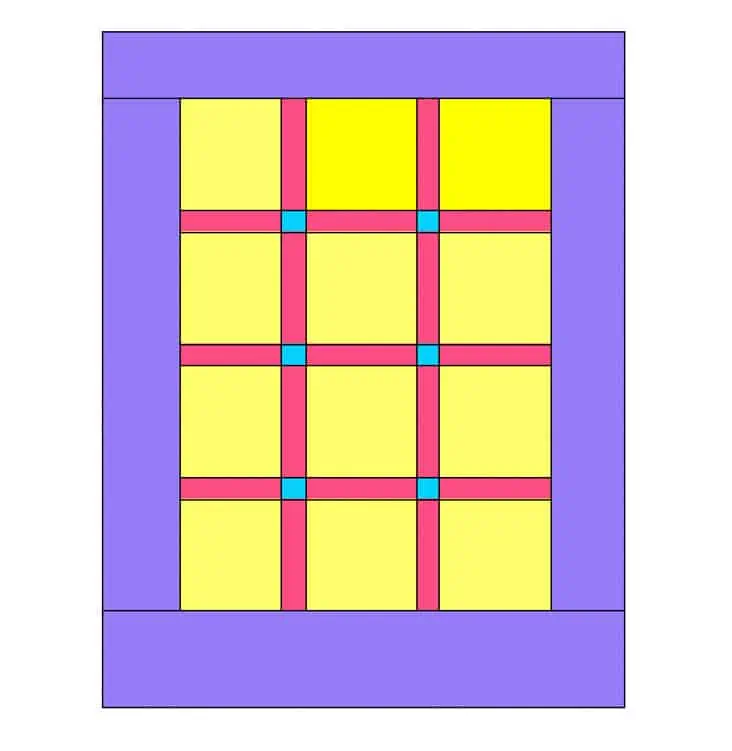
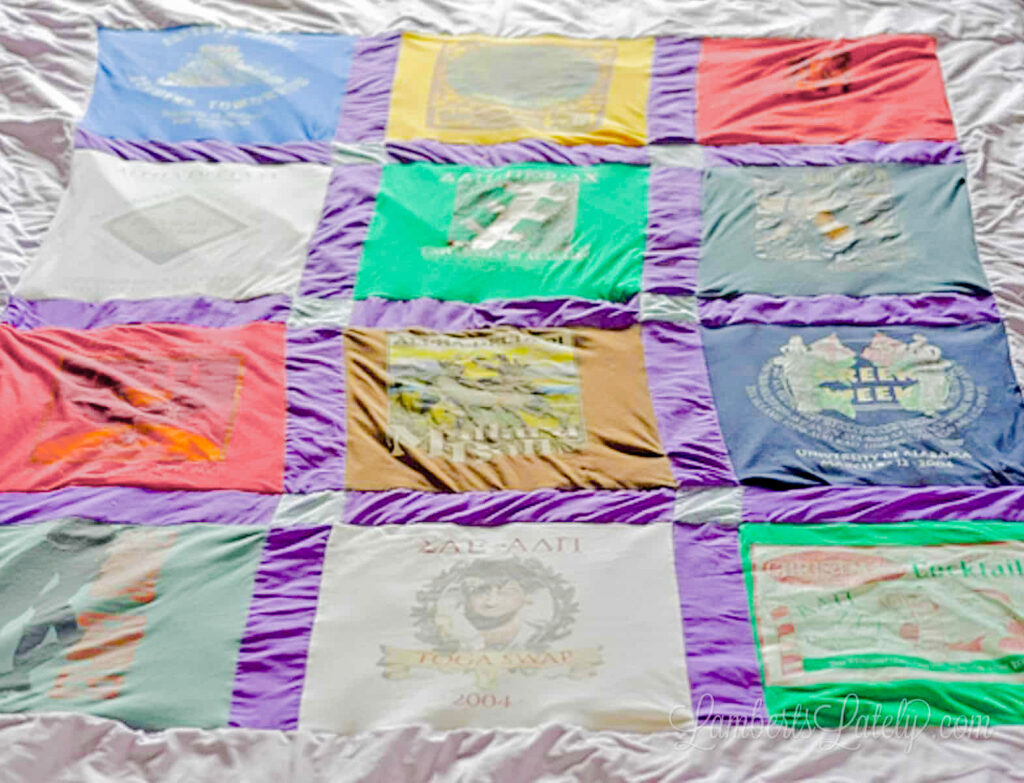
This is the pattern I used for my quilt. The pattern you see above is for a twin-sized blanket.
If you're using this pattern too, make the following fabric cuts by using your rotary cutter, quilting square, and quilting mat:
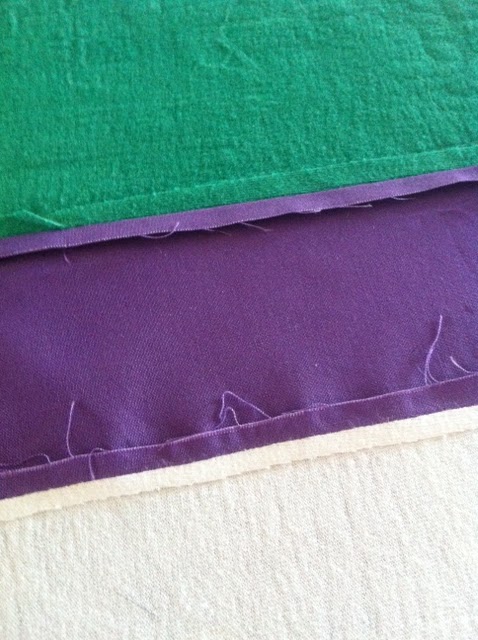
- 2 purple (side) pieces: 67.5" x 7.5"
- 2 green (top and bottom) pieces: 64" x 7.5" (Top/bottom and side pieces are usually cut from the same fabric, but don't have to be. In my quilt, these are light purple.)
- You'll need 2 yards of fabric for these 4 edge pieces.
- 17 pink sash strips: 15" x 3.5" - in my quilt, these are cut from dark purple fabric.
- You'll need half of a yard of this fabric.
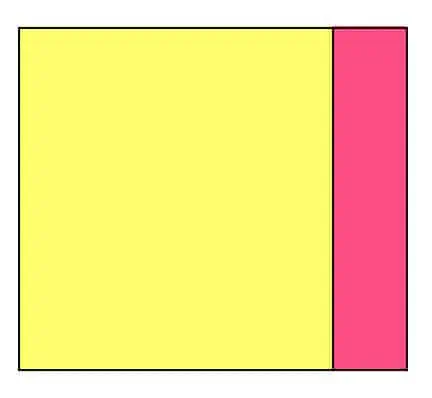
- 6 blue small squares: 3.5" x 3.5" - in my quilt, these are cut from a light blue patterned fabric.
- You'll need a quarter yard of fabric for the small squares. I also used this pattern for my bias tape (more on that later), which required an extra half yard...so ¾ yard total.
- Another option for the small squares is to use the graphic on the front of the t-shirt. I didn't do this, but it would be a great way to save a little bit of money and add some more character to the t-shirt quilt!
- 12 yellow (tshirt) squares: 15" x 15" (this might vary a little bit depending on the size of your shirt patterns. Confirm the size of those patterns before deciding on the size of these squares.)
Step 2: Cut t-shirt squares.
Now to the scary part! Totally kidding - it's really not that bad, just a little intimidating.
In my opinion, a quilting ruler, mat, and rotary cutter are essentials to do this.
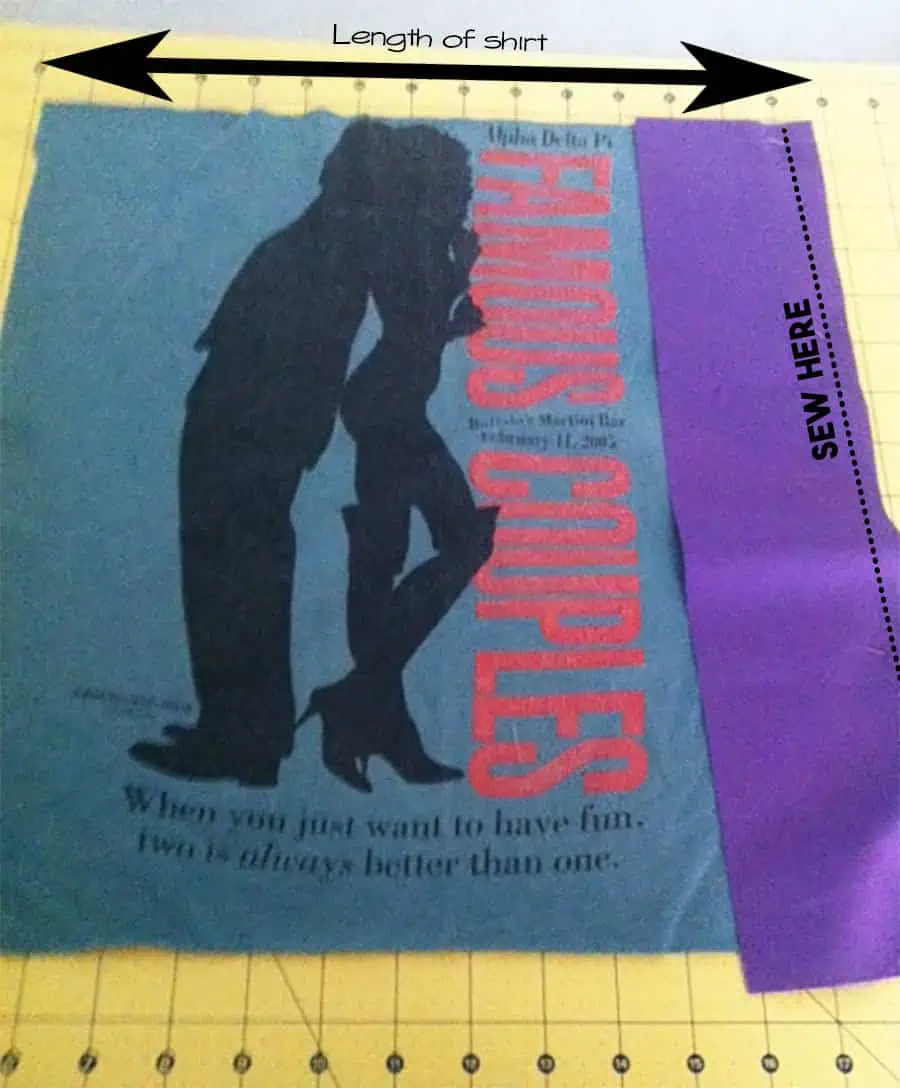
- Start at the bottom of the shirt, on the seam right below the armpit, and cut straight up to the armpit of one side of the shirt. Then, follow the seam of the shirt all the way around the back of the shoulder seam, neck, and other shoulder. Stay inside the seams, using them as a guide. See diagram below for a better explanation...
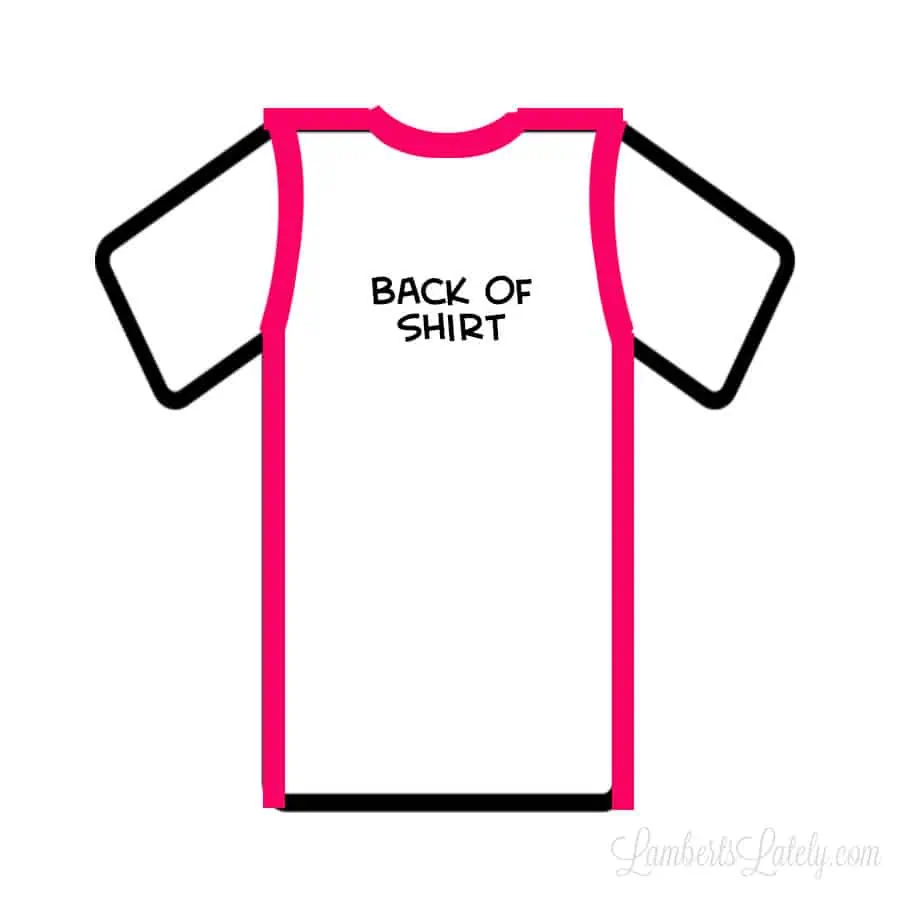
Just cut along the pink line, inside the seams with the back of the t-shirts facing up. Get as close as you can to the seams so you have more fabric to work with. Once you get to the other armpit, cut straight down to the bottom of the shirt.
- Lay the t-shirt piece out on your cutting mat and try to get the graphic straight and level with the grid on the mat. Use a quilting ruler and rotary cutter to cut a straight line across the top of the shirt piece, as high as you can above the design, while still getting a straight line across.
- Find the middle of your design (usually easiest to do by folding the design in half both vertically and horizontally; you can make a tiny pencil mark in the middle to help.)
- Measure 7.5" out to the top, bottom, left, and right of the middle; make tiny marks on your t-shirt to mark them. Then, using your rotary cutter and ruler, line up the t-shirt design on your mat and cut straight lines to make a 15x15" square.
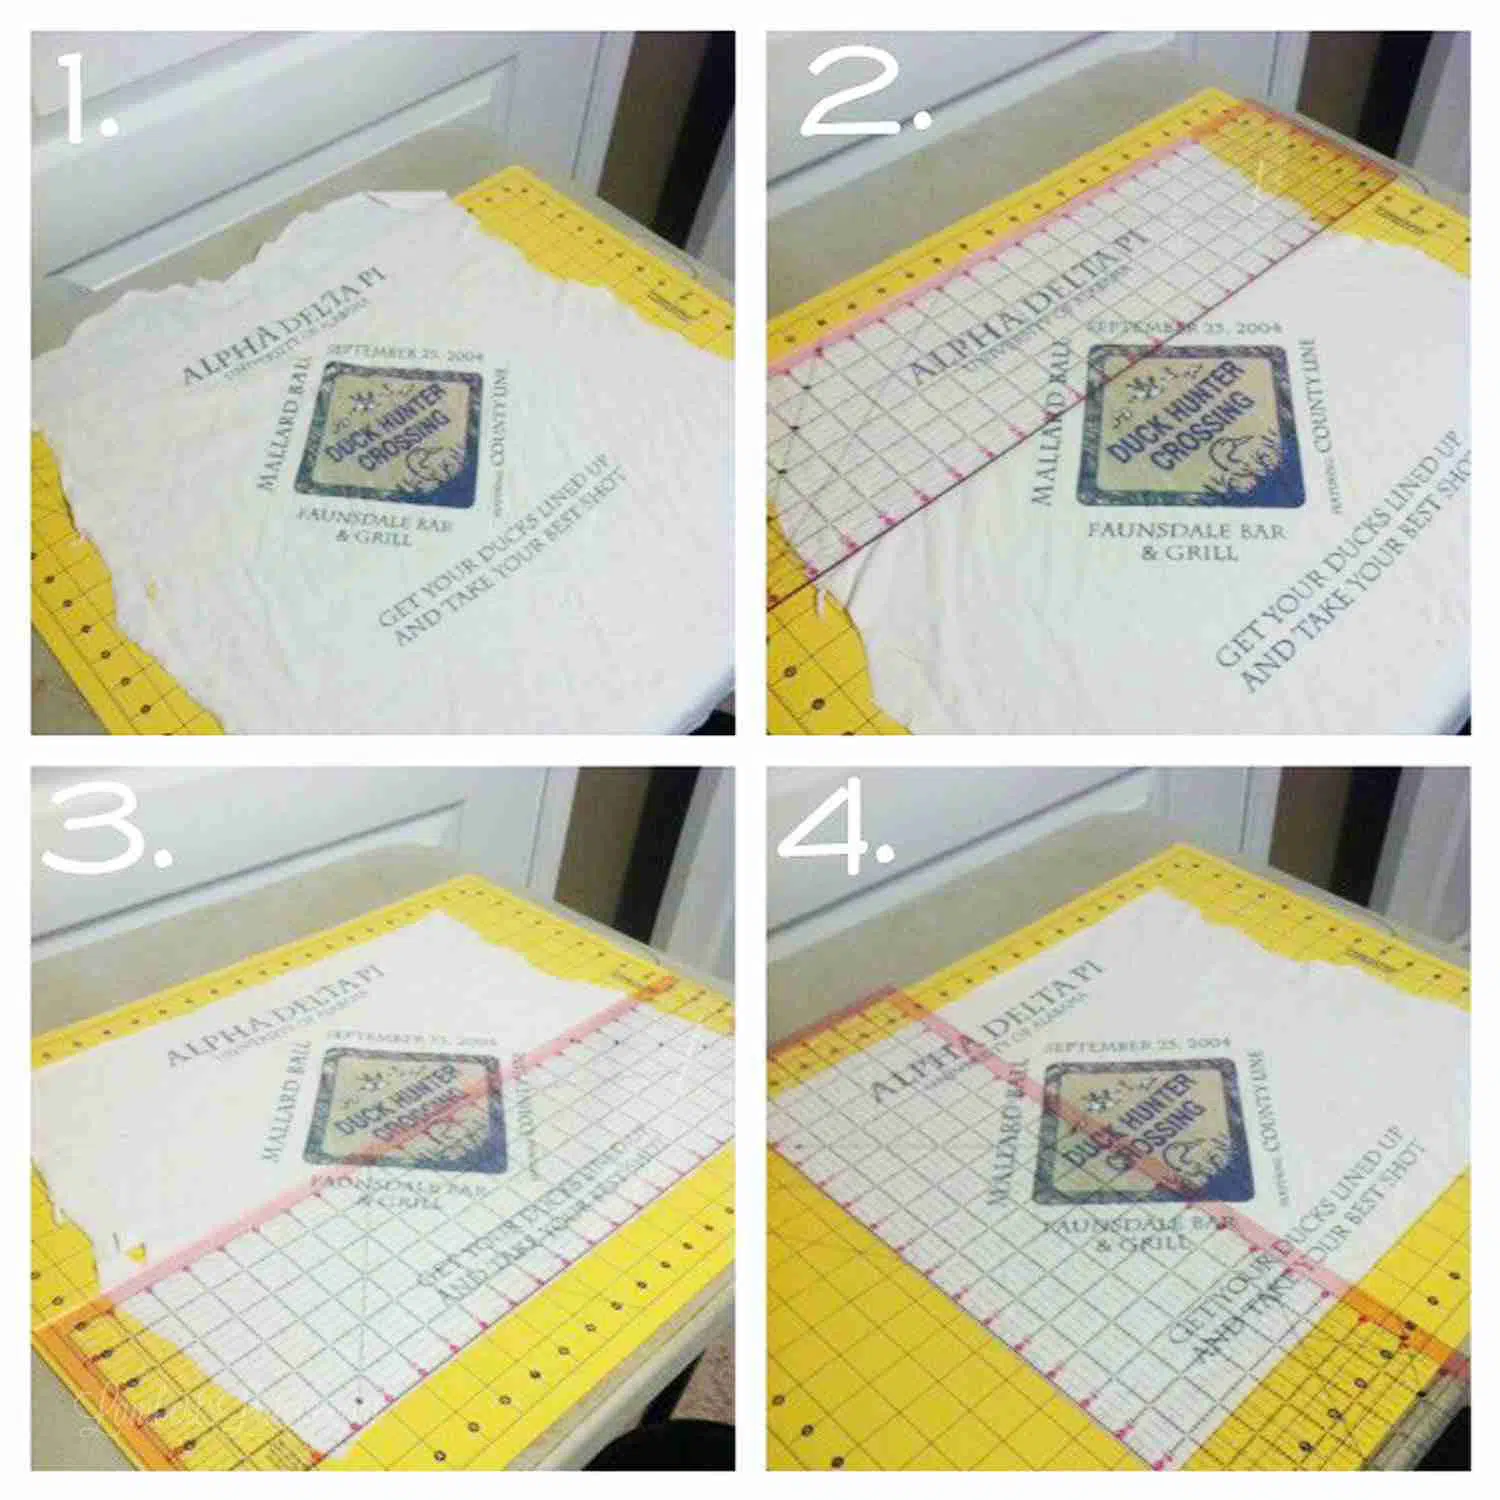
And voila! You have a centered, pretty t-shirt square. Really rely on your cutting mat's grid and your rotary cutter to cut the lines. Having straight lines and 90 degree angles makes sewing so much easier.
Note: Before you start sewing, you might want to consider adding iron-on fusible interfacing to the back of your t-shirt pieces. Tshirts are notoriously stretchy; this interfacing stabilizes the shirt fabric so it doesn't stretch as much in your quilt.
I didn't do this, and I will admit it was more difficult to get everything nice and lined up when most of your material stretches. If you're having issues with the fabric, this might help!
Step 3: Sew sash rows.
This is the fun part! Start pinning your pieces together.
Everything in this project will have a ¼ inch seam allowance, unless otherwise noted. The easiest thing to do is to measure ¼″ on your machine and mark it with masking tape. I lucked up - the end of my sewing foot was exactly ¼″, so it was pretty easy for me.

Take one 15″ x 3.5″ piece of fabric and pin two of the small squares on the inside of the ends, lining up the edges and putting the front sides facing each other. Ignore the picture, they are back sides facing each other…learned that was wrong the hard way. 🙃).
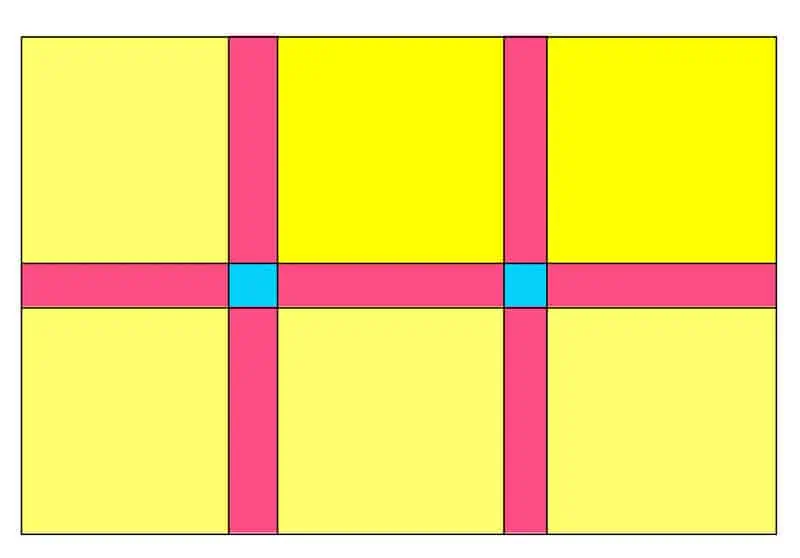
Let's take the original diagram of the quilt I showed you. The piece you sew in this step will complete the following part of the quilt:
Will call this the "three piece" for the next little bit.
Once the three piece section is sewn together, unfold it and lay flat (don't worry about ironing seams just yet; we'll do that later). Take another 15" x 3.5" sash strip and lay, front side down, on top of the three piece, with left edges lined up. Pin and sew that left edge. Do the same with another 15.5" x 3.5" strip for the right edge of the three piece.
Now, your sewn part should look like this.
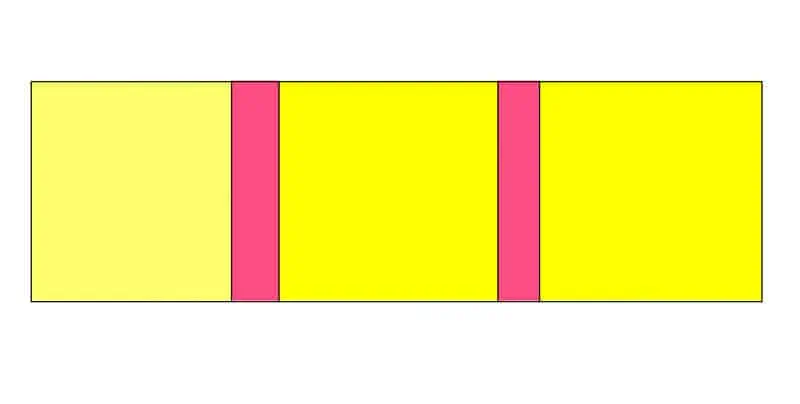
Make three total sections like the 5-piece one in the diagram above. Unfold and set aside.
Step 4: Sew t-shirt rows.
Now that the sash rows are done, start on the t-shirt rows.
Lay all 12 of your t-shirt blocks out in the floor, how they will be arranged in the quilt, to make sure your arrangement is correct and there aren't any funky colors together. You should have 4 rows of 3 shirts if you're following my pattern.
Take the t-shirt square on the far left of each horizontal row and pin a 15" × 3.5″ sash strip on the right-hand side of it, front sides facing each other. (See picture below.)
Sew down the right edge of this with your ¼″ seam and unfold. We've just completed this part of the quilt:
Next, take the second t-shirt square in the first horizontal row and put it, front side down, on top of the section you just constructed, with right edges lined up. Pin, sew, and unfold. Now, you have this...
Next, do the same with a sash strip. Place the strip on right edge of the piece you're constructing, front sides facing each other, right edges lined up. Pin, sew, and unfold. You now have this:
Finally, take the last t-shirt square from the first row and place, fronts facing each other, on top of the piece in the diagram above, lining up right edges. Pin, sew, and unfold.
Your finished row:
Step 6: Sew the quilt rows together.
Let's attach that row we just made to a sash row!
Lay out the top t-shirt row. Place a sash row, front side facing down, on top of the t-shirt row. Line up the bottom edges, pin, and sew.
The important thing here is that you line up the corners of each individual piece in the row so that there won't be any funky lines. It's a little tricky, so you might want to sew a little bit of the row at a time, giving it periodic checks to make sure everything is in line.

Once the first two rows are sewn together, unfold. It should look like the diagram above. Lay down the second t-shirt row, front side facing down and upside down, on top of the sewn-on sash row. Align the bottom edges, pin, and sew.
(Once again, take it slow and make sure the quilt squares are lining up while sewing.)
Once you have this piece, take another sash row, front side down, and line up bottom edges of completed piece and skinny row. Pin, sew, and unfold.
You're probably seeing a trend here. Pin the third t-shirt row to the bottom of what you see above, front side down and upside down, bottom edges lined up, then sew. Do the same for the next sash row, then finally the last t-shirt row.
Your quilt should now look like this! The two keys to getting this part right are...
a) taking it really slowly and making sure your pieces line up and
b) making sure to place each t-shirt row upside down and front side down when pinning, so when it unfolds it will be right side up.
Step 6: Sew on end pieces.
Finally, the end pieces needs to go on.
Take one of the 67.5" × 7.5″ pieces, lay on top of the big sewn piece front side down, and line up left edges. Pin and sew. Unfold, and repeat with the other 67.5" x 7.5" piece on the right side.
Now, lay one 64" × 7.5″ pieces on the top of the big piece, front sides facing each other, and line up top edges. Pin and Sew. Repeat for the bottom piece.
Attaching your piecing is done!
Step 7: Iron seams open.
Now that the front of the quilt is sewn, the only thing left for the quilt top is to iron the seams.
Turn the quilt front over and use an iron to open every seam on the back. This is a little tedious, but it makes sure that your quilt top lays flat in the completed piece.
You have a finished quilt front. Not so tough, right?
Step 8: Make a "quilt sandwich."
This is apparently a pretty common term in quilting - "quilt sandwich." It just means you layer your quilt backing fabric, quilt batting, and quilt front to prepare for the actual quilting part.
Like I mentioned earlier, I just used a twin-sized sheet I found at a discount store for the quilt back. I'd recommend this. Not only is buying just plain fabric more expensive per yard, but it's hard to find it big enough to fit in one big piece. I used a plain cotton fabric sheet, but another option for your backing is an inexpensive flannel or fleece sheet (for a warmer blanket).
In the middle of the sandwich, I used cotton quilt batting I found here. Several places recommended cotton over polyester batting because it is more stable and longer-lasting. If I'm going to put this much effort in, I'm going to get something that's going to last!
Layer your pieces, make sure everything is nice and flat and lined up, and start pinning! The sheet and quilt batting will probably be bigger than the quilt front. That's ok - don't trim it yet.
Now, pin, a lot! You'll need to place a big safety pin every few inches, all over the whole quilt, so it will stay together while quilting.
Step 9: Get to quilting!
The actual quilting process is just sewing through all three layers of your quilt sandwich to attach them and give the blanket a pretty sewn-in pattern.
Start in the middle of your quilt, with the front facing up, and use your nylon thread (or thread to match the quilt) to start sewing through all layers of the sandwich. This is where the walking foot would come in really handy if you have one.

It is a little difficult to squeeze all of the quilt in the sewing machine when you're doing the middle. I found it easiest to roll up the end, like this, so all of it would fit.
I did what's called "stitch the ditch." That just means I followed the edges of the original quilt pieces, just stitching along each seam line, all the way through the quilt sandwich, row by row. It made this nice pretty pattern on the back of the quilt!
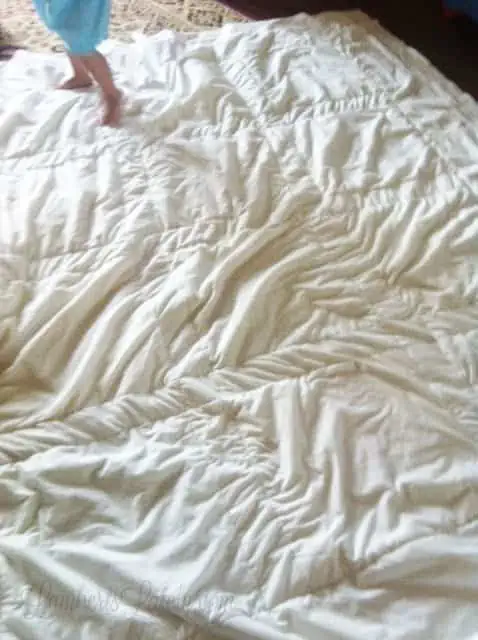
(See those baby feet walking on the quilt? The owner of those feet is now taller than me. Time flies.)
Step 10: Bind and trim the edges.
Once you have stitched all of the ditches, horizontally and vertically, bind the edge of your quilt. You'll need to sew a seam all the way around the quilt sandwich about ¼″ from the edge of your quilt front. This makes the ends stay together.
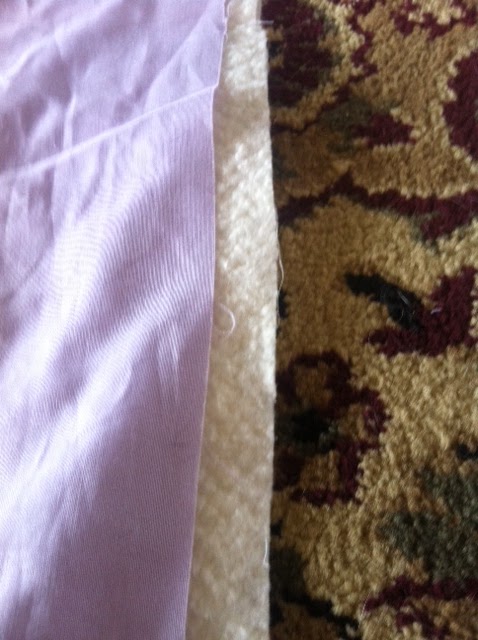
After you've bound the edge, trim the outside edges of the backing fabric and batting. Personally, I would trim all the way down to the edge of the binding stitch, leaving just a little bit of extra fabric (even less than shown - maybe ⅛″). Get it as tight as you can to the edge you just sewed in without compromising that edge actually holding.
This is where that really sharp pair of scissors is super useful! You need them sharp to get a precise cut all the way through the layers.
Step 11: Prepare your bias tape.
I'm not even going to try to explain bias tape, because honestly, I don't totally understand it. It's what you use to make the edge of your quilt pretty.
Just go here and thank me later. This easy method is what I used, and it worked perfectly! You can also buy bias tape, it's just a good bit more expensive than making it yourself.
Step 12: Attach bias tape to the edge of the t-shirt quilt.

Once the bias tape is made, wrap it around the rough edge of your sewn quilt sandwich and sew it on, making sure the edge of the bias tape stays nice and tucked.
My bias tape attaching wasn't perfect…but none of the quilting process was for that matter. That's ok with me - it's supposed to look handmade. It adds character, right? 🙂
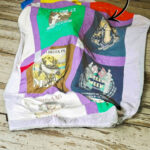
I absolutely love the way it turned out! And it wasn't a very time consuming project at all - I just worked on it for an hour or so here and there for about a week. So get to quilting! I promise you'll love it as much as I did. 🙂
More Helpful Tips & Tricks
- Label Your Quilt. Add a quilt label with date, name, and story ("Made from my freshman-year sorority tees, 2025"). It adds sentimental value and helps future recipients appreciate the story behind the quilt.
- Aftercare Advice: Care for the finished quilt by washing gently in cold water on a delicate cycle, then either air-drying flat or tumble-dry low to preserve fabric integrity and avoid shrinkage.
- Clean Cuts = Easier Sewing. A good rotary cutter with a fresh blade and a self-healing mat help achieve consistently straight, square-edge cuts, making sewing and alignment a breeze.
- Adjust for Shrinkage. Pre-wash and dry shirts before cutting to catch any shrinkage ahead of time. Or, leave a bit wider border - softer fabrics might still shrink after quilting.
- Pin Strategically. Use plenty of pins, especially through the quilt sandwich (top, batting, backing), to stabilize layers while quilting. When piecing rows, pin at the corners of each block to help keep seams aligned as you sew.


Leslie Lambert is a lifestyle writer and content creator specializing in home organization, family recipes, and intentional living. With 17 years of experience in blogging and digital storytelling, she helps busy women create calm, purposeful homes they love.


Good job! Iam getting mine ready to sew.
Good luck!
I’m going to give this my best shot! Your quilt looks beautiful! Thank you for the detailed instructions! Xo
I would highly recommend stabilizing the t-shirts with a lightweight interfacing such as Pelion 101.
Great job! I would recommend before you start sewing, to get some fusible interfacing and iron it to the back of the tshirt pieces. It will help it from stretching and becoming unconformed.
Great tip, I'll be trying that next time!
Did you use single or double fold bias tape ?
Just single!
what size quilt is the completed quilt?
Hi Karen! This ends up being roughly a twin-sized quilt.
I want to do this but it seems pretty daunting especially since I have little to no sewing experience. Should I try doing this? I have a bunch of old t-shirts I need to get rid of but want to keep for nostalgic reasons.
I'd recommend practicing on some old t-shirts first - maybe make a "quilt" of 4 shirts using the pattern above. If that works, you know you're ready for the actual quilt!
Do you have a king size pattern like your twin layout?
I don't right now, but I'll definitely keep that in mind next time I revise this post!