
Get that great cookies and cream flavor with these easy Oreo cake pops! With only 4 ingredients, this no-bake cake ball recipe is a great bite-sized dessert for parties.

Paid links used in this post. Read more about my link usage policies.
Why You'll Love This Recipe

Everybody needs an easy, show-stopping dessert that's perfect to bring to a party - and these Oreo cake pops are exactly that.
This is one of those recipes that looks bakery-level impressive…but secretly couldn't be easier. There's no baking involved, no cake mix, and no complicated decorating skills required.
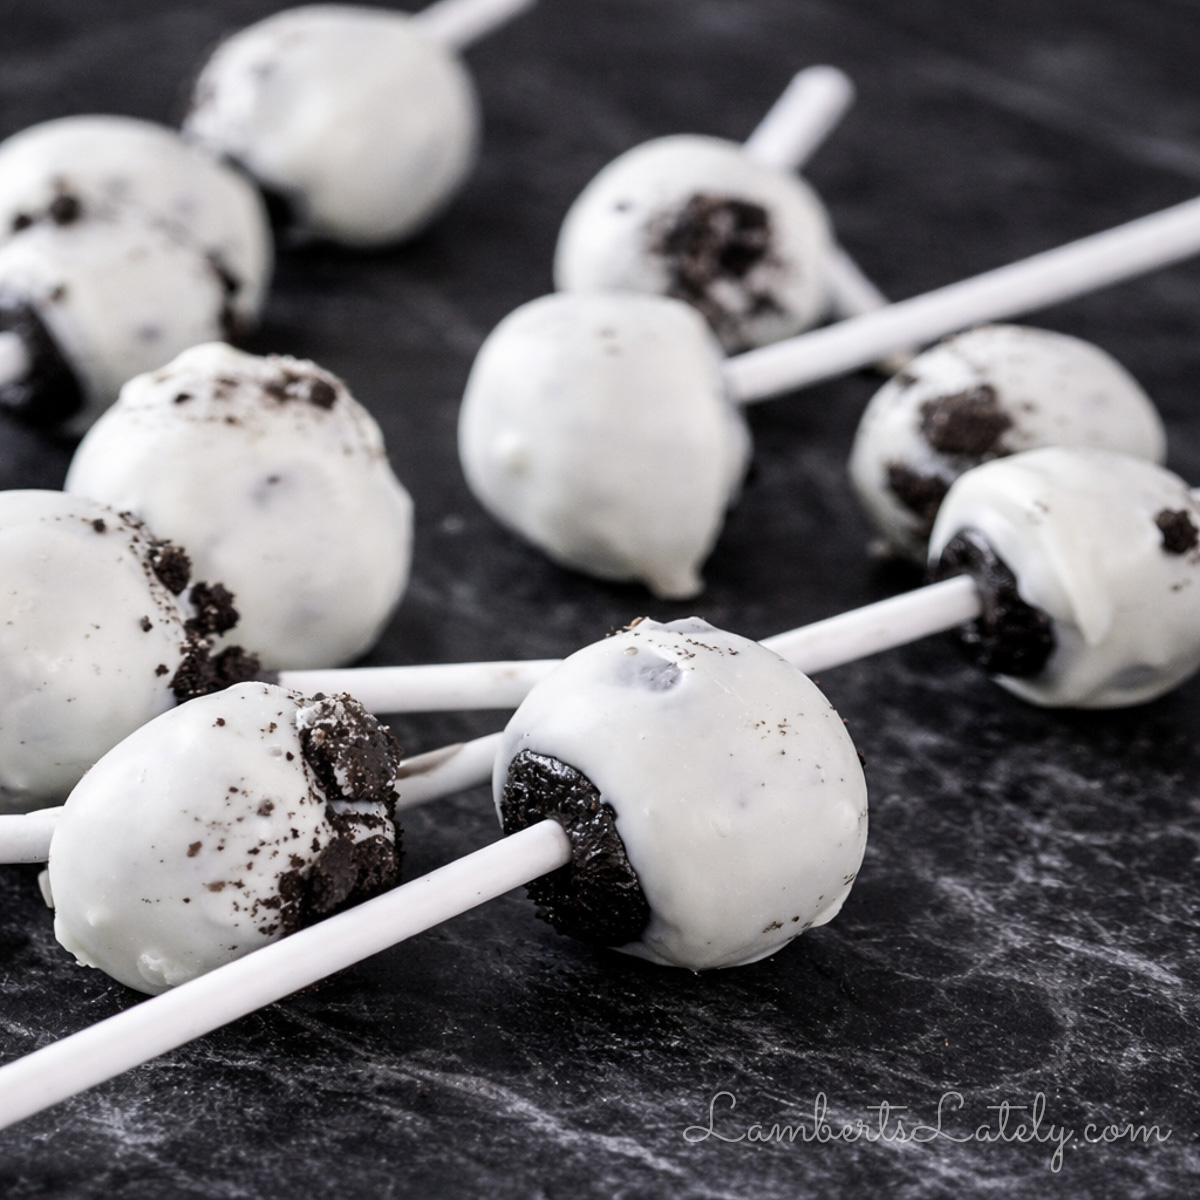
They're creamy and truffle-like inside with a crisp chocolate snap on the outside. It's like you made my Brownie Cake Pop or Pumpkin Cake Pop recipes even easier.
You're going to want to keep this recipe in your last-minute-treat arsenal. It's one of those recipes that looks super complicated...nobody will know that you're able to whip these up in under an hour!

Ingredient Notes
(See recipe card at the bottom of this post for full ingredient measurements.)
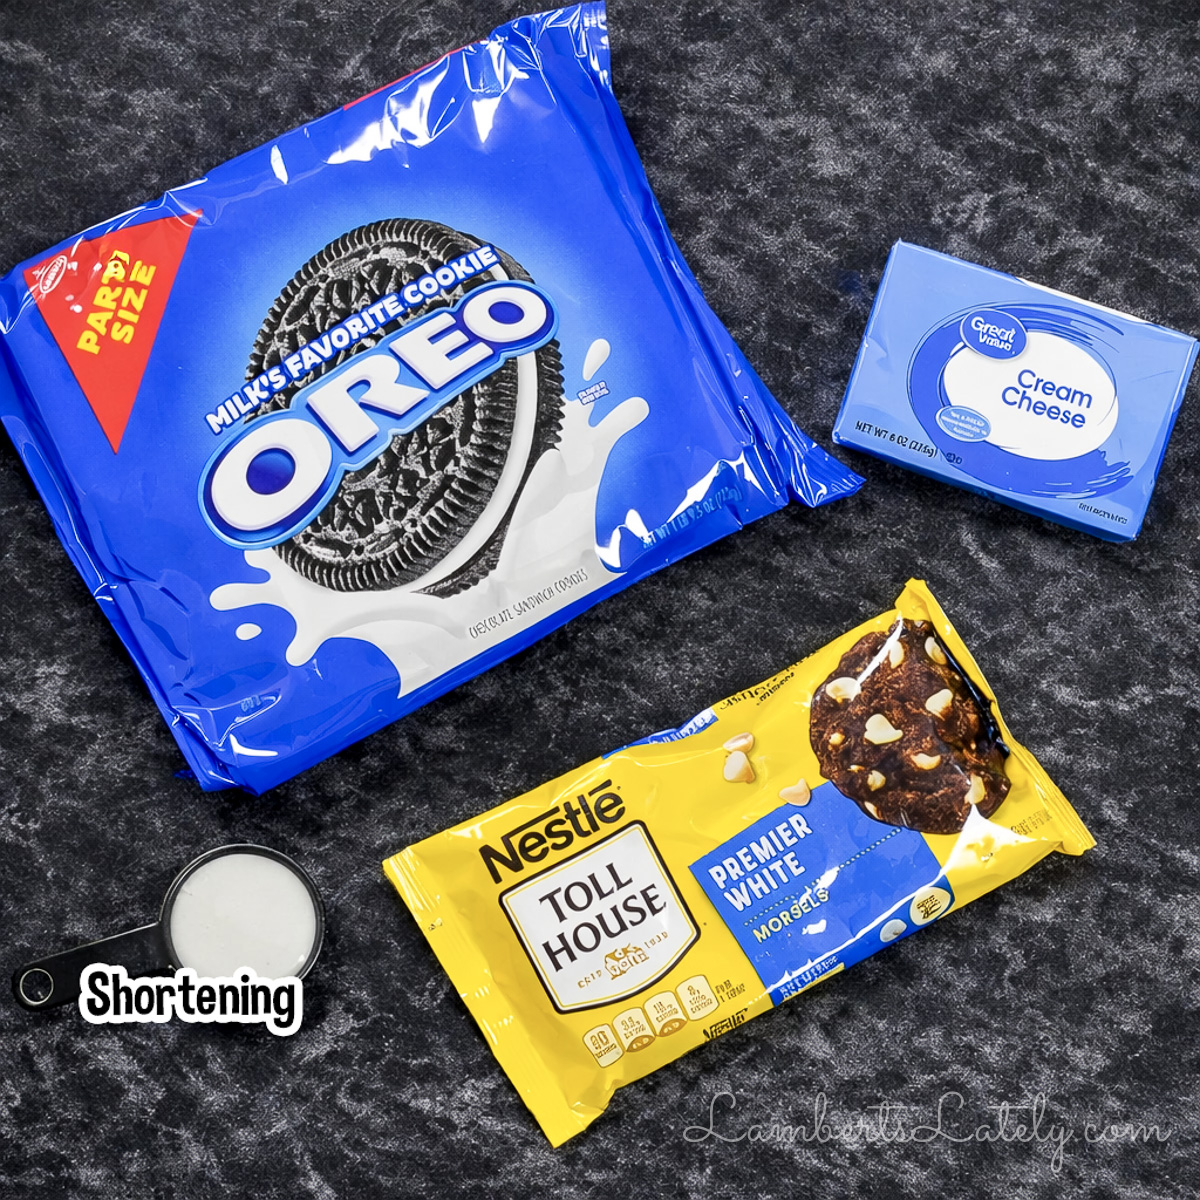
- Oreo cookies - The whole cookies (filling included) are blended into fine crumbs to create the base of these Oreo cake pops. The cream filling helps bind everything together and gives that cookies-and-cream flavor. You can use regular Oreos or swap in Golden, lemon, peanut butter, or seasonal flavors to customize the taste. Double-stuffed varieties will make the mixture a little softer and creamier (I prefer to work with the standard kind).
- Cream cheese - This is what is going to turn crushed cookies into a smooth, rollable dough. Full-fat cream cheese gives you the richest texture and the most stable cake pop center, but light cream cheese also works if you're trying to cut the fat. Make sure it's softened to room temperature before mixing so it blends evenly and prevents lumps in the filling.
- White chocolate chips or candy melts - These give your cake pops that smooth outer shell. Candy melts are slightly easier to work with because they're designed for coating, but good-quality white chocolate chips will give a richer flavor. You can also use milk chocolate, dark chocolate, or colored melting wafers depending on the look and taste you're going for.
- Shortening - Just a little bit helps thin the melted chocolate so it coats the Oreo cake pops smoothly without becoming thick or clumpy. It also adds a shine once the coating sets. If you don't have shortening, a small amount of neutral oil (like vegetable or canola oil) works well.
Supplies Needed
In addition to the ingredients, you'll also want to make sure you have the following on hand:
- Food processor
- Cake pop sticks
- A block of styrofoam or floral foam (to allow the pops to stand up while setting)
- Cookie sheet
- Parchment paper or wax paper
Additions & Variations
Once you've mastered the base recipe, it's really easy to customize these Oreo cake pops for any flavor or occasion!
Flavor Ideas
- Peanut Butter - Mix a spoonful of peanut butter into the filling - super rich and comforting.
- Mint Chocolate - Add a tiny drop of peppermint extract and drizzle with dark chocolate.
- Strawberries & Cream - Fold in crushed freeze-dried strawberries for a fruity pop.
- Birthday Cake - Stir sprinkles into the filling for a funfetti-style version.
Coating & Decorating Ideas
- Use milk or dark chocolate for a richer flavor.
- Try colored candy melts for themed parties.
- Drizzle contrasting chocolate over the top for a pretty finish.
- Add sprinkles or crushed cookies before the coating sets.
Make Them Cake Balls
Skip the sticks and dip the chilled balls in chocolate instead. Oreo cake balls are way easier to transport and perfect for holiday cookie exchanges.
How to Make Foolproof Oreo Cake Pops
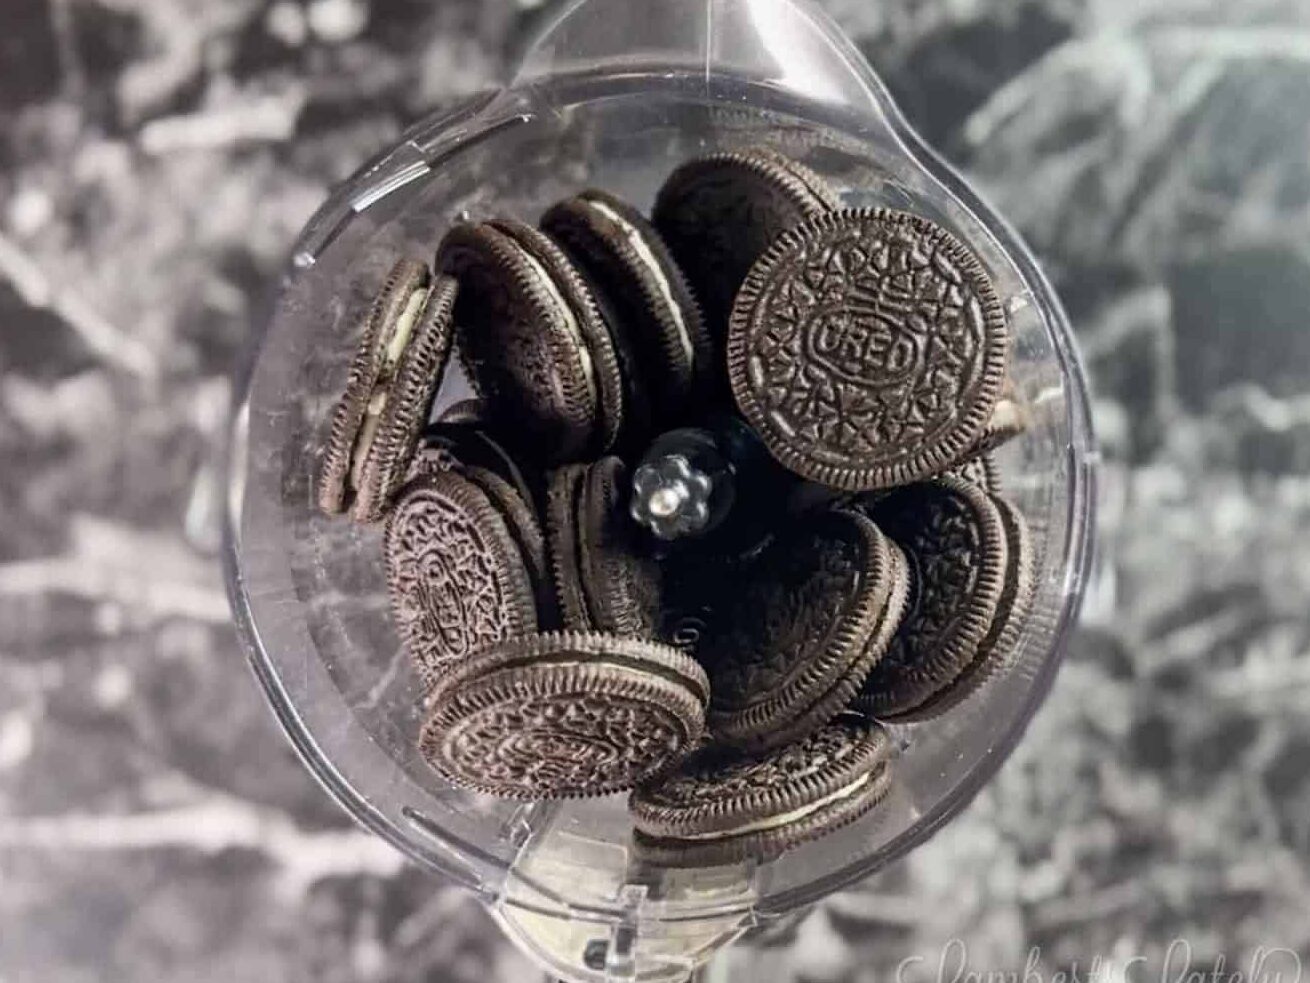
- Crush the Oreos. Add the Oreo cookies (with the filling included) to a food processor and pulse until they become fine, even crumbs. There shouldn't be any big chunks - bigger pieces can cause lumpy filling and make rolling the balls difficult.
- No food processor? Seal cookies in a zip-top bag and crush with a rolling pin until very fine.
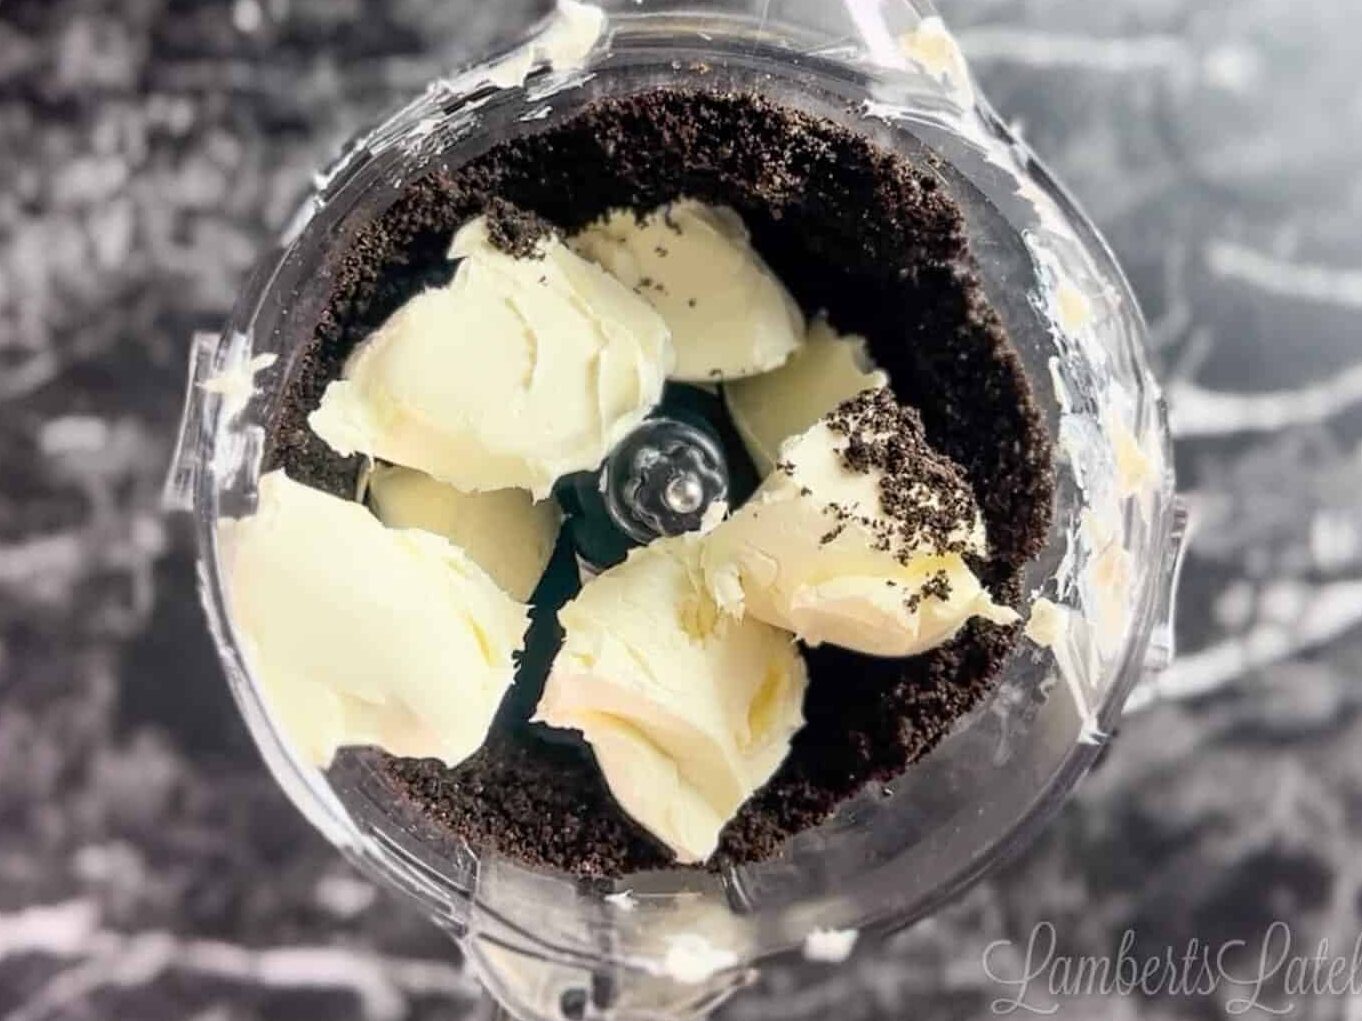
- Mix with cream cheese. Add softened cream cheese to the crumbs and pulse until the mixture forms a thick, smooth dough. It should hold together easily when pressed between your fingers. If it feels overly sticky, chill it for 10-15 minutes before rolling.
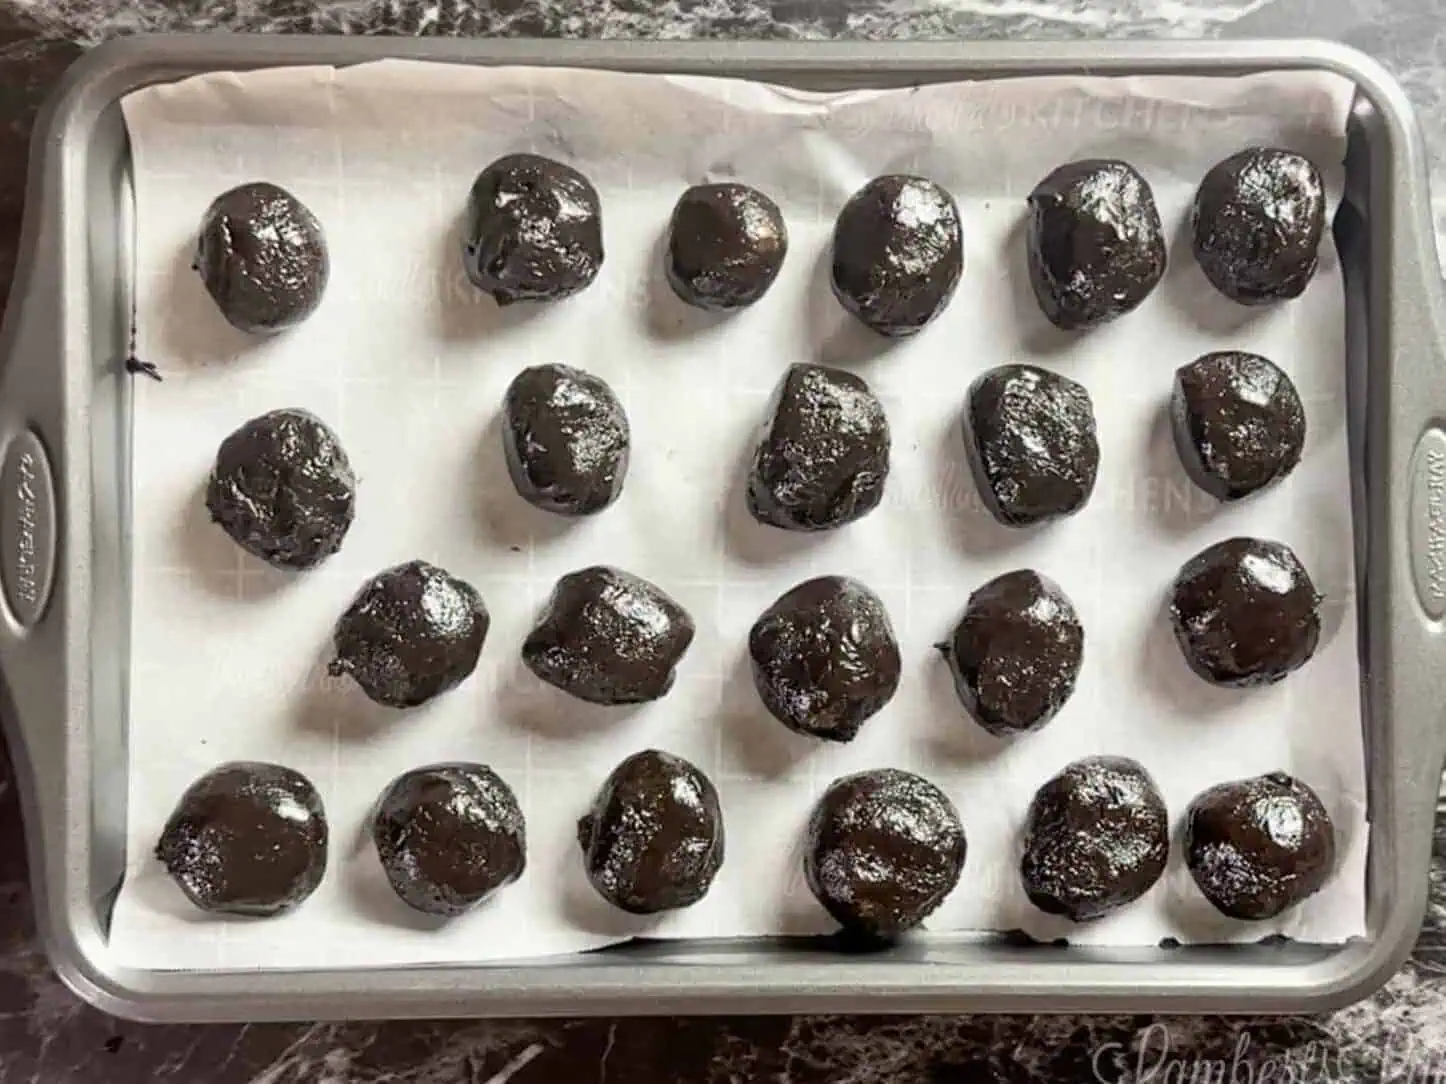
- Roll and chill. Scoop and roll the mixture into 1-inch balls, keeping them uniform so they coat evenly. Place on a parchment-lined baking sheet. Freeze for 30-60 minutes, until firm but not rock hard. Over-freezing can cause cracking when dipped in warm chocolate.
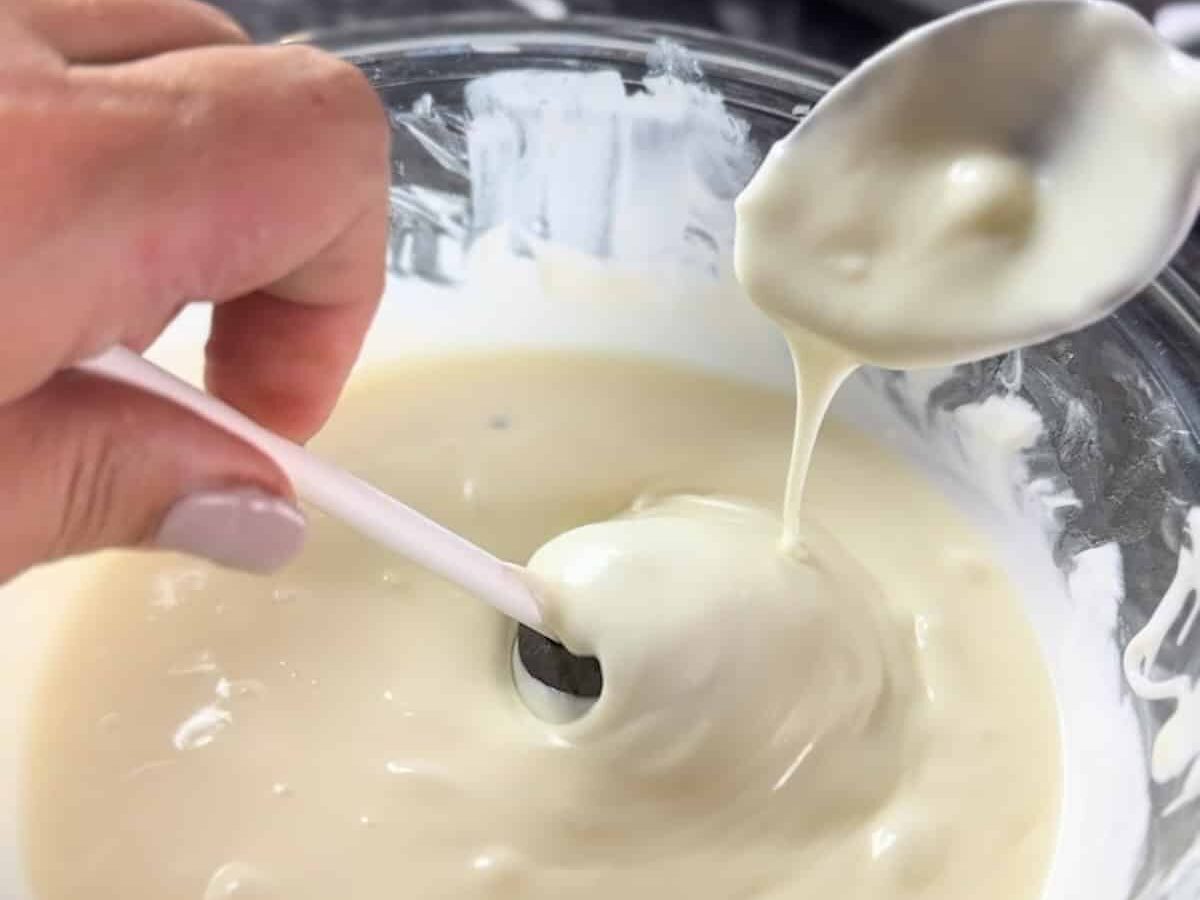
- Melt the chocolate properly. Combine white chocolate and shortening in a microwave-safe bowl (just make sure bowls/utensils are completely dry - water can cause chocolate to seize up). Microwave in 30-second intervals, stirring well between each, until smooth. Do not overheat - chocolate that's too hot can cause cracking or make the coating too thick. The melted chocolate should be smooth enough to drip easily from a spoon. If it's too thick, stir in a tiny bit more shortening.
- Insert the sticks. Dip the tip of each cake pop stick into the melted chocolate, then insert it halfway into a chilled ball. This acts like glue and helps prevent the cake pop from falling off the stick. Let them sit for a few minutes so the chocolate seal firms up.
- Dip and coat. Submerge each cake pop into the melted chocolate, making sure it's fully covered. Lift straight up and gently tap your wrist (not the stick itself) to remove excess coating. Lightly spin the pop to smooth the surface and prevent pooling at the base.
- Decorate (optional). While the coating is still wet, sprinkle with crushed Oreos, sprinkles, or drizzle with contrasting chocolate. Decorations must be added before the shell sets.
- Let set upright. Place the finished cake pops upright in styrofoam or floral foam and allow them to set at room temperature for about 30 minutes. Avoid refrigerating immediately, as rapid temperature changes can cause condensation or cracking.
Leftover Storage
STORAGE: Because of the cream cheese filling, these Oreo cookie balls should be stored in a refrigerator. Just pop them in an airtight container and store for 3-4 days after preparing.
FREEZING: These Oreo cake balls freeze beautifully! I recommend leaving the stick out if you're planning on freezing them.
Prepare cake balls as instructed, using a spoon to coat them with white chocolate (leaving a small area exposed to put in a cake pop stick). Allow the coating on the Oreo balls to set on a piece of wax paper or parchment paper, then place them in a freezer bag once set. You can store them in a freezer for up to 6 months.
When you're ready to serve, allow the cake balls to thaw in a refrigerator. Once thawed, you can pop a stick in the bottom to make them cake pops.
Leslie's Helpful Tips & Tricks
- Yield: This recipe makes about 20-24 Oreo cake pops, depending on how large you roll them. Keeping them uniform in size helps them coat evenly and look more polished.
- Keep them small. Aim for balls about 1 to 1½ inches in diameter. Larger cake pops are heavier, more likely to slide off the stick, and harder to coat smoothly without excess chocolate pooling at the bottom.
- Turn them into Oreo cake balls. Prefer to skip the sticks? Simply dip the chilled balls in melted chocolate using a fork or spoon and let them set on parchment paper. Oreo cake balls are easier to transport and perfect for cookie trays or holiday platters.
- Aim for a smooth coating. The melted chocolate should drip easily off a spoon in a thin ribbon. If it's too thick, it will create heavy shells and uneven coating. Stir in a tiny amount of shortening to loosen it if needed.
- No food processor? No problem. Place the cookies in a large zip-top bag and crush them with a rolling pin until very fine. Then mix the crumbs with softened cream cheese using a hand mixer or sturdy spoon until a smooth dough forms.
- Work with chilled (not frozen solid) balls. If the centers are too cold, the chocolate coating may crack as it sets. They should feel firm but not rock hard before dipping.
FAQs & Troubleshooting


Show me those cake pops! Tag me on social media (@lambertslately) with your cake pop creations. 📸 You can also let me know how they were by commenting/rating the recipe below. ⭐️

Oreo Cake Pops
Equipment
- A block of styrofoam or floral foam (to allow the pops to stand up while setting)
- Cookie sheet
- Parchment paper
Ingredients
- 38 Oreo cookies
- 8 oz cream cheese softened
- 11 oz white chocolate chips or candy melts
- 1 tablespoon Crisco shortening
Instructions
- Crush the Oreos (filling included) in a food processor until fine crumbs form. No large chunks. (No processor? Just crush in a zip-top bag with a rolling pin.)
- Mix with softened cream cheese until a smooth, thick dough forms. If the mixture feels too sticky, chill for 10-15 minutes.
- Roll into 1-inch balls and place on a parchment-lined baking sheet. Freeze 30-60 minutes until firm but not frozen solid.
- Melt white chocolate and shortening in 30-second microwave intervals, stirring between each, until smooth. Do not overheat. Chocolate should drip easily from a spoon. (Make sure bowls and utensils are completely dry.)
- Dip stick tips in melted chocolate and insert halfway into each chilled ball. Let sit a few minutes to secure.
- Dip each cake pop fully into melted chocolate. Lift straight up, gently tap your wrist to remove excess, and lightly spin to smooth coating.
- Decorate immediately with sprinkles or crushed Oreos before coating sets.
- Let set upright at room temperature for about 30 minutes. Avoid immediate refrigeration to prevent cracking or condensation.
Notes
- Use softened cream cheese for the smoothest filling and easiest mixing.
- Crush the Oreos into very fine crumbs to prevent lumps and make rolling easier.
- Roll cake balls about 1-1½ inches in diameter to prevent them from falling off the sticks.
- Chill until firm but not frozen solid - overly cold centers can cause the chocolate coating to crack.
- Make sure bowls and utensils are completely dry when melting chocolate to prevent seizing.
- The melted chocolate should be smooth and fluid, dripping easily from a spoon. If it's too thick, stir in a tiny bit more shortening.
- Dip the stick tip in melted chocolate before inserting into the cake ball - this helps secure it in place.
- Let cake pops set at room temperature first to prevent condensation and cracking.
- Store in an airtight container in the refrigerator for up to 3-4 days, or freeze (without sticks inserted) for longer storage.
Nutrition Facts

Leslie Lambert is a lifestyle writer and content creator specializing in home organization, family recipes, and intentional living. With 17 years of experience in blogging and digital storytelling, she helps busy women create calm, purposeful homes they love.


Very impressive. I'm interested owing my cake pop business . Please send information on how to start up cake pops business