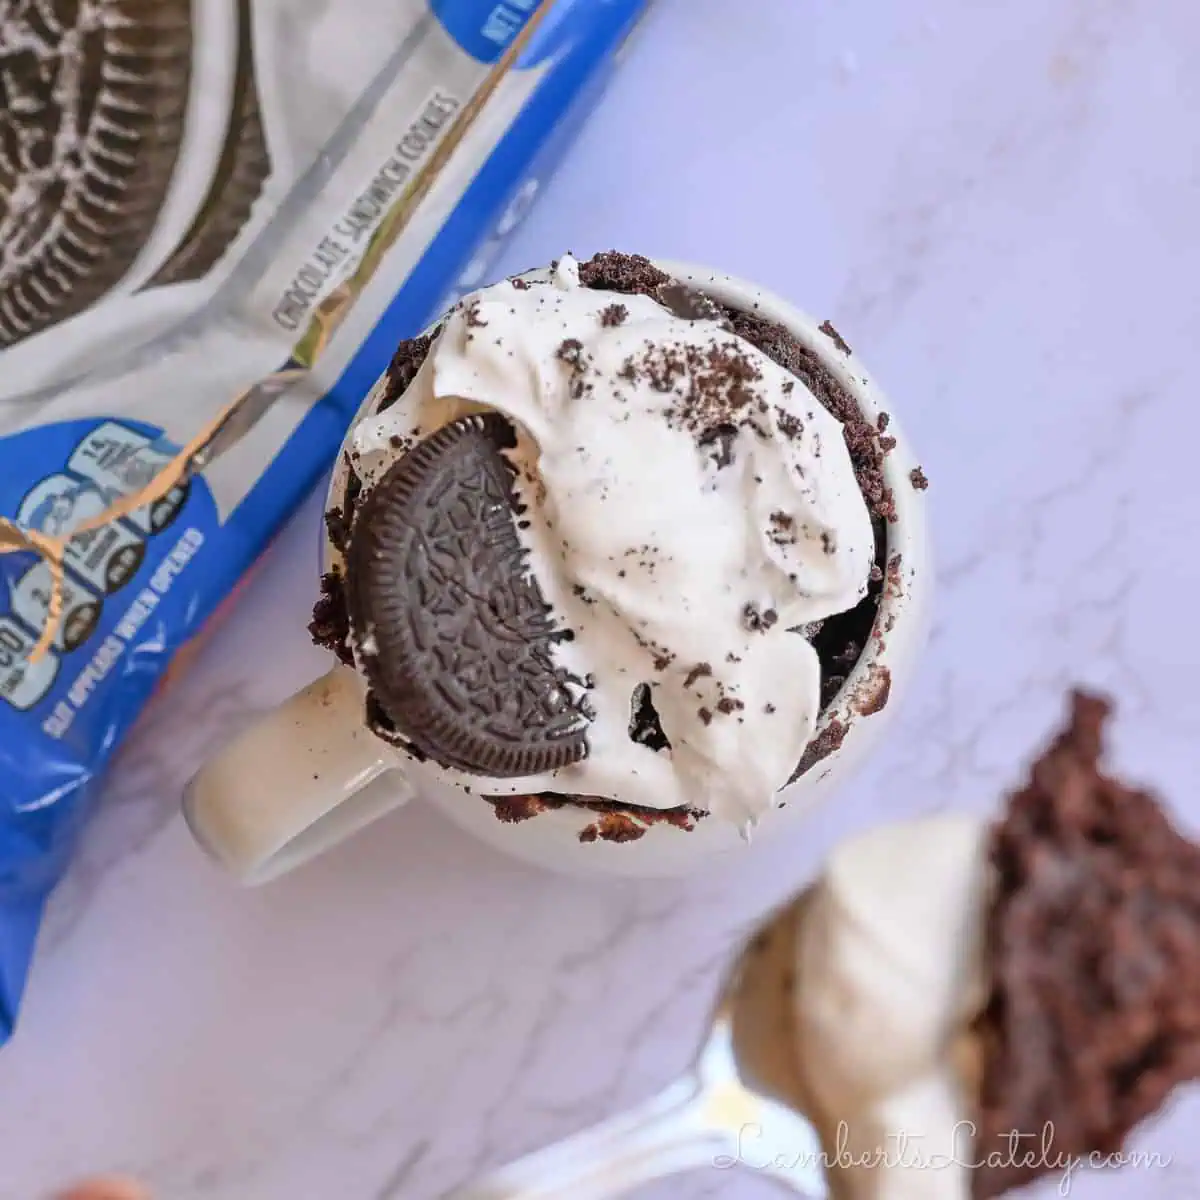
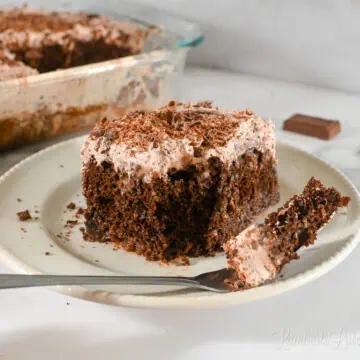
This Oreo mug cake is soft, fluffy, and rich with the perfect gooey center - made with cake mix so it tastes like real cake instead of the gummy texture common in those viral 2-ingredient versions.

Why You'll Love This Cake Mix Shortcut

A cookie, but made into a warm, fluffy cake? Sign me up!
Look, when you're snacky, I know it's easy to just open a pack of Oreos and go to town. But if you've got 2 extra minutes and a couple of pantry staples, this little dessert is such a fun upgrade. It's quickly become one of my favorite cake mix mug cakes for when that chocolate craving hits hard.
The thing that makes this Oreo mug cake a little different is the cake mix shortcut. I know there are a lot of viral versions out there that just use crushed Oreos and milk, but those can sometimes end up a little dense or gummy. Using cake mix gives this one a much richer chocolate flavor and a soft, fluffy texture that tastes way more like actual cake. (In fact, if you're a fan of my Oreo cake pops, you are going to obsess over this warm version!)
You still get all of that classic cookies-and-cream goodness, but with a warm, gooey center and the kind of texture that makes you want to grab a spoon immediately. It's quick and absolutely perfect when you want a single-serve dessert that feels just a little more special.
If you're ready to skip the gummy texture and get straight to the good stuff, let's mix up this 2-minute treat!

Ingredient Notes
(See recipe card at the bottom of this post for exact ingredient measurements.)
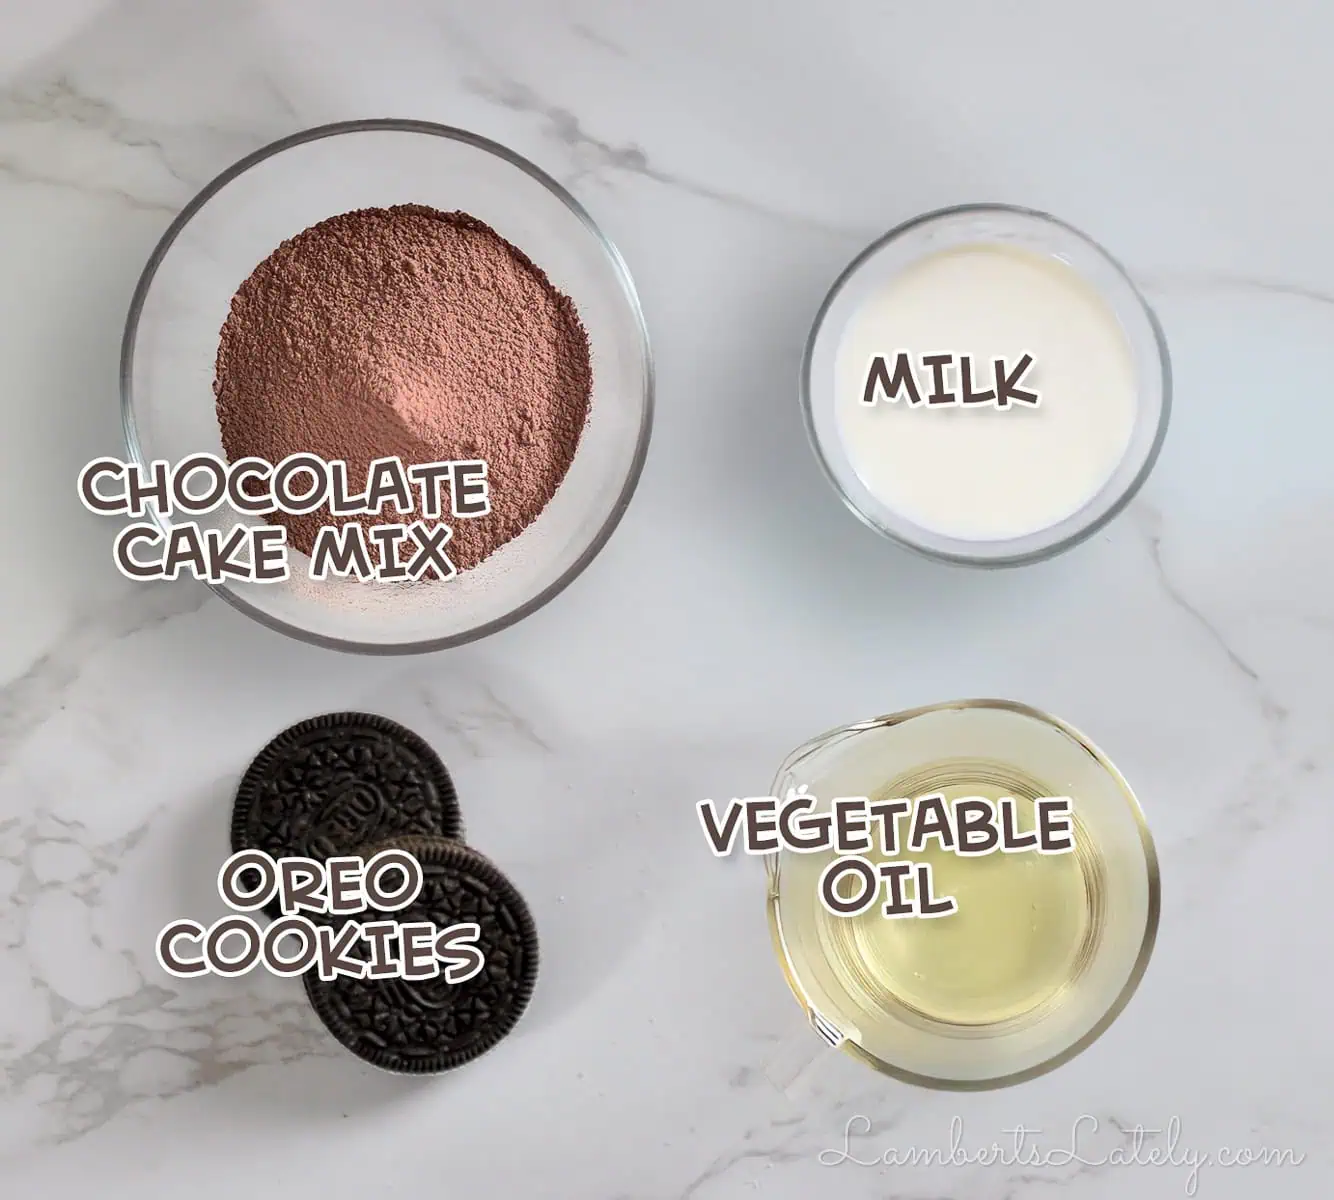
- Chocolate Cake Mix: This is the ultimate shortcut. Unlike using plain flour and cocoa, the mix already contains the perfect ratio of sugar and leavening. This is exactly how we skip the baking powder and avoid that gummy texture common in other viral mug cakes. I like keeping a box of cake mix on hand for desserts like this one and my microwave Nutella Cake!
- Milk: I like using whole milk for the richest flavor. If you need to make this dairy-free, oat milk or unsweetened almond milk both work great too; just keep in mind the batter might be a little bit less creamy.
- Vegetable Oil: While you can use any oil (like canola or melted coconut oil), I like using vegetable oil because it gives the cake a better structure. It's going to help the batter stay moist and soft in the microwave without getting tough as it cools.
- Oreo Cookies: You will need two cookies for this recipe. We are not just using the chocolate wafers; the cream filling is going to be key to getting that cookies and cream flavor that everyone loves. We will crush one into the batter and hide the second one right in the center for that gooey middle!
Substitutions & Additions
- Try Different Oreo Flavors: You can swap the traditional chocolate cookies for any of the fun seasonal flavors out there. This recipe is really good with strawberry, toffee, or even birthday cake Oreos.
- Mix and Match Your Cake Mix: Don't feel like you have to stick to chocolate cake mix. Try using a vanilla or yellow cake mix with Golden Oreos for a "blonde" version. You could even use a red velvet mix with the classic cookies for a really yummy twist.
- Dairy-Free Options: If you need to skip the dairy, you can always use oat milk or almond milk. Since Oreos are actually dairy-free, this is a great way to make a quick vegan-friendly treat.
- Add a Topping: While this cake is delicious on its own, it is even better with a little extra something on top! I love adding a scoop of vanilla bean ice cream or a big dollop of whipped cream to the warm mug.
- Extra Crunch: If you want a little more texture, sprinkle a few extra cookie crumbles or some mini chocolate chips on top right before serving.
Check out my other chocolately mug cake recipes - you'll love both my Hot Cocoa Mug Cake and my Microwave Chocolate Chip Mug Cookie!
How to Make a 4-Ingredient Oreo Mug Cake
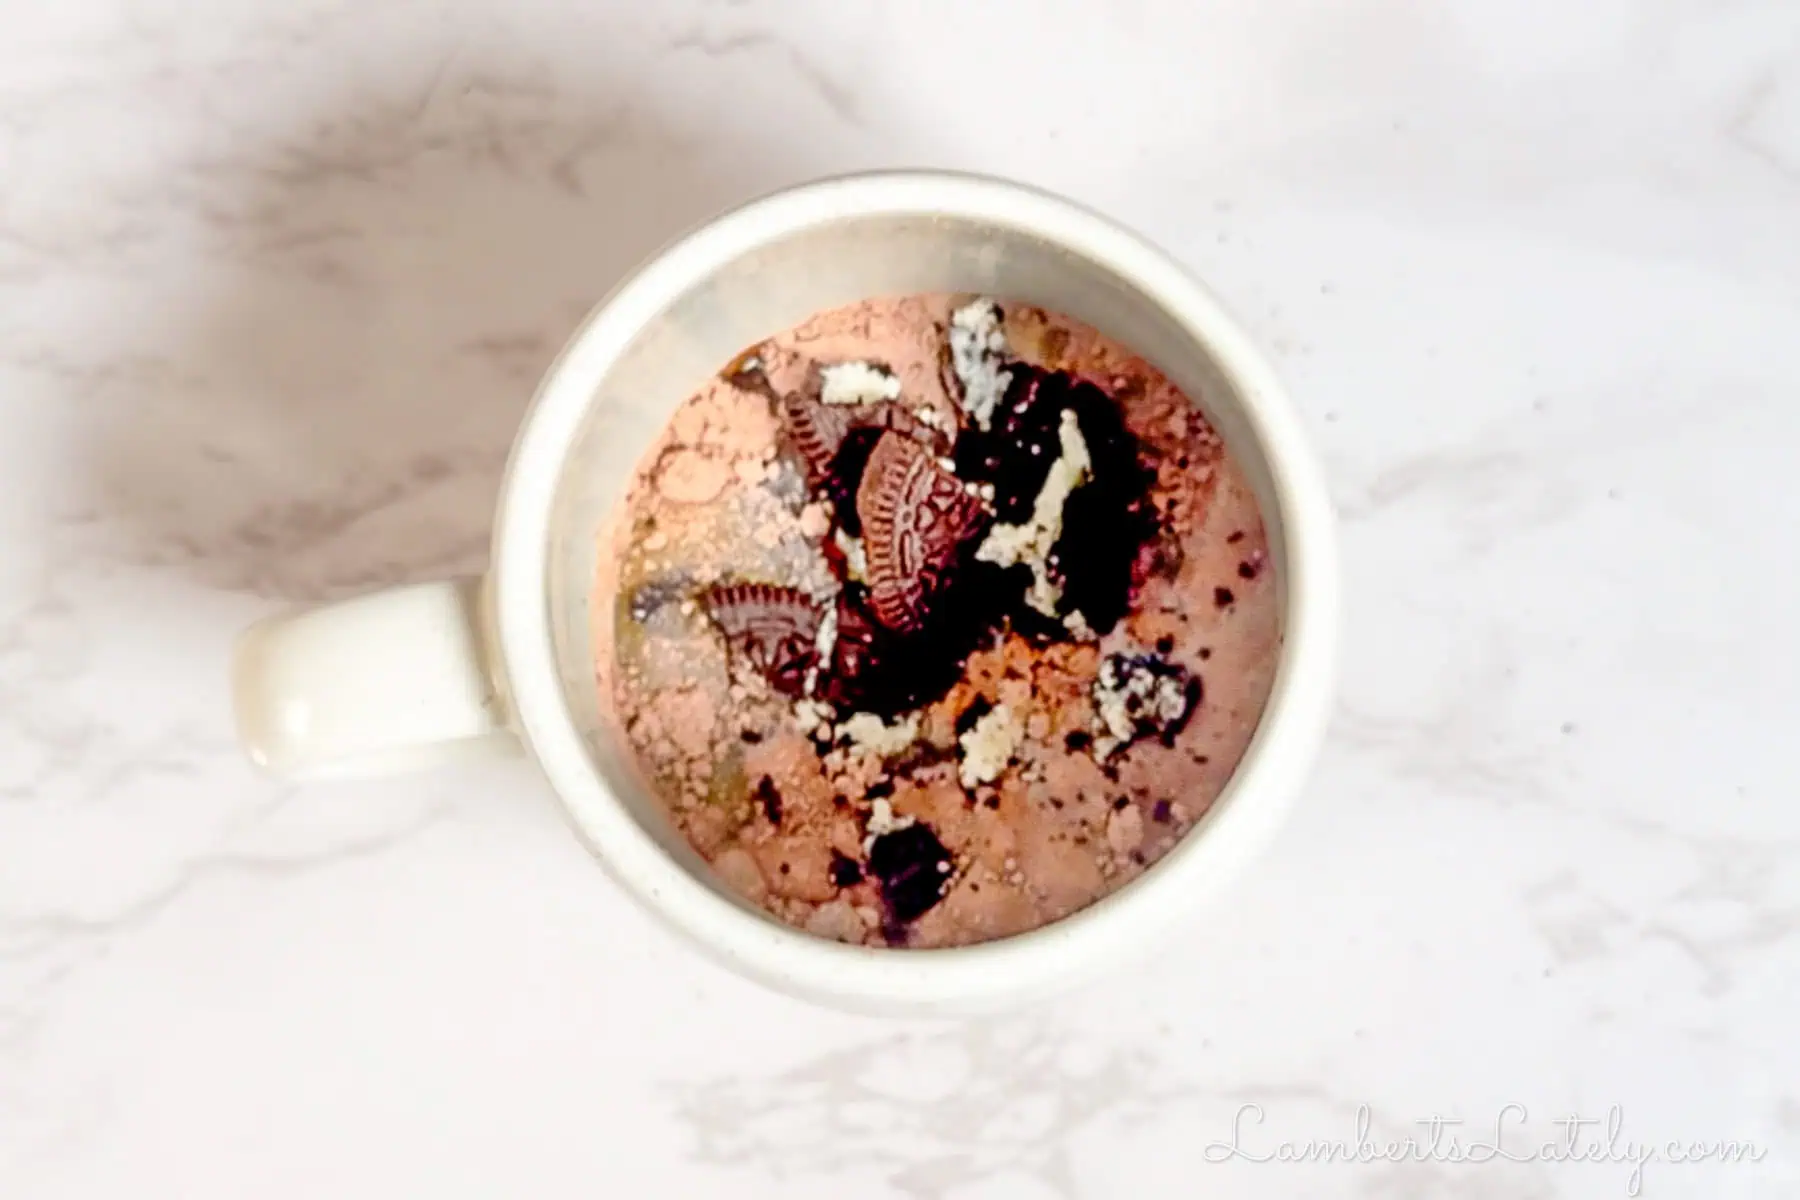
- Whisk the Base: In a microwave-safe mug, combine ⅓ cup chocolate cake mix, ¼ cup milk, and 2 tablespoon vegetable oil. I recommend using a fork to mix everything together until the batter is completely smooth. This helps break up any little pockets of dry cake mix that like to hide at the bottom of the mug.
- Add the Crunch: Roughly crush one Oreo cookie into small pieces and stir it directly into your batter. You don't need to pulverize it into dust; having a few larger cookie chunks makes for a better texture once it's cooked.
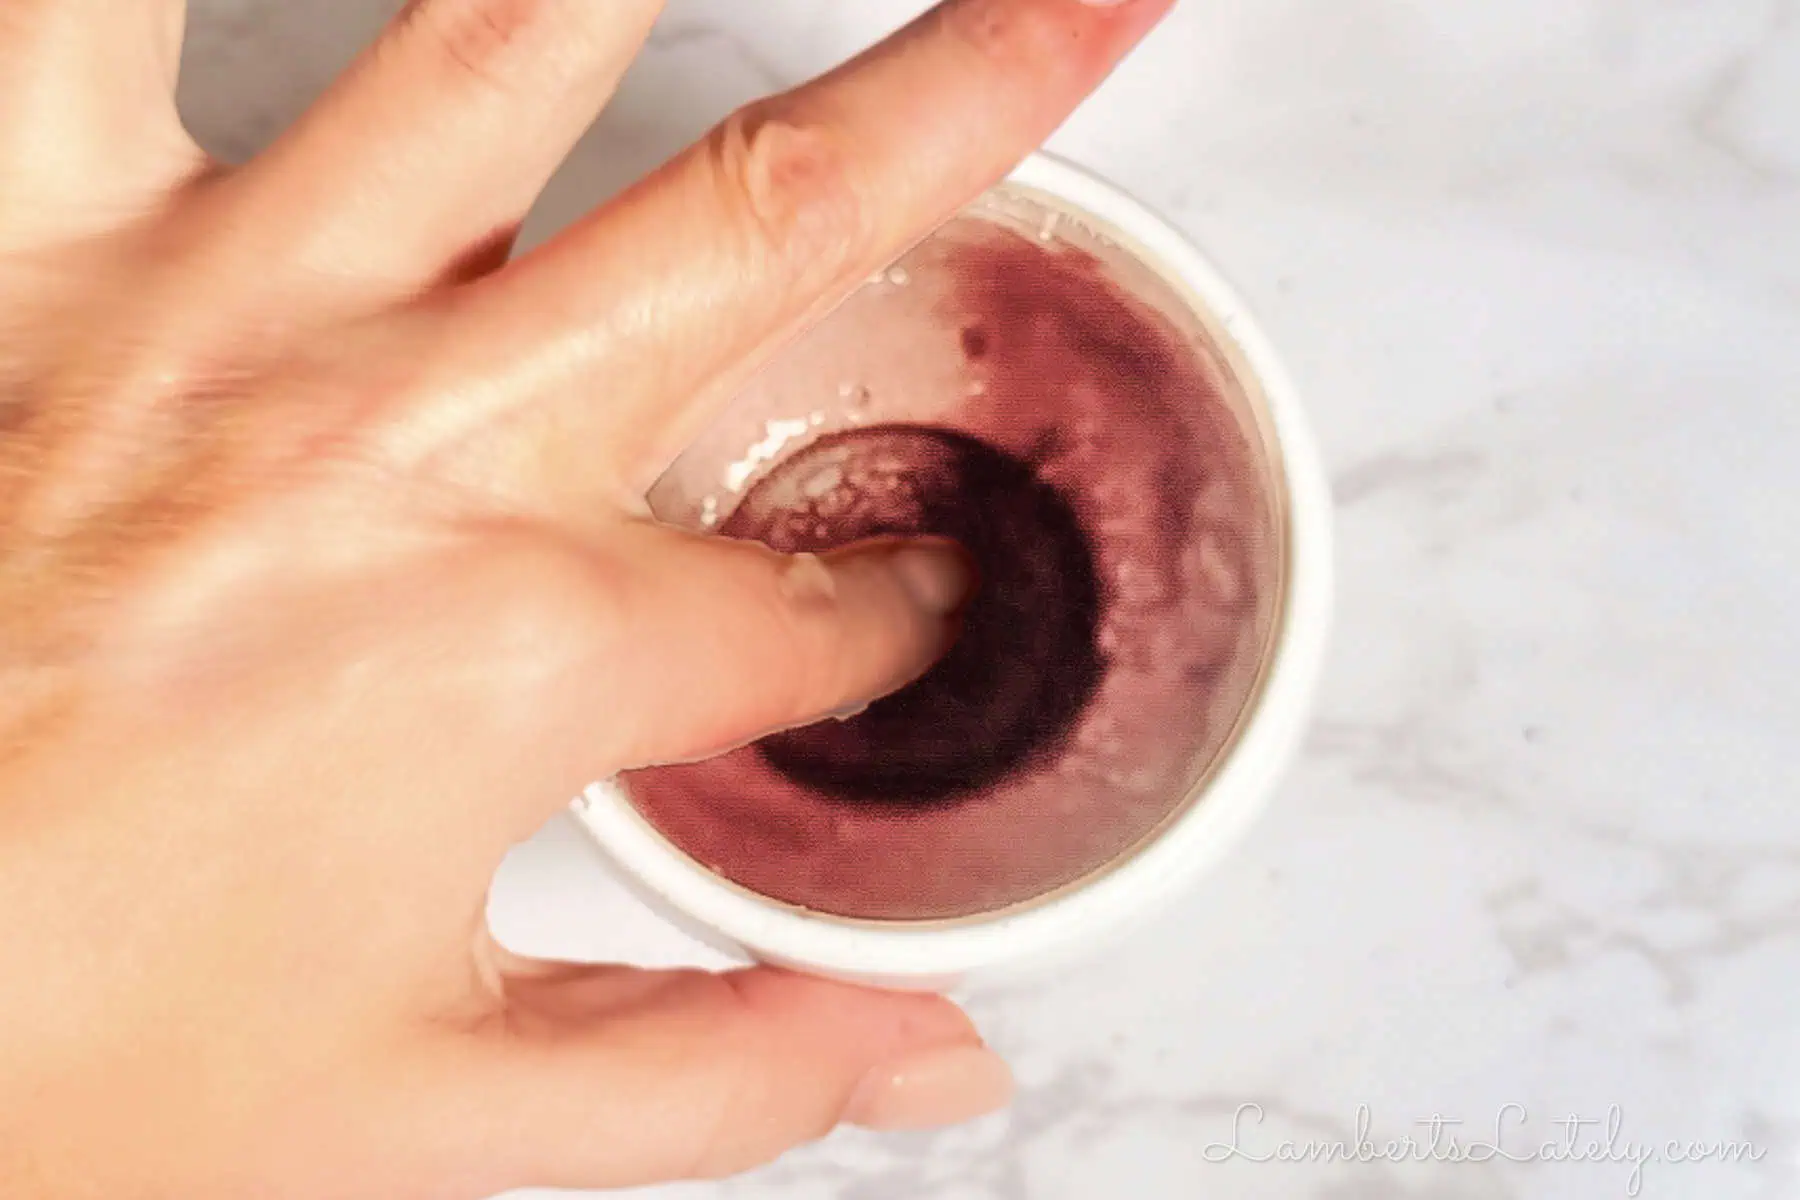
- Create the Gooey Center: Take your second Oreo and press it right into the center of the batter. Use your fork to gently push it down until it is just barely covered by the cake mix. This is the secret to getting that warm, melty center in every single bite.
- Microwave and Rest: Cook on high for 60 seconds. Every microwave is different, so if yours is a lower wattage, you might need an extra 10 to 15 seconds. Let the mug sit for about a minute before digging in. This brief rest helps the cake finish setting up so it stays fluffy instead of gummy.
- Top and Serve: Enjoy your cake while it is still warm!
Step-by-Step Recipe Video
Watch this short video to see exactly how I get the fluffy cake with a gooey center!
No Baking Powder? No problem!
One of the most common questions I get is whether you can make a mug cake without baking powder or baking soda. The answer is a big yes!
While traditional from-scratch recipes require you to measure out leavening agents for a good rise, we are skipping that step entirely. Here is why this shortcut works so well:
- Built-in Leavening: Since the chocolate cake mix already has the perfect amount of baking powder and baking soda mixed in, you don't have to hunt through your pantry for extra ingredients.
- Better Texture: Using the mix instead of plain flour helps us avoid that gummy texture that often happens with DIY microwave cakes.
- Consistent Results: You get a fluffy, reliable rise every single time without the stress of measuring tiny amounts of baking soda.
It is the ultimate hack for when you have a major sweet tooth but realize your baking powder is expired or missing from the cabinet!
Leslie's Helpful Tips and Tricks
- Adjust Your Cook Time: Every microwave is different, but with my 1100-watt model, 60 seconds is just right. Subtract 10 seconds for a gooey, lava-style center, or add 10 seconds for a more solid, cakey texture.
- The Turntable Trick: If your microwave has a turntable, place the mug on the outer edge rather than the center. This helps the heat circulate more evenly so you get a perfectly cooked cake every time.
- Easy Cleanup: Give your coffee mug a light coat of cooking spray before you start. This prevents the batter from sticking and makes cleanup so much quicker!
- Use a Fork for Mixing: I always choose a fork over a spoon for mug cakes. It is the best way to break up those little cake mix pockets and ensure your batter is smooth and fluffier, not gummy.
- Prep Your Cookies: If you prefer smaller bits of cookie throughout your cake, you can pulse the Oreos in a food processor or blender before stirring them into the batter.

FAQs & Troubleshooting
Let me know what you think! Leave a comment 💭 or rating ⭐️ below. You can also tag me on social media (@lambertslately) with your thoughts!

Oreo Mug Cake
Ingredients
- ⅓ cup chocolate cake mix
- ¼ cup milk
- 2 tablespoon vegetable oil
- 2 Oreo cookies
Instructions
- Add ⅓ cup chocolate cake mix, ¼ cup milk, and 2 tablespoon vegetable oil to a microwave-safe mug. Stir well with a fork to break up any dry pockets of cake mix.
- Roughly crush one Oreo cookie into the batter and stir until combined.
- Gently press the remaining Oreo into the center of the batter until it is just barely covered.
- Cook on high for 60 seconds. If the center still looks very liquidy, add 10 seconds.
- Let the mug sit for 1 minute before eating. This allows the cake to finish setting up so it stays fluffy instead of gummy.
Notes
- No Baking Powder Needed: Don't add extra leavening! The cake mix shortcut already contains the perfect amount of baking powder for a fluffy rise.
- Watch the Microwave: Start with 60 seconds. If it's still too liquidy, add 10 seconds. Substract 10 seconds for a more "lava-style" center.
- The Resting Step: Let the mug sit for 1 minute after cooking. This allows the cake to finish setting up so it stays fluffy instead of gummy.
- Oil for Structure: I recommend vegetable oil to keep the cake moist and soft, but melted coconut oil or canola oil work too.
- Best Served Warm: Eat this within 10-15 minutes of cooking. Mug cakes can get rubbery as they cool to room temperature!
Nutrition Facts

Leslie Lambert is a lifestyle writer and content creator specializing in home organization, family recipes, and intentional living. With 17 years of experience in blogging and digital storytelling, she helps busy women create calm, purposeful homes they love.