
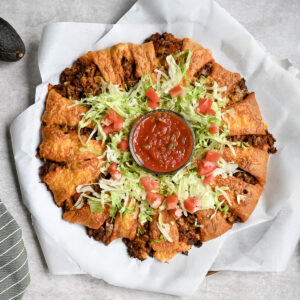
Tired of the same old Taco Tuesday? This Taco Crescent Ring is a quick & easy upgrade! Use pantry shortcuts for a flaky, cheesy centerpiece that looks impressive but is secretly so easy, with a perfectly crispy crust - no soggy bottoms allowed.

Paid links used in this post. Read more about my link usage policies.
Why You'll Love This Taco Crescent Ring

Today, we're bringing back the crescent ring.
Ever remember a recipe from years ago and think, "why did I stop making this?" That's exactly what happened here. This used to be one of our go-to dinners before kids, and somehow it fell out of the rotation. That changes today!
This easy Taco Crescent Ring is a flaky, cheesy Mexican-inspired dinner that comes together in just over 30 minutes. If you love recipes like my Frito Pie Casserole or easy Taco Mac, you'll love this one too. It's fun, easy, and always a hit!
I'm hoping to keep this one in the dinner rotation from here on out - I hope you do too!

Ingredient Notes
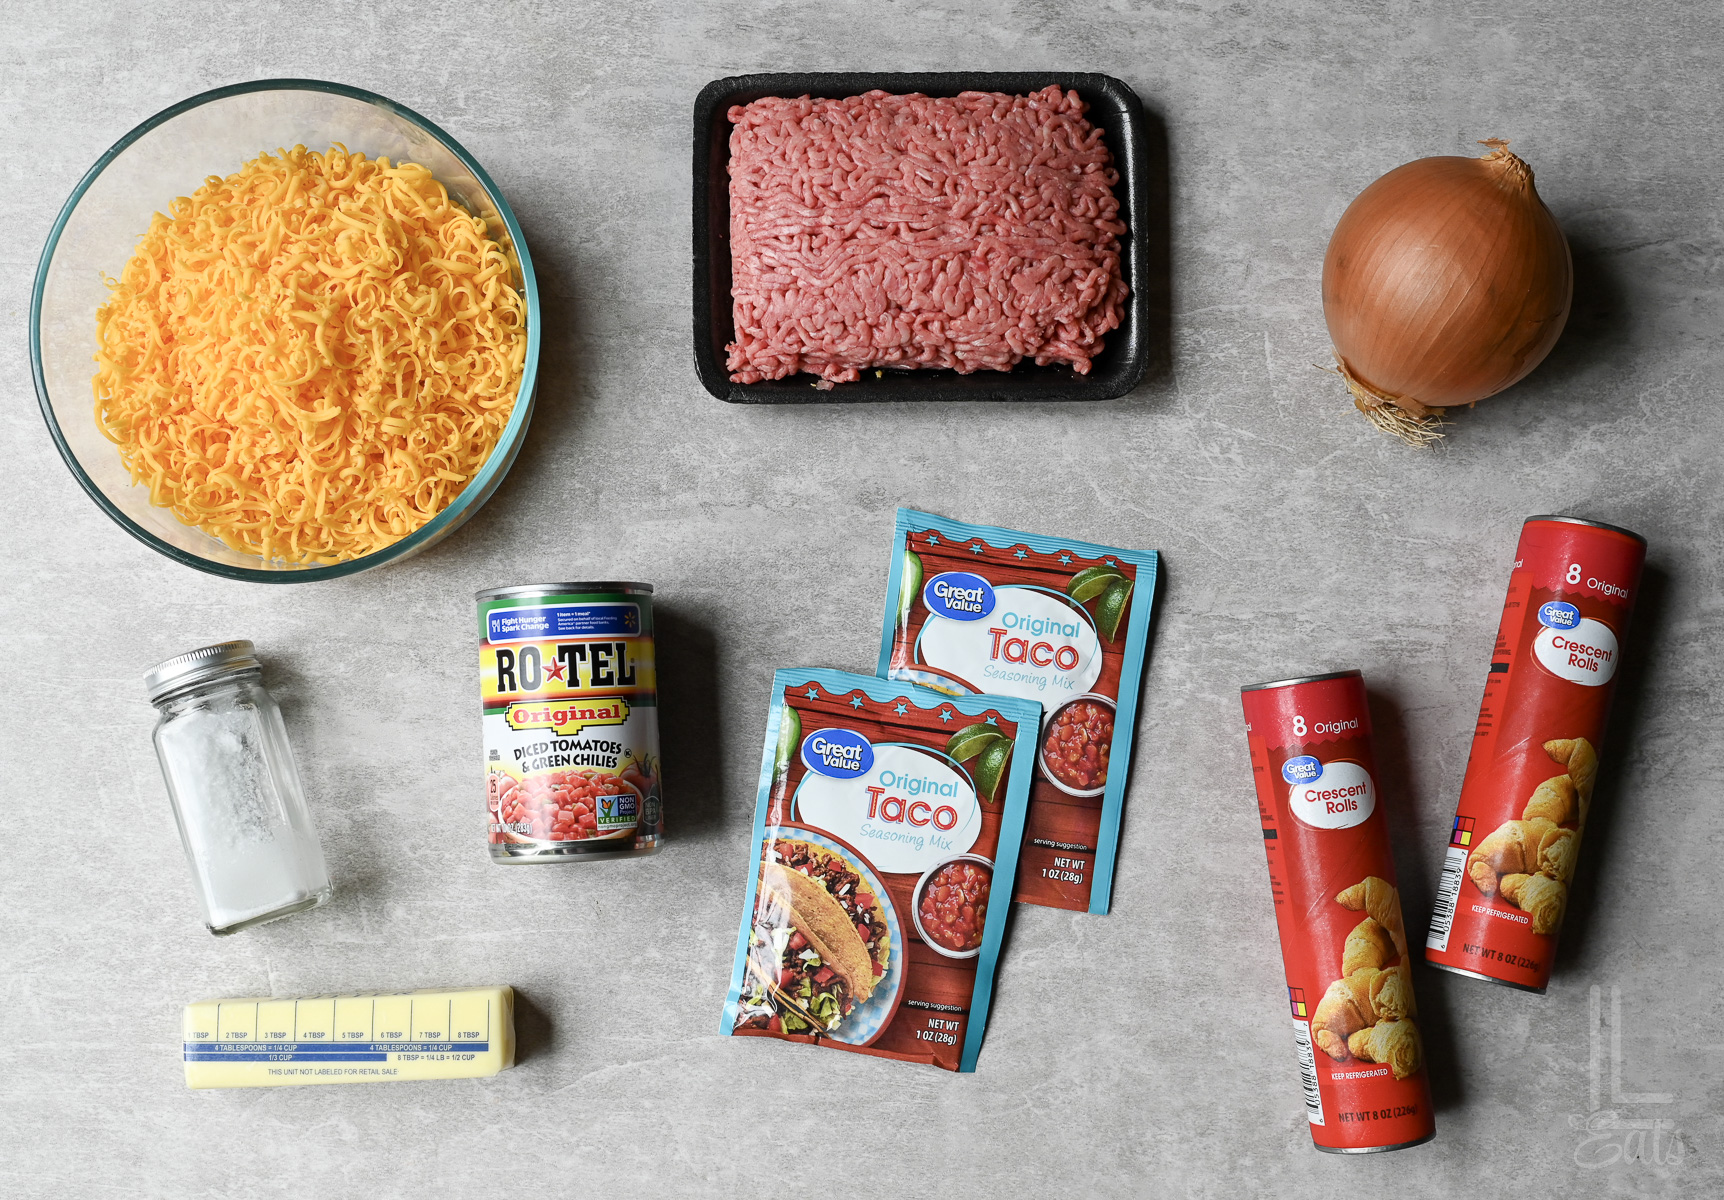
(See recipe card at the bottom of this post for exact ingredient measurements.)
- Ground Beef: I like to use a 90/10 lean ground beef. It gives you all the flavor without a ton of excess grease, which is key to keeping the crescent dough from getting soggy. You can also swap this for ground turkey or chicken if you want a lighter option!
- Crescent Rolls: You'll need two 8-ounce cans for this recipe. The store brand works just fine! Make sure to keep them in the fridge until the very second you're ready to assemble - the cold dough is much easier to work with.
- Rotel: This is the secret to that classic Tex-Mex flavor. I use the original variety (diced tomatoes and green chilies), but you can grab the Mild version if you're cooking for little ones or just don't love a ton of heat.
- Taco Seasoning: Two packets provide the perfect punch of flavor. If you're watching your sodium, you can use a low-sodium version or about 6 tablespoons of a homemade blend.
- Salt: Since taco seasoning packets already contain salt, those who are a little more sensitive to sodium might want to just use this "to taste." Give your meat a quick sample before you assemble the ring to see if it needs that extra pinch!
- Shredded Cheese: A Mexican Blend or sharp Cheddar works great here. If you have the time, grating your own cheese from a block gives you in a much better melt, but the pre-shredded bags are a lifesaver if you need a shortcut meal.
Optional Toppings
Totally optional, but in my opinion, the toppings are what makes a taco crescent ring special! My favorites...
- The Basics: Shredded lettuce, diced tomatoes, and sour cream.
- A Little Kick: Fresh or pickled jalapeños and a splash of hot sauce.
- The Creamy Stuff: Guacamole or sour cream are perfect to balance out the bite of that cheese.
- The "Extras": Sliced black olives, red onion, or a sprinkle of fresh cilantro.
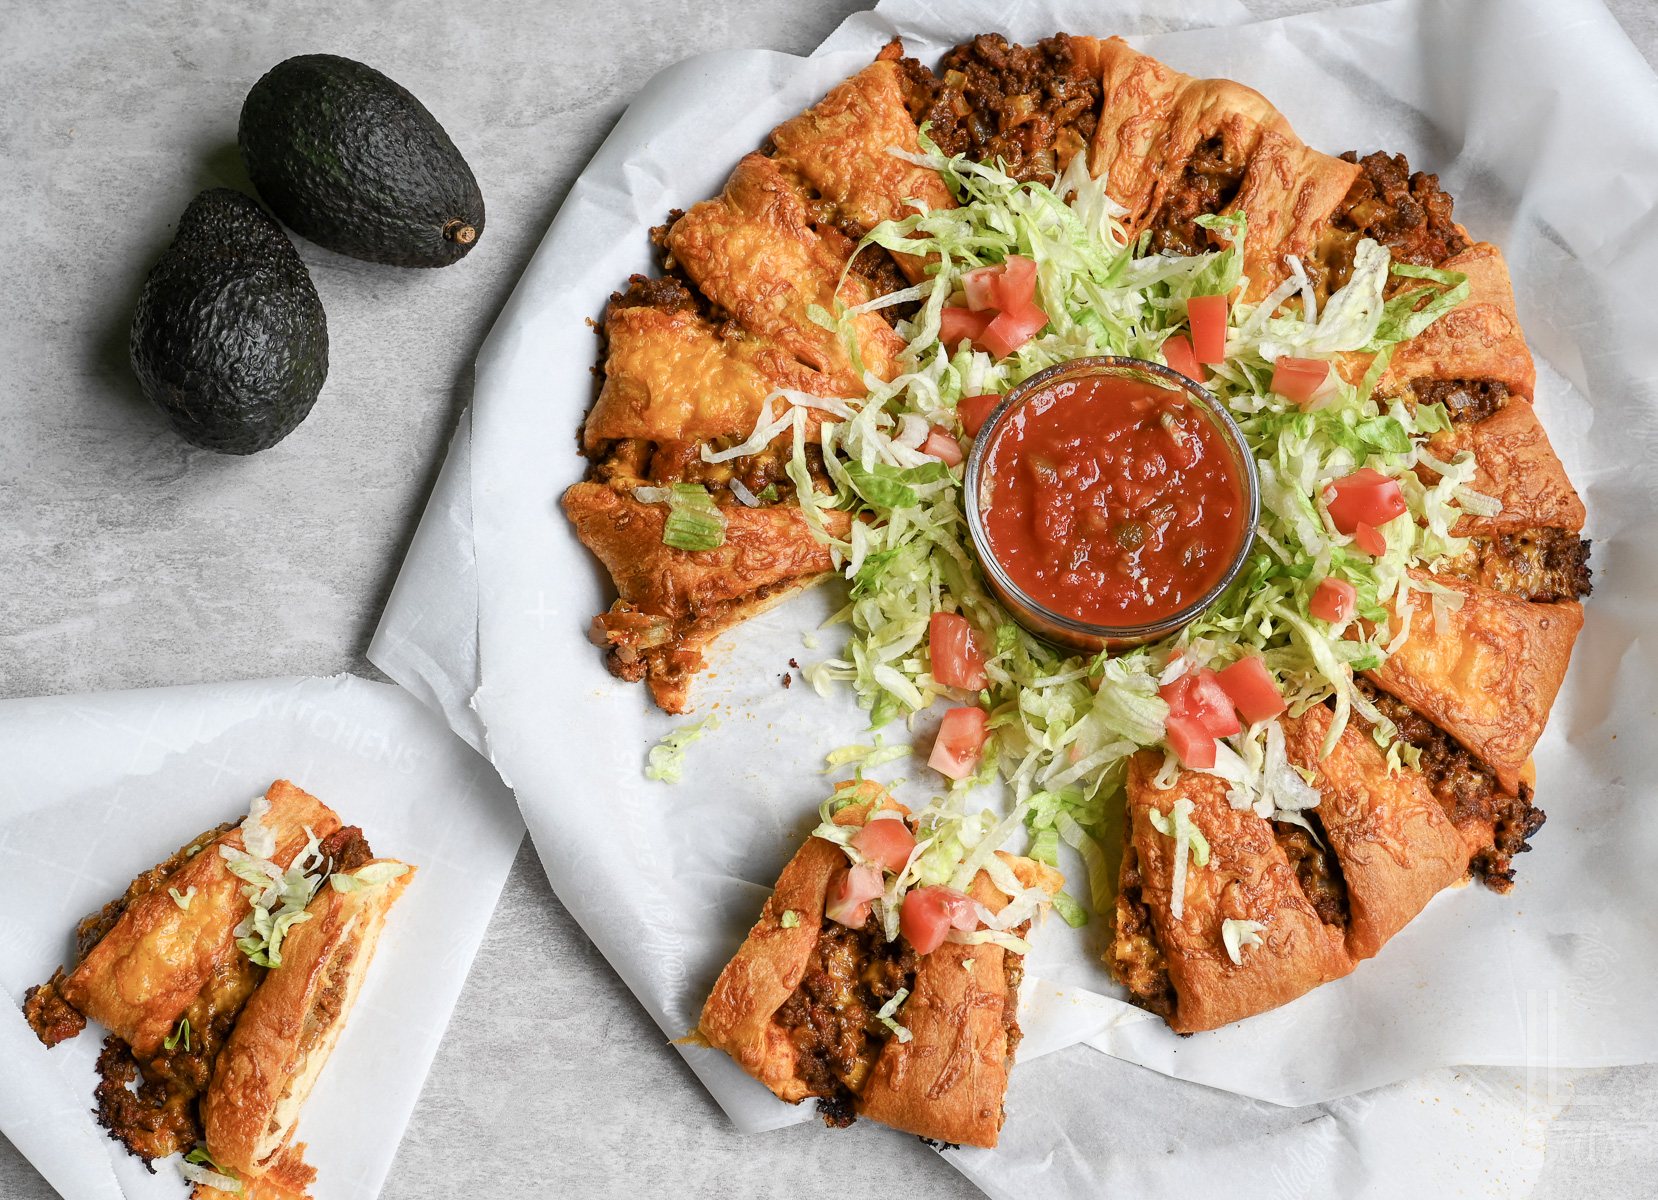
- For the Center: I usually pop a bowl of my favorite chunky salsa right in the middle of the ring to finish the look and make a perfect dipping zone!
Recipe Variations
- The "Lighter" Version: Swap the ground beef for ground turkey or chicken for a lighter meal that still keeps all the taco flavor.
- Vegetarian Option: Use two cans of black or pinto beans (drained and rinsed) instead of meat. Add sautéed peppers or corn if you'd like - just know this will make for extra filling, but it freezes well to use later!
- Breakfast Ring: Use cooked sausage or bacon with scrambled eggs instead of taco beef. Perfect for weekend brunch.
- Buffalo Chicken: Toss shredded rotisserie chicken with buffalo sauce and ranch seasoning. Swap cheddar for blue cheese crumbles or pepper jack for extra kick.
- The "Street Taco" Style: Use less cheese in the filling and top with diced white onion, lime juice, and lots of fresh cilantro.
How to Make a Taco Crescent Ring
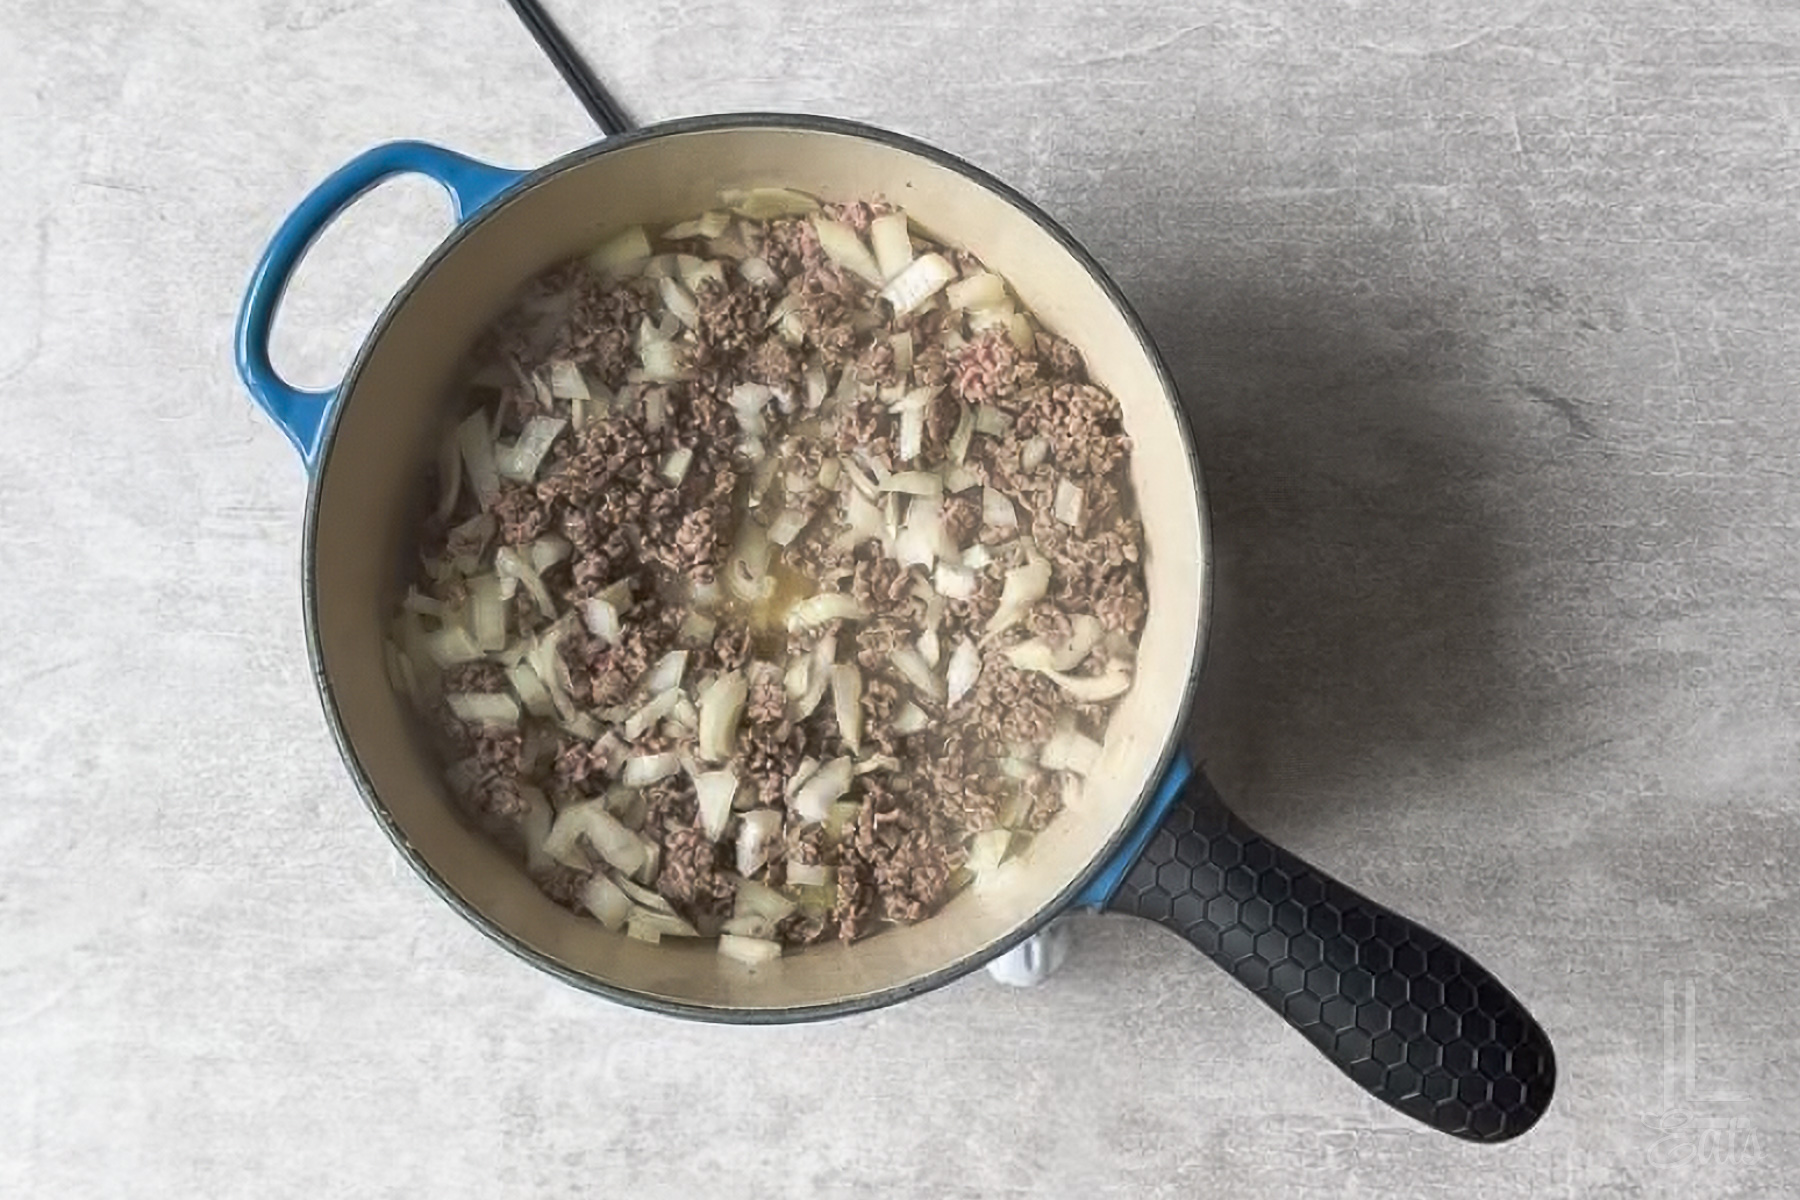
- Preheat oven and prepare filling. Preheat oven to 350°F. In a large skillet over medium heat, cook ground beef until brown, then add diced onion and cook until translucent. Drain as much excess grease as possible to prevent soggy crescent roll dough.
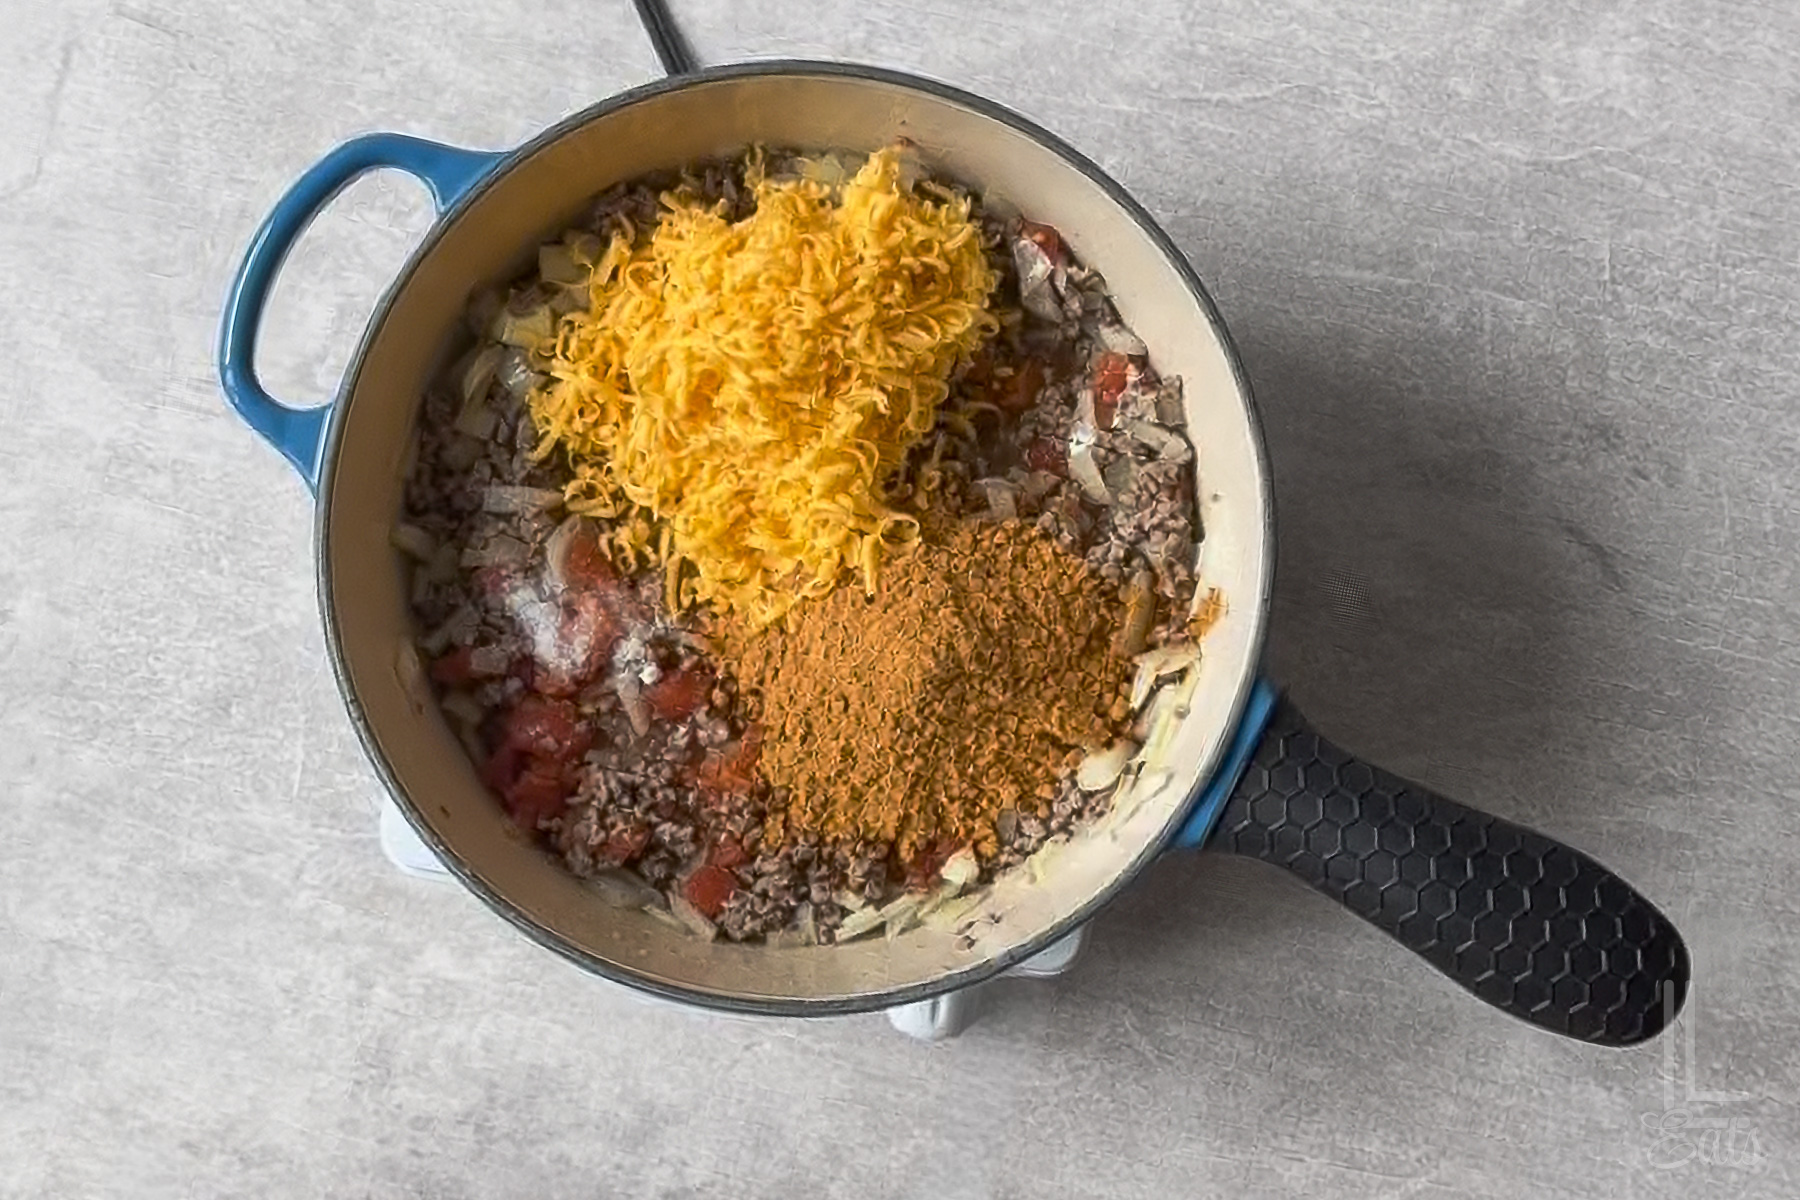
- Season the taco meat. Stir in drained Rotel, taco seasoning, salt, and shredded cheddar. Cook until 90% of the liquid has reduced, about 3-4 minutes. The mixture should be thick, not watery. Let mixture cool slightly while you do the next step - this will prevent soggy dough and let it thicken up a bit.
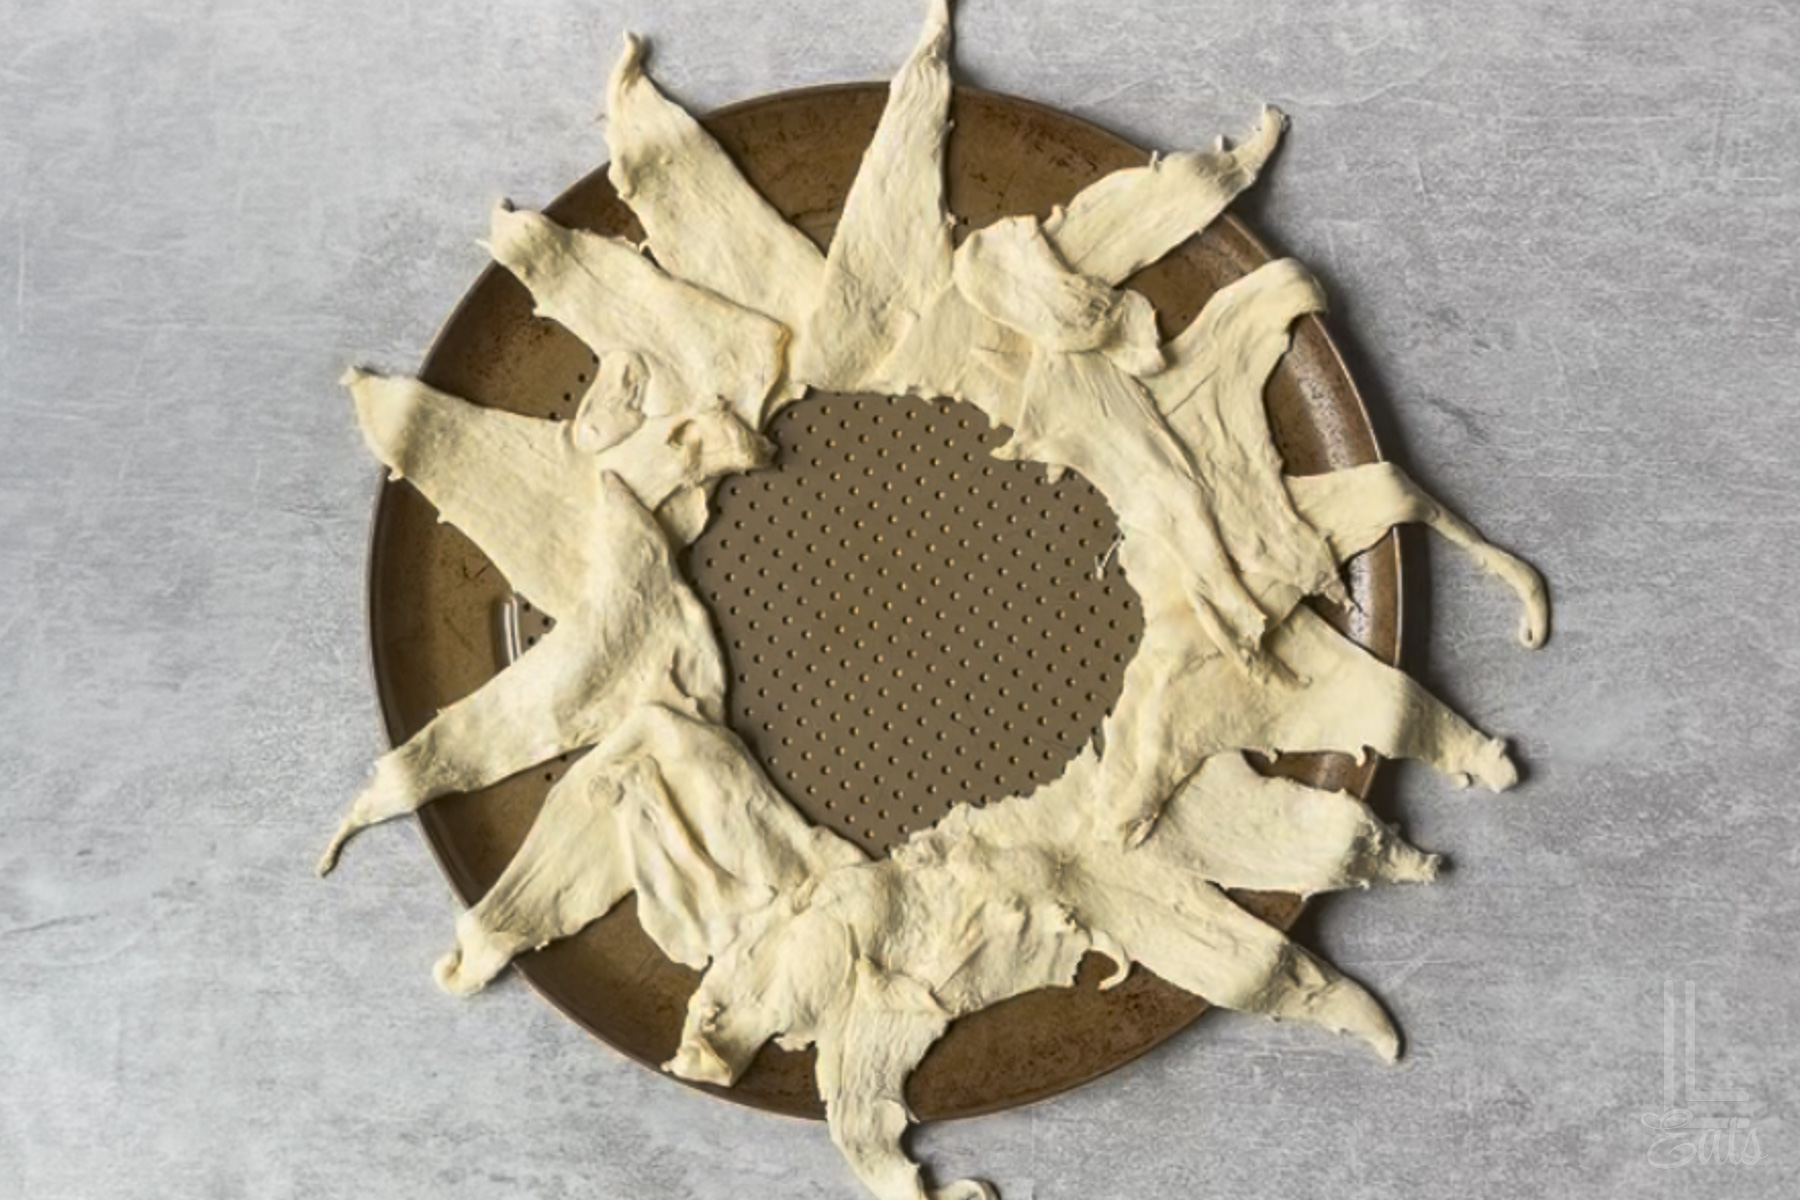
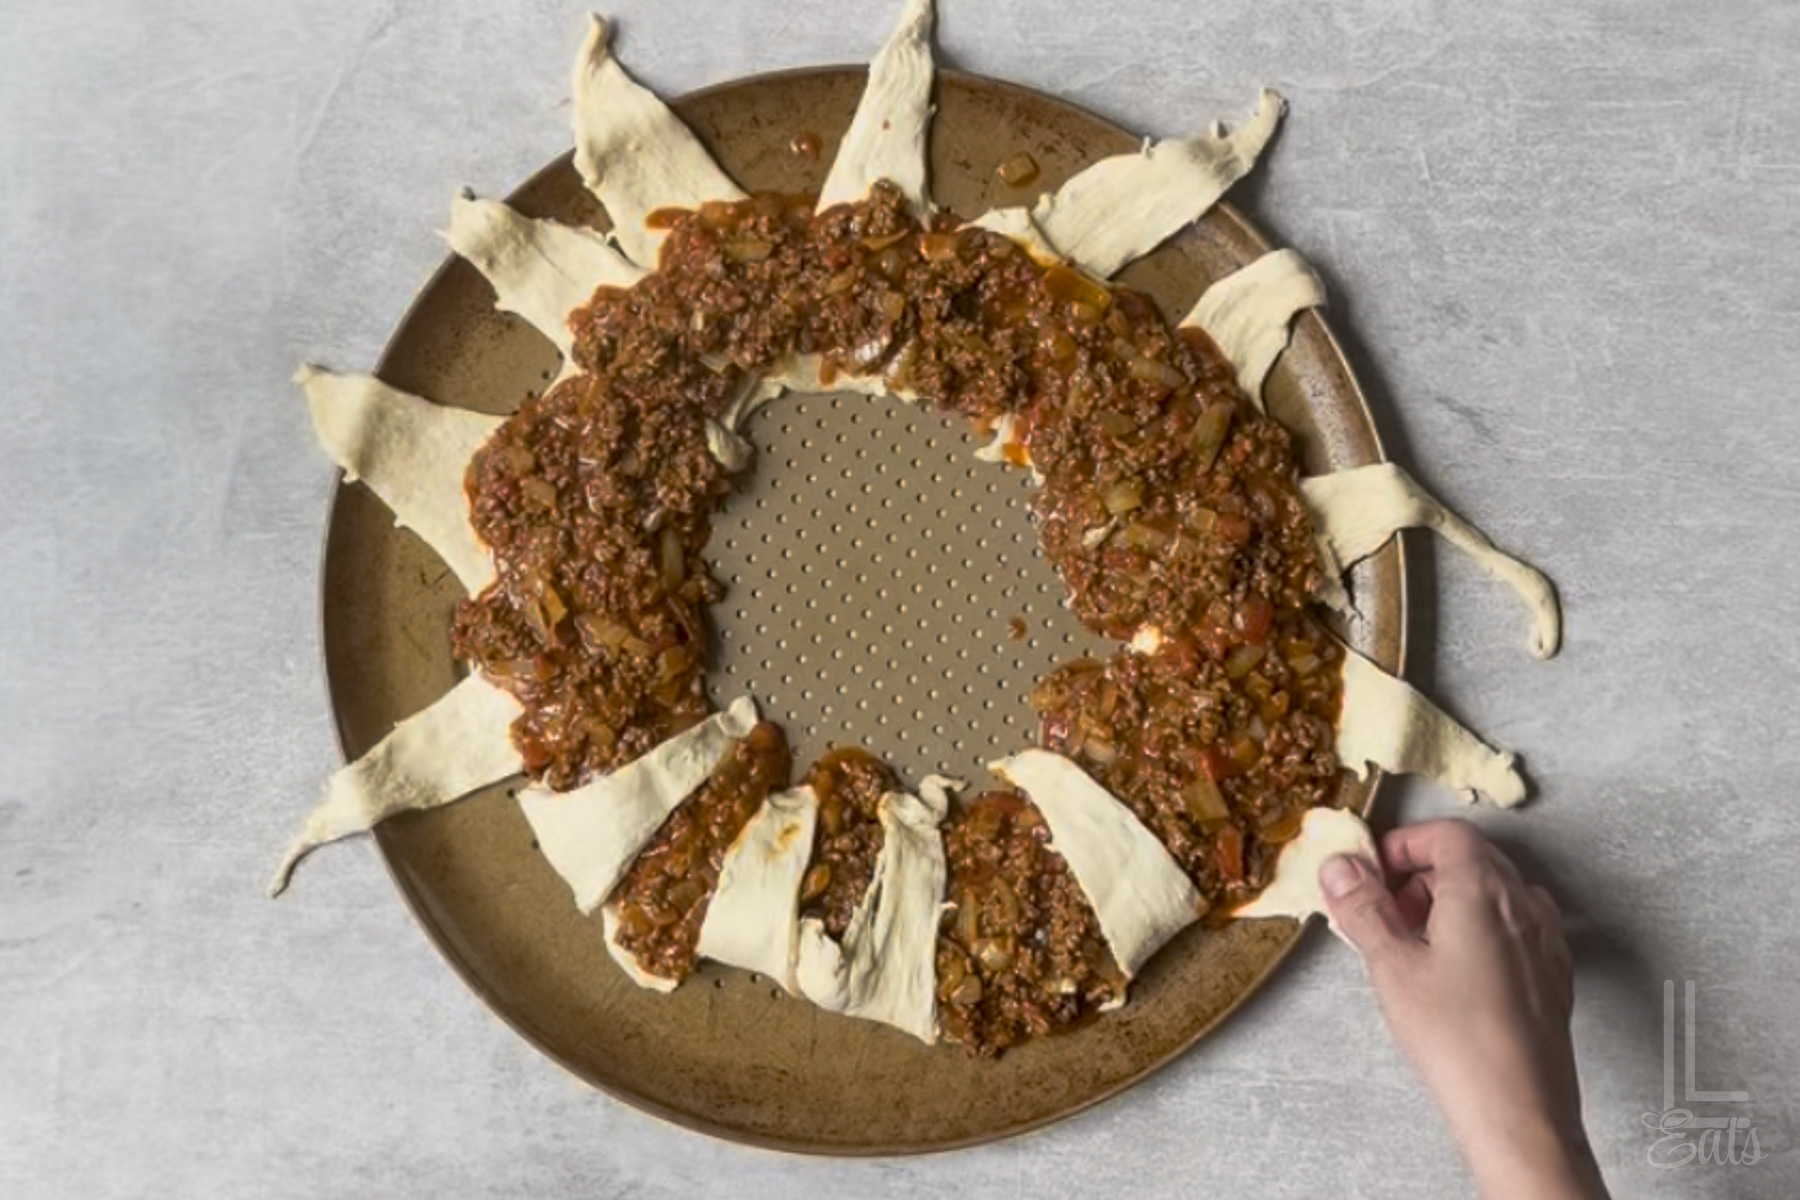
- Arrange crescent dough into a ring. On a 12-14 inch pizza pan, arrange crescent roll triangles in a circle with wide ends overlapping in the center and points facing outward. This forms a sunburst shape.
- Add taco filling and fold dough. Spoon taco filling evenly over the wide ends of the dough. Fold the pointed ends over the filling and tuck them under the center to seal the ring.
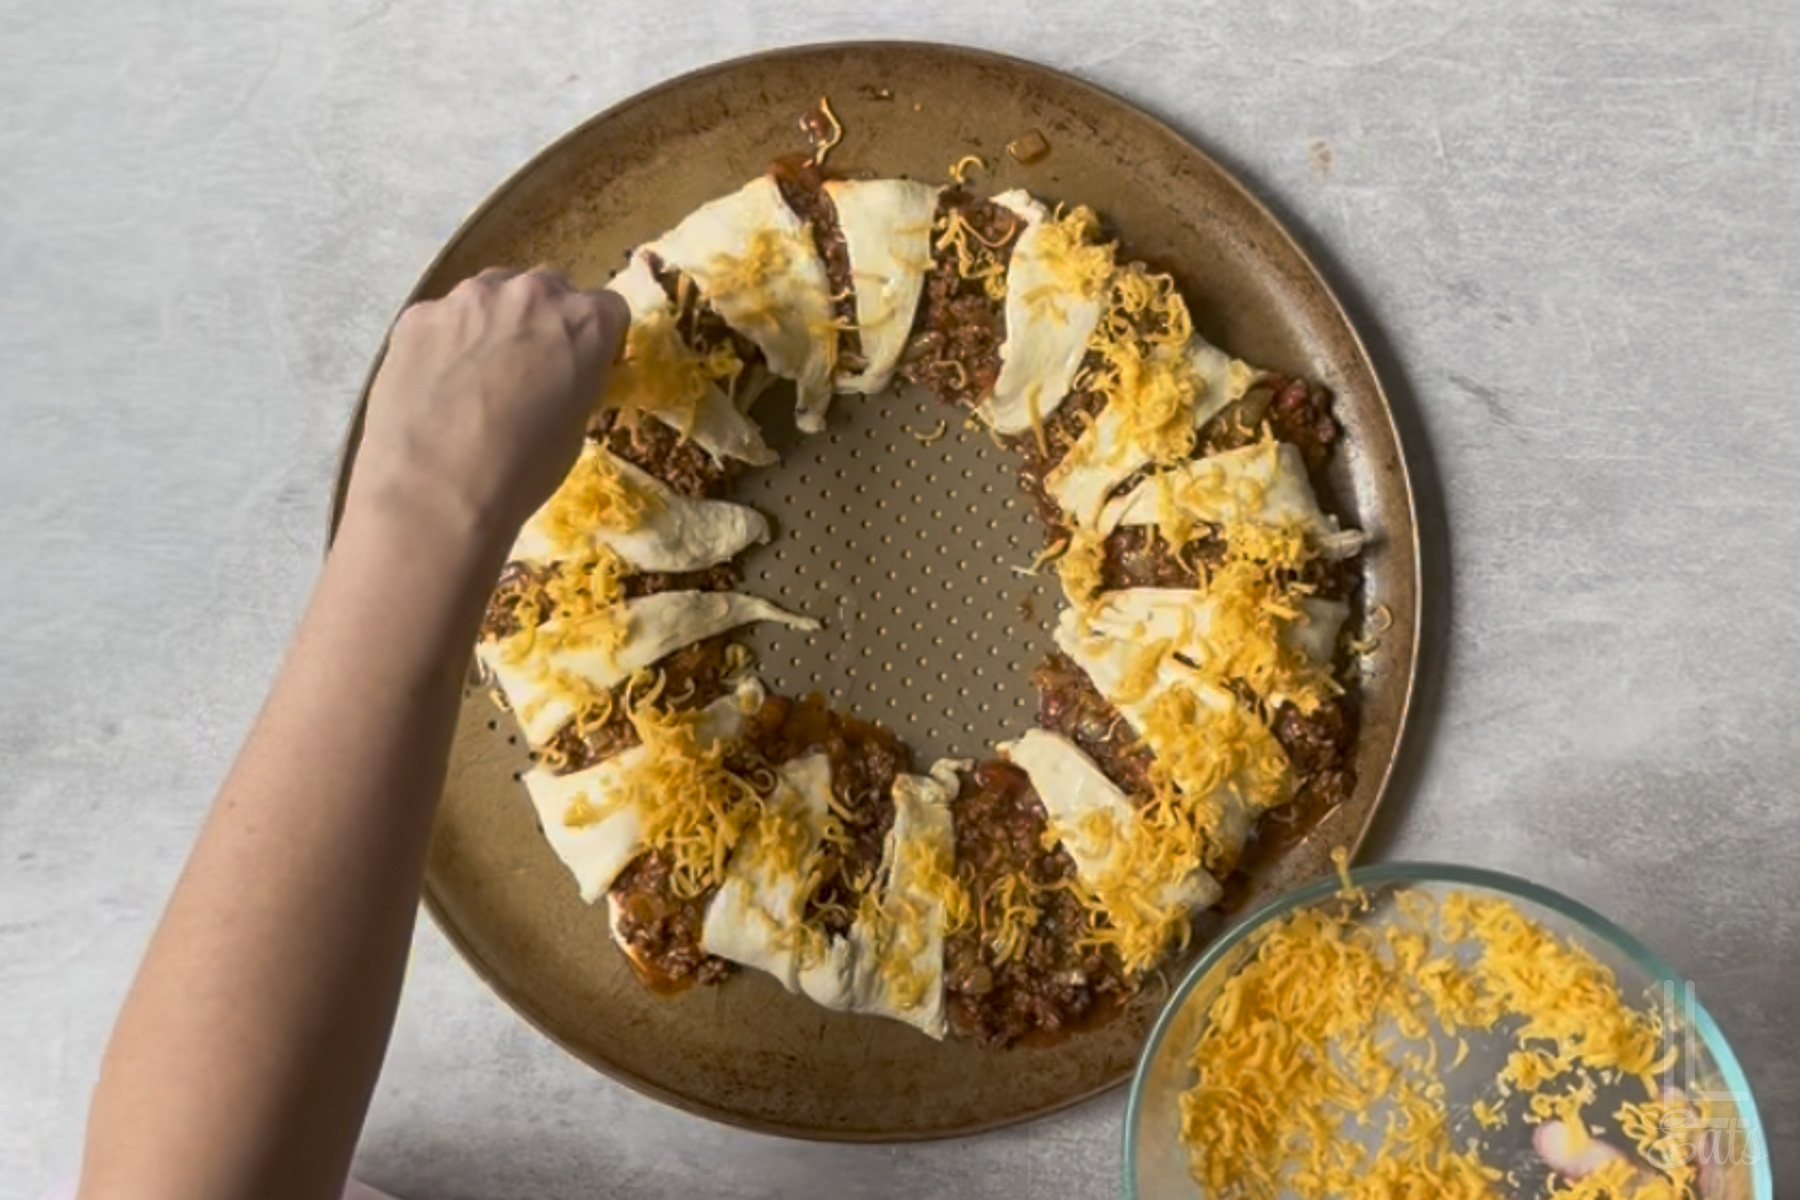
- Finish and bake. Brush the top with melted butter and sprinkle with remaining cheese (this is the secret to a crispy, pretty crust!). Bake at 350°F for 18-20 minutes, or until golden brown and fully cooked.
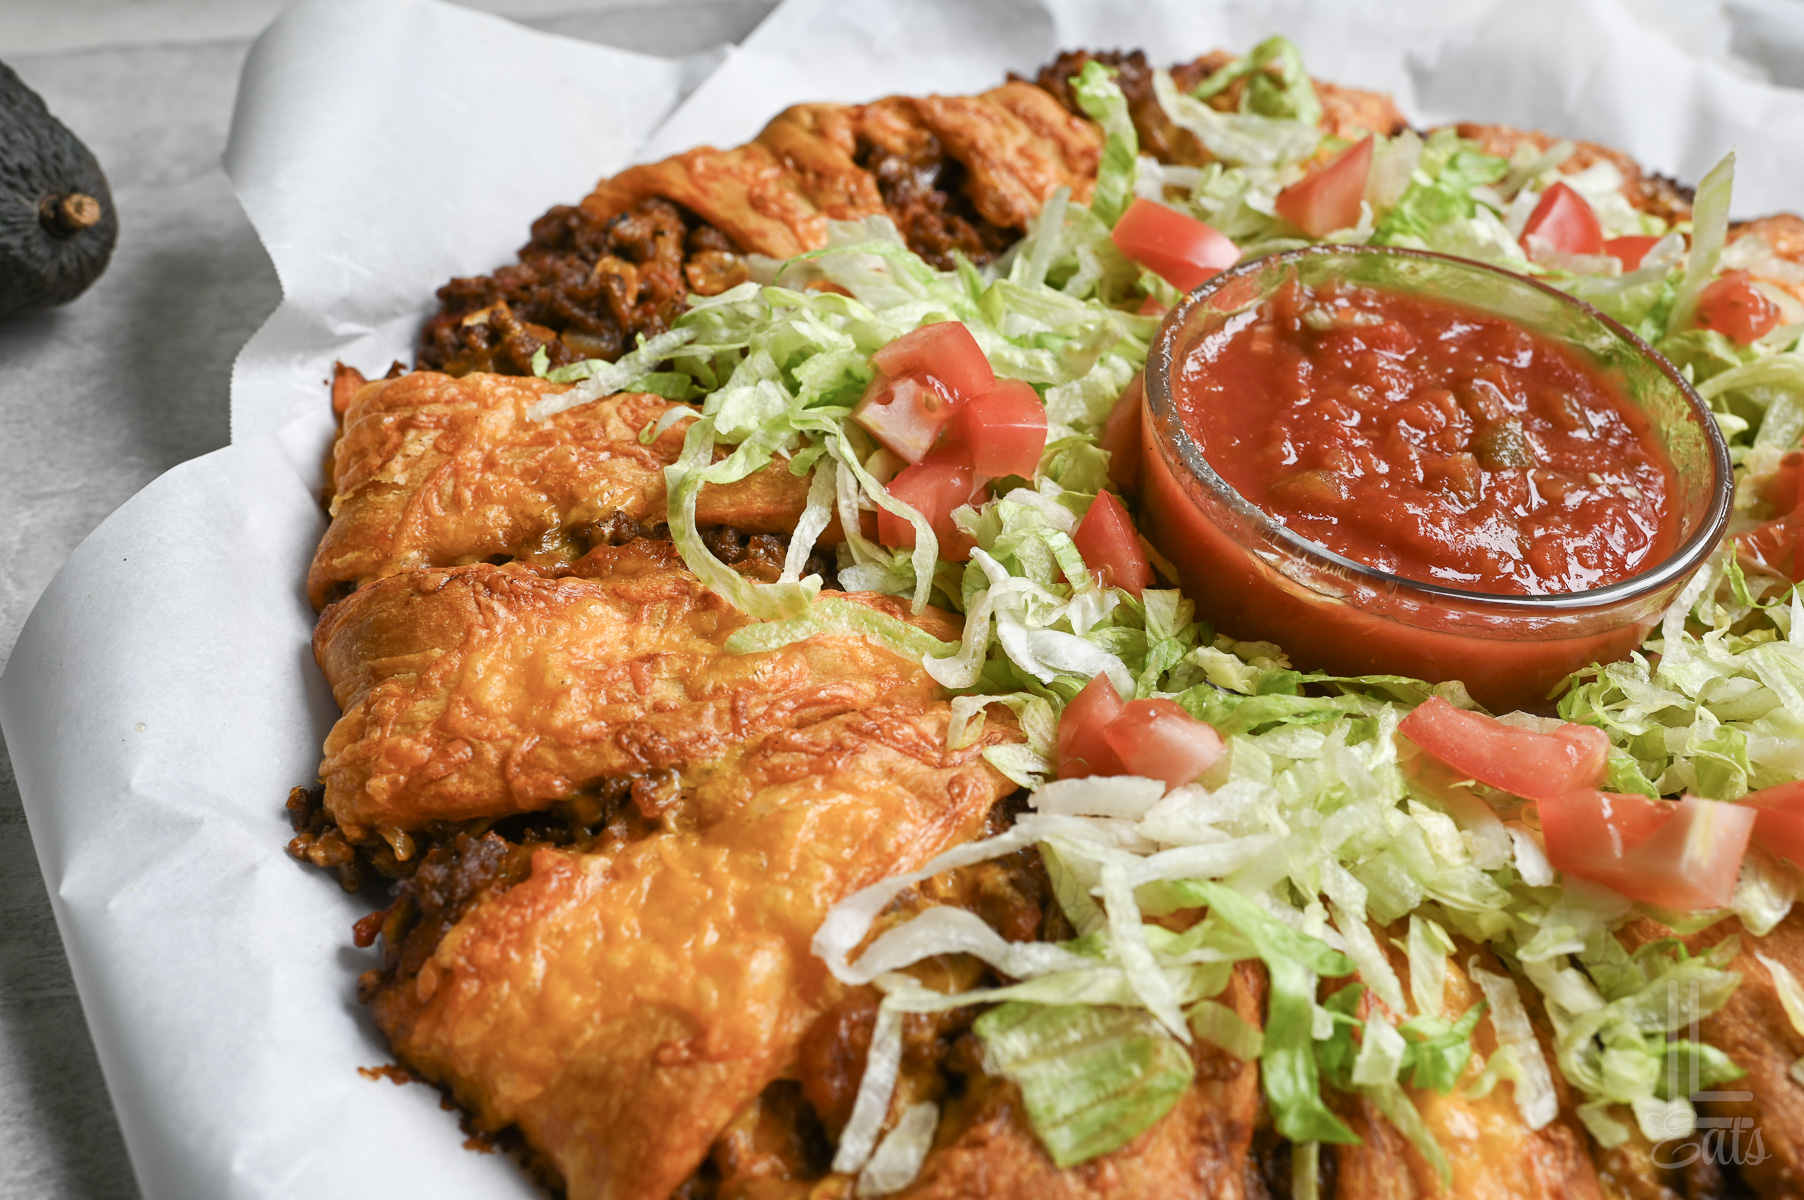
- Cool, slice, and serve. Let the taco crescent ring rest for 5 minutes before slicing. Serve with your favorite taco toppings like lettuce, sour cream, salsa, or guacamole.
Leftovers & Storage
Storage: I like to go on and cut the entire ring into servings (around 8-10), then store the servings stacked in a big container in the refrigerator. Make sure to store this one in an airtight container for up to 3-4 days after baking.
Reheating: For those crispy edges, it's best to reheat single servings in the Air Fryer or a convection oven for a few minutes. You can microwave in a pinch, but the crescent dough can turn kind of soggy.
Freezing: If you want to freeze this, it's best to just freeze the filling and make the actual crescent ring fresh. A great time-saving tip is to double the amount of filling you make, freeze half, and make an easy dinner 2-3 months down the road!
Leslie's Best Tips For Success
- Keep the Dough Cold: Don't open the cans until the meat is ready. Cold dough is much easier to shape and puffs up much better than room temperature dough.
- Prevent a Soggy Crust: Make sure your beef mixture isn't watery or greasy before adding it to the dough ring. Drain your beef & onions well before adding the other ingredients, simmer the Rotel until the liquid evaporates, and let the meat cool a little bit before placing it on the dough.
- The Bowl Trick: If needed, when making your sunburst shape, place a 5-inch bowl in the center of your pan as a guide. Lay the wide ends of the triangles against it to create an even circle.
- Overlap for Strength: Overlap the wide bases of the triangles to create a sturdy "floor." This prevents the filling from falling out when you slice it.
- Save a couple of pieces of crescent roll dough to fill in gaps. You'll have 16 triangles; I normally use 13-14 of them, then tear the remaining pieces to fill in any thin spots in my sun shape.
- Don't Overstuff: If you pile the meat too high, the points won't reach the center to tuck under. An even layer makes for that perfect dough-to-meat ratio.
- Use Parchment Paper: Even with non-stick pans, parchment makes it way easier to slide the finished ring onto a serving platter without it breaking.
- If your pizza pan has holes in the bottom like mine does, I recommend putting a baking sheet under in the oven to catch any falling grease.
FAQs & Troubleshooting


Here's to bringing back family favorites! 🌮 If you give this one a try and love it, I want to hear what you think - just leave your recipe rating in the comments below!
Taco Crescent Ring
Ingredients
- 1 lb ground beef
- 1 small onion (diced)
- 2 packs taco seasoning
- 1 teaspoon salt
- 1.5 cups shredded cheddar cheese (divided)
- 10 oz Rotel tomatoes & green chilies (drained)
- 16 oz crescent roll dough (2 standard cans)
- 1 tablespoon melted butter
Toppings (Optional)
- shredded lettuce
- diced tomatoes
- salsa
- sliced black olives
- sour cream
Instructions
- Preheat oven to 350℉.
- In a large pan, brown the ground beef. Add diced onion and cook several minutes, until translucent. Drain as much excess fat as possible.
- Add drained Rotel, taco seasoning, 1 cup of shredded cheddar, and salt; stir well. Cook mixture until it thickens some and excess moisture cooks off, 3-4 minutes (or until 90% of the excess moisture evaporates).
- Open crescent rolls and divide triangles. On a large pizza pan, make a sunshine out of the divided pieces of crescent rolls, with the smaller points of the triangles pointing towards the outside. (See picture in the post.)
- Spoon taco beef mixture on the inside of the crescent roll pieces and evenly distribute. Fold smaller points of the triangle in until a ring forms.
- Brush top of the crescent roll ring with melted butter. Sprinkle ½ cup remaining cheddar cheese on top.
- Bake at 350℉ for 18-20 minutes, until top of the crescent ring is browned.
- Serve in slices, topped with optional toppings.
Notes
- Prevent a Soggy Crust: This is critical. Drain the beef well and simmer the Rotel until the liquid is almost gone before adding the meat to the dough.
- Keep Dough Chilled: Wait to open crescent cans until the meat is seasoned and slightly cooled. Cold dough is easier to shape and less likely to tear.
- The Sunburst Shape: Use a 12-14 inch pizza pan. If needed, place a 5-inch bowl in the center as a guide while laying down your triangles.
- Filling Gaps: You'll have 16 triangles total. Use 13-14 for the ring, then use the remaining dough to patch any thin spots or gaps.
- Avoid Overstuffing: Keep the meat layer even. If piled too high, the triangle points won't be long enough to tuck securely under the center.
- Drip Protection: If your pizza pan has holes, place a baking sheet on the rack below to catch any stray cheese or grease.
- Reheating: Avoid the microwave. Reheat leftovers in an air fryer at 350°F for 3-4 minutes to restore the flaky crunch.
Nutrition Facts

Leslie Lambert is a lifestyle writer and content creator specializing in home organization, family recipes, and intentional living. With 17 years of experience in blogging and digital storytelling, she helps busy women create calm, purposeful homes they love.