
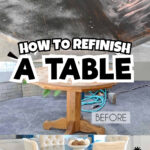
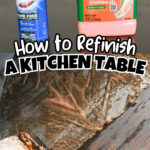
Thinking about updating an old kitchen or dining table? Learning how to refinish a wood table is a beginner-friendly DIY project that can turn worn, dated furniture into something durable and beautiful again.
In this guide to how to refinish a wood table, you'll learn how to strip the old finish, repair surface wear, sand and prep the wood, then apply stain and a protective topcoat built for daily use.
Paid links used in this post. Read more about my link usage policies.
TL;DR: How to Refinish a Wood Table
- Strip off the old finish down to bare wood
- Sand smooth (80 → 120 → 180 grit)
- Clean dust and prep the surface
- Restain the wood evenly
- Seal with multiple coats of polyurethane for durability
- Total time: 2-7 days (mostly drying time)
- Difficulty: Beginner-friendly, but patience required
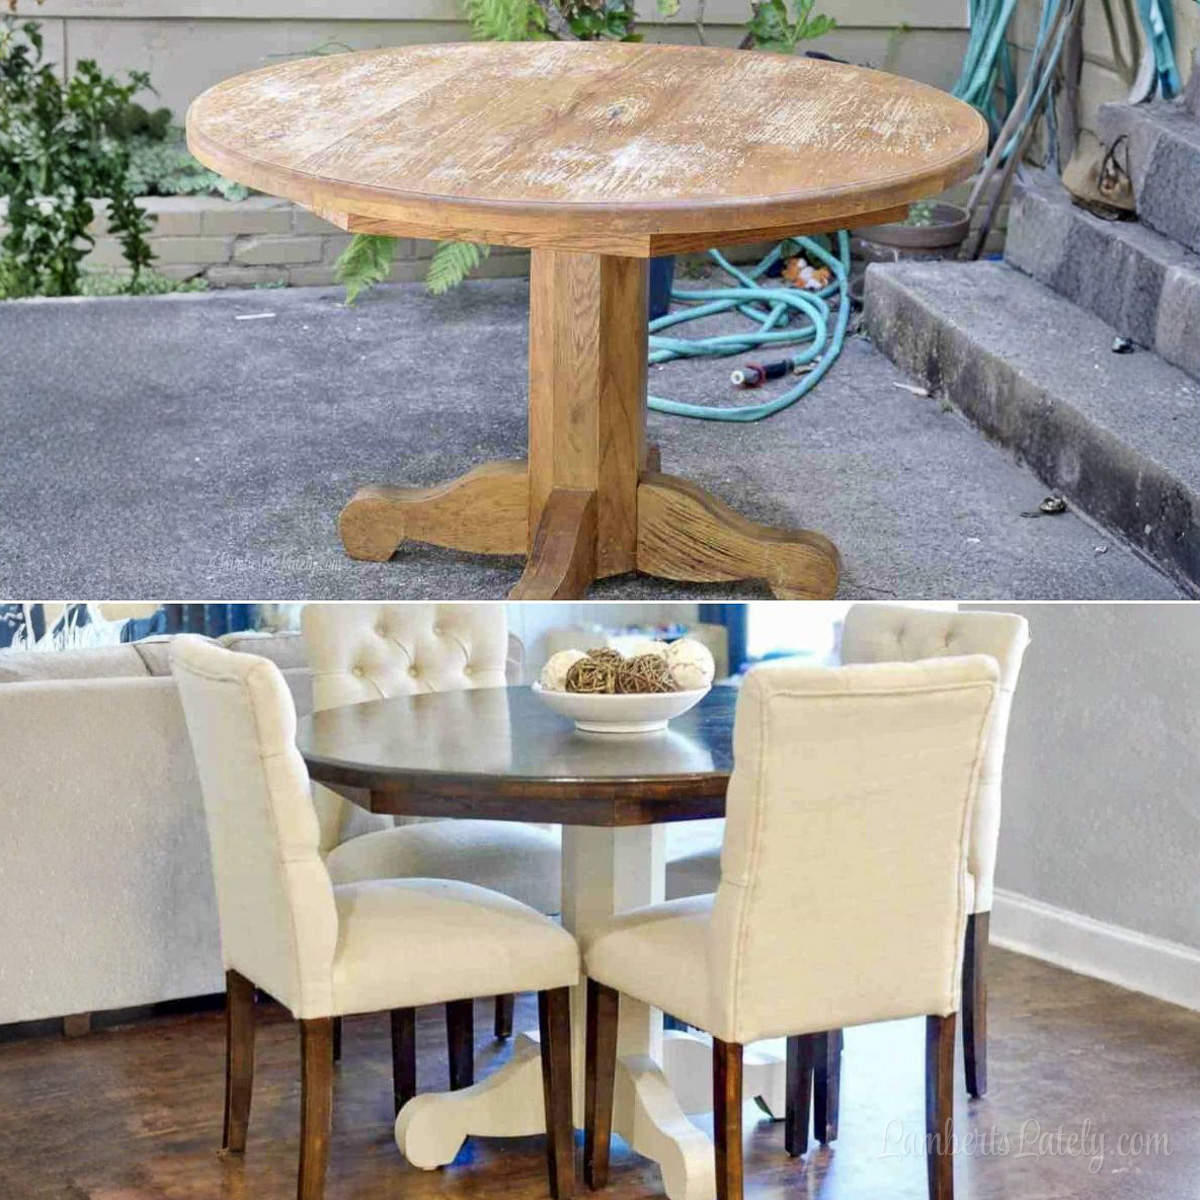
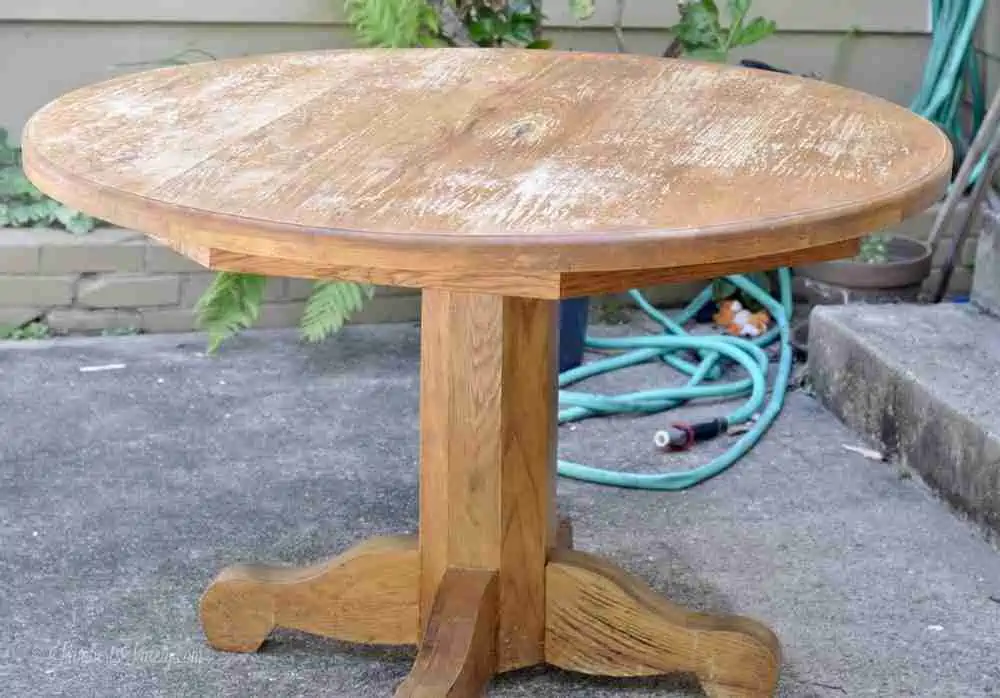
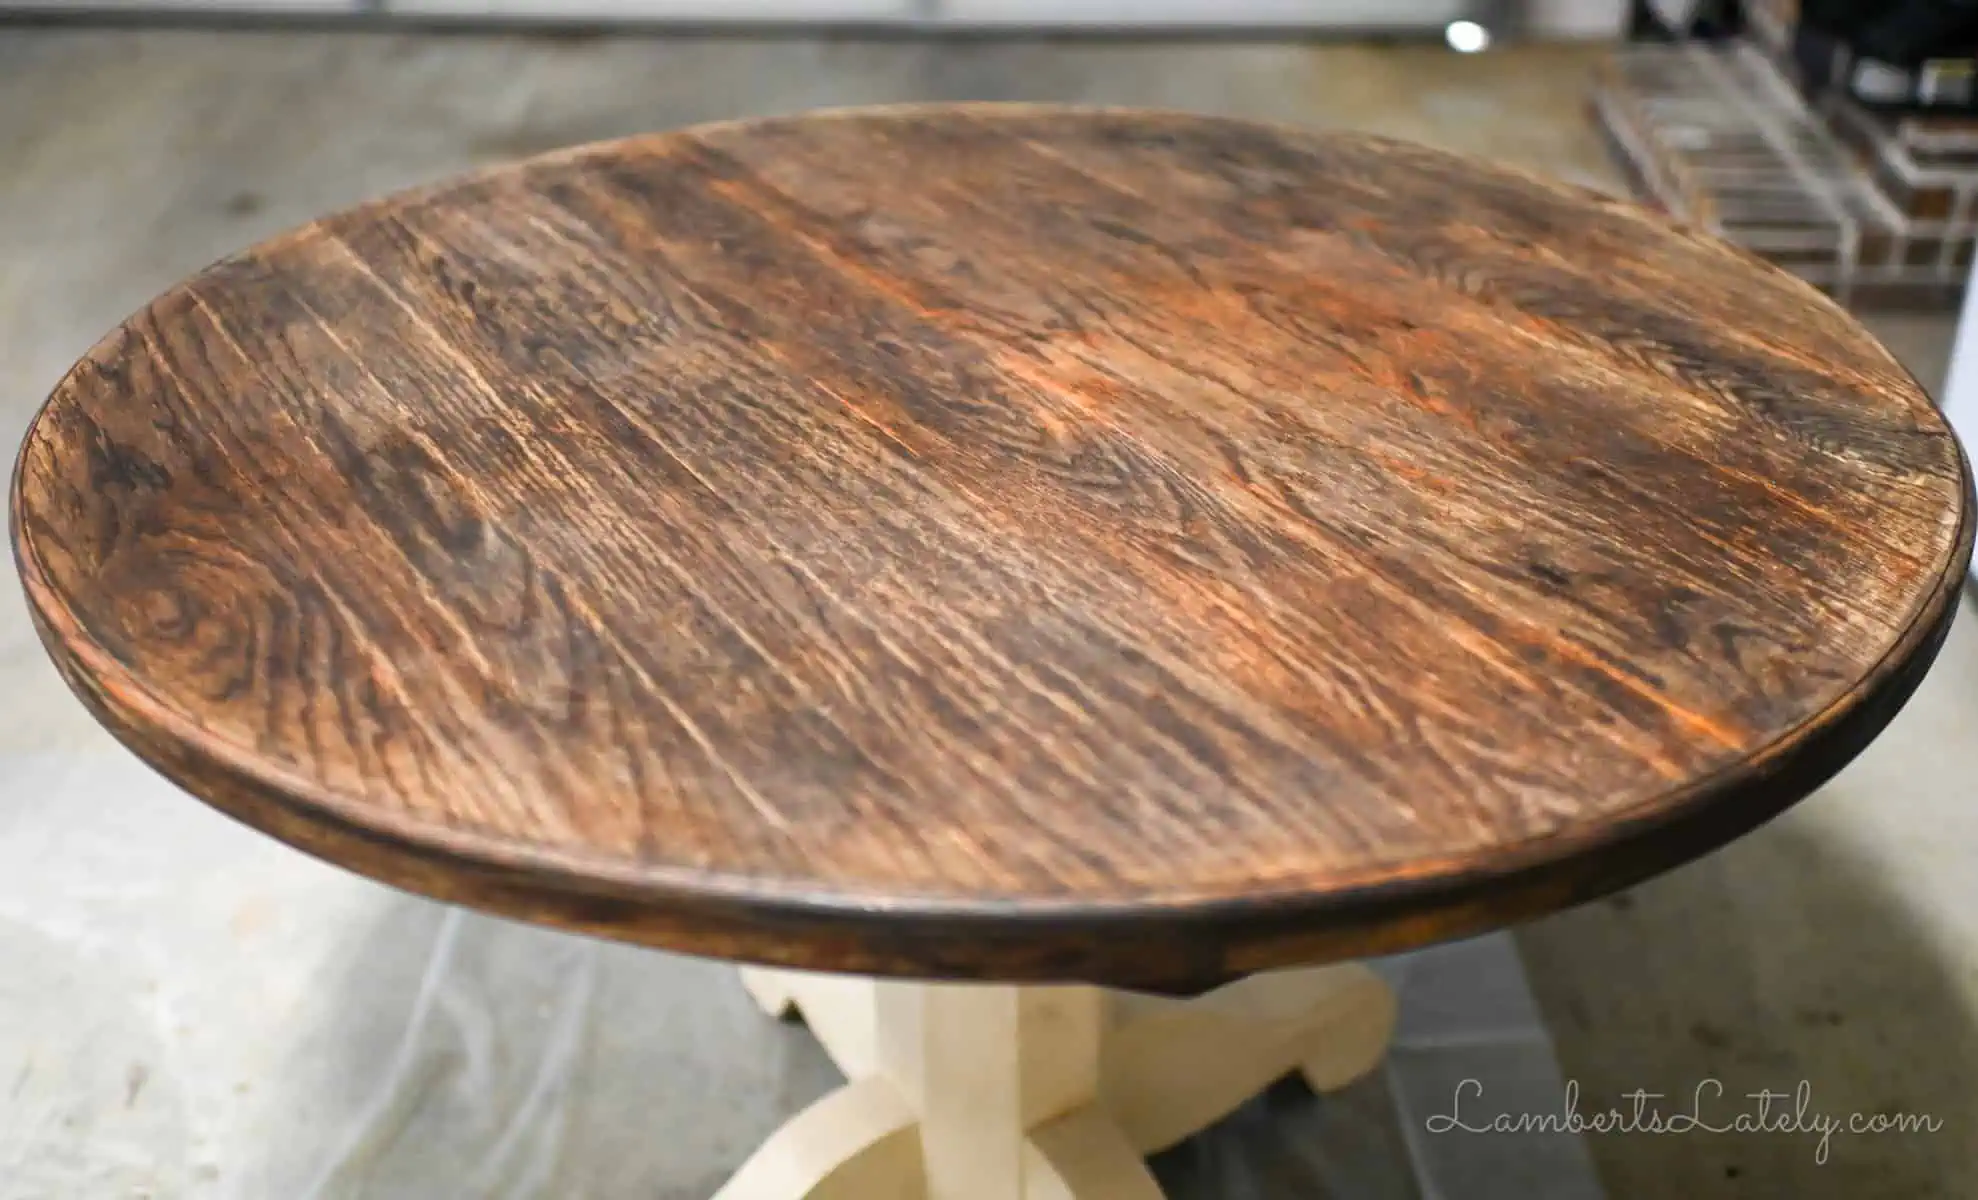
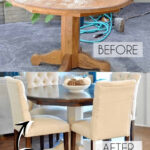
Around 10 years ago, I took a family heirloom from a worn, dated orange wood stain...
...to this gorgeous, updated classic!
Before tackling this, I had never refinished a single piece of furniture in my life, so it was a major learning experience. In the original version of this post, I walked everyone through our process from stripping to varnishing. It racked up over 100,000 views, so I'd say it helped a few of you out!
But...at this point, it had been almost 7 years since we completed that first project. We use our refinished wood table almost daily for family meals, crafts, and life, so it had gathered some normal wear and tear.


It was past time to give it some love.
When we first did this project, we didn't have to do much in the way of heavy stripping. This time, we absolutely did. Because we wanted it to look just as beautiful as the first makeover, we had to completely strip the old finish off the tabletop and even out the wood tone before we could add fresh stain.
This was the perfect opportunity to update this tutorial with a highly detailed, beginner-focused look at exactly how to strip down and refinish a dining table to give it new life. Let's get going!
Crucial First Step: Is Your Table Solid Wood or Veneer?
Before you buy a single supply, you must check if your table is solid wood or wood veneer.
- Solid Wood: Can handle heavy chemical stripping, aggressive sanding, and deep staining.
- Wood Veneer: They have a paper-thin layer of real wood glued over particleboard or MDF. If you take a heavy-grit orbital sander to a veneer table, you will sand completely through the wood layer in seconds, destroying the table.
How to check: Look at the underside of the tabletop. If the wood grain underneath perfectly matches the grain pattern on top, it's solid wood. If you see particleboard, plywood, or a completely different wood pattern underneath, it is a veneer and must be sanded super gently with fine-grit sandpaper only.
Supplies Needed to Refinish a Wood Table
Materials
Drop cloth
Stripping agent (I highly recommend Citristrip - more detail about that below)
Putty Knife
Mineral spirits
Paintbrush
Scrub sponges
80-Grit Sandpaper
Stain (we love Minwax Dark Walnut)
Sponge brushes
Old t-shirts/rags
Polyurethane
Paint of your choice (if using in addition to stain)
Thick rubber gloves
Tools
Orbital sander (not required, but a massive time-saver for large dining tabletops)
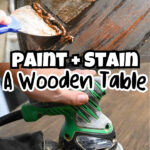
Step 1: Strip the Existing Finish Off the Table
First things first - lay down a heavy drop cloth. This is a really messy project! You absolutely need to do this step in a highly ventilated area, like an open garage, a workshop, or a covered porch.
Because our table had layers of old stain and polyurethane protective topcoat, everything had to come completely off before we could add anything new. Think of it like old, chipped fingernail polish...if you just paint over it, the final result will look uneven, bumpy, and messy.
For a smooth, professional result, the surface must be taken all the way down to bare wood.
The Experiment: Stripping Gel vs. Oven Cleaner

I wanted to run a little test. I kept seeing viral DIY trends claiming you could use cheap oven cleaner to strip wood furniture, and I was incredibly intrigued. So, I bought a traditional chemical stripping gel and a can of oven cleaner, coating exactly half of the tabletop in each to see what happened.
I let them sit for about two hours, then tried to scrape the old finish off using a putty knife. Here are the real results:
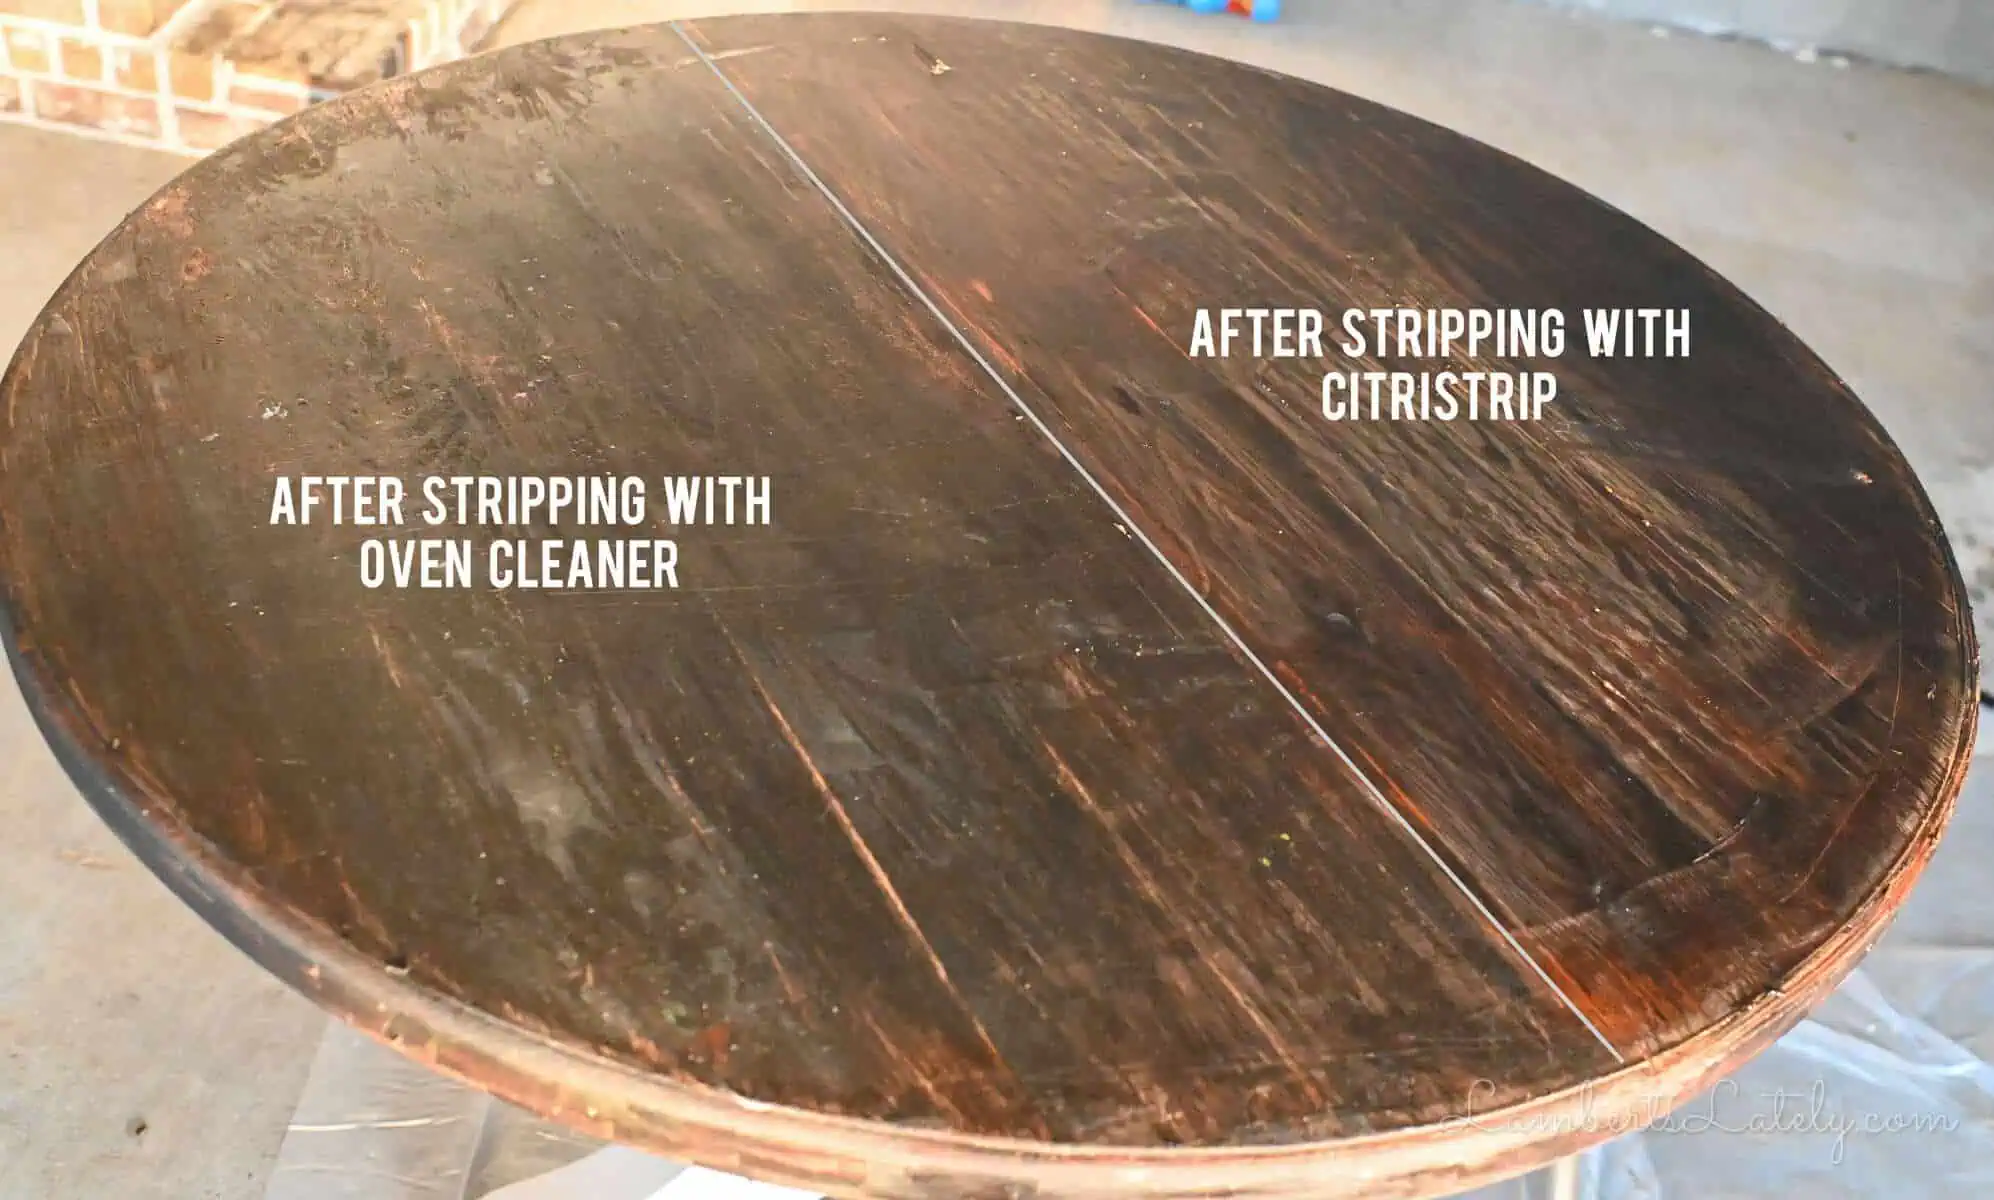
I really wanted the oven cleaner option to win because it's cheaper, but it just didn't work well enough. While it softened a little bit of the surface, the dedicated stripping gel was way more effective at lifting the actual polyurethane layers.
Save yourself the frustration and go straight for the Citristrip!
How to Apply and Scrape Stripping Gel
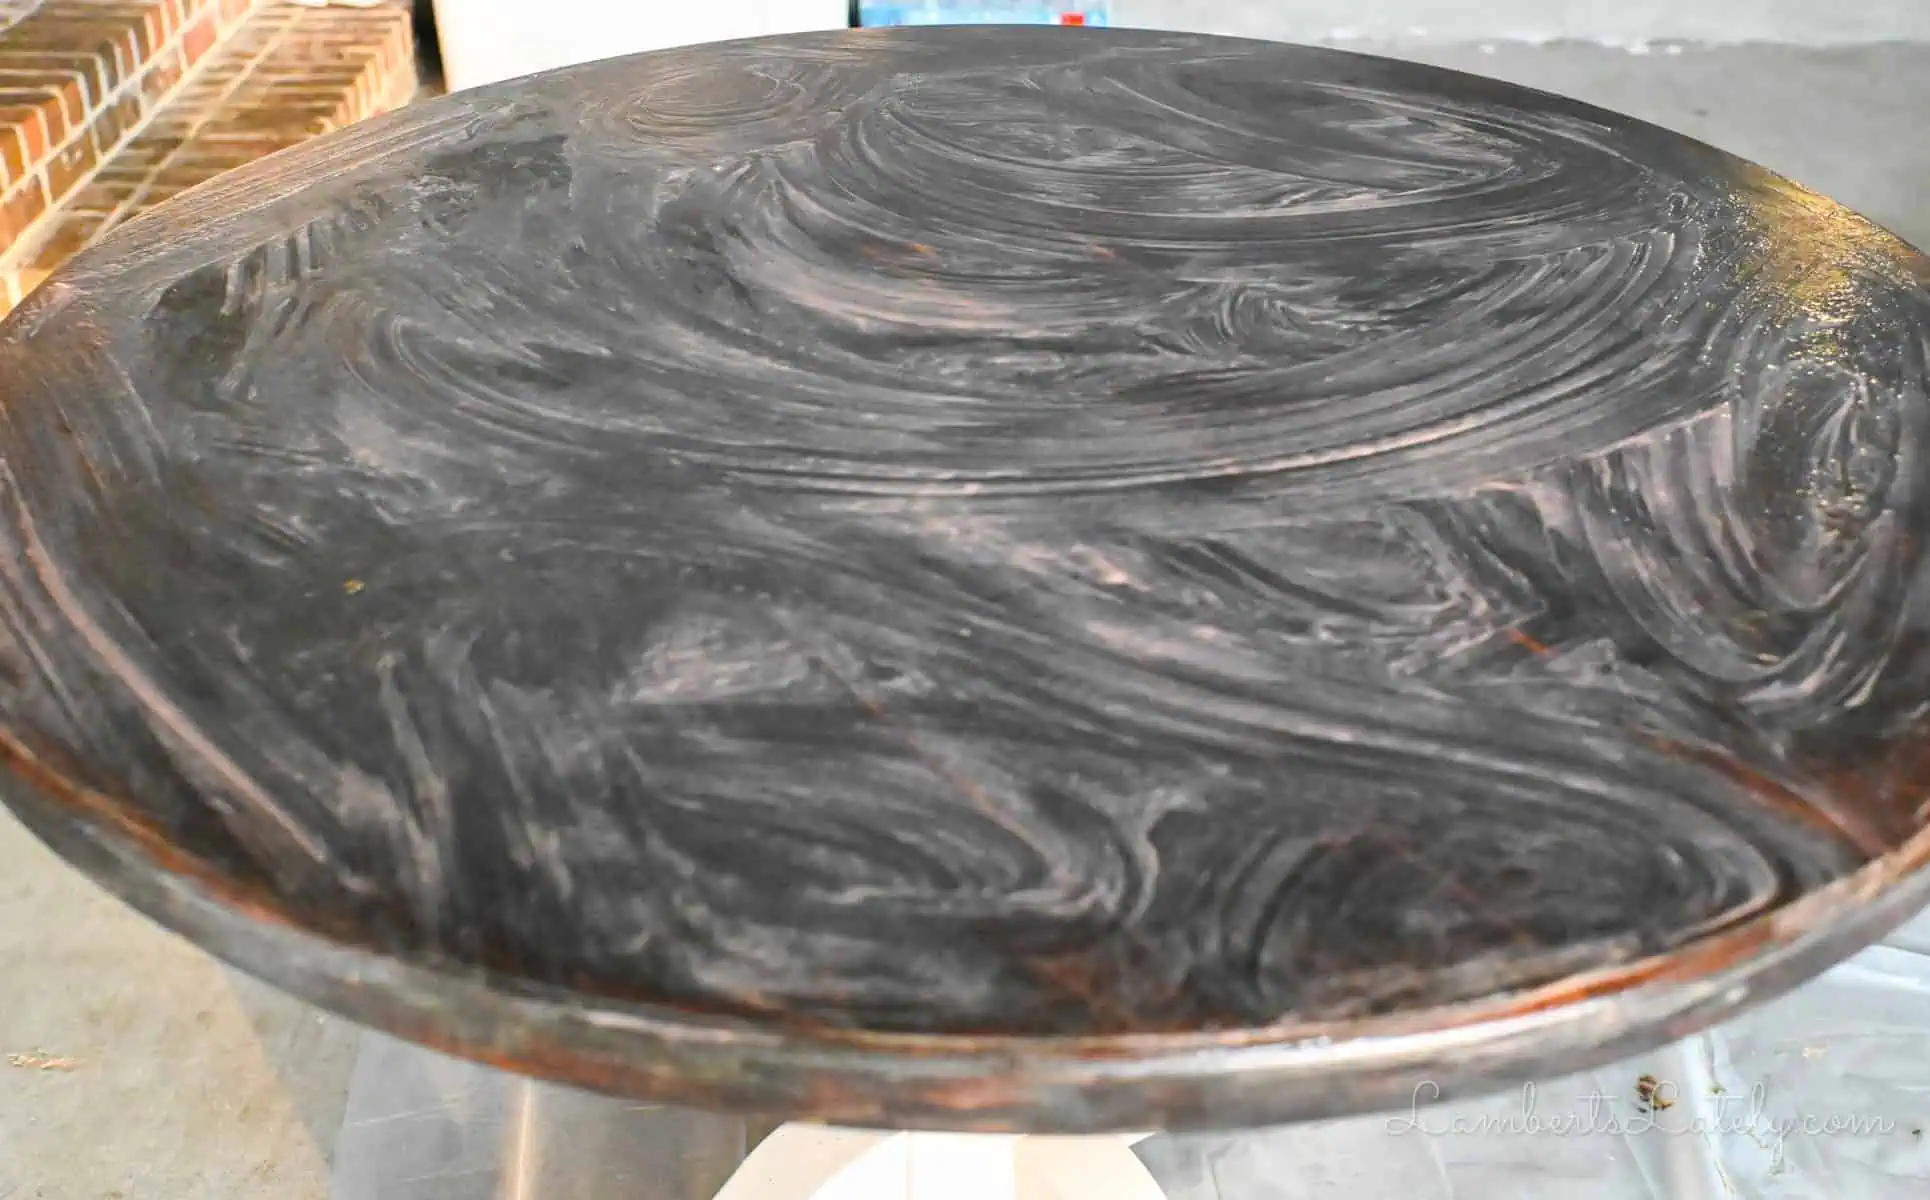
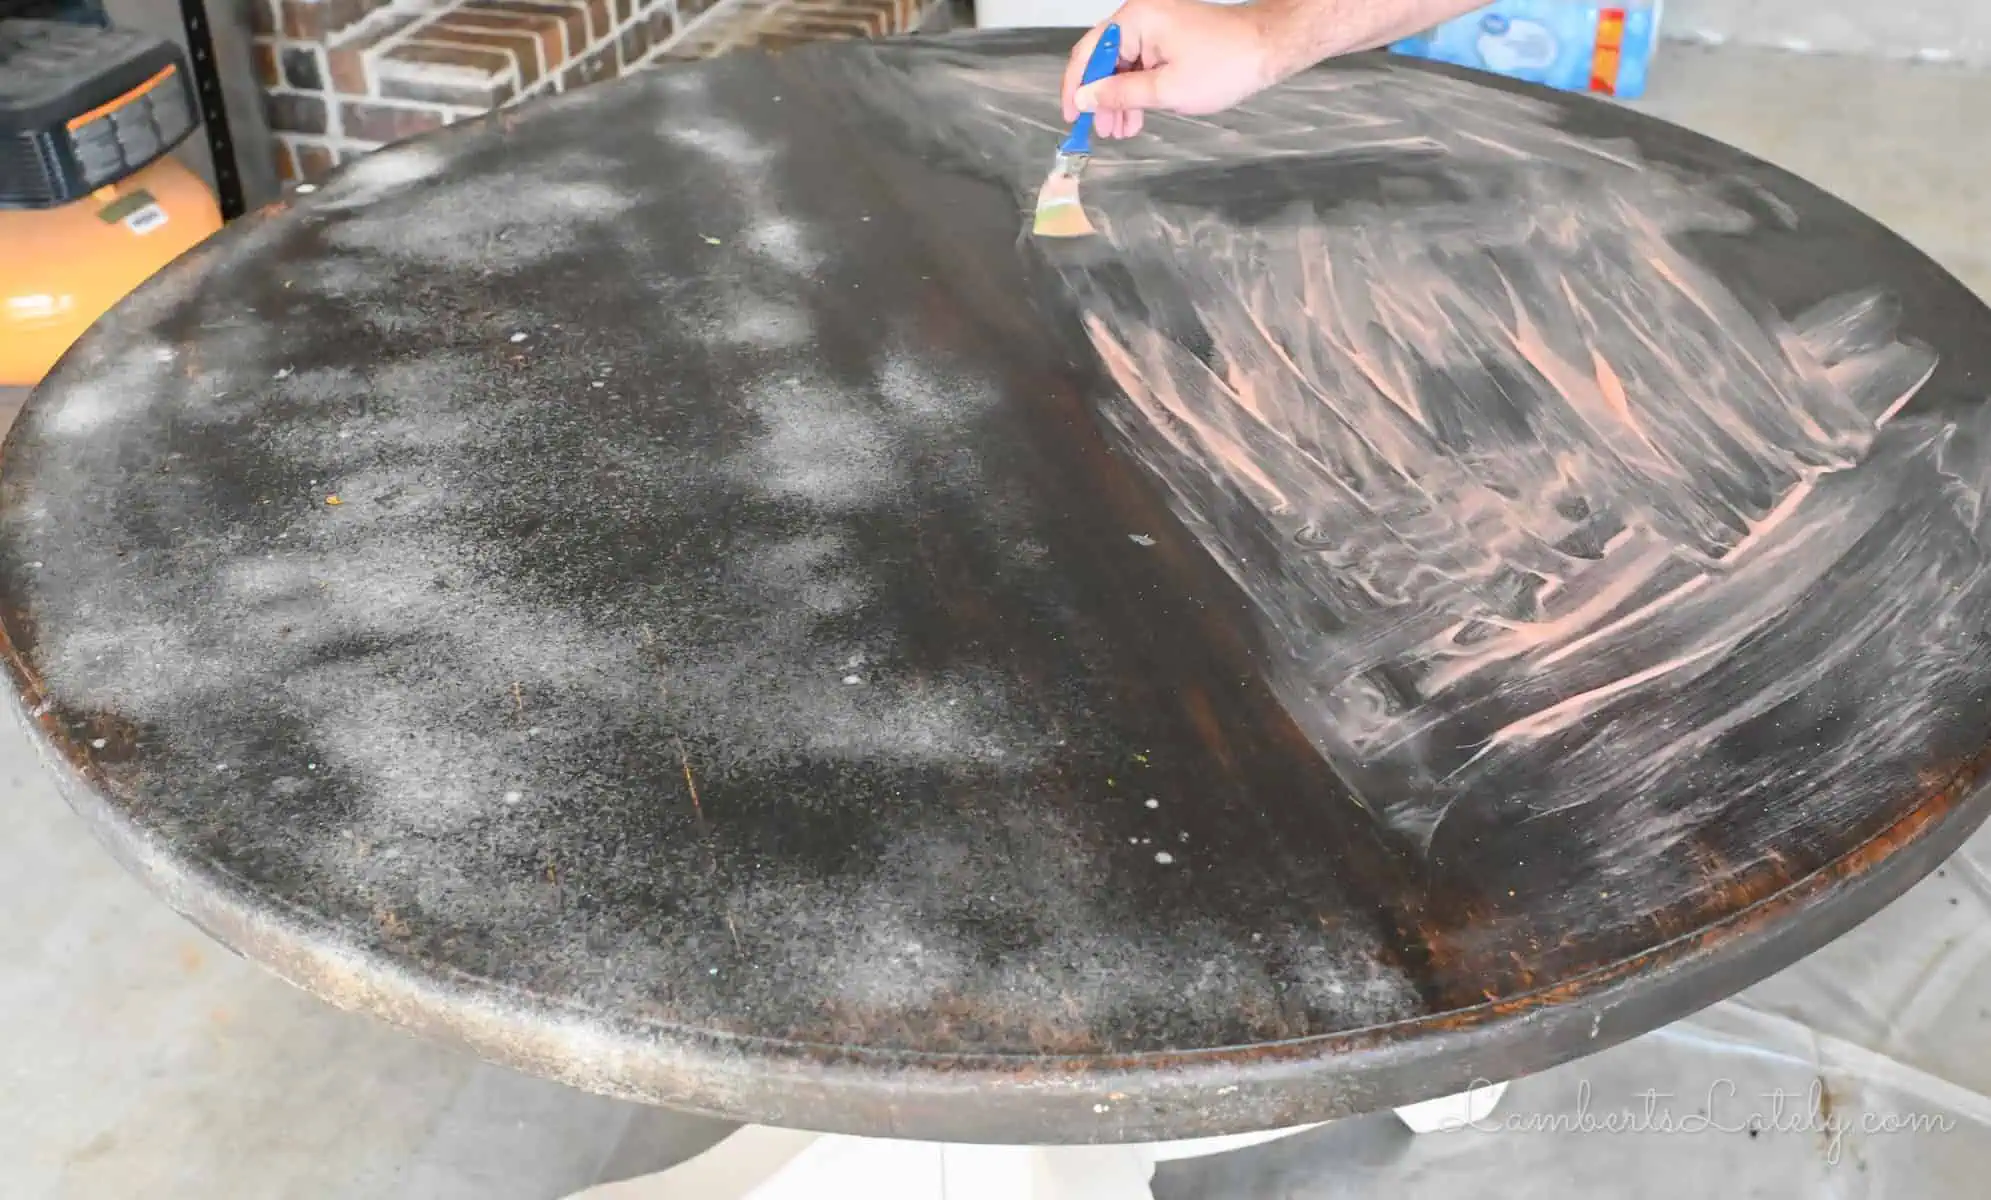
Using a cheap paintbrush, apply a very thick, generous layer of the stripping gel over the entire wood surface. Don't skimp on this - it needs to look heavily coated. Let it sit for at least one to two hours (leaving it overnight covered in plastic wrap works wonders for stubborn finishes).
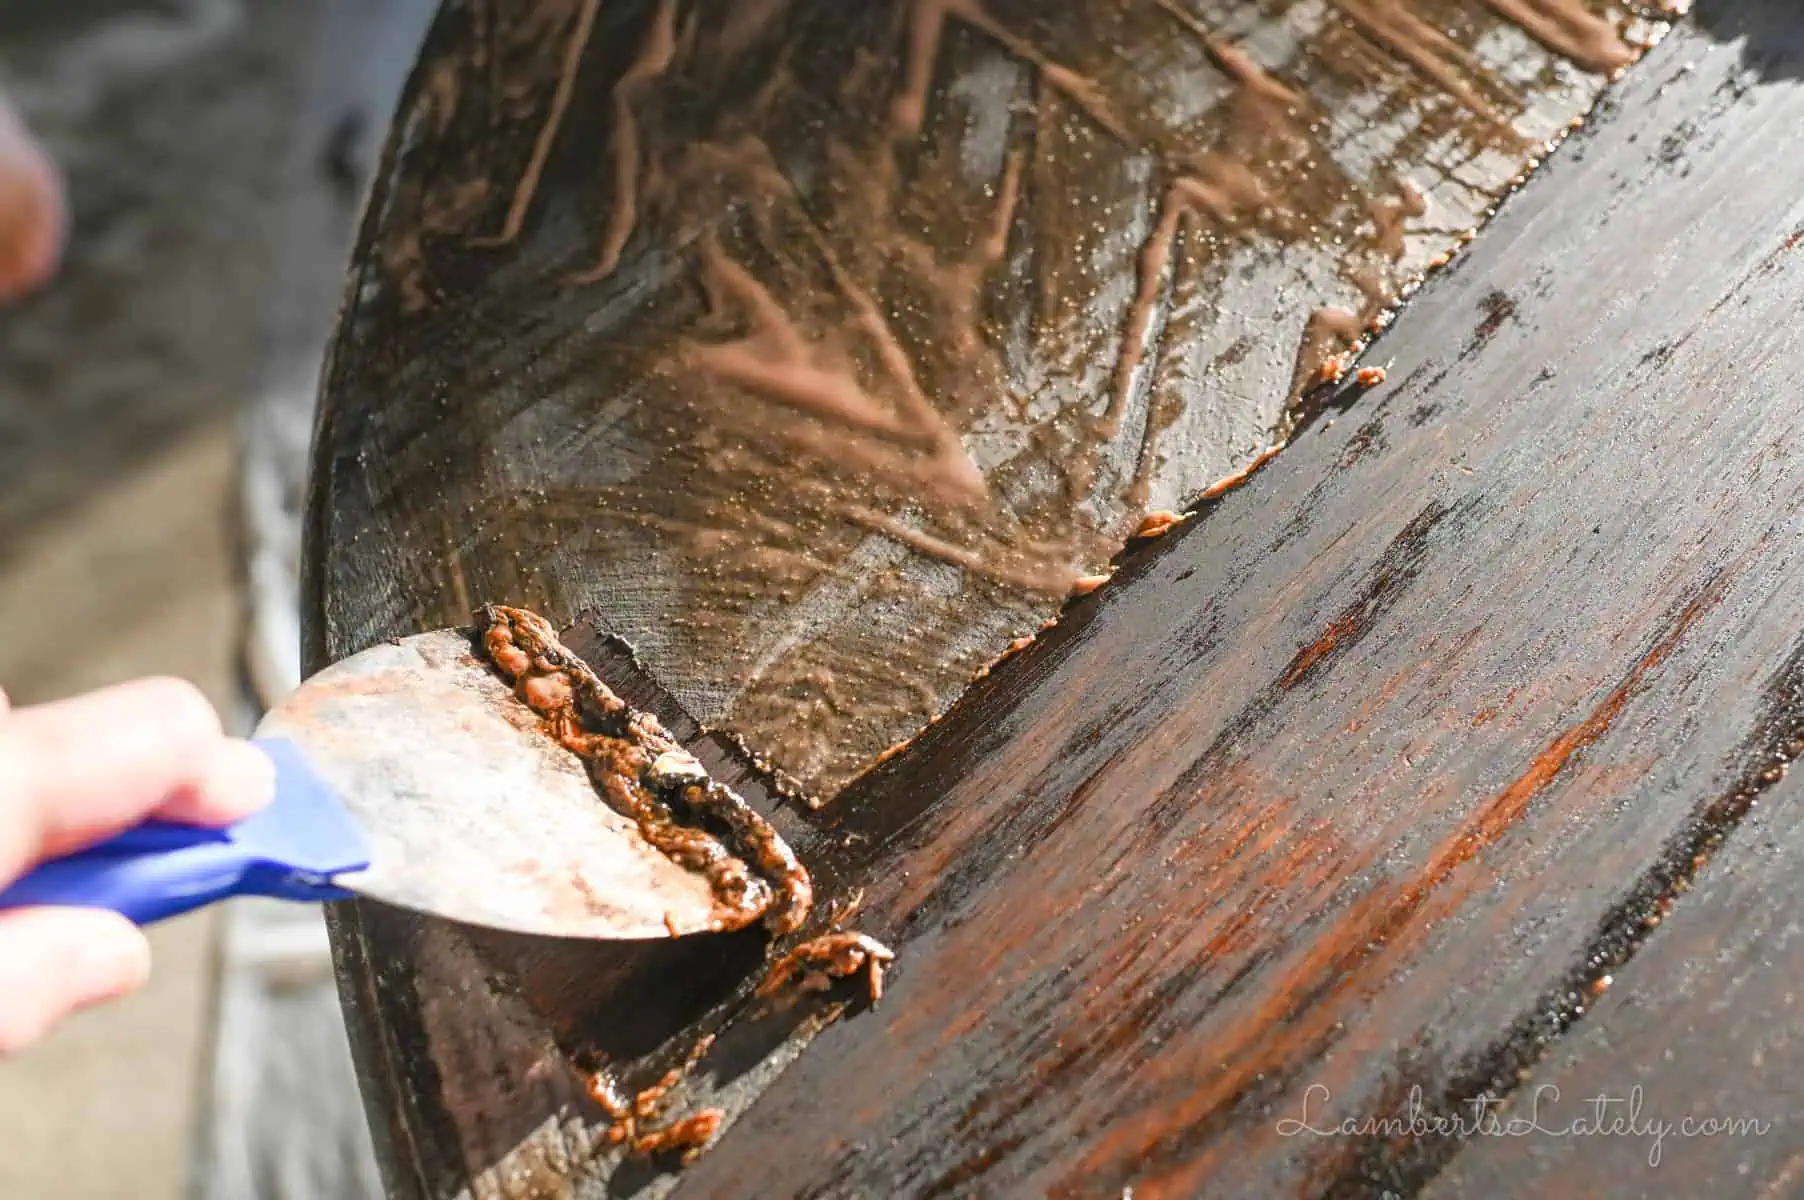
Once it has marinated for a little bit, take your putty knife and gently scrape off the goo. Keep the knife relatively flat so you only scrape the softened gel layer without digging into and gouging the actual wood.
Fair Warning: This part is pretty gross! As the gel lifts, it pulls up years of old liquefying stain and varnish with it. Keep a disposable plastic cup or container on hand to scrape the sludge into as you move across the table.
How to Clean the Wood After Stripping
Once you've scraped away the bulk of the gel, you'll be left with a sticky residue.
Pour mineral spirits liberally onto the wood and scrub the surface really well with a heavy-duty scrub sponge to neutralize and wash away the remaining chemical residue.
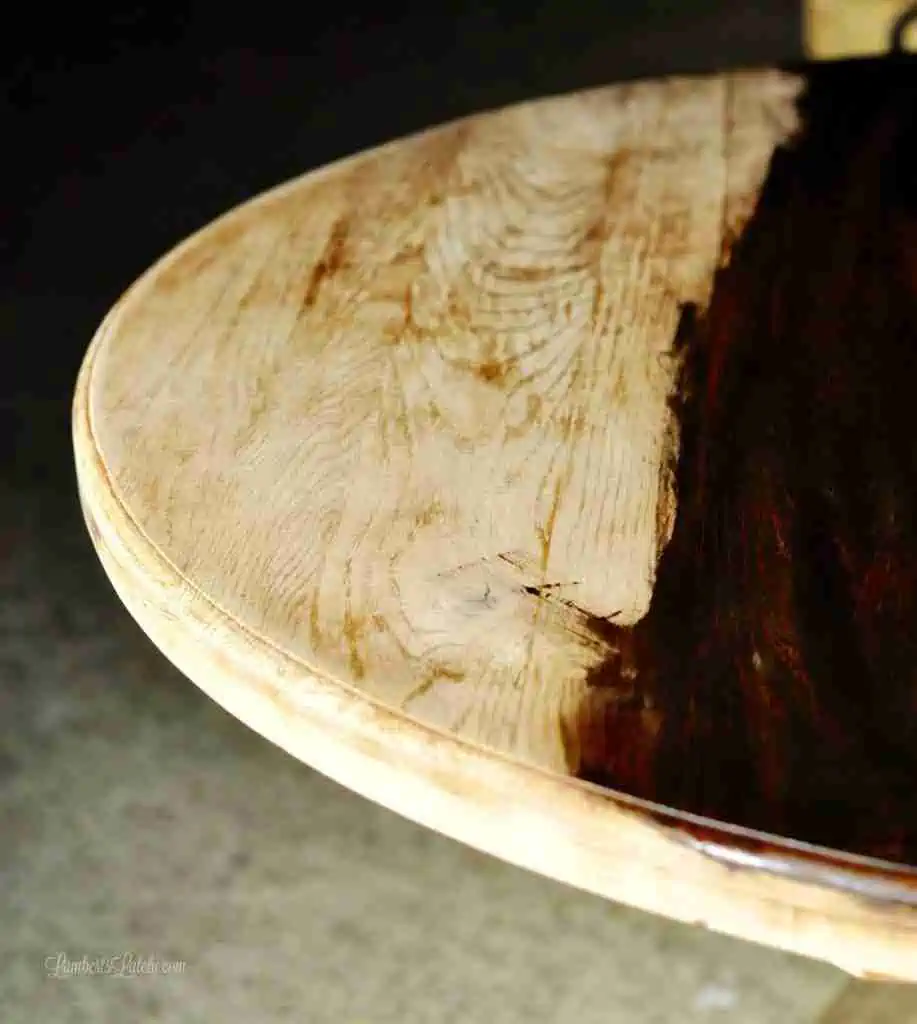
Let the table dry completely for an hour or two. If you still spot shiny patches of lingering polyurethane or leftover paint, you will need to repeat the stripping process on those areas. Depending on how tough the original coat is, expect to do this step a few times (we had to do it 3 times to clear the tabletop completely).
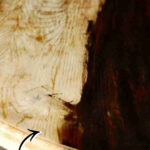
The Dark-to-Light Color Dilemma: Old wood stain soaks very deep into the grain fibers, making it just about impossible to pull out 100% of the pigment. As you can see above, our stripped wood is clean, but it still holds a darker tone from its previous life.
Think twice if you plan to change a dark-stained table into a light, natural blonde look - it is a super difficult process! But if you are going from a light to dark tone, or keeping it a similar color like we did, it's perfect.
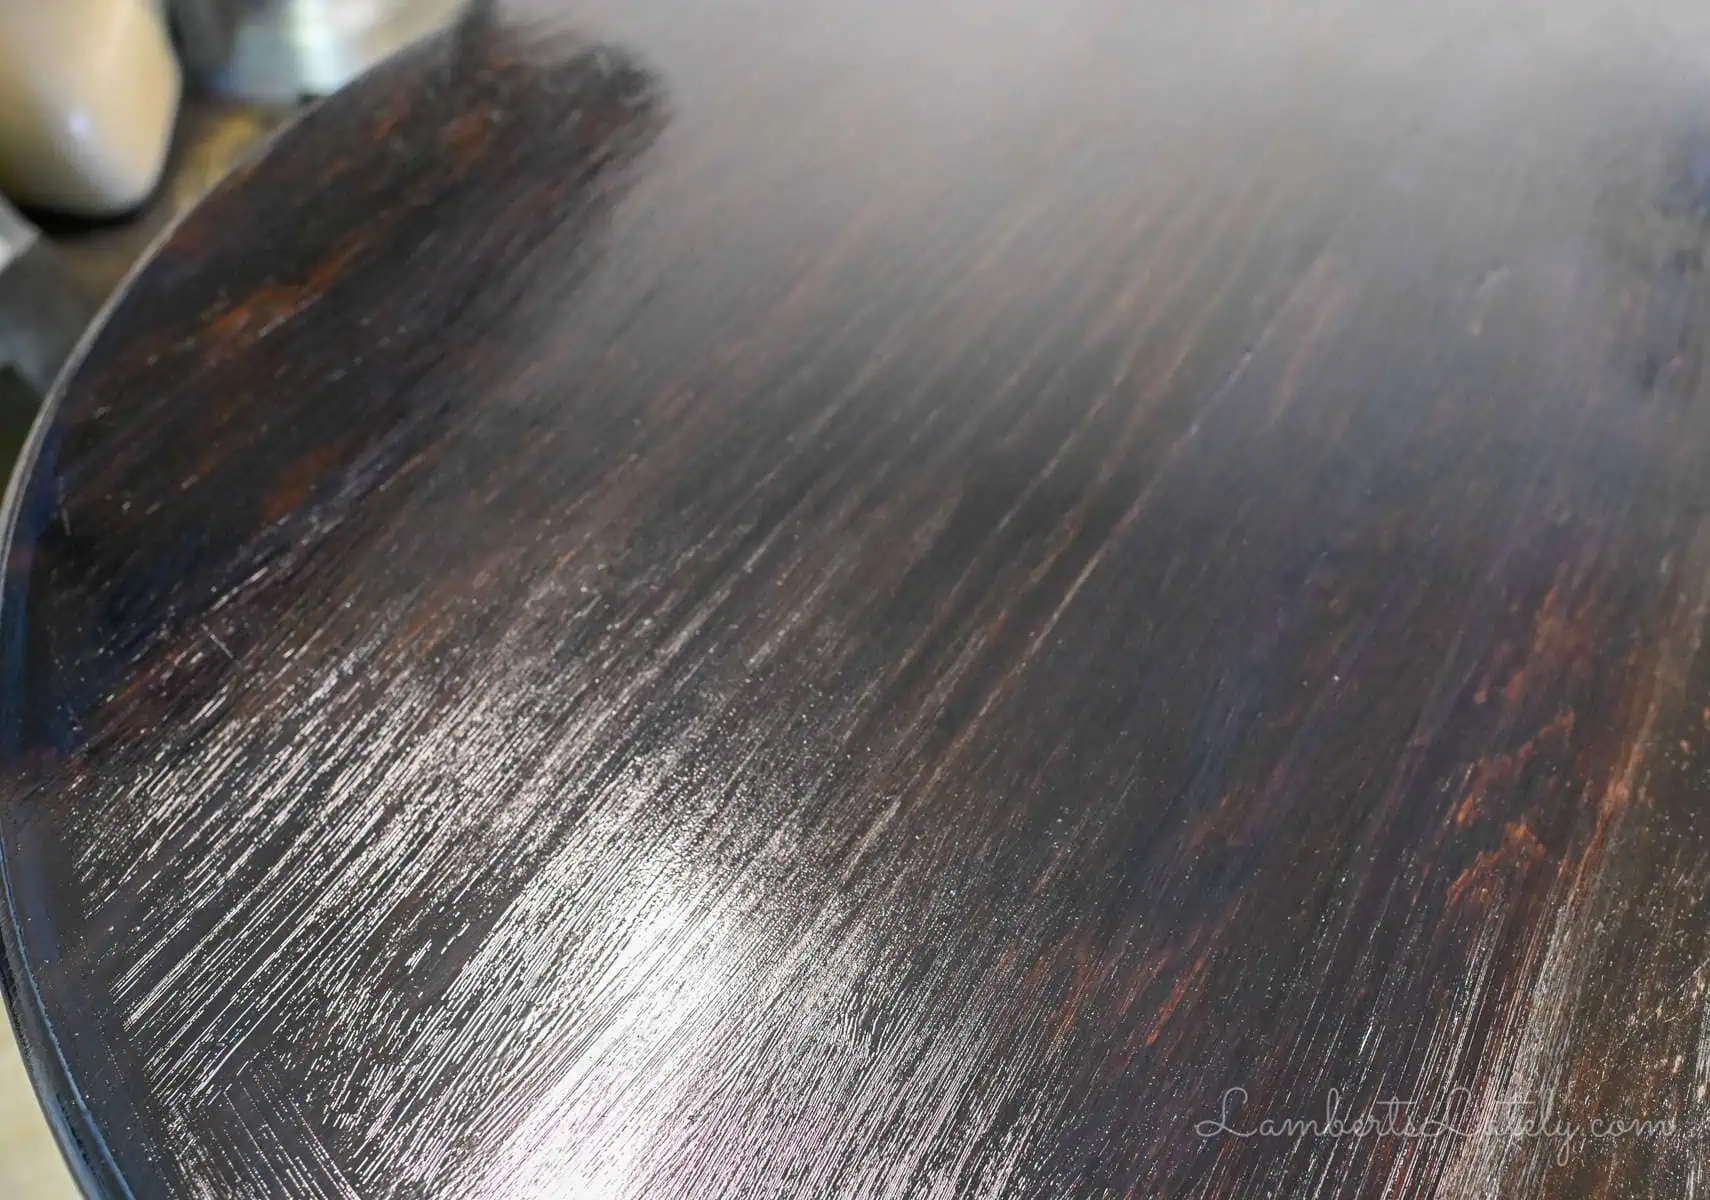
Step 2: Sand the Wood Table After Stripping
Sanding smooths out open wood grain patterns, clears out the very last remnants of any finish, and opens up the wood pores so you can evenly apply a fresh coat of stain.
Coarse Sanding (80-Grit)
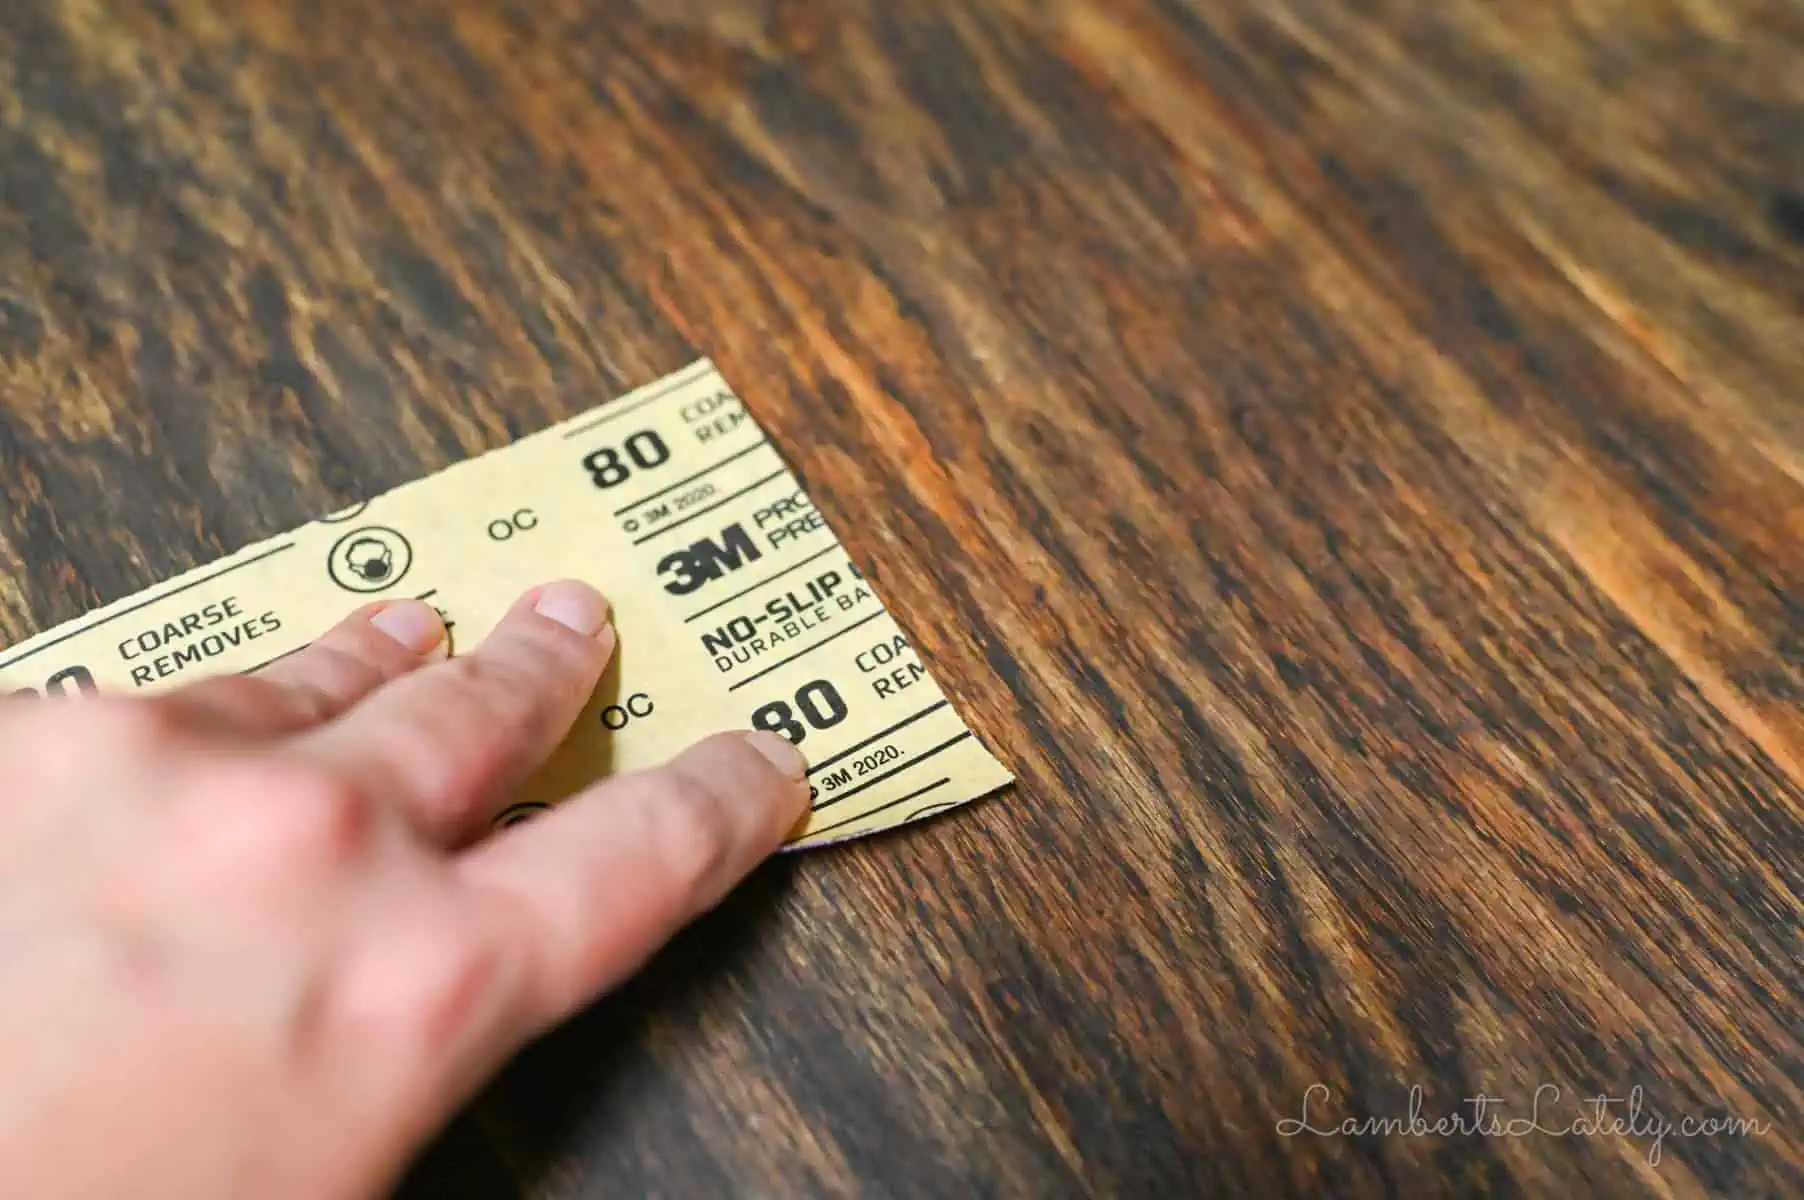
Start with a coarser sandpaper grit (like 80-grit). If your table is solid wood, I highly recommend doing this aggressive first pass completely by hand. Coarse grits on power tools can leave deep, ugly swirl marks in the wood if you aren't perfect.
Sand with the natural direction of the wood grain until the surface looks totally matte and you no longer see any old glossy finish building up on your sandpaper.
Fine Sanding (120-Grit to 180-Grit)

Once the last stubborn bits of finish are gone, step up your grit to flatten out the texture. Run a quick pass with 120-grit, then go up a fine 180-grit or 220-grit disc to your orbital sander to polish everything smooth.
Move the sander slowly across every inch of the tabletop. When you are done, you should be able to look at the wood from any angle under bright light and see zero shine, leftover patches, or glowing spots of old varnish. It should feel completely smooth to the touch.

For our table refinishing project, I also gave the painted base of the table a light scuff-sand at this point just to knock off loose flakes and create a good texture for our new paint coat. Because we were keeping the legs a similar painted style, stripping them down to bare wood wasn't necessary. (If you want to stain your table legs to match the top, you'll need to run them through the full Step 1 stripping routine!)
Step 3: Clean and Prep the Wood Surface
Do not underestimate the power of sawdust to absolutely ruin a beautiful finish! Take a damp, clean cloth or a lint-free rag and wipe down every inch of the sanded wood, making sure you pull all the hidden fine dust out of the joints, cracks, and grain grooves.
Let it dry for a few minutes, then pass your bare hand firmly across the table surface against the grain. It should feel soft and completely level, without any grain roughness, stray particles, or tiny hidden bumps of old polyurethane remaining.
If it's perfectly clean, you're ready to refinish your wood table!
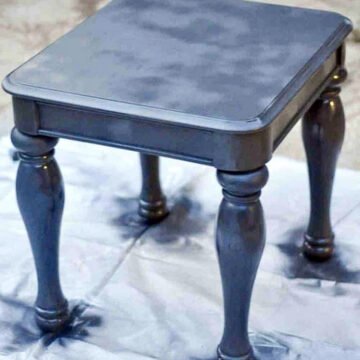
Step 4: Paint or Stain the Legs and Base

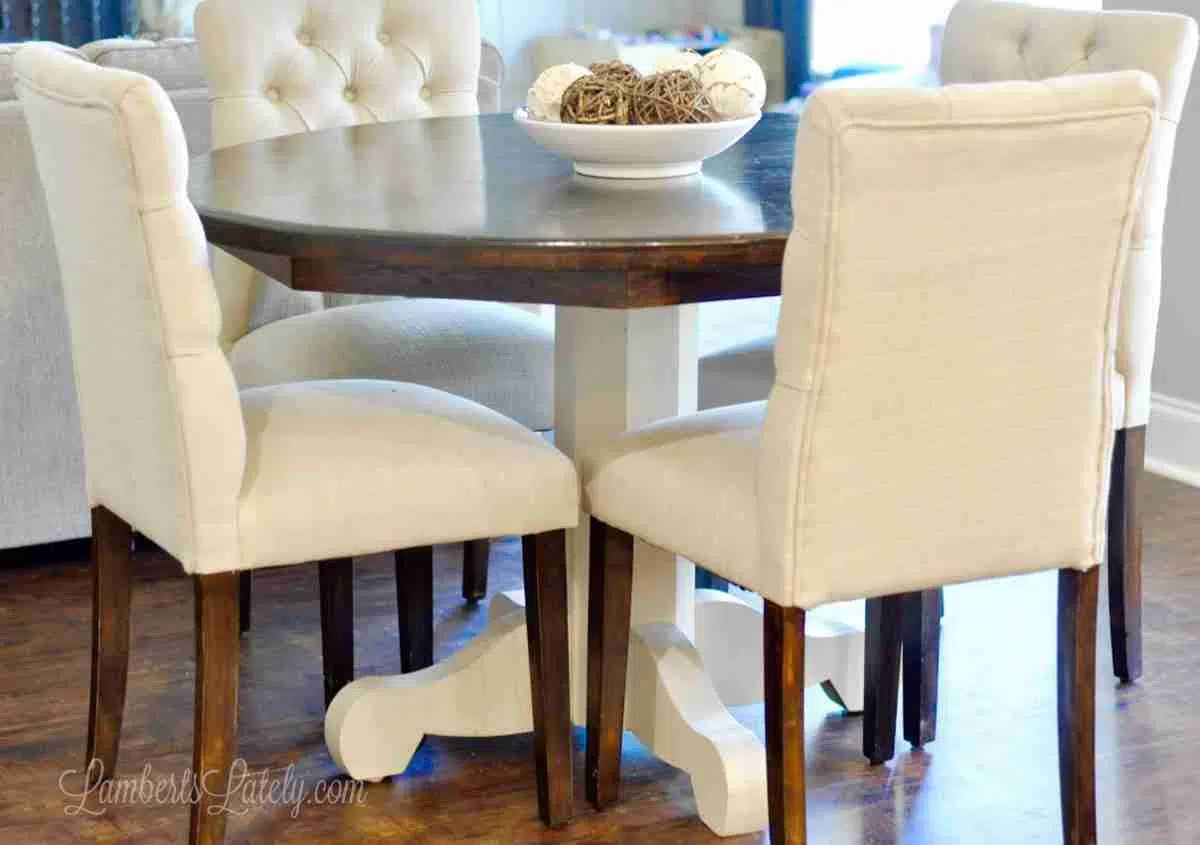
If you disassembled your table for this makeover, now is the time to paint or finish the legs while they are detached. I love the modern traditional look of a clean, painted base paired with a dark stained wood top.
I used an off-white shade called Sherwin-Williams Agreeable Gray for this step. I wasn't too picky about the base paint brand, and just a sample-sized can from the local home improvement store was the perfect size for a set of table legs.
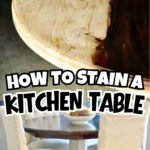
Step 5: Stain the tabletop
Pro-Tip: If you took your table apart, wait until your painted base is 100% dry, reassemble it, and stand the table up completely before applying your wood stain. It is so much easier to get an even stain application when the tabletop is upright and stable at working height!
Our absolute favorite stain color is Minwax Dark Walnut. It is so versatile - depending on your application style and how many coats you choose to layer on, you can get anything from a warm, medium brown highlighting the natural grain to a really rich, almost-espresso tone. You can see how I used this wood stain in my outdoor couch and blanket ladder projects as well!
Note: This is an oil-based wood stain, meaning it carries strong fumes and will permanently stain clothing, so wear old clothes and work in a well-ventilated spot. A single half-pint can is plenty for a standard dining room table.

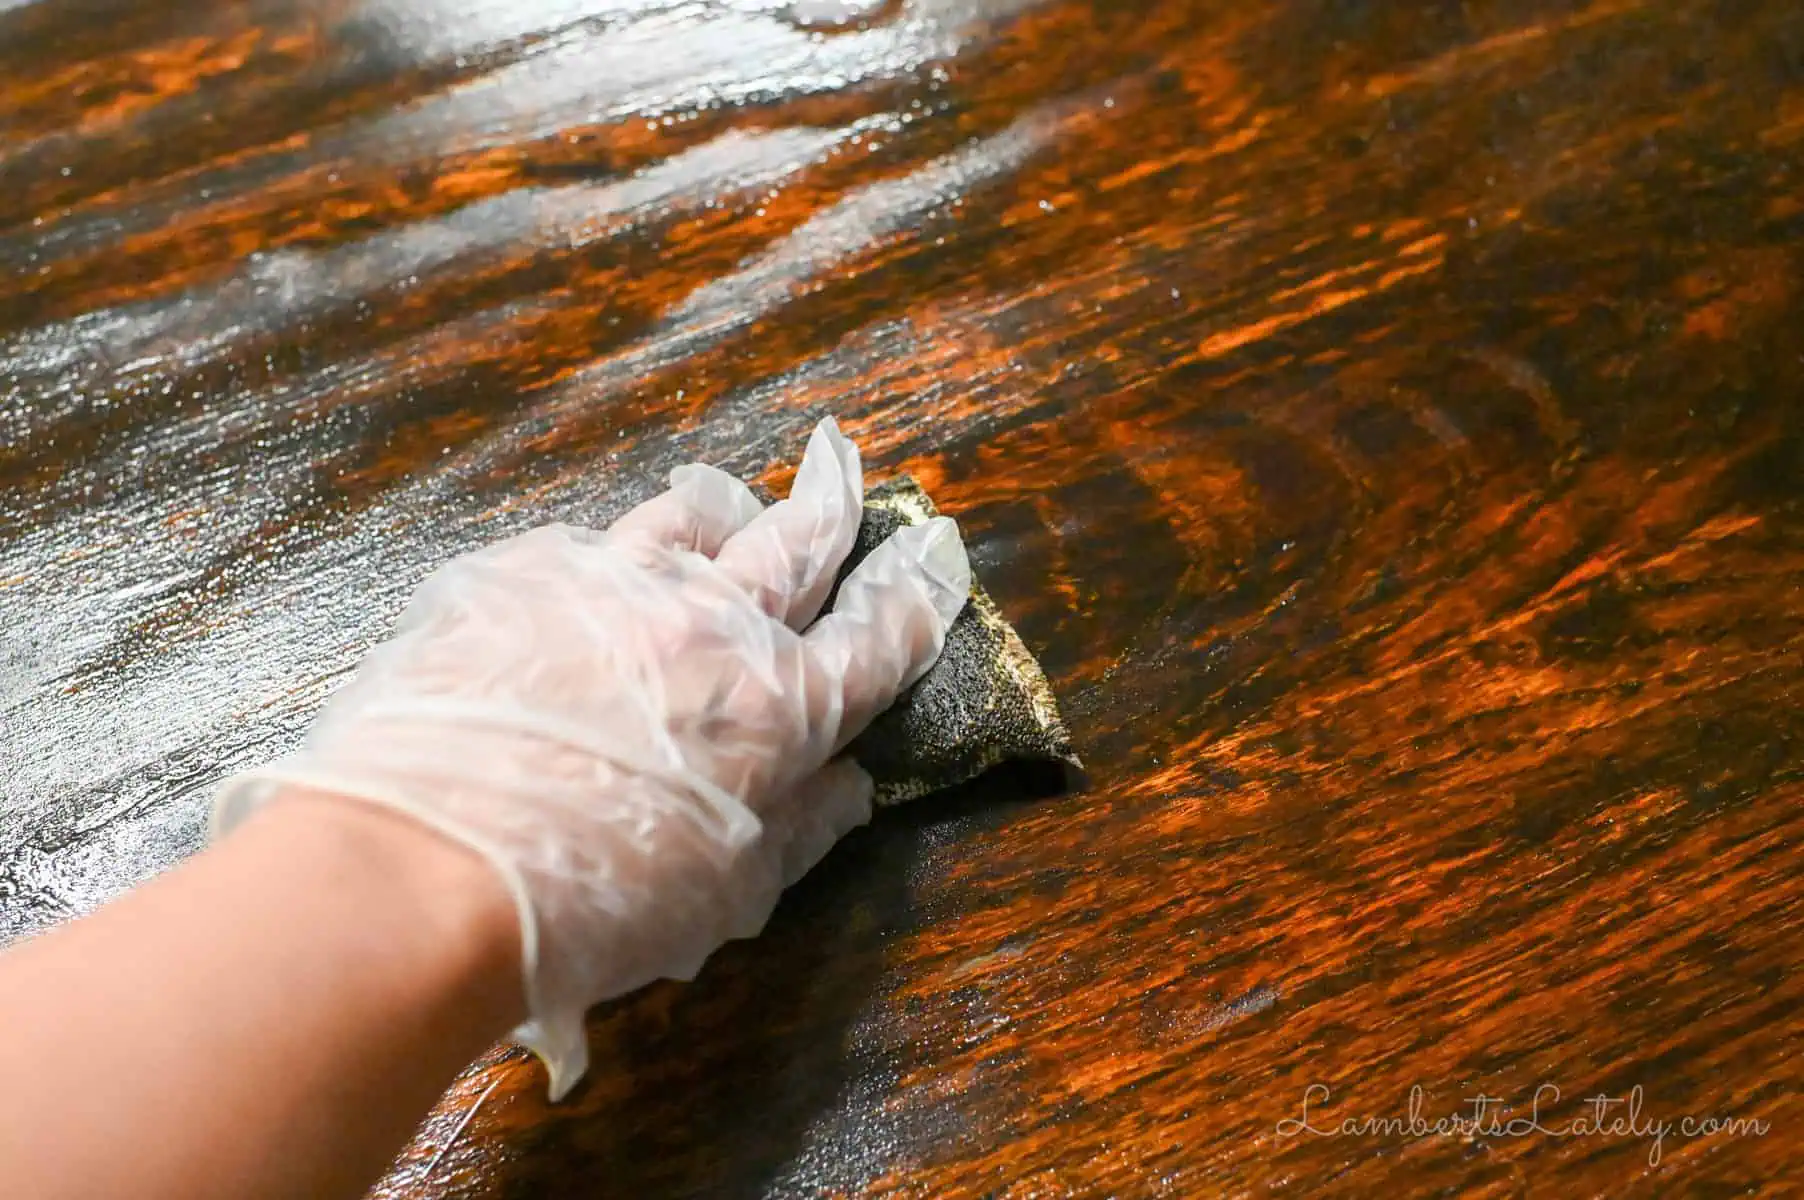
I prefer to apply oil stain using a cheap, disposable foam sponge brush so I can just toss it in the trash when I'm done. Brush on long, steady strokes running parallel with the wood grain. It should look coated but not pooling or dripping. If it's forming puddles, your layer is way too heavy.
Let the stain sit on the wood anywhere from 10 minutes up to an hour, depending on how deep you want the color to develop. Then, take a clean, dry cloth (the old cotton t-shirt scraps I saved from my sorority t-shirt quilt were perfect) and gently wipe away all excess stain resting on top.
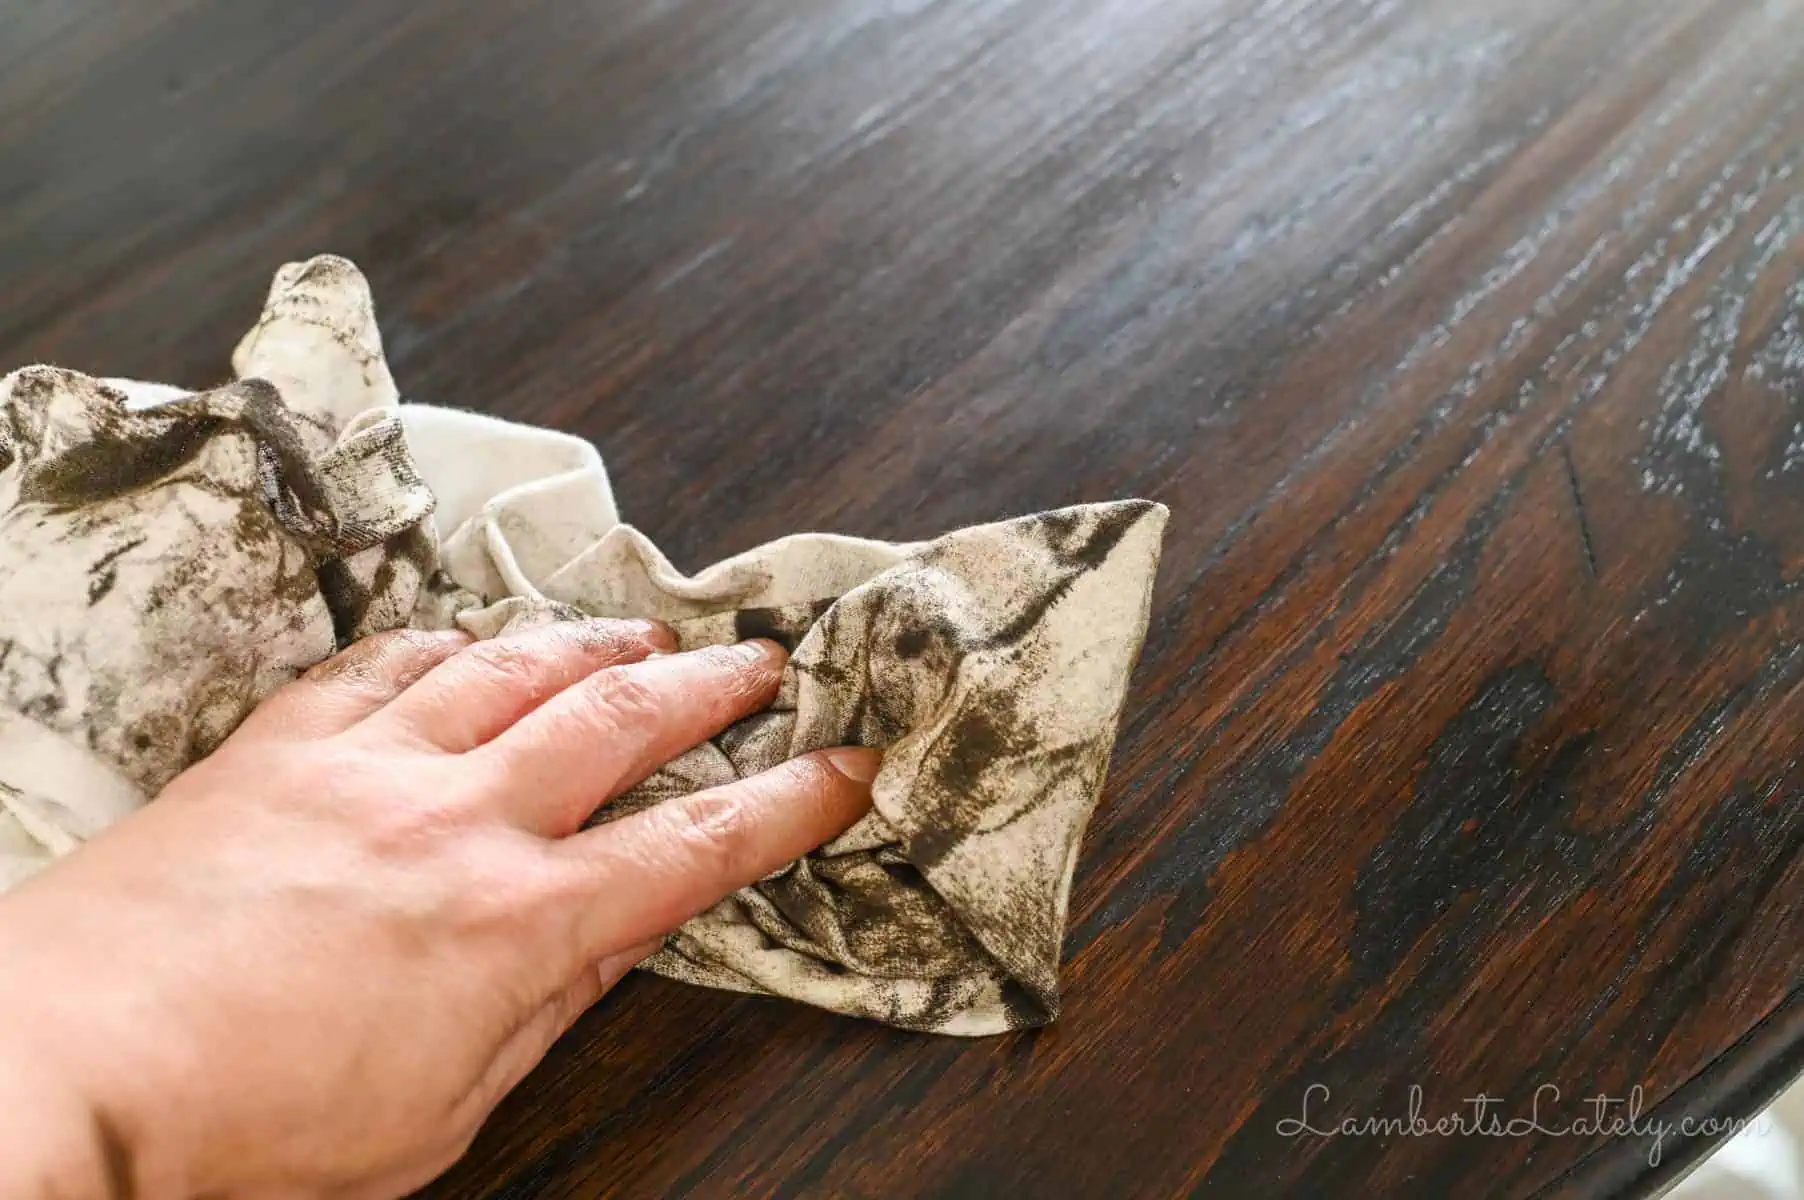
Wipe using light, even pressure - just enough to remove the that sticky surface wetness without rubbing the color completely out of the wood pores. Let that first pass dry for a few hours, then repeat if you want a deeper look.
Wood stain always dries a little bit lighter than it looks when wet, so don't be shocked if the initial coat looks a little funky! I ended up applying 3 full coats of stain to get the gorgeous depth we wanted for our tabletop.
Once your final coat is wiped down, let the table dry completely for a full 24 hours before moving to the sealer.
Step 6: Sealing and Protecting Your Kitchen Table
For high-use areas like kitchen and dining spaces, you need a topcoat that seals the wood entirely, cleans up effortlessly, and handles daily spills, condensation rings, and heavy cleaning.
I highly recommend a water-based polyurethane (like Minwax Polycrylic in clear gloss) for home projects. Unlike oil-based polyurethanes, water-based formulas have less odor, dry quicker, clean up really easily with water, and will never turn amber or yellow over light paints and stains as they age.

Pour a small amount (think around ¼ cup) of your clear coat straight onto the tabletop and spread it quickly along the grain using a clean foam brush. Use long, feathering strokes to prevent brush lines in the finish.
The sealer will look a little bit milky or cloudy as you apply it, which is totally normal - it cures 100% clear. However, to keep it clear, you have keep your coats thin.

If your sealer coat shows a blue tint across the surface like the picture above, it is pooling too thick! Brush it out immediately.
Your wet coat should look even and translucent, like this picture. Allow each coat to dry for about 2 hours, then give the table a very light hand-sand using ultra-fine sandpaper (220-grit or a brown paper bag) between coats to smooth out tiny bits of dust. Wipe away the dust, and apply your next layer.
While the can might recommend 3 coats, high-traffic dining tables need real armor. I applied 5 thin coats to get the perfect texture and durable protection needed to survive daily life around here.
Let your final coat cure undisturbed for 24 hours, and your gorgeous new table is officially ready for action!
Daily Maintenance Tips for Your Refinished Table
To make sure your gorgeous new finish lasts another 7+ years, follow these basic care rules:
- Wipe up moisture immediately: While water-based polyurethane is highly water-resistant, leaving puddles, wet cups, or condensation rings to sit on the wood for hours can eventually damage the bond.
- Avoid harsh chemical cleaners: Skip the abrasive bleach sprays or heavy degreasers. Clean your table daily using a soft cloth, warm water, and a drop of dish soap.
- Don't scrub with abrasive pads: Avoid rough scouring pads or coarse scrub brushes, which can slowly dull your clear coat.
FAQs & Troubleshooting
Quick Project Breakdown
- Time Commitment: Expect 2-7 days total due to drying time between steps. You'll only spend a few hours of actual, hands-on physical labor, but the passive dry times for chemical stripping, wood stains, and poly layers require patience!
- Always wear gloves: Seriously, learn from my mistakes! Always wear thick rubber safety gloves during the stripping and oil-staining phases to protect your skin from harsh chemicals and stubborn dark pigments.
- Outdoor Environment Warning: If you are working outside or in an open garage, try to shield your table from wind. Stray pollen, bugs, and floating leaves love landing straight in wet varnish, which can create a frustrating sanding fix later.


I can't wait to see your gorgeous refinished tables! If you follow this tutorial, make sure to tag me (@lambertslately) on social media with your pictures. And you can leave your best refinishing tips and tricks below!

Leslie Lambert is a lifestyle writer and content creator specializing in home organization, family recipes, and intentional living. With 17 years of experience in blogging and digital storytelling, she helps busy women create calm, purposeful homes they love.
How wonderful to update something... and have the project turn out nicely. 🙂
It turned out fantastic. I've done a few tables and they can be tricky.
I love old furniture and having a family hand-me-down makes it even more special.
Very nice transformation!
I love this post. I'm hoping to find an old table for my breakfast area and redo it, so your post was very helpful. I love the curves on the table too. It turned out great. Thanks for sharing on Sunday's Best.
Nicely done! It's nice you were all able to help in updating your table. I hope it brings many more years of use in your kitchen. Thanks for sharing with us at Creatively Crafty #ccbg 🙂
Thanks, Lydia!
Your table looks lovely. I am so happy to see you restored it. it looks like it will get you two for seveal more years.
Thanks so much, Christine!
Hi Leslie! I have always wanted to do this. Thanks for the easy DIY instructions, can't wait to give it a go. The table looks beautiful! You have been featured this week at Dishing It & Digging It. Thank you so much for sharing with us 🙂
Thanks so much for the feature! 🙂
Beautiful...and you have such a pretty helper!
Aww thank you!
Looks beautiful, but after all that work I was hoping for more after pictures!
It's currently sitting in my cave of a kitchen where the lighting is terrible...hoping to get some updated pictures up of it when we move in a couple of months!
Awesome post! I’ve been thinking of refinishing my table, and this tutorial is perfect! Can I ask how well the tabletop has held up over time?
I have been absolutely amazed with how well it's held up! It still looks like new, even after wiping down almost nightly. The only issue I've had was really my fault...I worked on our Christmas wreaths at the table and the wire from the wreaths scratched it. Totally my fault, I wasn't thinking!
Thank you for sharing. I purchased a round dining table second hand to refinish and followed you steps. This was my first project and your instructions were perfectly helpful. After all the coats of the polyurethane, was it completely smooth?
I'm so glad I could help! I wouldn't say it's 100% smooth - it still has a tiny bit of grain to the touch, but definitely smooth enough to keep clean for a kitchen/high traffic table.
It's a great work that is done by you. It's look beautiful and i just like your work skill. I have a old kitchen table and i have been thinking to refinish it hopefully your tips are helping me. Thanks for the sharing your great experience with all of us.
Can I ask what type of paint you used in the legs? Satin, flat, semi-gloss, or gloss. I am going to attempt the same process on a beautiful solid oak table we have and was going to paint my legs and chairs black. I read several sites that say to use chalk paint on the legs and chairs and put a gloss finish in them as well for durability.
I used a semi-gloss on mine audit's held up well (it was Valspar, I'm not sure of the specific type). I thought just using a semi-gloss was much easier than chalk paint, but if you're wanting a more weathered look, chalk paint is definitely the way to go!
What a nice thing to have that table from so long ago. One tip, you don't have to sand the pieces of wood you will paint. Just give it a good wash with soap and water and use a primer, then good quality paint over. The table is beautiful.
Great idea to try next time...thanks!
This is great! Can I ask - do you remember - you said a half pint would be fine to do just the tabletop - I'm going to do my table but it'll include the base/legs as well. Think a half pint is still enough?
If I remember, I had plenty left that could have been used on legs. You should be fine just getting a half pint!
Thank you for the very detailed steps on how you went about this. I have wanting to redo my kitchen table and chairs since we moved into our new house but have been to scared to try and not willing to pay someone else to do yet at this point. With these details, it is looking like this is going to be attempted yet this fall!!
You are very welcome...good luck to you!
Thanks for taking time to give us your tips! I'm curious about the base holding up to getting kicked and a broom/mop/vacuum being smacked into it?
It's actually doing pretty well! I do clean it once a month, and that takes most of the scuffs off. No paint chipping to report yet.
I have an oak table this will be perfect for! Where are your chairs from? I love the whole look!
Thanks...they are Target! I linked them just now at the bottom of the post (they're called Brookline Tufted).
I like that you have chosen two colors for refinishing, it looks fantastic with your chairs.
Thank you!
This post is exactly what I need! So happy it was the first in my google search. Thank you for the clear step by steps! Can’t wait to start my project.... I scored a beautiful farmhouse table and chairs for $125!!
I hope it helps - best of luck to you!
Do you use polycrytic or polyurthan on top of stain
I used the polycrylic pictured above.
Nice job on the restoration! Have you ever seen the restorer?
Not sure what you mean - could you explain?