
Learn how to cook rice in the Instant Pot so it turns out fluffy and perfect every time. This easy pressure cooker method works for white, basmati, jasmine, and brown rice. No rice cooker needed!
Affiliate links used in this post. Read more about my link usage here.
I've published so many Instant Pot recipes on this blog that I've lost count. You would think my collection of recipes would be the most popular posts, right?
Wrong.
The most popular Instant Pot post I've got on this blog is one of the simplest - how to cook rice in an Instant Pot.
Why make rice in the Instant Pot?
Once you use the Instant Pot to cook rice you'll never cook it another way!
- The Instant Pot rice cooking method takes a fraction of the time it takes on the stovetop or in the microwave. The rice always comes out perfect.
- You don't need a special appliance like a rice cooker. You can use the Instant Pot for a massive amount of other cooking tasks.
- It's never crunchy, but never mushy. Instant Pot rice has this perfect balance of texture that complements any recipe.
Once you dial in the water ratio and pressure time, Instant Pot rice is nearly foolproof.
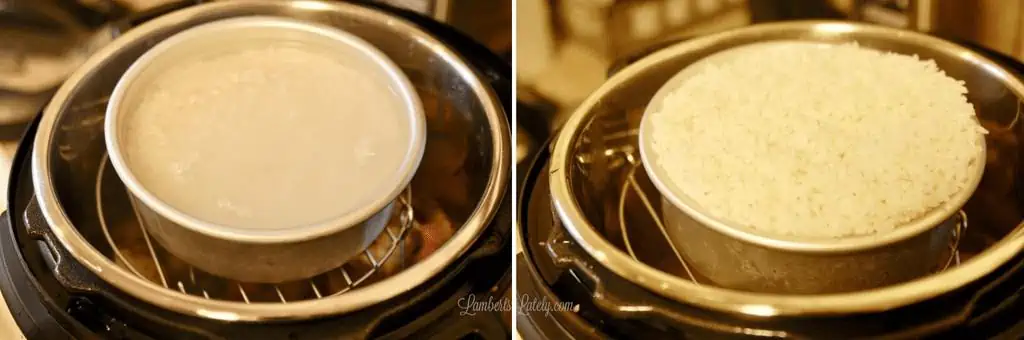
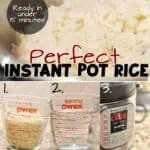
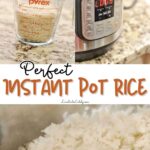
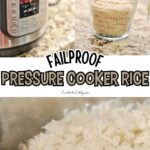
Step 1: Measure & rinse rice.
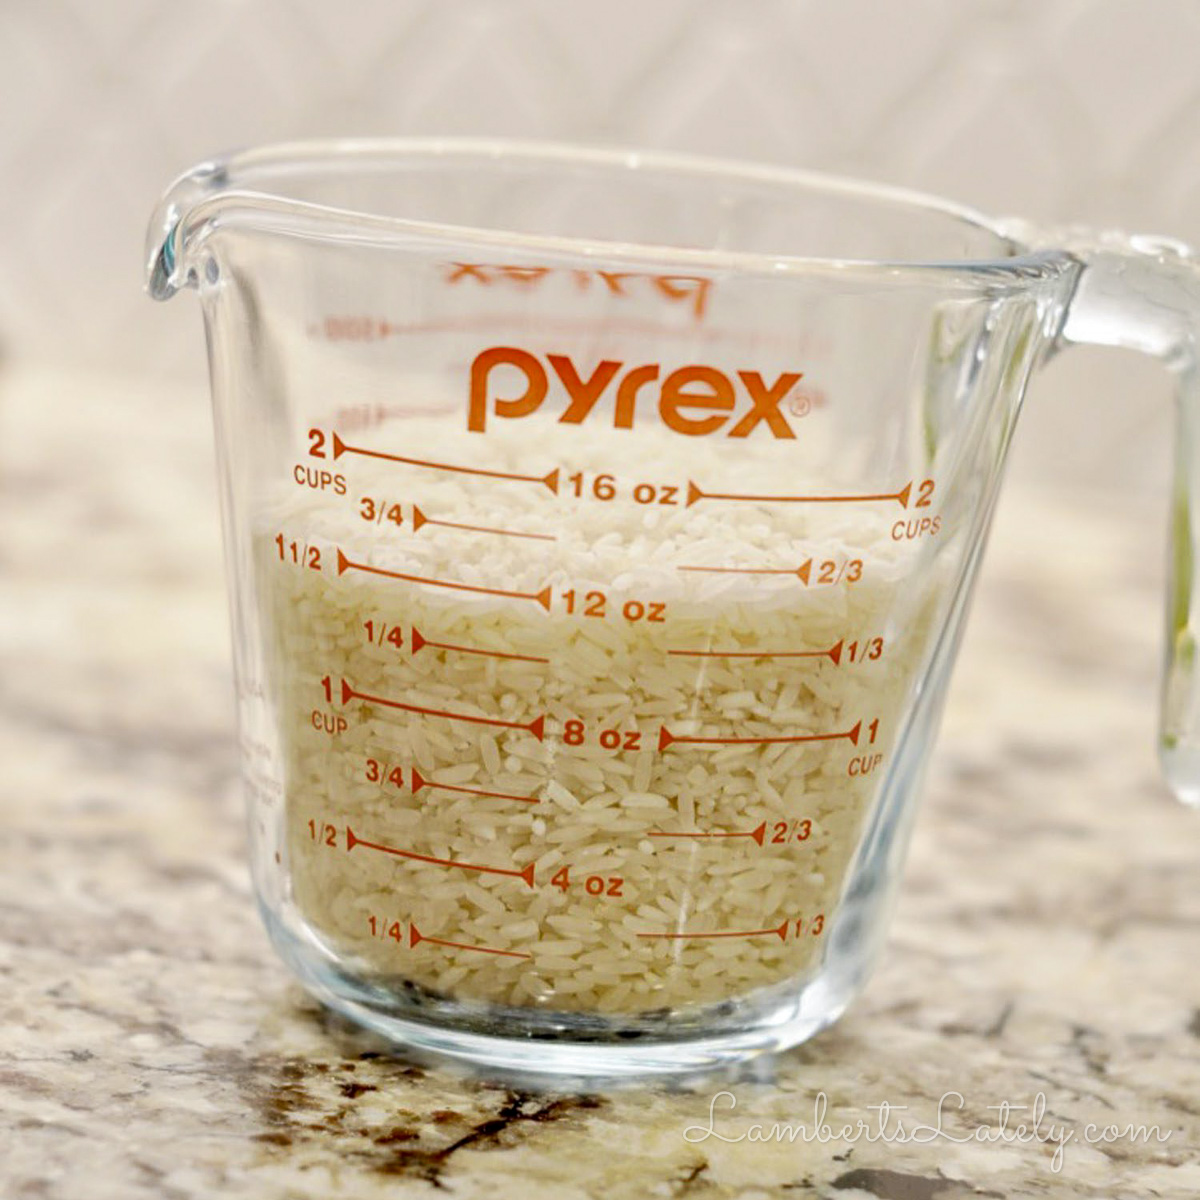
For reference, I usually start with 1.5 cups of rice. But, this method works for any amount of rice - the key is using the right ratio, not a fixed recipe.
Rice can come covered in all kinds of yuckiness, and you need to wash it. Washing rice will also result in fluffier rice - this separates the grains and makes sure starch doesn't make them stick together.
A fine mesh strainer is super useful for this - put the rice in the strainer and rinse thoroughly before adding to the Instant Pot inner pot.
Step 2: Add water, oil, and salt.
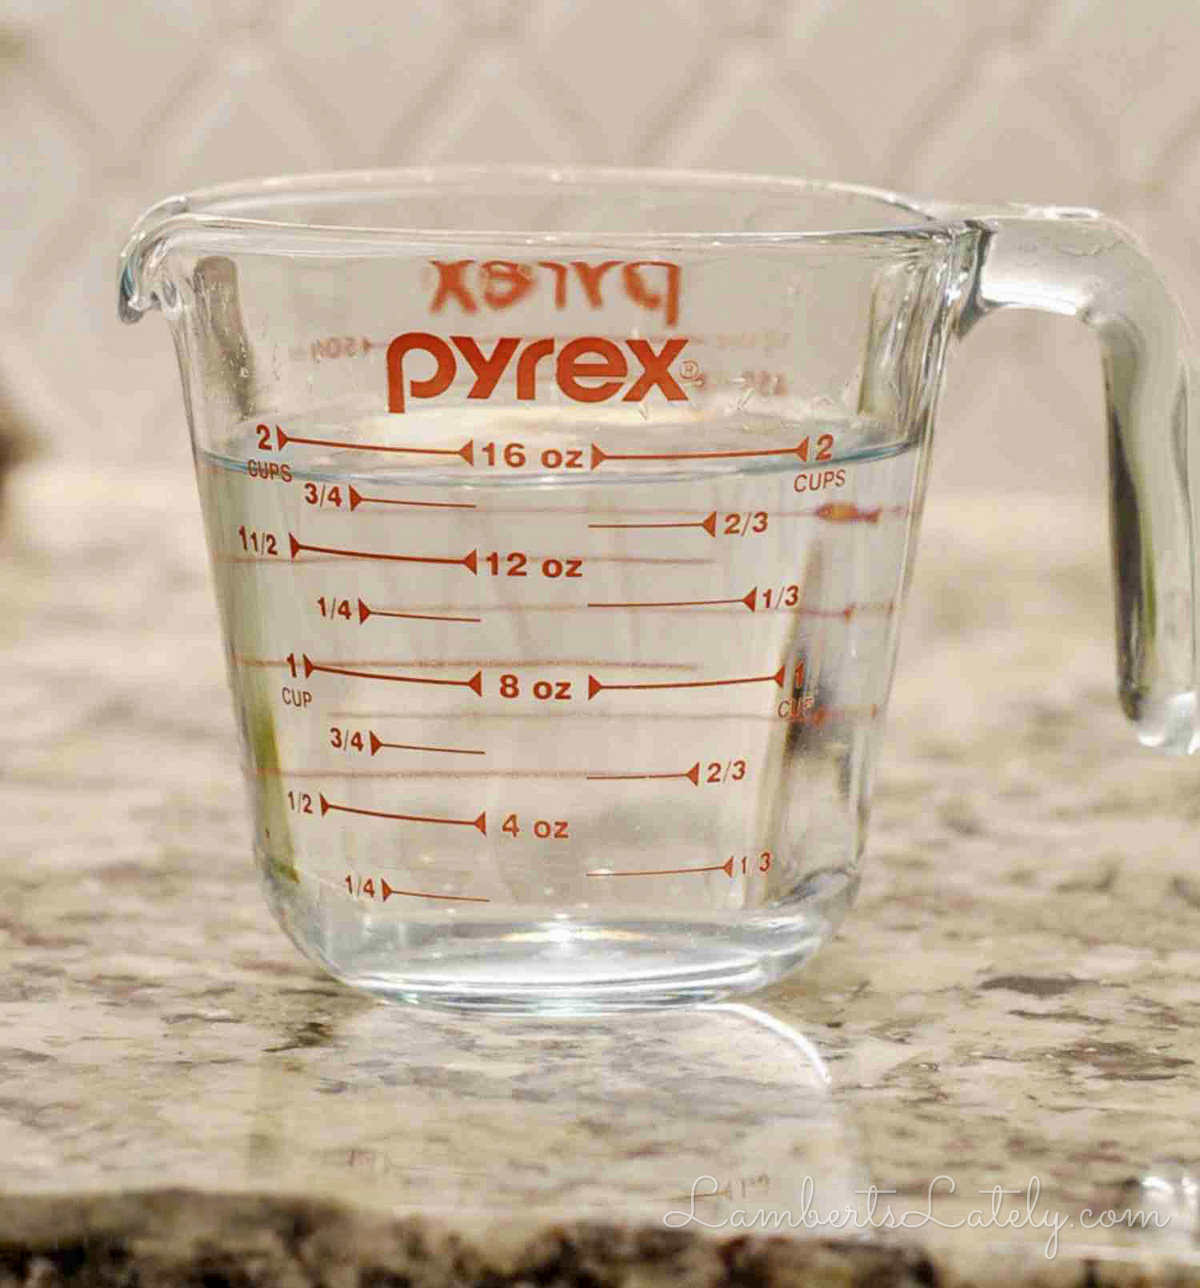
The Perfect Water-to-Rice Ratio
Here's the secret to cooking perfect Instant Pot rice: use a 1 cup of rice to 1.25 cups of water ratio. I use slightly more water than some methods because it consistently prevents crunchy rice, especially with newer Instant Pot models.
For example: If you're using 1.5 cups of rice, you'll mix just under 2 cups of water into your cooker with the rice. (The ratio doesn't have to be perfectly measured, rounding is fine).
I sometimes use Instant Pot chicken stock instead of water to give the rice lots of flavor. You can add any seasoning you'd like at this point!
I add a drizzle of olive oil (I don't measure, maybe about a teaspoon) and a couple of pinches of salt in my pot.
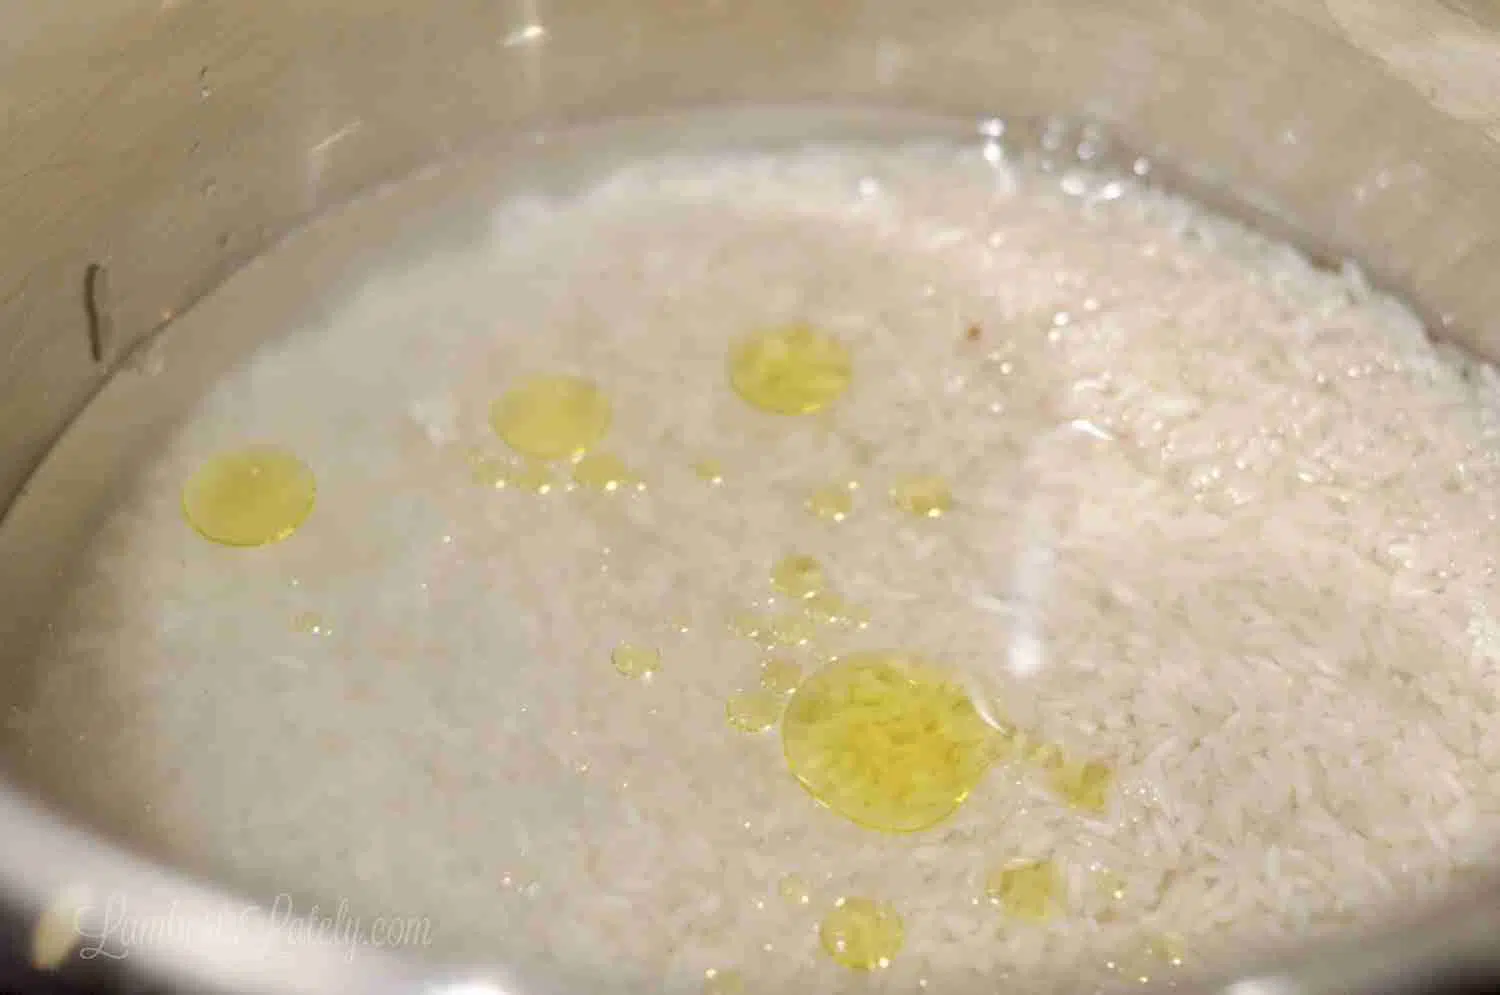
It doesn't have to be completely stirred together before putting your lid on. I do like to stir the rice a little to eliminate any clumps.
Related: if you like this tutorial, check out my easy Instant Pot pasta method!
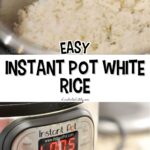
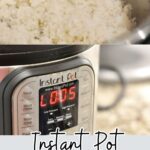
Step 3: Set the cooking time.
When I prepare Instant Pot rice, I use the manual setting (high pressure). On newer models, this is the Pressure Cook button; older models may say Manual.
Set the timer for 7 minutes for white, basmati, or jasmine rice and 15 minutes for brown rice. These times work no matter how much rice, whether you have half a cup or 3 cups of rice.
Put the lid on with the pressure release valve on top in the sealing position (turned away from you).
Let the cook cycle run and quick release the pressure after cooking (meaning - just turn that valve on top of the Instant Pot as soon as the cook cycle is over).
One note: You will set the same amount of time no matter how much rice, but more rice in the Instant Pot takes longer to come to pressure. This is because there is just more food in the pot, so it takes longer to heat up.
So, your total cooking time might be slightly longer, but you'll still set the same time. I wouldn't recommend cooking more than about 3-4 cups of dry rice in a 6-quart Instant Pot.
Should I use the Instant Pot Rice Setting?
No, I don't use the rice button that many Instant Pots include. Manual high pressure gives me more consistent results across rice types.
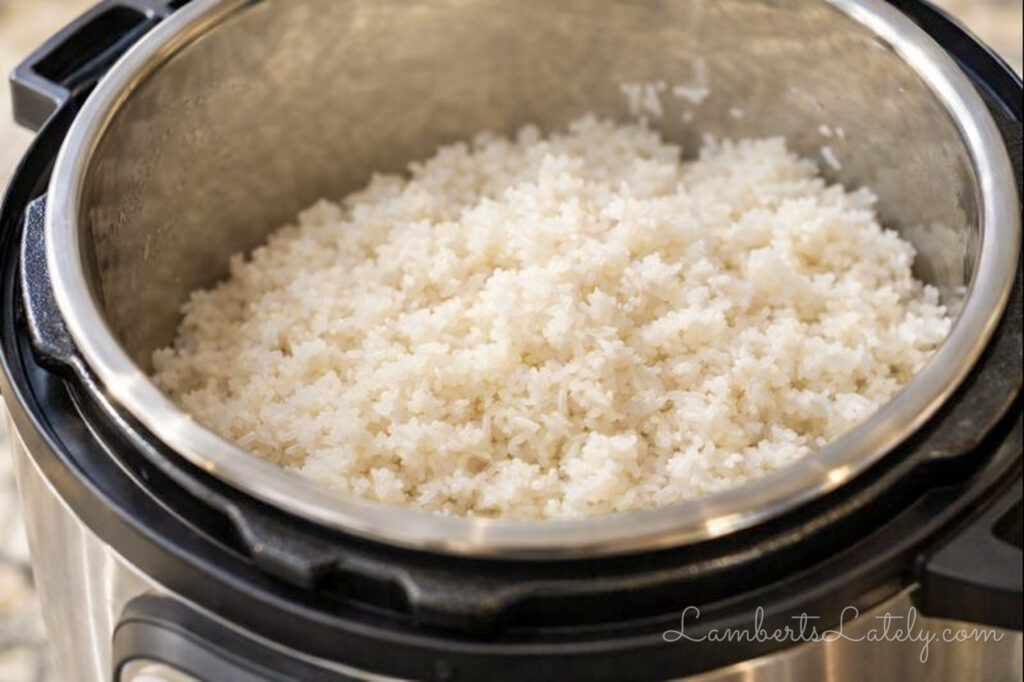
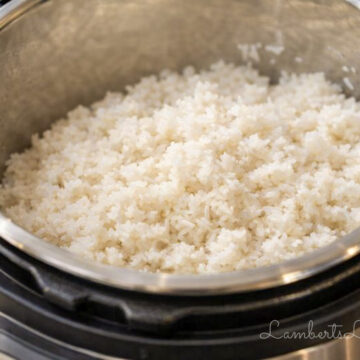
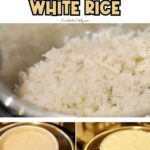
Step 4: Fluff and serve

Finally, fluff the rice with a fork. I usually add a little bit of butter to keep the rice from sticking together. This also gives the rice a little bit of flavor.
I turn the warm setting off as soon as I take the lid off. This will automatically come on after the cooking cycle is over, but it tends to make the rice stick to the bottom of the pan after a few minutes.
You can either take the inner pot out of the Instant Pot or put rice in another dish.
From here, you're ready to serve your fluffy, perfectly-cooked rice!
Quick Summary
Let's sum up the steps to making perfect Instant Pot rice...
- Measure and rinse rice before adding to the Instant Pot. A typical amount for a meal is 1-1.5 cups of rice.
- Add water (1 cup of rice to 1.25 cups of water), along with a dash of olive oil and salt. Any other seasonings can be added at this point.
- Cook rice on manual, high pressure setting for 7 minutes for white rice, or 15 minutes for brown rice. Quick release the pressure after cooking (just turn the pressure valve on the lid as soon as the cooking cycle is over).
- Fluff with a fork and add a little bit of butter. Turn off of the warm setting.
Storage and Reheating
This rice can be stored in an airtight container in the refrigerator for 3-4 days.
It can be reheated in the microwave in 30-second increments. I like to add a sprinkle of water and oil when I reheat it to keep the rice fluffy.
I don't recommend using the Instant Pot to reheat leftover rice - too complicated! Reheating rice in a microwave works just fine.
Pot-in-Pot Method
In the tutorial I shared above, I'm cooking rice by itself in the Instant Pot. Sometimes I use the Instant Pot to cook just the rice and sometimes I cook it along with another part of my meal.
This method is a little bit more advanced than the basic tutorial - if you're new to the Instant Pot, start with the basic method above.
To cook rice at the same time as another dish, I use the pot-in-pot method. I talked a little bit more about that in my Instant Pot Freezer Meal Boot Camp post.
With this method, you use the trivet that comes with your Instant Pot pressure cooker. Stand it up over the main item you're cooking, then put a small baking dish on top of the trivet and fill it with any other item you need to cook for your meal.
This pot-in-pot method is great for cooking rice, potatoes, and even veggies along with your main course!
You will need to make sure the cooking times roughly match. For example, to cook rice using the pot-in-pot method, you'll need to make sure your other item cooks for roughly 7 minutes as well.
Step-by-Step Video
FAQs
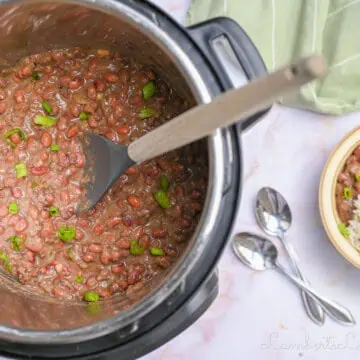
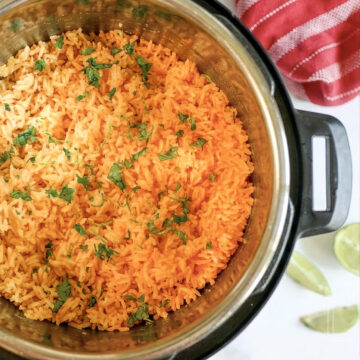
More Great Instant Pot Rice Recipes

I hope you love this easy, fool-proof rice! If you try this recipe and love it, please leave a rating ⭐️ and comment 💭 down below. And before you go, make sure to follow along for the latest from the blog!
Instant Pot Rice
Equipment
Ingredients
- 1.5 cups long-grain white rice (rinsed)
- 2 cups water
- 1 teaspoon salt
- 1 teaspoon olive oil
Instructions
- Add rinsed rice to the Instant Pot; cover with water. Add salt and olive oil and stir slightly.
- Lock on the Instant Pot lid. Set the Instant Pot to manual, high pressure, 7 minutes (for white/jasmine/basmati rice) or 15 minutes (for brown rice).
- Once the cook cycle is over, quick release the pressure. Fluff rice with a fork and remove from the warming setting (so rice doesn't dry out).
Notes
- Rinse rice to remove excess starch and improve texture.
- Use a 1:1.25 rice-to-water ratio; exact measuring isn't necessary.
- For extra flavor, substitute chicken stock for water and add seasonings as desired.
- Fluff with a fork; a little butter helps prevent sticking.
- Turn Keep Warm off after cooking to avoid rice sticking to the bottom.
- Store leftovers refrigerated for 3-4 days; reheat in the microwave with a splash of water.
- For cooking rice with another dish, use the pot-in-pot method with similar cook times.
Nutrition Facts

Leslie Lambert is a lifestyle writer and content creator specializing in home organization, family recipes, and intentional living. With 17 years of experience in blogging and digital storytelling, she helps busy women create calm, purposeful homes they love.

Increase the rice say to 5 cups do you have to increase the cook time?
You shouldn't! Just make sure there's enough room in your pot for the rice and water (I'd do about 6 cups for 5 cups of rice).
Why is there a Rice button on the IP if we are not going to use it?
in my manual for the IP, it does not specify a cooking time or pressure release plan.
Good question! 🙂 I'm sure there is a rice setting on most IPs - I just prefer to do it through the manual setting (which honestly might not be that different than the rice setting).
I'm sure the settings you recommend will work as expected. I can't say as much for the "Rice" button as there is no information in the manual for what the Rice button does.
I'm with you, I wish there was better explanation of that.
I tried the rice button twice and it just burns the rice, so the manual setting is better.
Do you pressure cook the rice on HIGH for 8 minutes?
Yes, the high pressure that is automatic on Instant Pot manual setting!
my IP does not have a "manual" setting. would I use the "pressure cooker" setting??
Yes, the pressure cooker setting is the same as manual!
could you use a broth instead of water?
Absolutely! That would add even more flavor.
This is the best IP rice I have made. No sticking and no sticky rice. Perfectly fluffy.c
How many ppl will this serve? With your above instructions?
It really depends on serving size, which can vary so much with rice. You can usually expect finished rice to be about triple the amount of dry rice; so if you put 1 cup of dry rice in, you'll get around 3 cups of ready-to-serve rice.
I am getting ready to do this with a yellow rice… It’s the Vigo authentic Spanish rice! Has anyone tried that to you how much liquid or time?
I would think the process/water would be similar for this kind of rice to white rice.
So if I put 3 cups dry rice do I put 4 cups water is that correct and cook time still 8 minutes?
Yes, that's correct!
My instant pot is a Tefal multi cooker, will your measurements and times be the same. Thank you.
If it is a pressure cooker, the measurements and time should be the same.
This was great! Thanks!
It turned out perfect! Thank you for sharing.
I’ve made lots of rice in my IP, made this tonight and I will follow this recipe from now on! It was perfect!!
That's so great to hear Becky, thanks for the review!
Fantastic! I added two tablespoons of Sriracha and a tablespoon of red pepper flakes to the sauce. We like heat. Instead of vegetable oil I used sesame oil for the sauce as well. Made a great recipe to our taste. Thank you!
Can this recipe be doubled?
It can! Use as much rice as you need, just use that ratio of 1:1.25 for water. No need to change cook time.
OMG. I just tried you method and my rice was PERFECTION! I’ve always used the “rice button” and it was always too dry. This was so good… and super easy. Loved the addition of salt and olive oil - made a huge difference. I also added a little butter at the end. I could eat it plain fixed this way. Thank you so much for your recipe. It’s the only one I will continue to use!
This is so great to hear, thanks for the review!
I made this tonight used 1.5 c of rice and 2 c of chicken broth and added a little avocado. Did the eight min . It was perfect
I just made rice but it was stodgy and stuck together. Any suggestions on what to alter please?
Different humidity levels can affect your rice. If you're seeing that it's a little over-saturated, I'd suggest leaving out a quarter cup of water and taking a minute off of the cook time. Keep doing this until it's perfect!
This does turn out perfect!
This recipe works EVER single time!
It was good although it was sticky
I have been using your process for exactly one year, and it works perfectly every time! Thanks!
Mine was one large sticky mass. I washed the rice until the water ran clear, followed the directions precisely.
This ratio has always worked for me at 4,500 feet.
Perfect 100% of the time!
Thank you
How many cups of water for 3 or 4 cups of rice?
For 3 cups of rice, I'd recommend just under 4 cups of water. For 4 cups of rice, I'd recommend around 5 cups of water.