
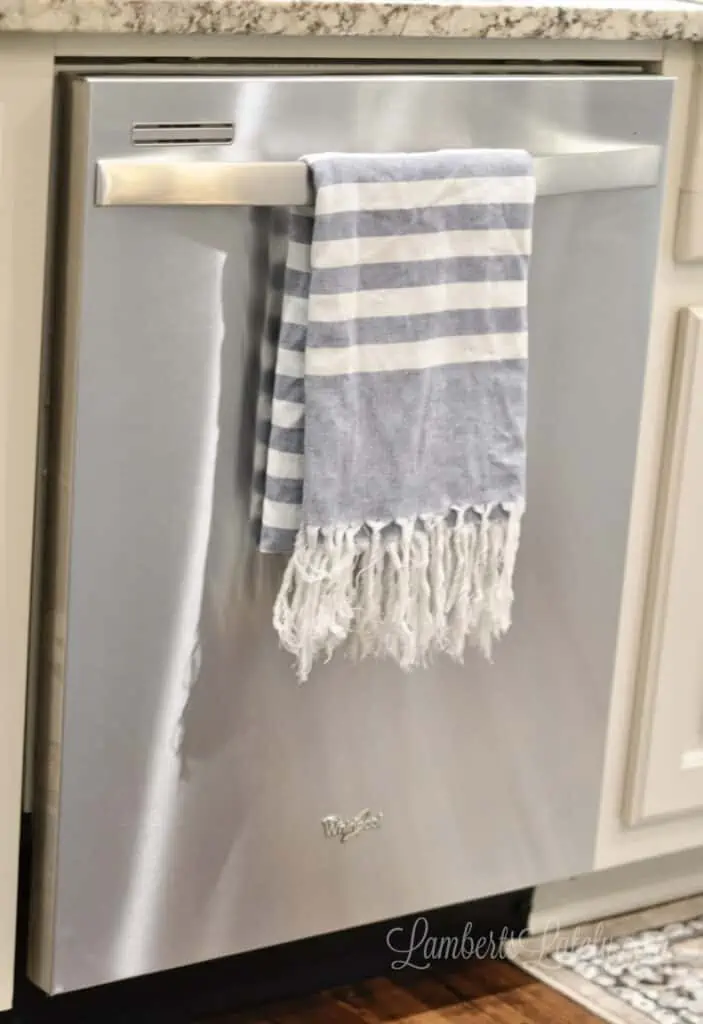
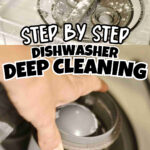
This post shows how to clean a Whirlpool dishwasher step-by-step, including how to use vinegar and baking soda safely for a deep clean and maintenance. I'm sharing exactly what to do (and what not to do) to keep your dishwasher running efficiently and smelling fresh without needing a degree in appliance repair!
Paid links used in this post. Read more about my link usage policies.
Today, I'm breaking down how to clean a Whirlpool dishwasher, including both a quick cleaning routine and a deeper cleaning method using vinegar and baking soda. It's one of those things that we all (myself included) forget to do, but if done properly, it can seriously impact your day to day chores.
If you're wondering how to clean a Whirlpool dishwasher, this step-by-step guide shows exactly how to clean it using vinegar and baking soda!
If you're anything like our family, you run your dishwasher at least once a day. Between the snacks, meals, and just life, those dishes add up so fast!
After a little while, I noticed that our dishwasher wasn't drying as well and just didn't knock out stubborn messes like it did when it was new. I honestly just attributed it to the age of the machine.
As it turns out, it just needed a deep cleaning! I had no idea what kind of impact this would have. Not only is it drying better, but the cleaning is so much more efficient.
TL;DR: Cleaning Your Dishwasher Will...
- Knock out yucky germs
- Eliminate those "funky" smells
- Help the machine clean more efficiently
- Improve the drying power (no more soggy plastic!)
How Often to Clean Your Dishwasher
This whole deep cleaning tutorial doesn't need to be done very often. This is a process I complete once every few months at most.
The reason you don't want to do it every week is that vinegar can break down the rubber and plastic in your dishwasher over time. It might be natural, but it's still pretty acidic!
Quick Steps: How to Clean a Whirlpool Dishwasher
- Clean door seals and edges
- Remove and clean dishwasher filter
- Clean spray arms and vent area
- Run vinegar cleaning cycle
- Wipe interior and exterior surfaces
Supplies Needed
Melamine sponges
Dishwasher-safe bowl
Dish soap
Old toothbrush or small scrub brush
Vinegar
Baking soda
Step 1: Clean the Interior Edges
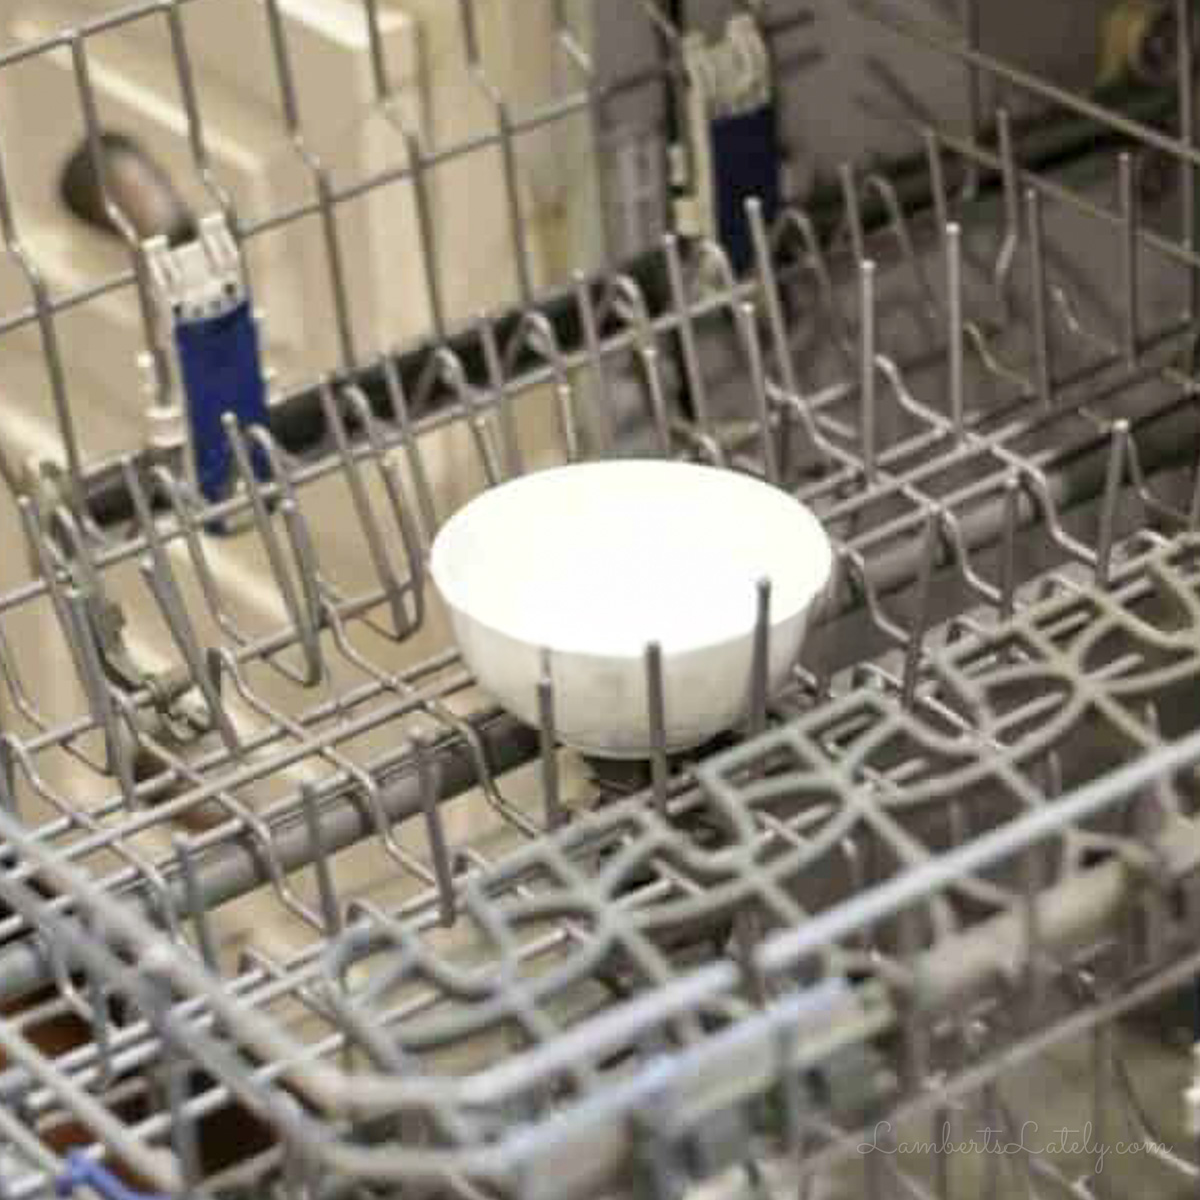
Let's get after the interior first. Start with a completely empty dishwasher (which is like spotting a unicorn, I know; just pile those dishes in the sink for now).
The dirtiest places on my Whirlpool are the edges and the seals. There is always a build-up of soap scum and hard water that the sprayers just don't reach.
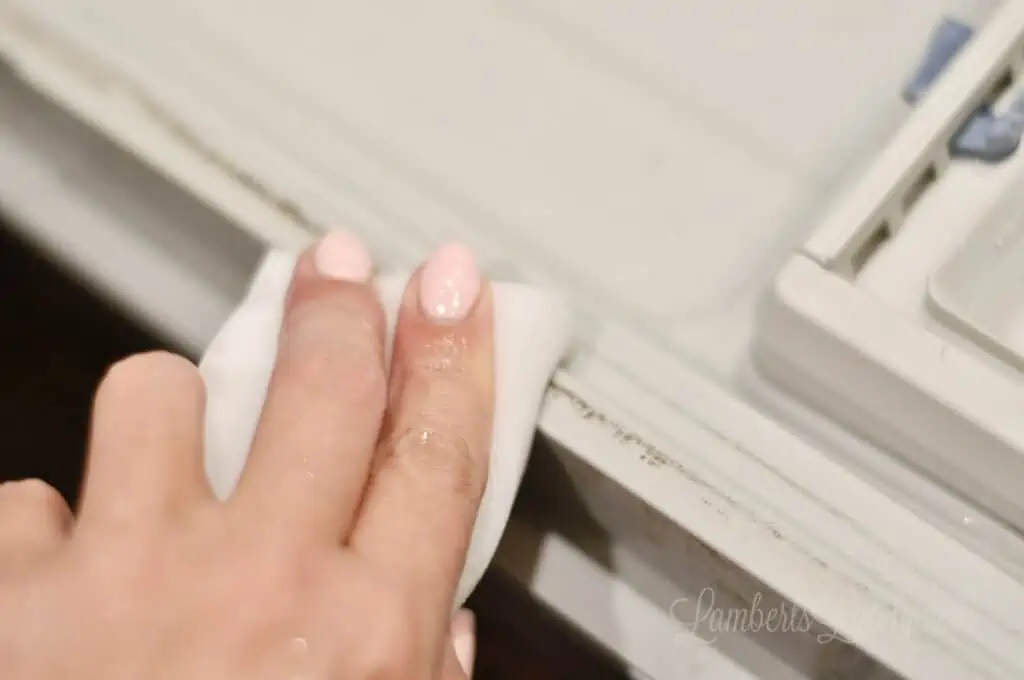
I use a wet melamine sponge and really scrub the edges of the door and the bottom frame. Be gentle with the rubber seals, though, you don't want to rip them!
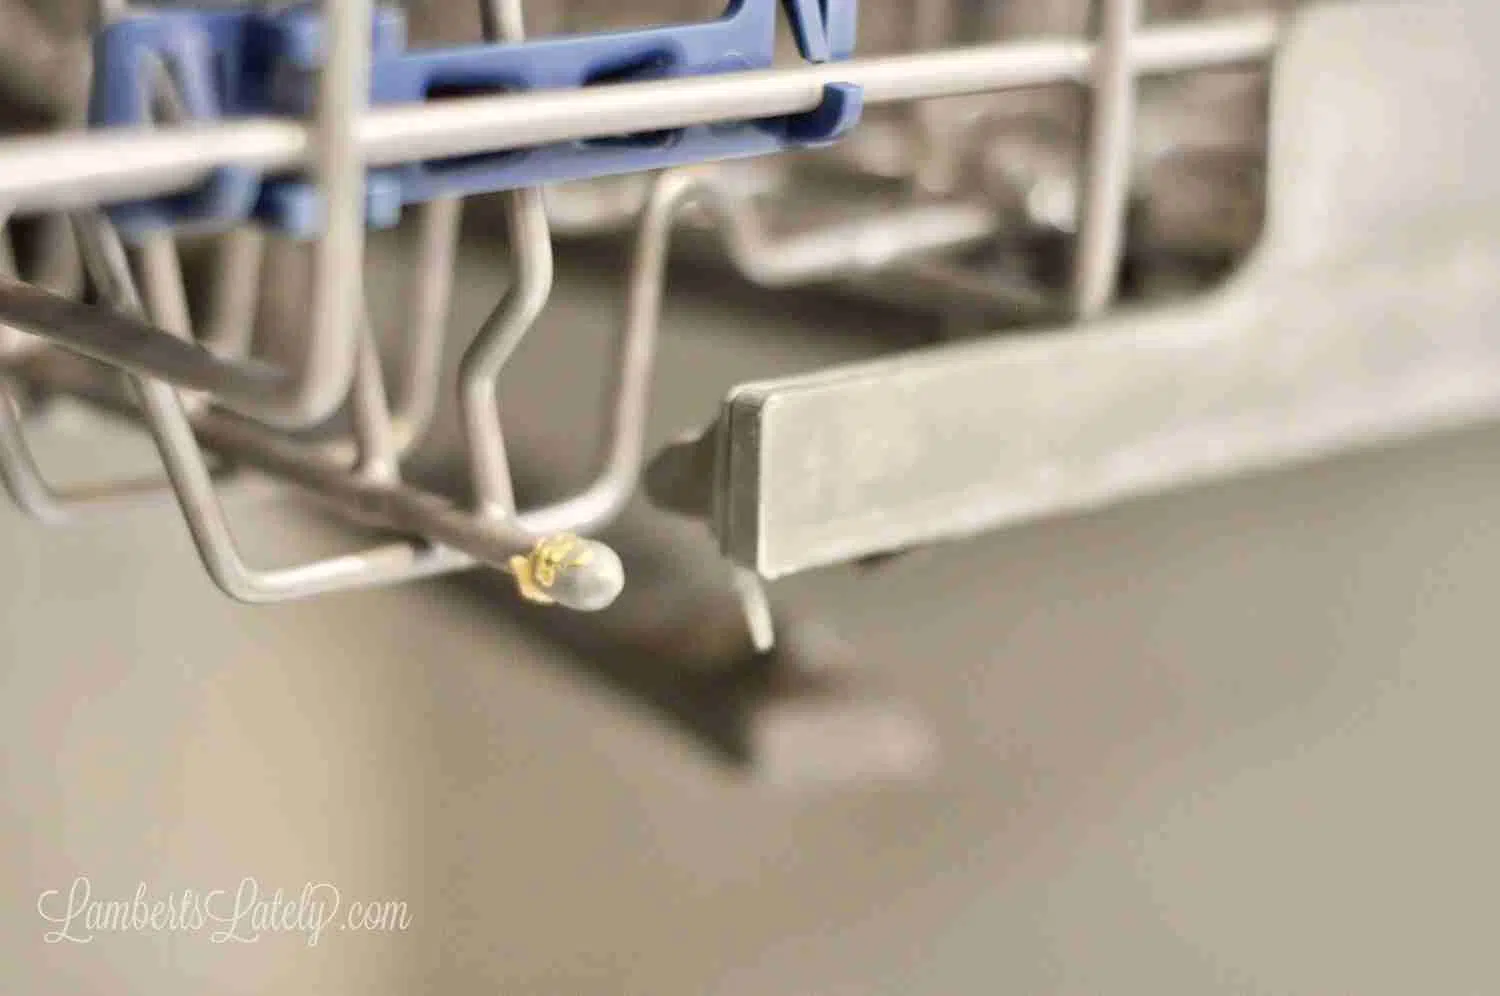
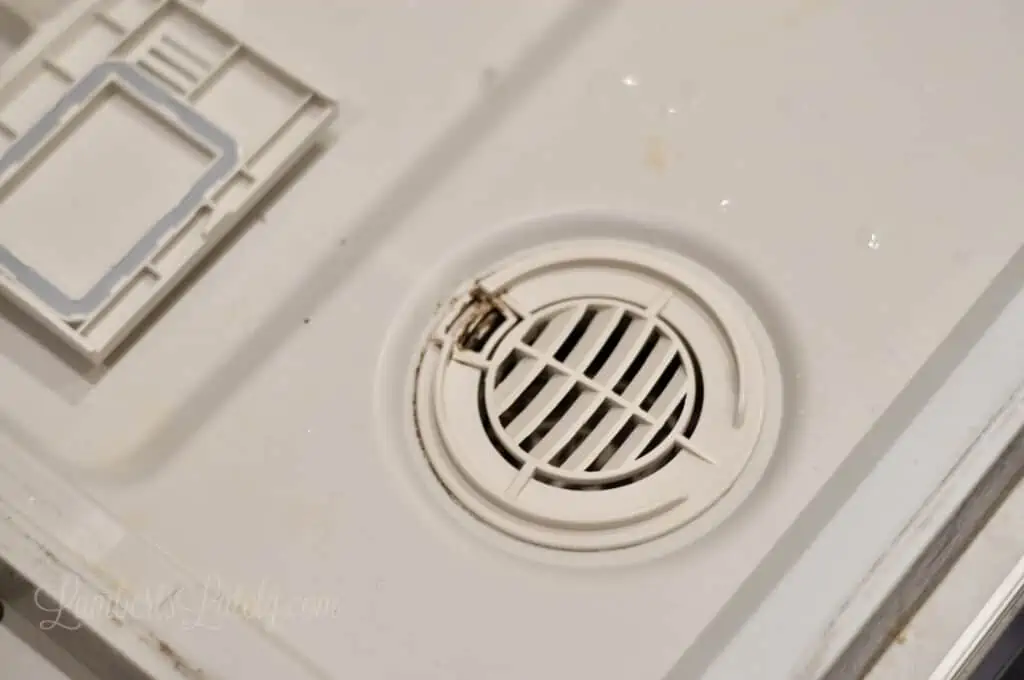
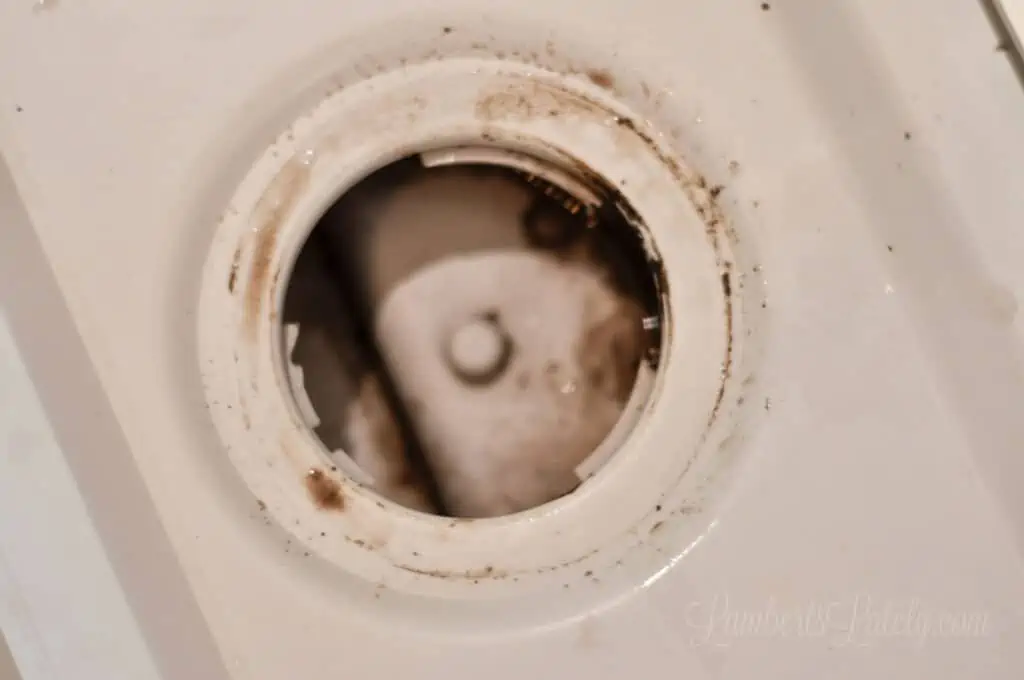
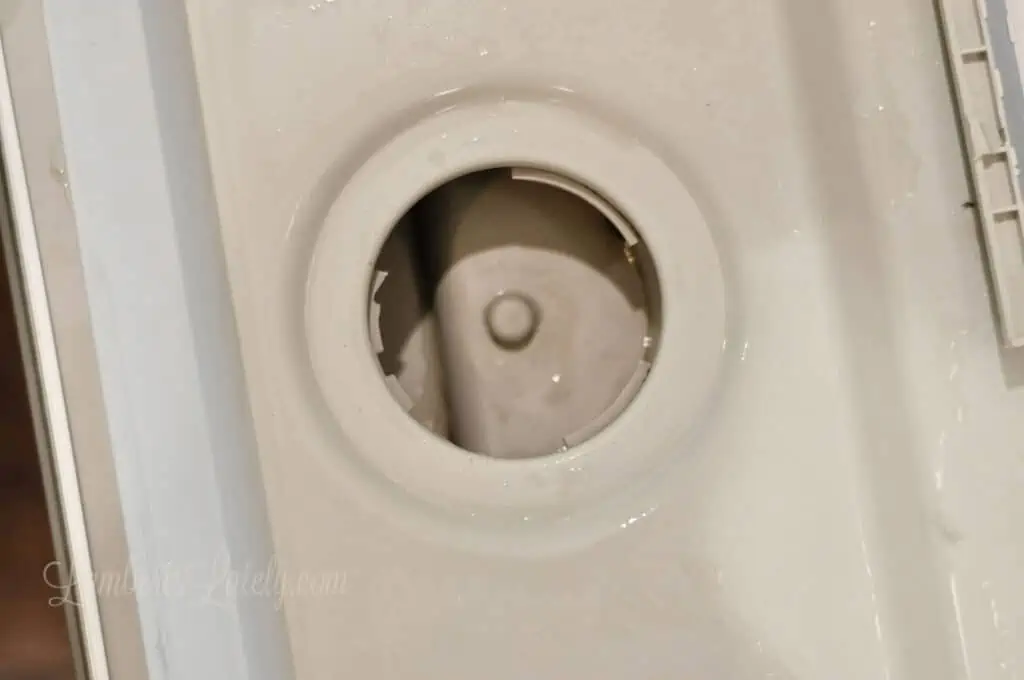
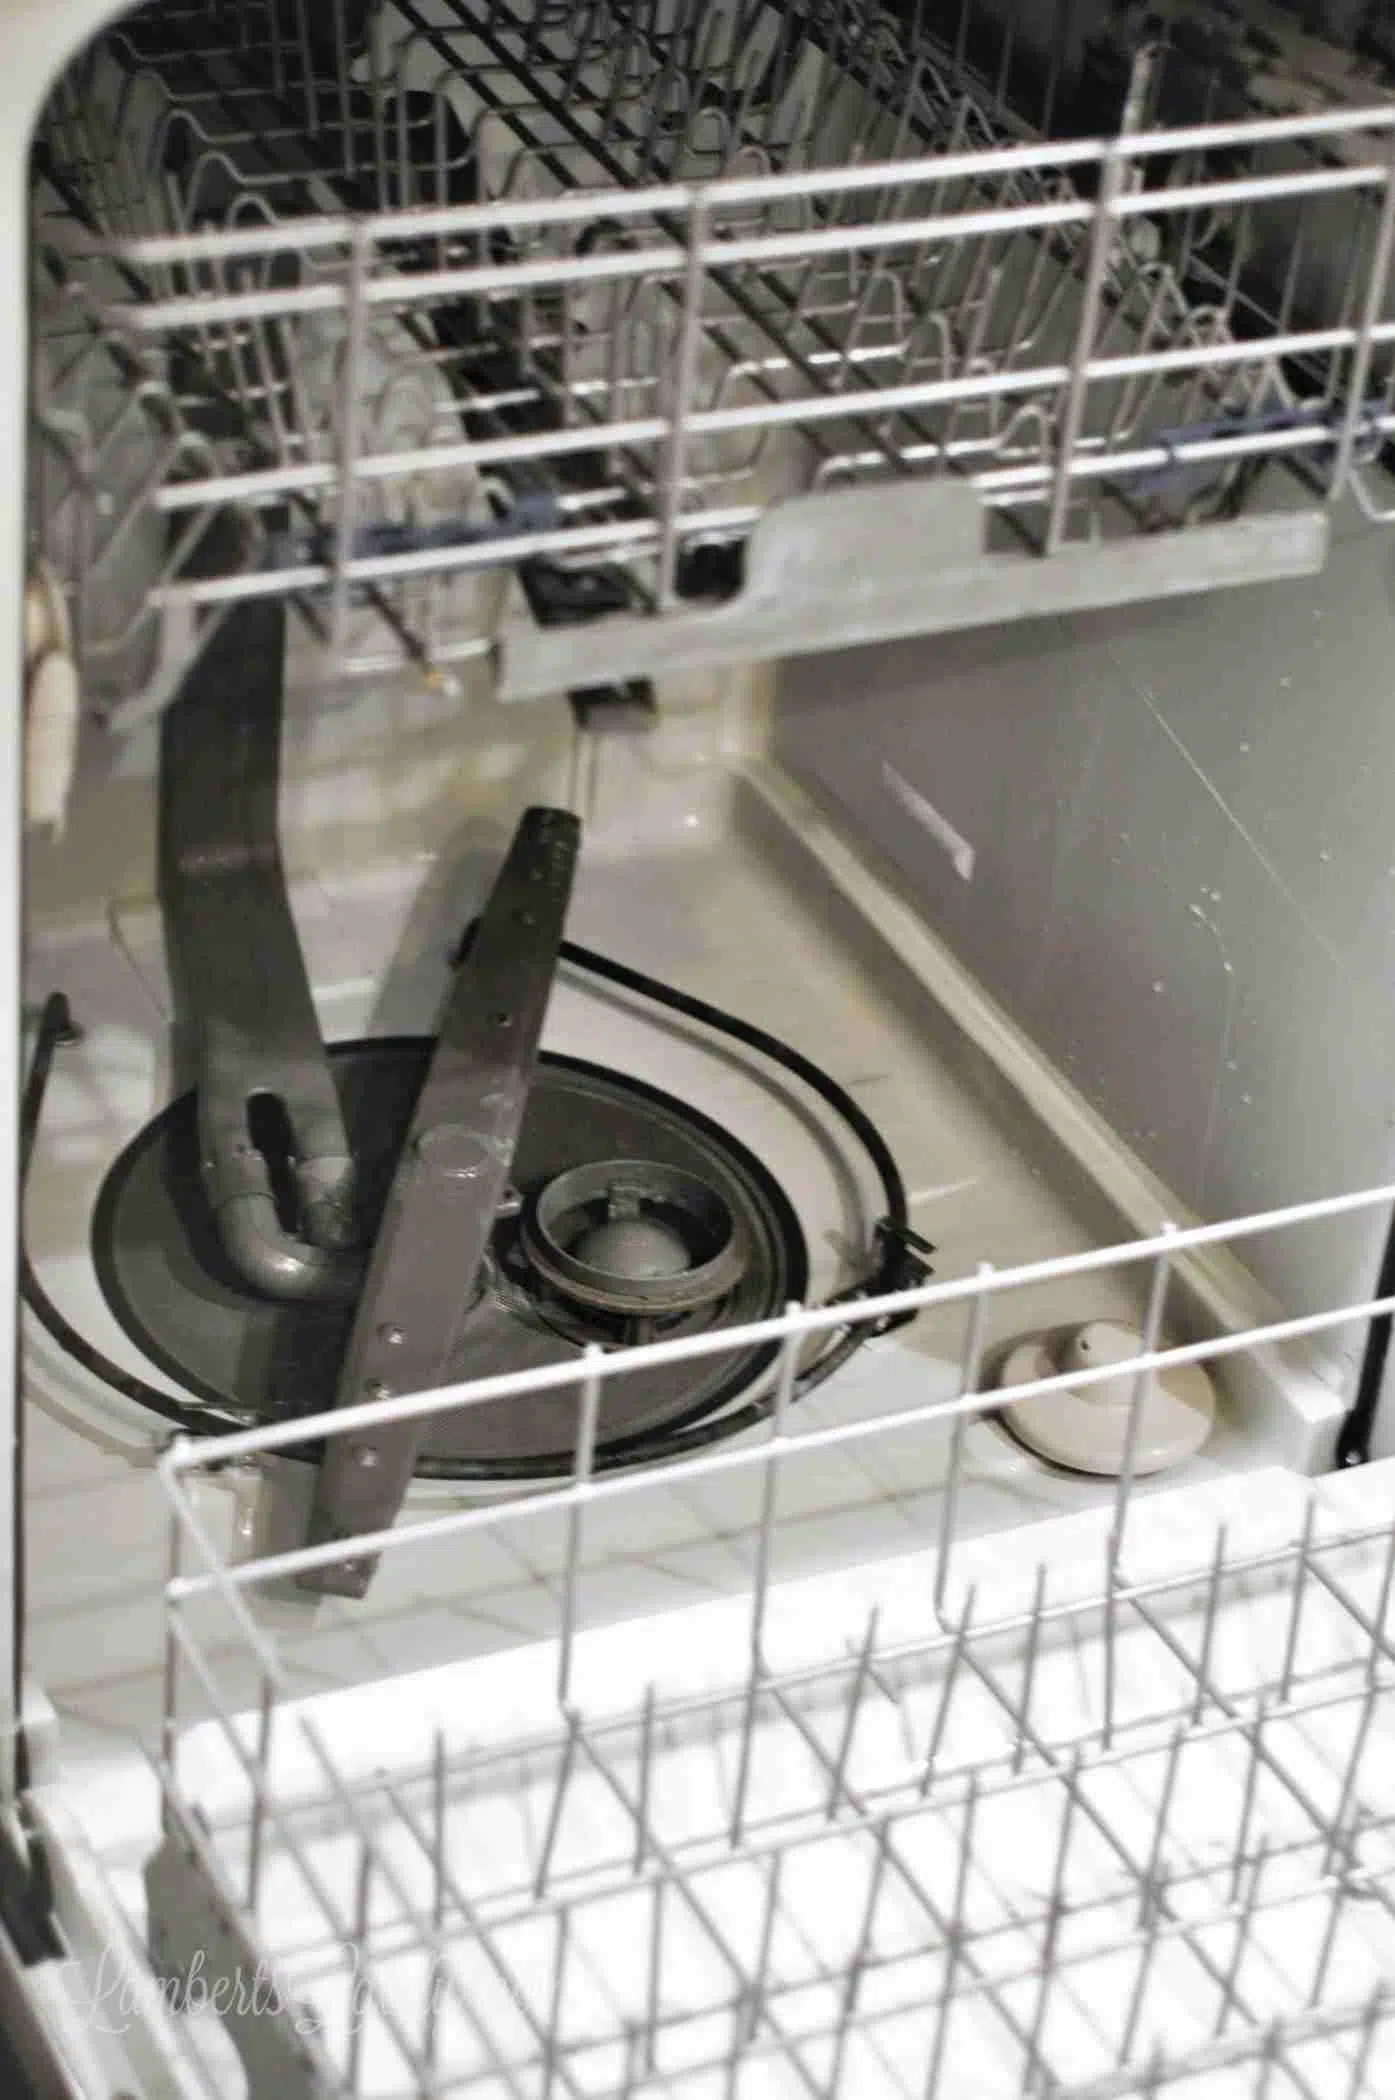
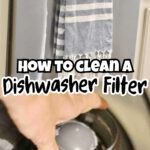
Step 2: How to Clean the Whirlpool Dishwasher Filter
This is a game-changer. Most Whirlpool models have a filter at the bottom to catch food particles and gunk. If this is clogged, your water lines can get backed up.
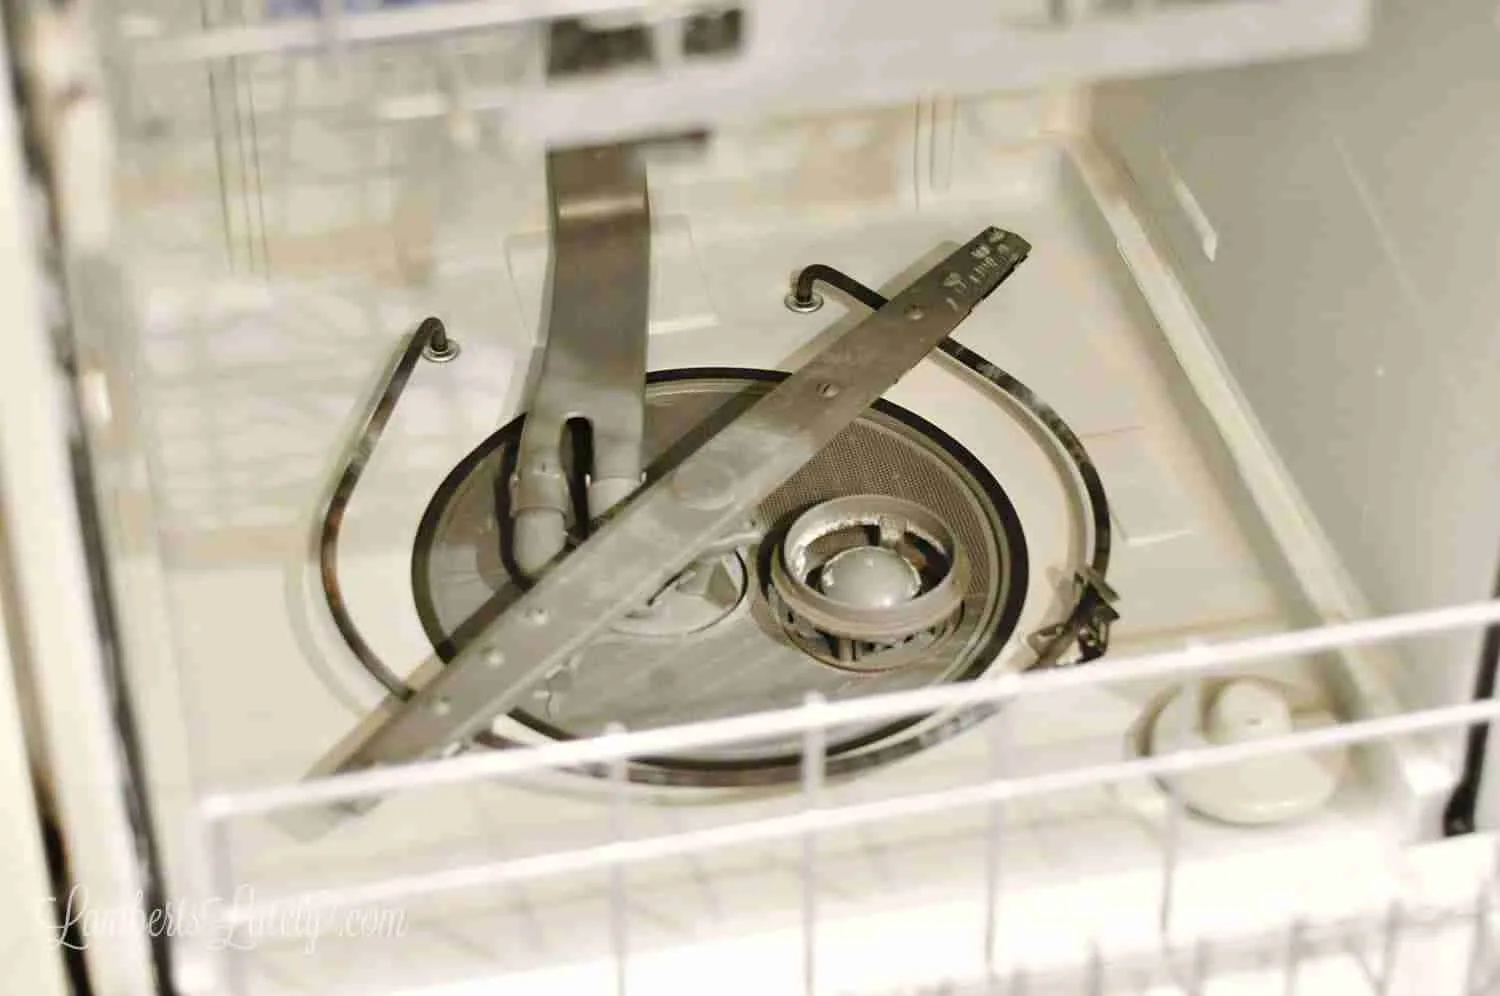
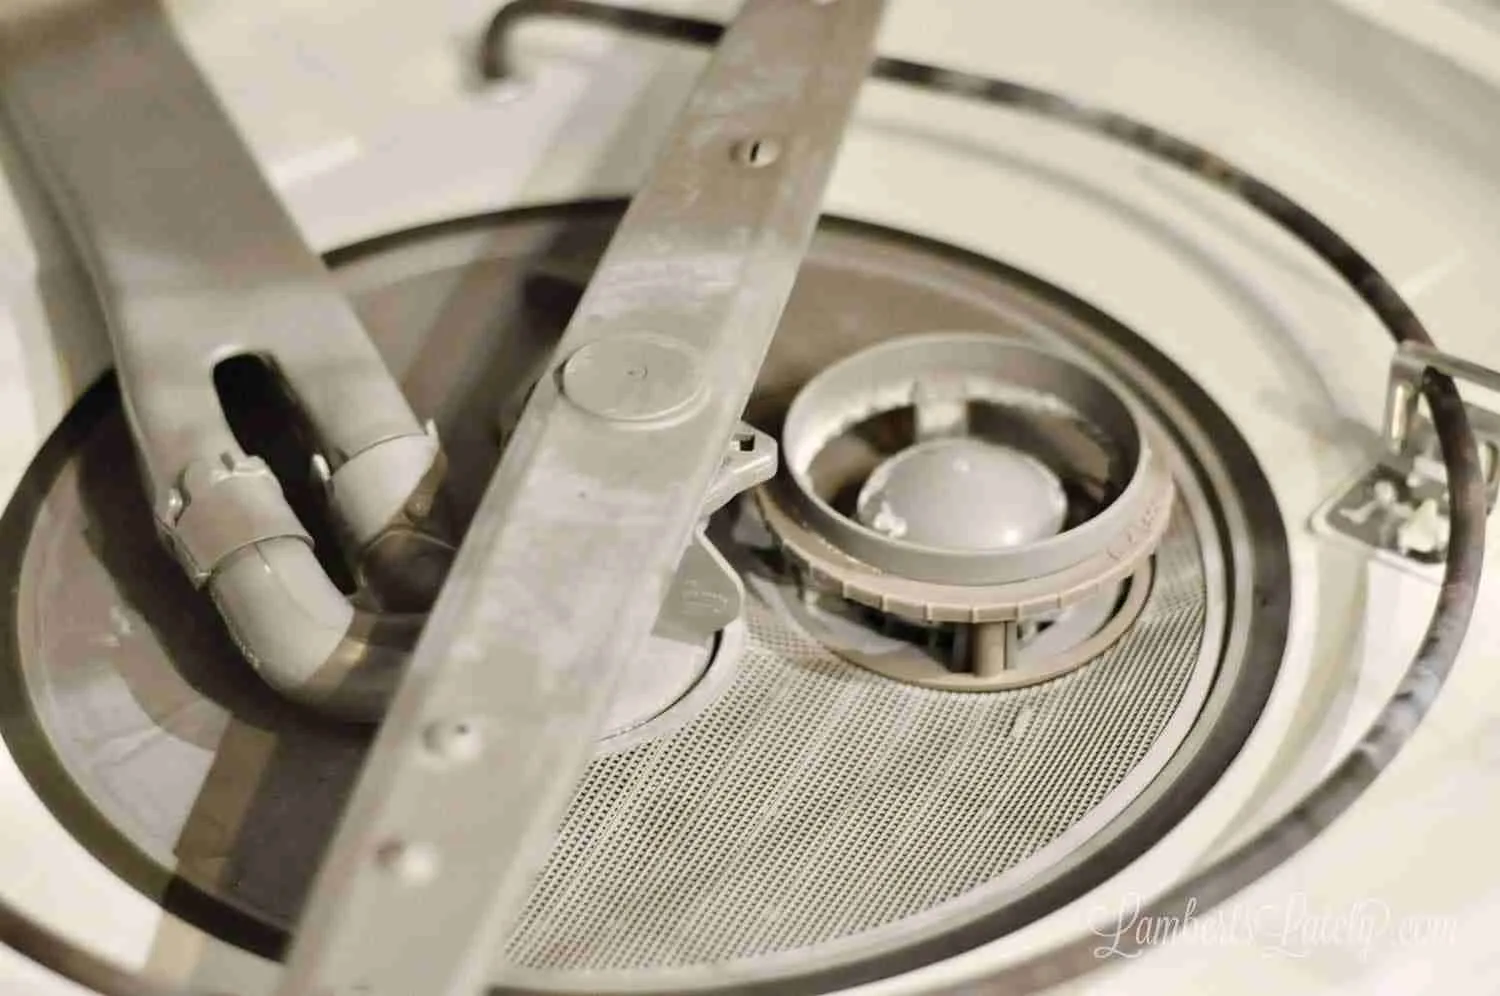
Locate the filter: On my Whirlpool, it's right below the bottom rack.
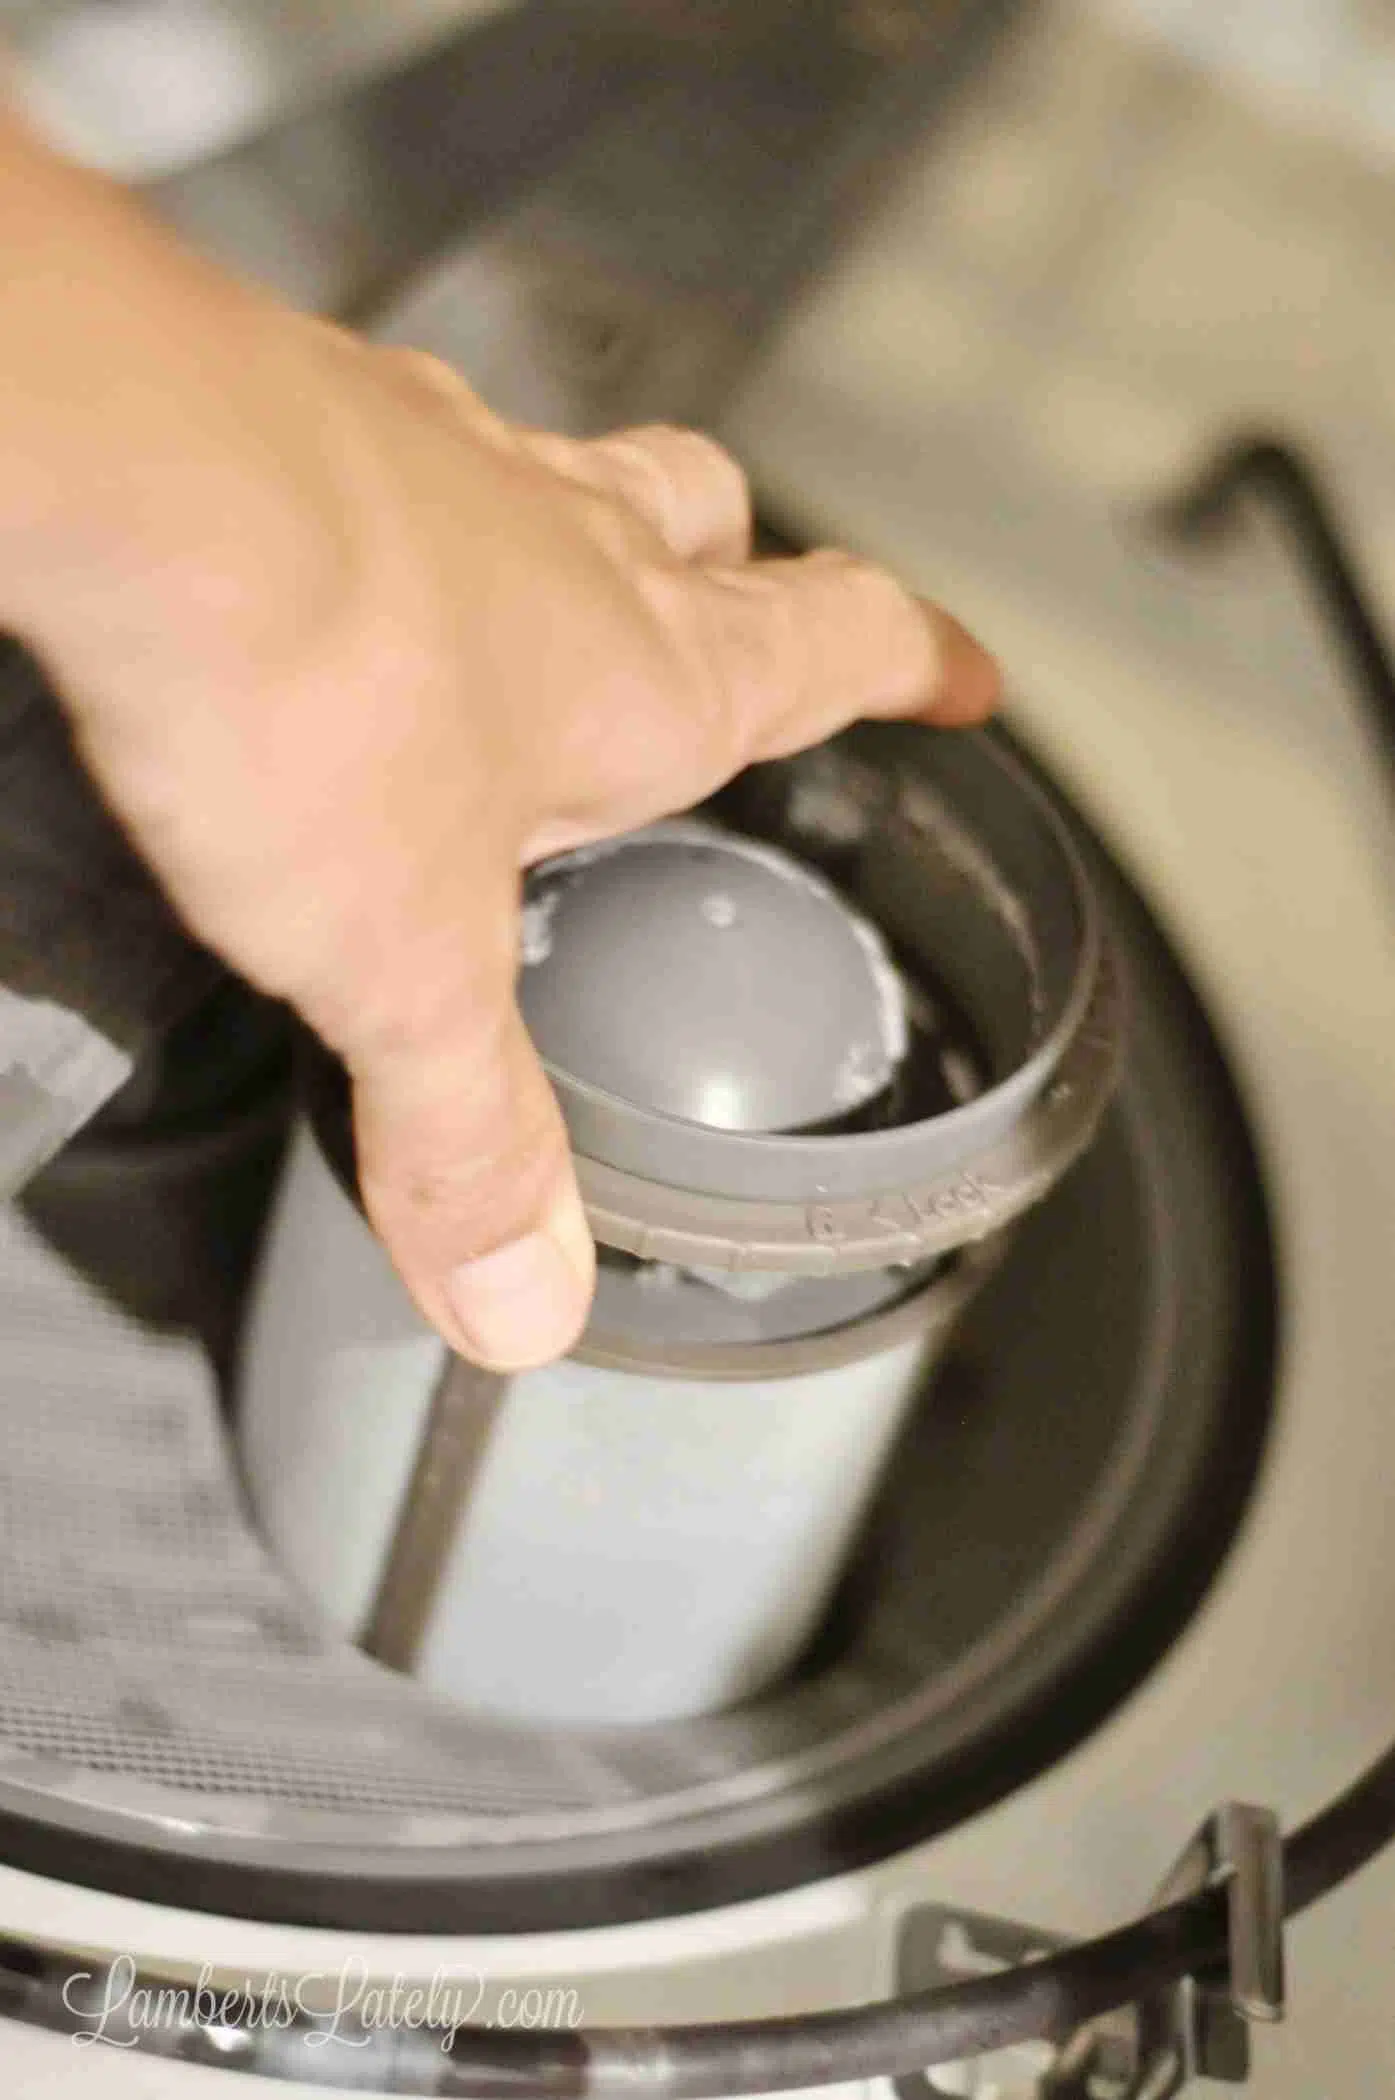
Remove it: You usually just turn the round plastic assembly counter-clockwise to dislodge it.
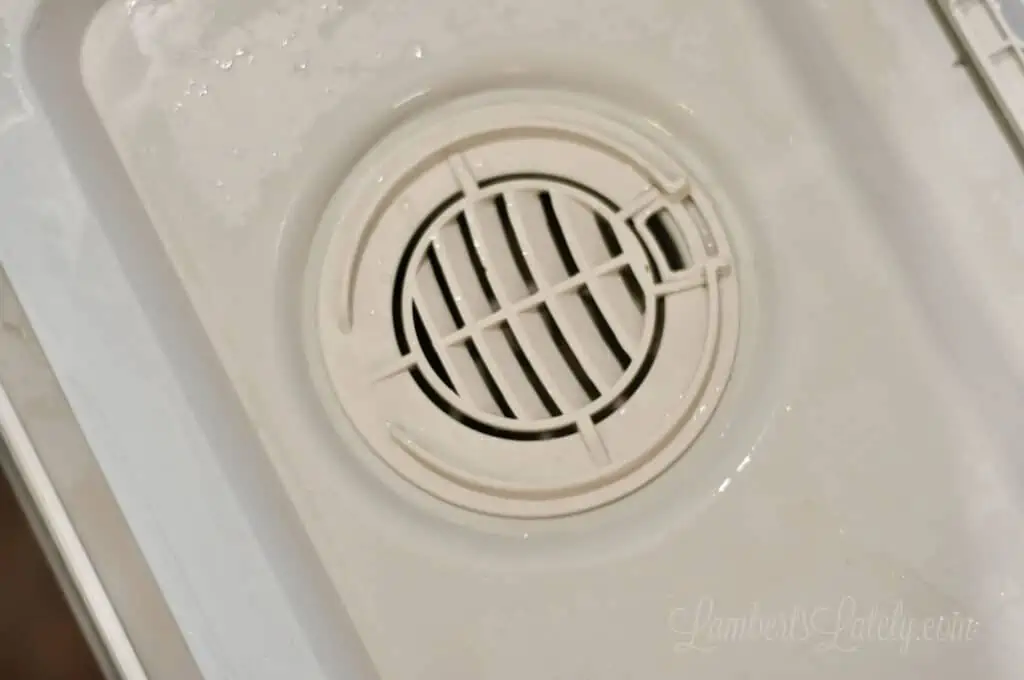
Scrub it: Get ready to be grossed out. I bet you had no idea how nasty this could get! Use a little dish soap and an old toothbrush to get into the mesh.
Replace it: Give it a rinse and important: place it back in the dishwasher before moving on.
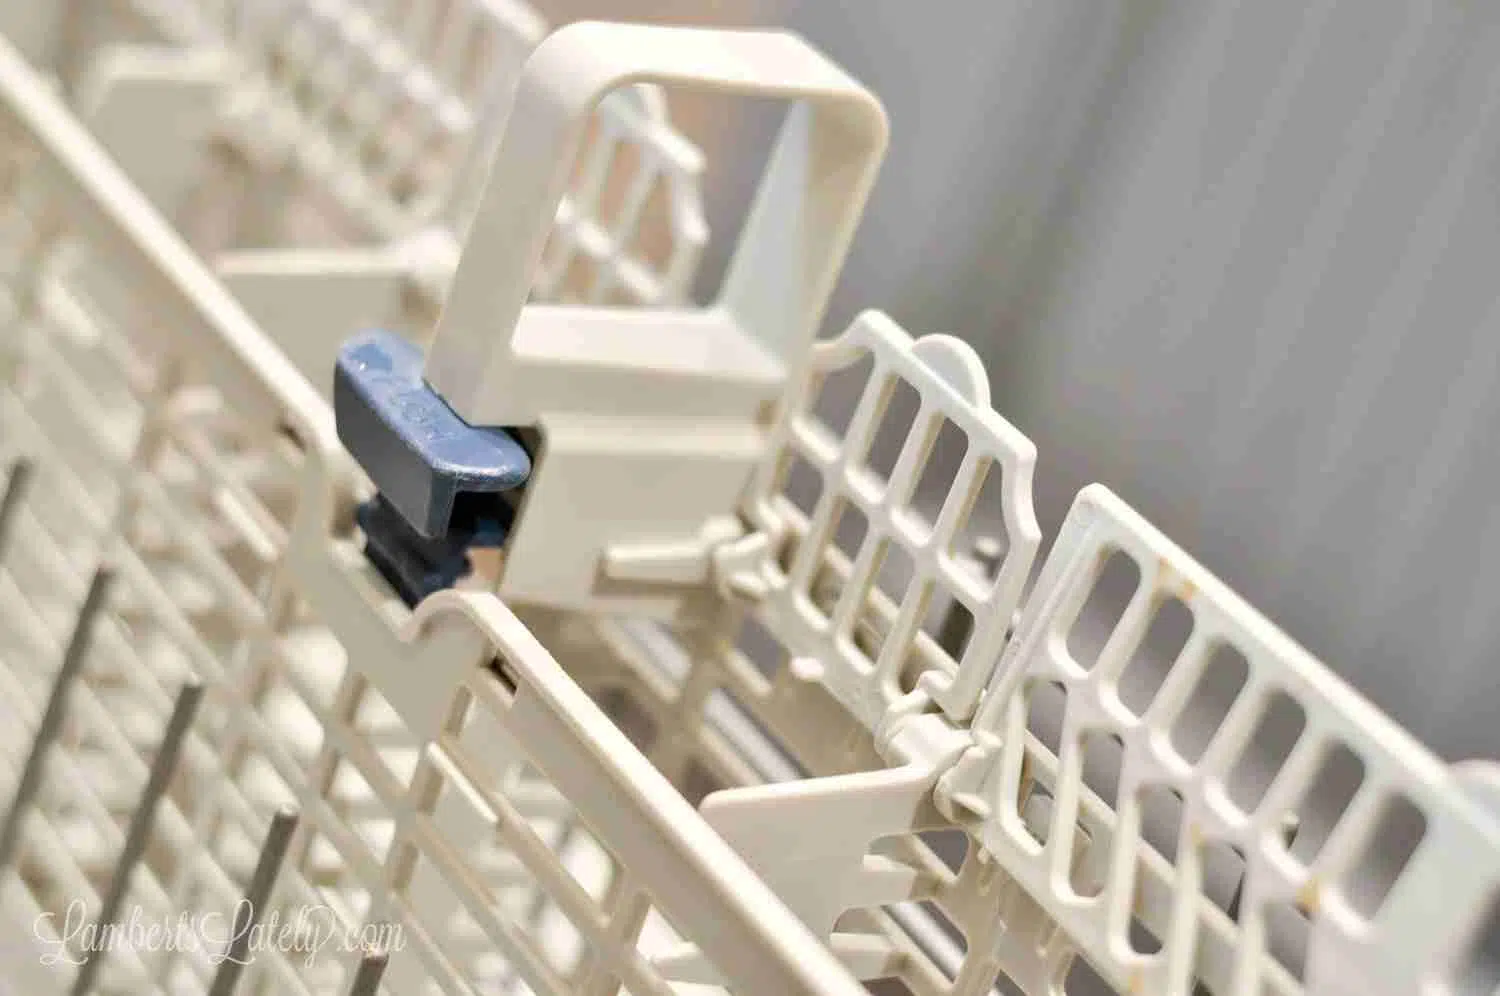
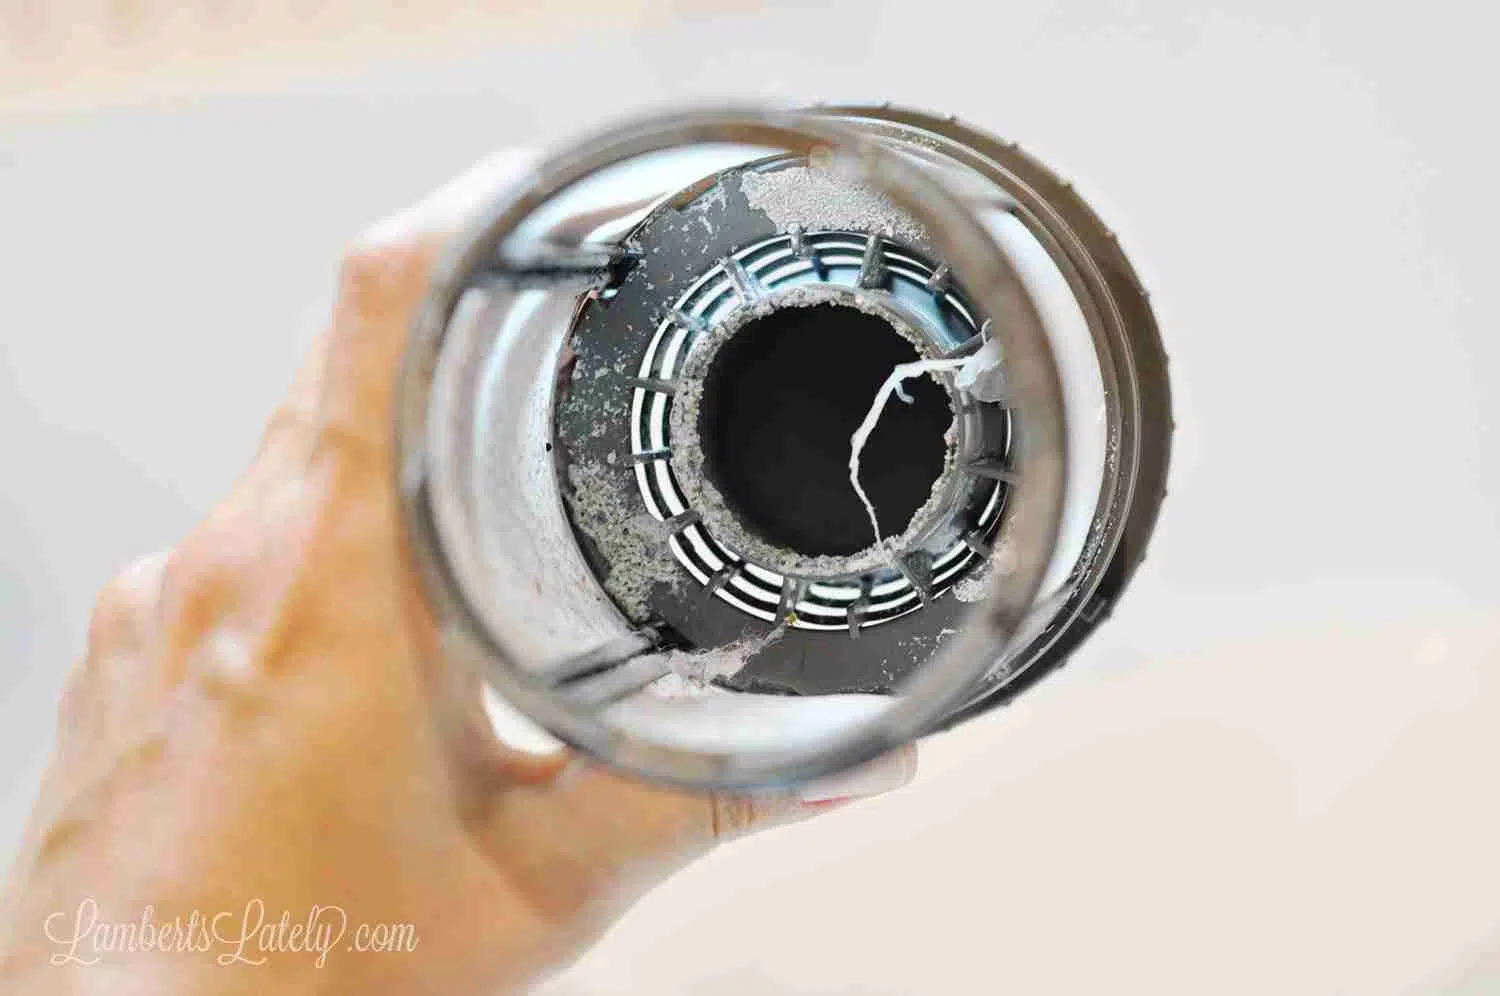
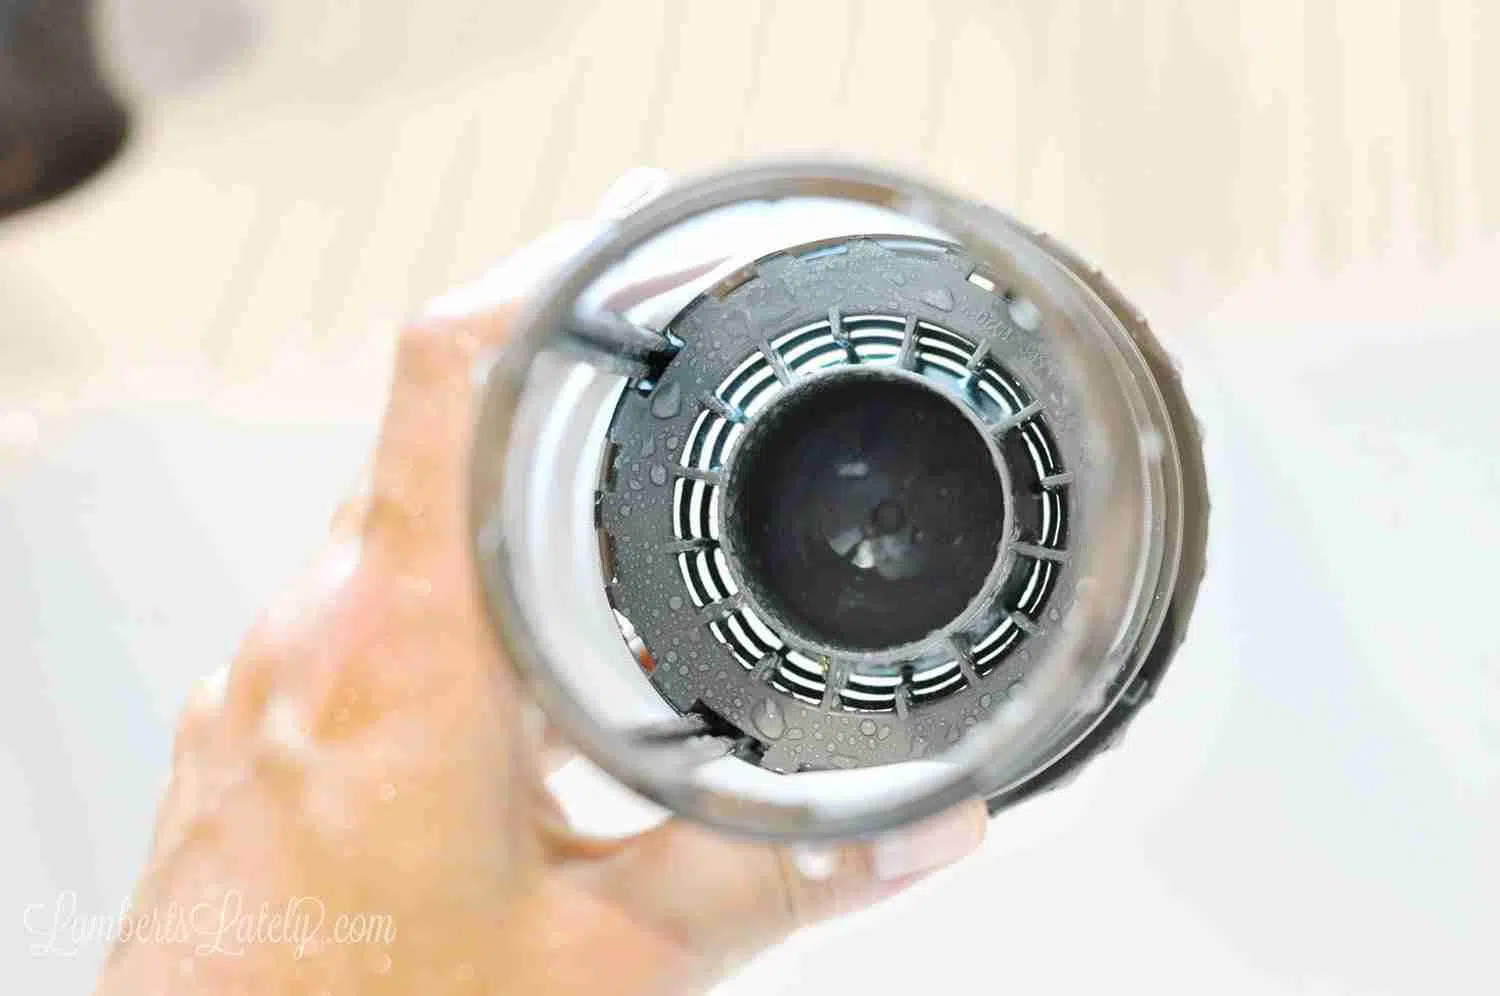
Step 3: Remove & Clean the Whirlpool Vent Cover
On the inside of my dishwasher door, there is a vent that can get really gross with hard water and mildew. To take it off, I usually have to turn it counter-clockwise (I use a screwdriver to gently pry it to the left).
Once it's off, scrub both the vent and the inside. Cleaning this allows steam to escape, which is exactly why your dishwasher starts drying efficiently again!
Related: Check out a few of my tips for ordering cleaning products from grove!
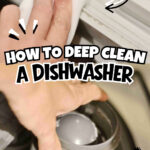
Step 4: How to Clean a Whirlpool Dishwasher With Vinegar
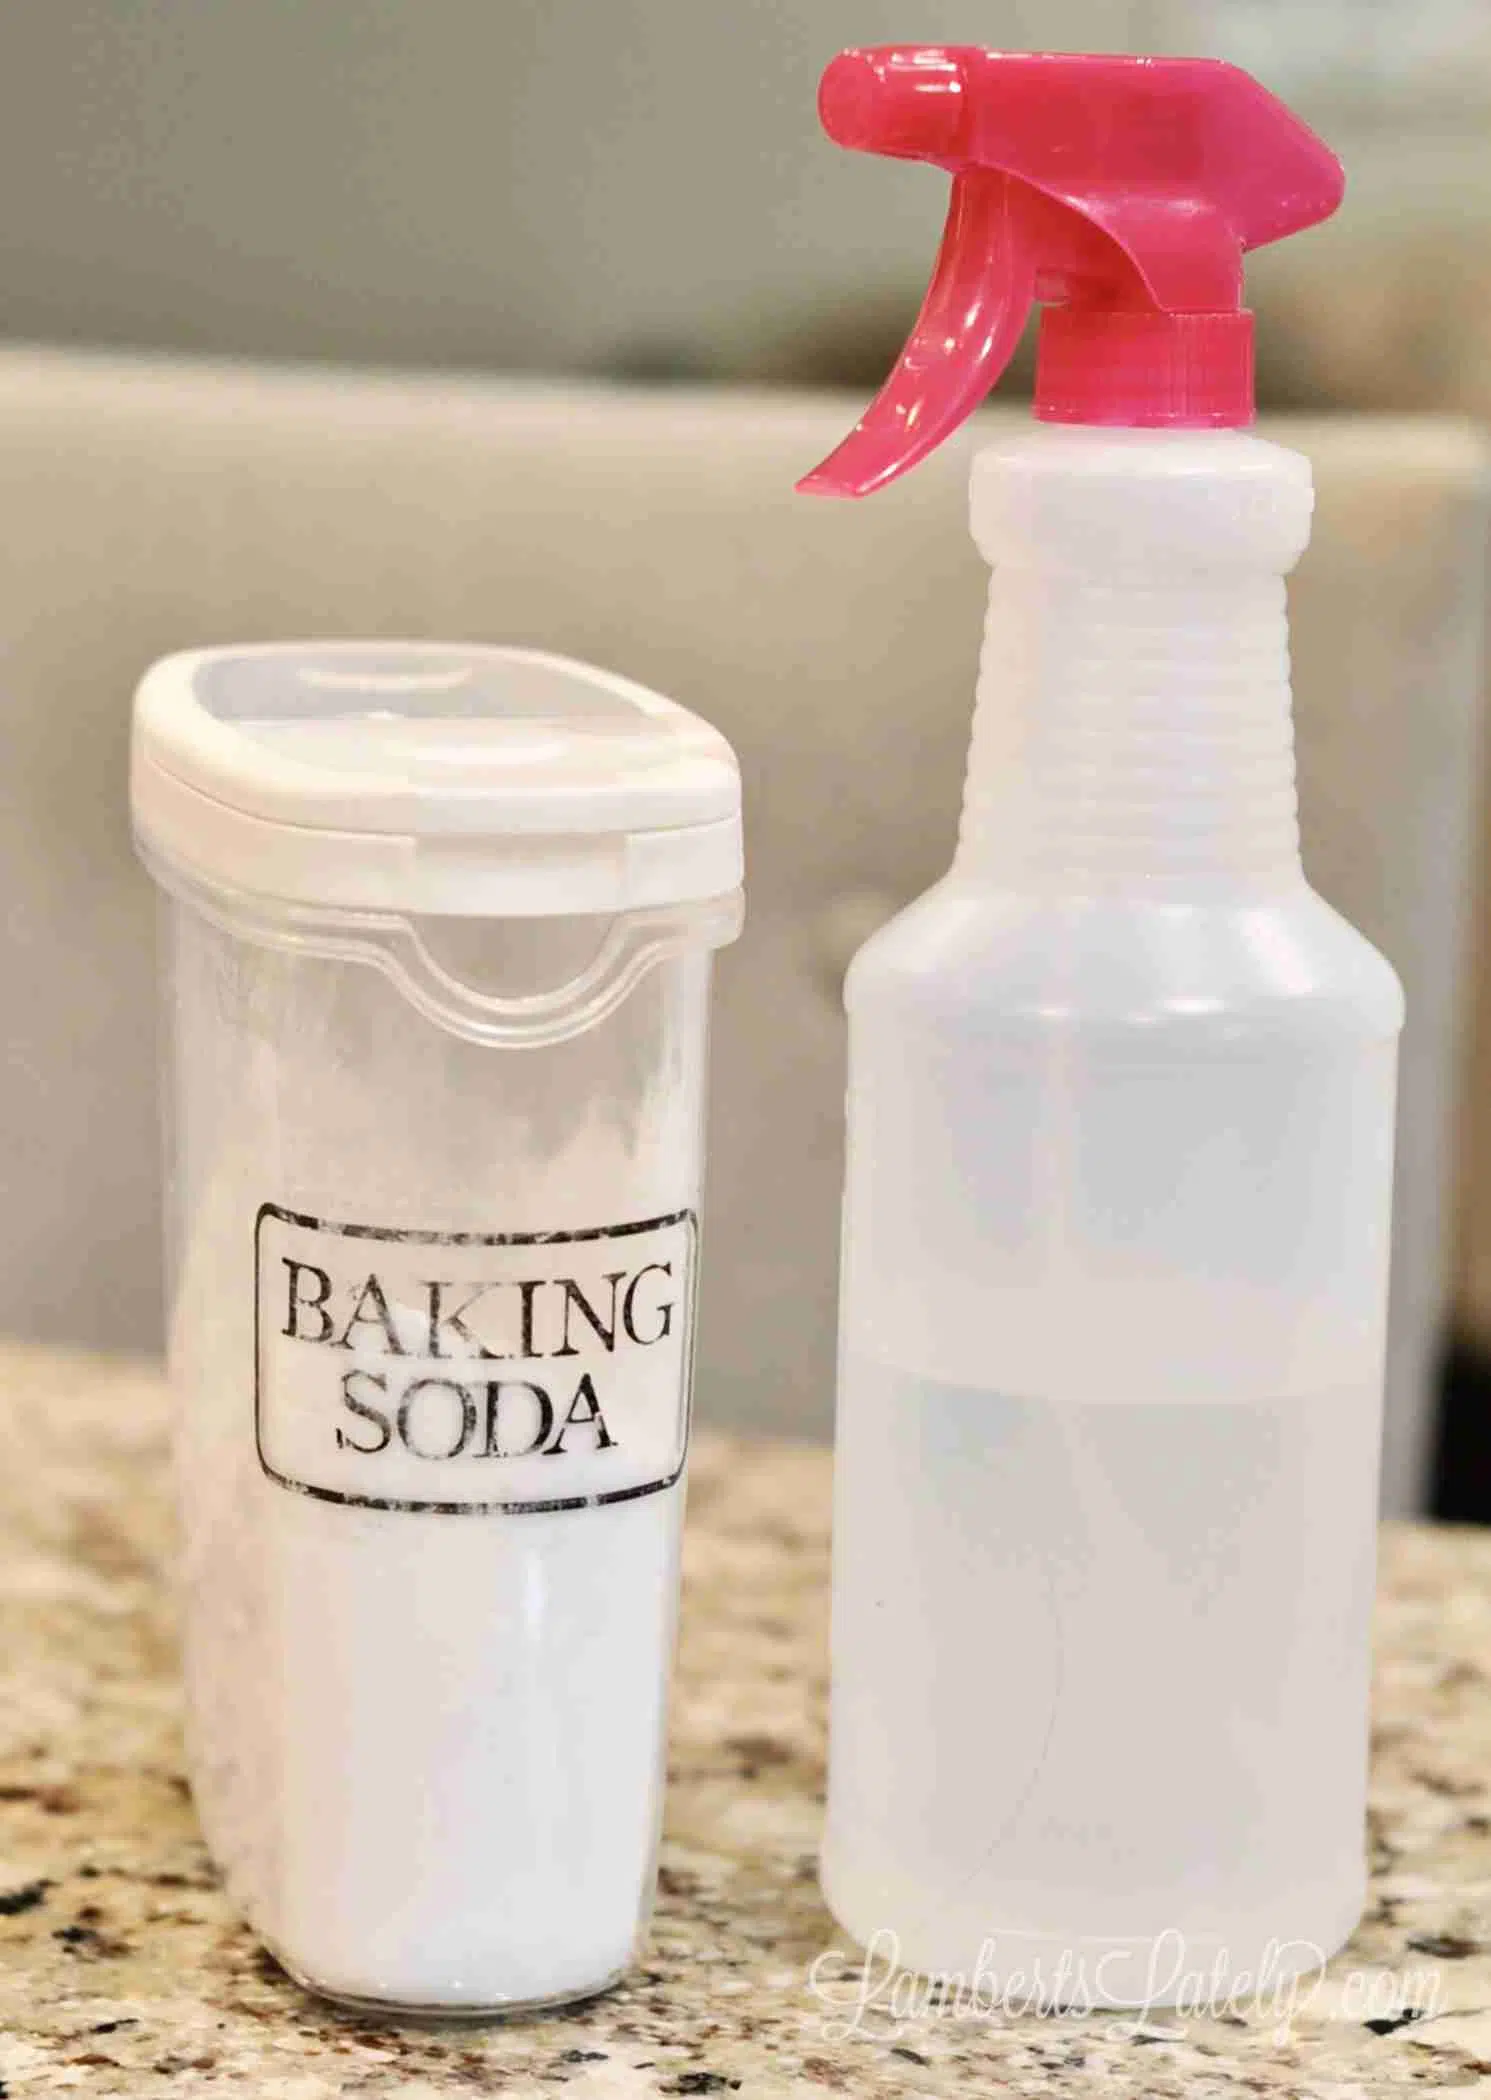
If you've read my other Cleaning Basics posts, you know I love vinegar and baking soda. They are non-toxic, cheap, and actually work!
To clean a Whirlpool dishwasher, spray the inside with vinegar and use baking soda to help remove buildup and odors. It will fizz a little, that's normal. Use the baking soda and a scrubber to hit any visible stains.

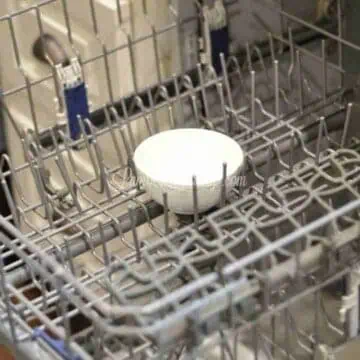
Step 5: Run a High-Temp Cleaning Cycle
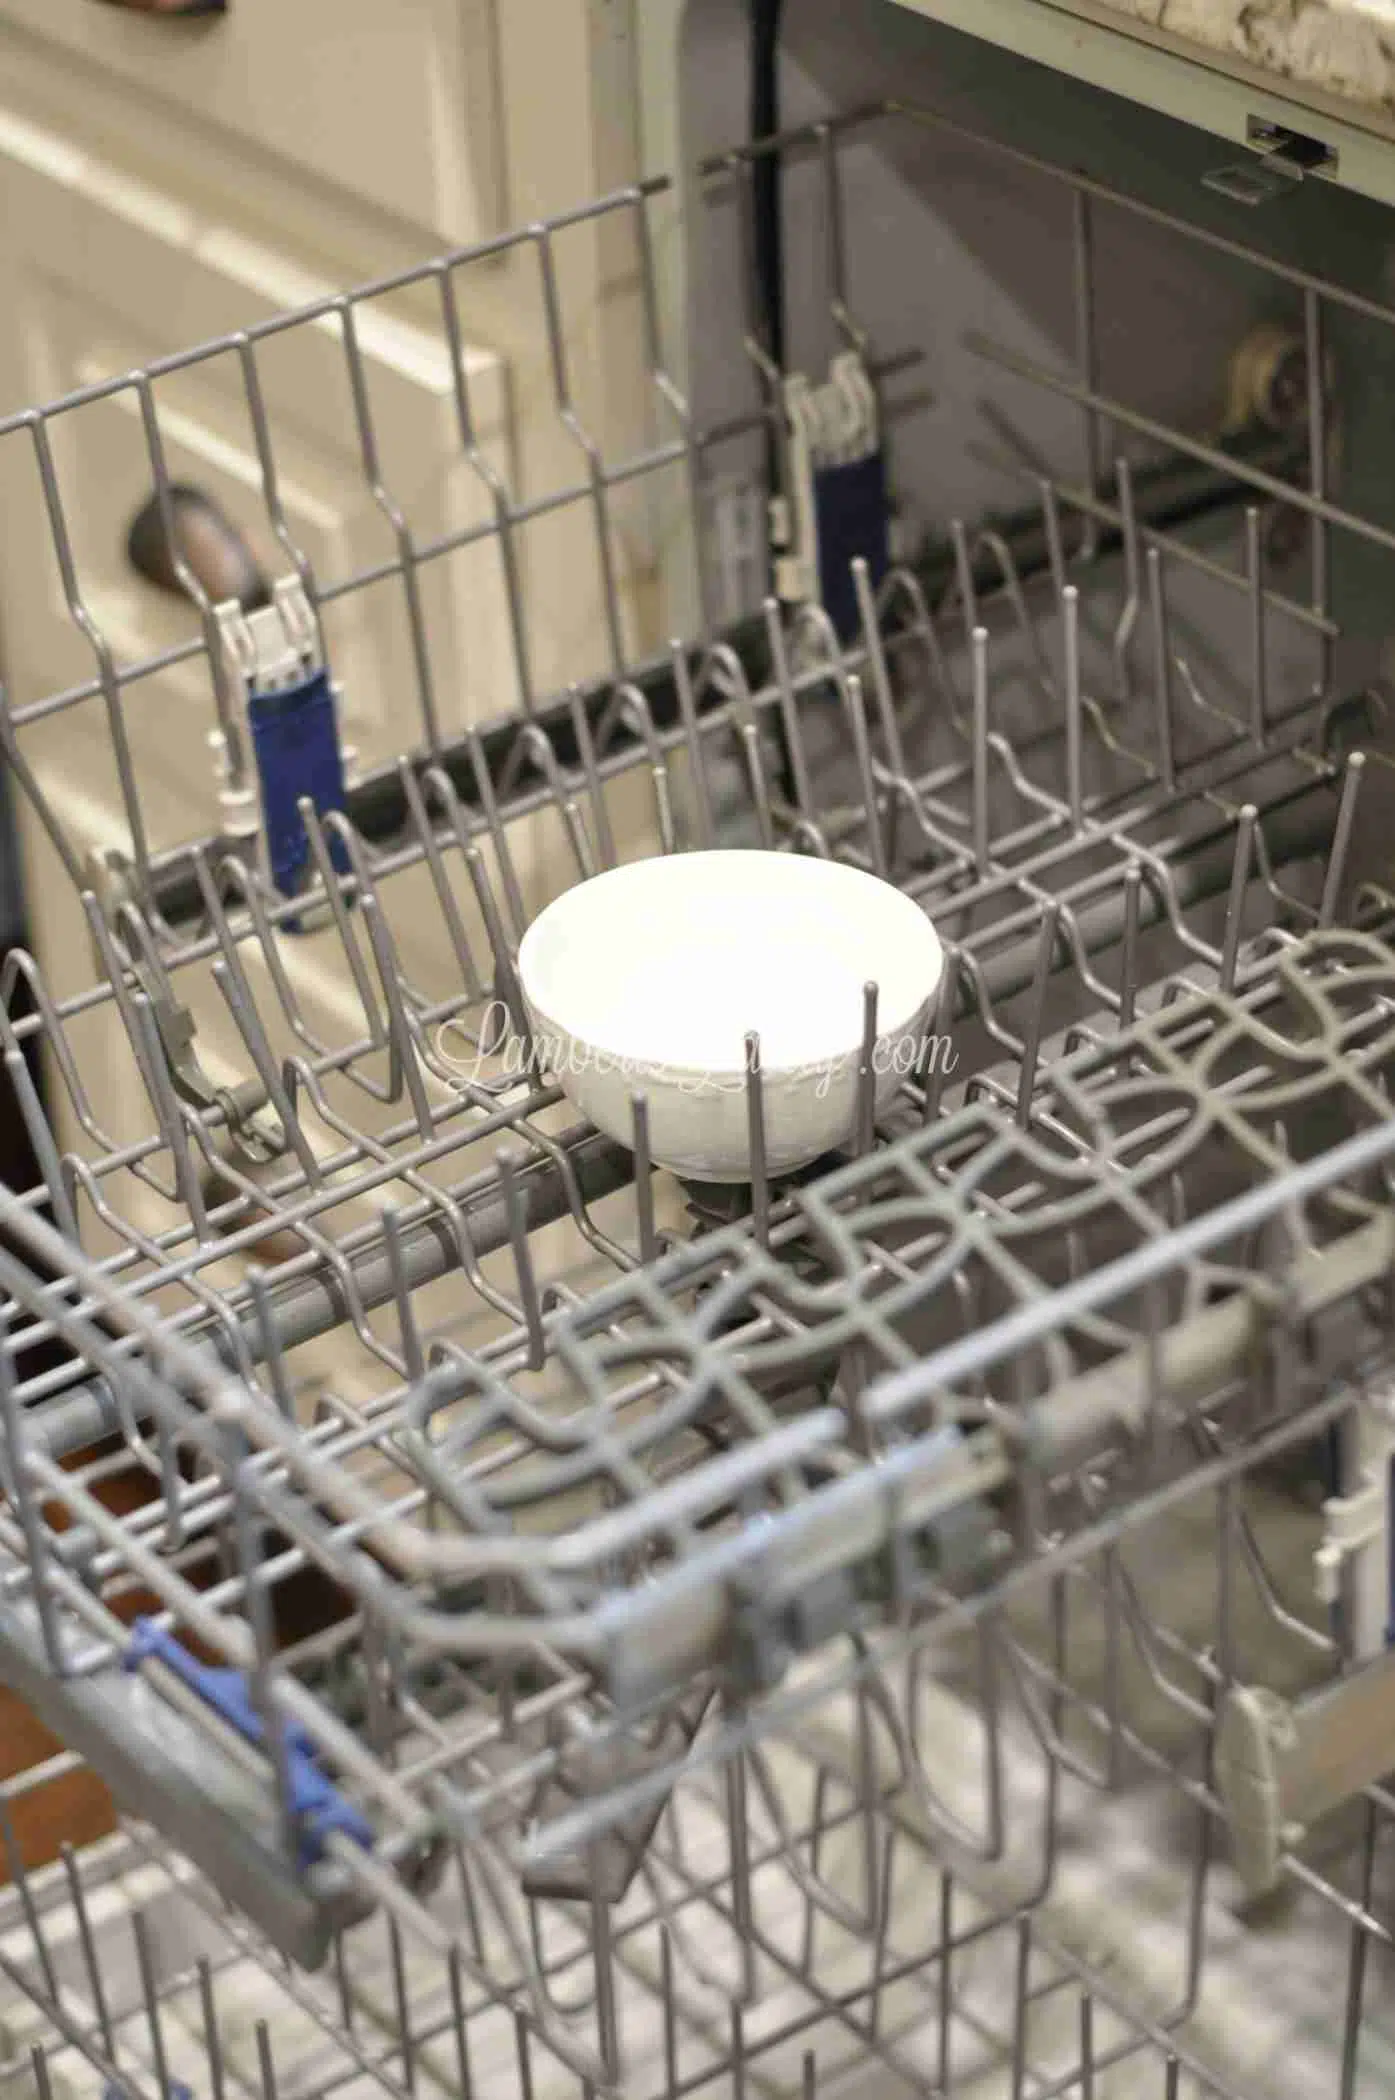
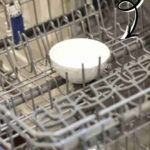
Place a dishwasher-safe bowl with about a cup of white vinegar in the top rack. Close it up and use the high-temperature wash setting to run a full cycle.

While that's running, I usually wipe down the stainless steel exterior to get rid of water marks.
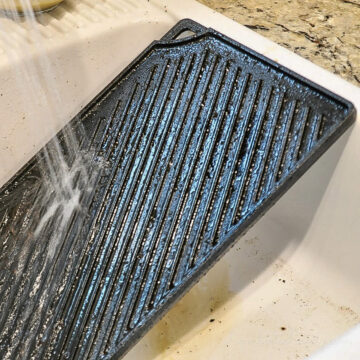
Step 6: Clean the Dishwasher Exterior
While you're waiting for that cleaning hot water cycle to run, you might as well clean the outside of the dishwasher! I wipe my stainless steel down a few times a month...it tends to get a ton of stains and water marks around the vent.
Final Result: A Clean Whirlpool Dishwasher
In just a couple of hours (with very little effort), you'll have a new and improved dishwasher. This is one of those tasks you won't notice as much in looks as you will in performance. Your dishes will be cleaner, and your kitchen will smell so much better.
In-Between Cleanings
Now, as I mentioned above, this process isn't something I do every month. I have a reminder on my cleaning schedule to give the dishwasher a light cleaning once per month, during my kitchen week.
When I do this cleaning, I...
- wipe around the edges of the door
- wipe the sides and the bottom of the inside
- scrub the utensil rack, if needed
- give the vent a light scrub with a scrub brush or old toothbrush
- rinse out the filter
This is a process that takes maybe 10 minutes - no biggie! It just keeps mildew and hard water at bay in between cleanings.
More Tips to Keep Your Whirlpool Running Like New
If you want to stretch out the time between cleanings, these little habits make a huge difference in how your Whirlpool performs day to day.
- Scrape, don't rinse. You don't need to fully wash your dishes before putting them in the dishwasher, but you should scrape off any significant food. Anything caked on will eventually end up in that filter we just cleaned, and a clogged filter is the number one cause of poor drainage.
- Prioritize glass over plastic. Have you ever noticed your glass cups are bone-dry while the plastic Tupperware is still dripping? Most modern dishwashers use residual heat to dry, which works great on glass but not so well on plastic. Using more glass will actually help your dishwasher dry everything more efficiently.
- Give your water heater a head start. Dishwashers need very hot water to sanitize and melt away grease. To help yours out, run the kitchen sink for a few seconds until the water is hot before you start a cycle. Also, try to avoid running the washing machine or taking a shower at the same time so your dishwasher isn't fighting for the hot water.
- Watch the "nesting" dishes. It is so tempting to cram every last plate in there, but if the dishes are touching, the water can't reach them. Make sure your bowls and spoons aren't "nesting" together in a single layer. If the water can't circulate, you'll just end up having to wash them all over again by hand!
Common Whirlpool Dishwasher Problems (and How to Fix Them)


Clean on, cleaner friends! 🧽 I would love to see some of your favorite dishwasher cleaning tips & tricks- leave them in the comments. And, make sure to follow along via email for my latest cleaning updates.

How to Clean a Whirlpool Dishwasher
Affiliate links used in this recipe card.
Equipment
- White vinegar
- Baking soda
- Dish soap
- Melamine sponge
- Old toothbrush or scrub brush
- Dishwasher-safe bowl
Instructions
- Scrub the door seals, edges, and bottom frame using a damp melamine sponge. Focus on areas where grease, soap scum, and hard water buildup collect.
- Remove the bottom filter by twisting it counter-clockwise. Rinse under hot water and scrub with dish soap and a toothbrush, then reinstall it.
- Remove the vent cover on the inside of the dishwasher door and scrub away hard water stains and mildew buildup.
- Spray vinegar inside the dishwasher and sprinkle baking soda across the bottom. Lightly scrub visible stains as needed.
- Place a dishwasher-safe bowl filled with white vinegar on the top rack. Run a full high-temperature wash cycle.
- Wipe down the stainless steel exterior with a soft cloth to remove fingerprints, smudges, and water spots.
Notes
- Use vinegar only occasionally, as frequent use may wear down rubber seals over time
- Always make sure the filter is fully reinstalled before running a cleaning cycle
- Deep cleaning every 1-3 months is usually enough for most Whirlpool dishwashers
- If odors persist after cleaning, check the drain and filter area for trapped debris
- Avoid overloading the dishwasher, as poor water circulation can reduce cleaning performance
- Cleaning the vent cover can significantly improve drying performance
- Always run a hot cycle for best results when deep cleaning

Leslie Lambert is a lifestyle writer and content creator specializing in home organization, family recipes, and intentional living. With 17 years of experience in blogging and digital storytelling, she helps busy women create calm, purposeful homes they love.

Do you have a 2020 teacher planner/notebook?
It's coming next week!
Hey, Leslie... love the tip posts you shared on Tuesday Turn About... I'm trying to pin this post, and it seems that your actual pin is disabled for pinning, and you don't have a Pinterest share button... so I'm struggling to pin! Help! 😉
Sorry about that, Julie! I just added another pinnable image at the bottom of the post. Thanks for pinning!
Great info here. Thanks.
I would like to know how to clean out the gray plastic strip at the bottom of the door which is caked inside with tons of disgusting crud. Also, does the float switch come off. That has lots of crud under it, too. I have photos/videos of where I am talking about if you need further info to answer my question.
Hi Pamela, I like cleaning that edging with a little bit of dish soap and water - the best thing you can do is just give it some elbow grease to get the crud off. If you live in a hard water area (I do), unfortunately, that's probably going to be a monthly/weekly chore. And not sure which float switch you're asking about - where is it in the dishwasher?