
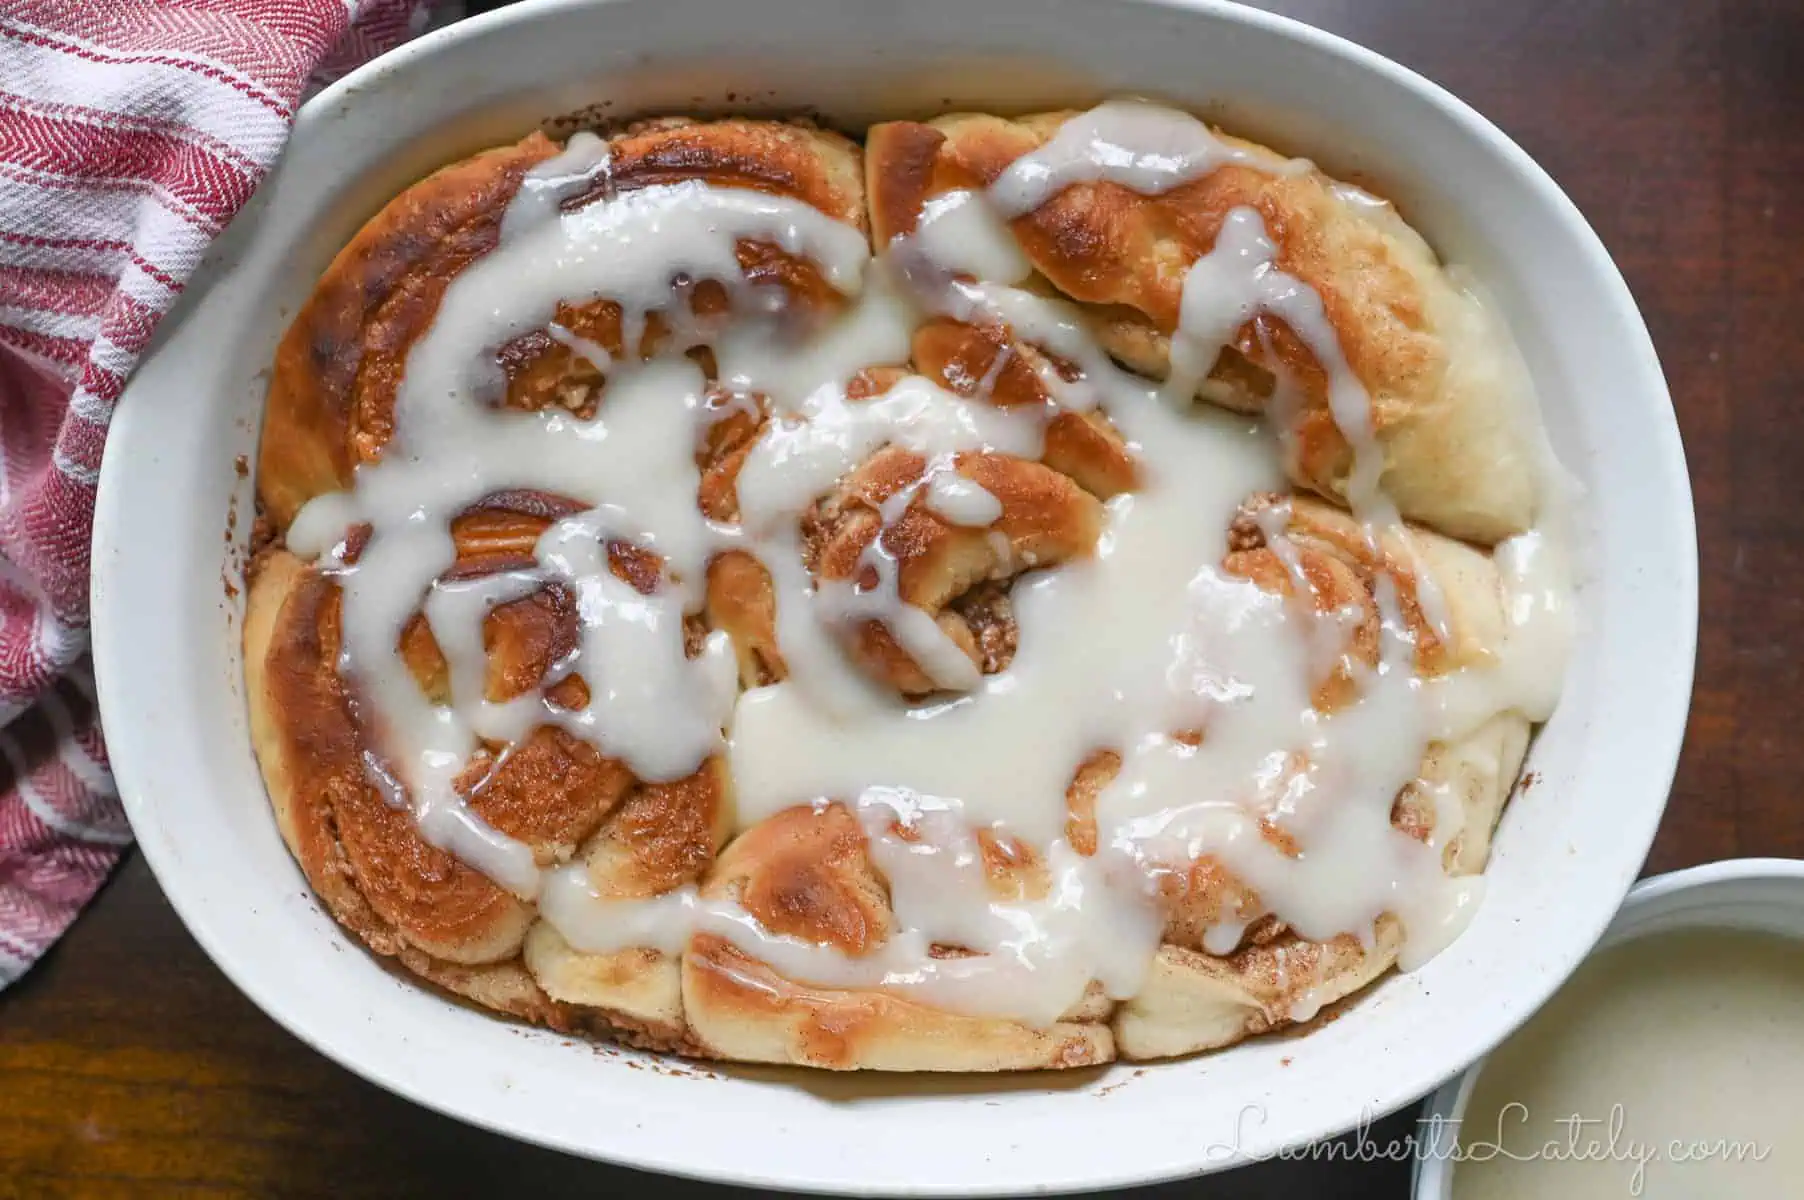
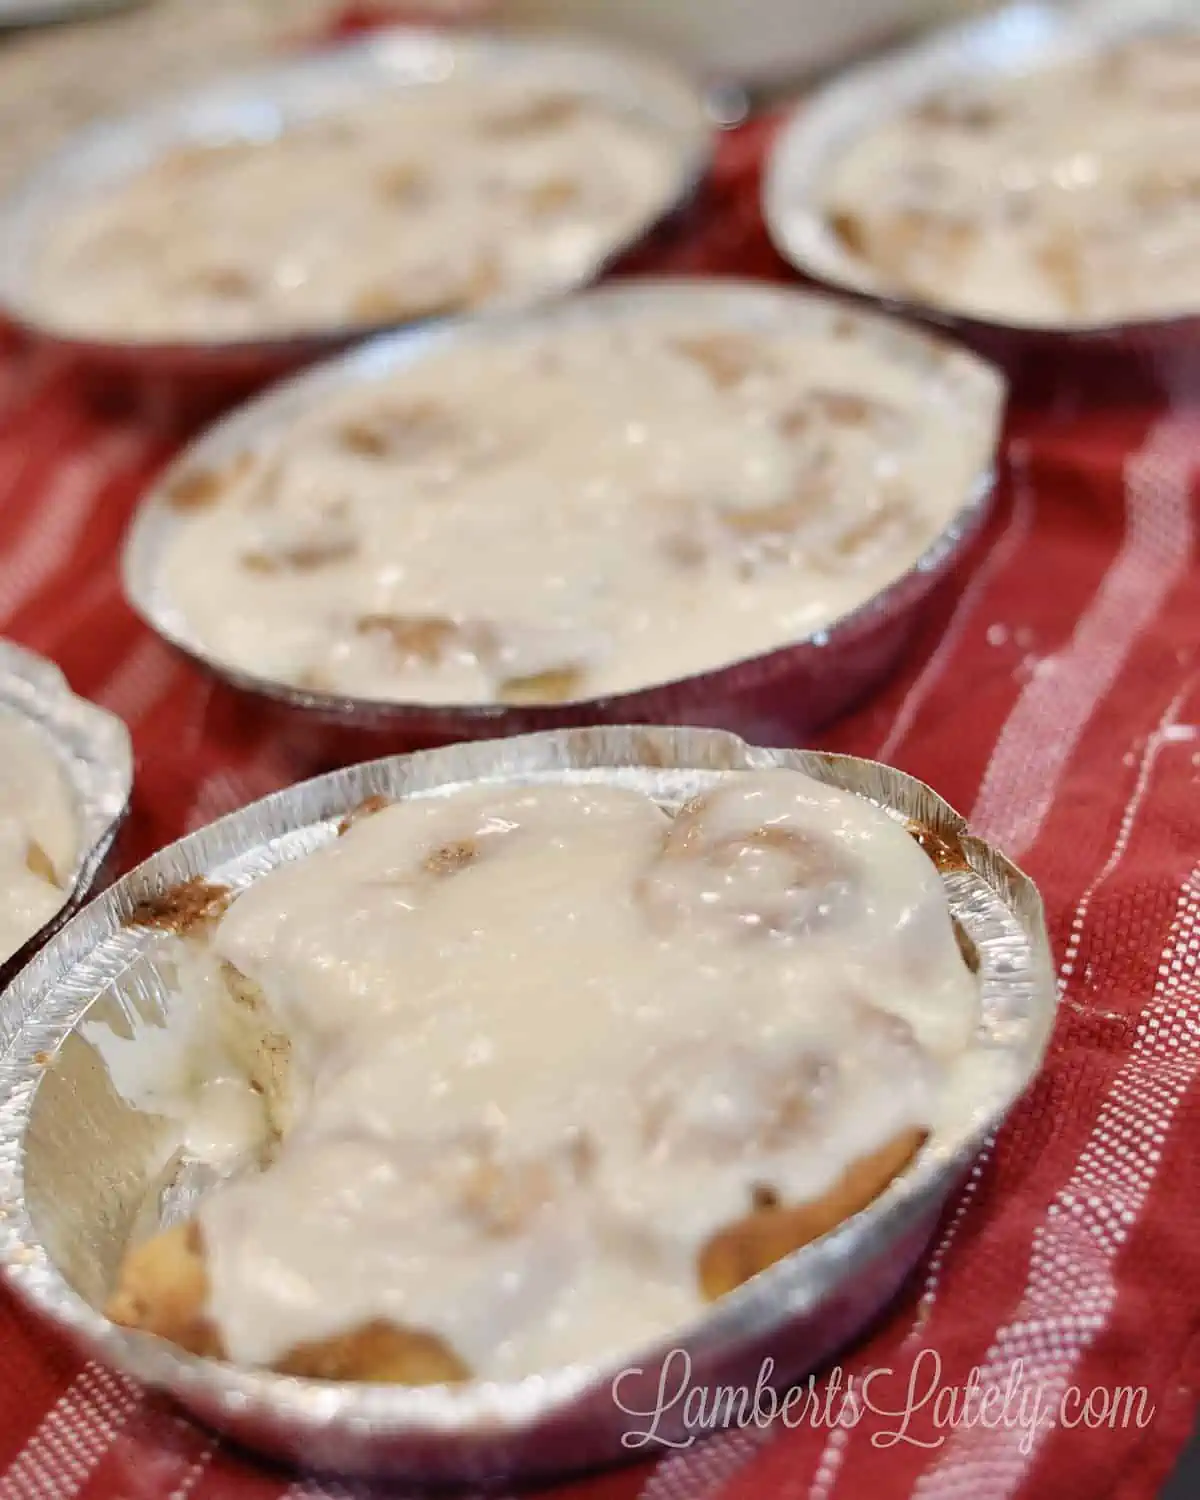
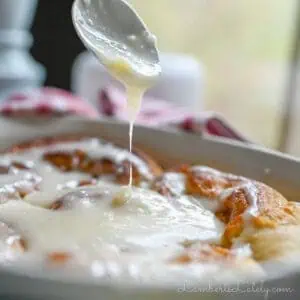
These cinnamon rolls with cream cheese frosting are perfect for holiday mornings or weekend brunch. With a gooey cinnamon filling and creamy icing, this easy recipe is great for making ahead or freezing for later!

Paid links used in this post. Read more about my link usage policies.
Homemade cinnamon rolls have been a tradition in our family for years. We make them in big batches for easy Saturday morning or holiday breakfasts.
For years, I used (and loved) the Pioneer Woman's cinnamon roll recipe, modifying it here an there until I had it just like we like it. Over the years, I've added cream cheese to the icing/frosting, added seasoning, taken away a cup of flour here and there.
After awhile, the recipe became one of my family's favorites!
🍲 Dough in an Instant Pot?
If you and your family make these beauties too, let me let you in on a secret: your Instant Pot has the potential to make the process ten times easier.
You guys know I love the Instant Pot for freezer meals, but it can do so much more! You can prep the dough, let it rise, and cool it for rolling all in the same dish. It's a total game-changer for any kind of bread dough, especially larger batches like the one this recipe requires.
For this recipe, I prep my dough in the Instant Pot. Its yogurt function is the perfect temp for allowing yeast to rise.
No Instant Pot? No Problem.
If you don't have an Instant Pot, no biggie. Place your dough in a warm area (window, beside an oven) for the time needed to rise.
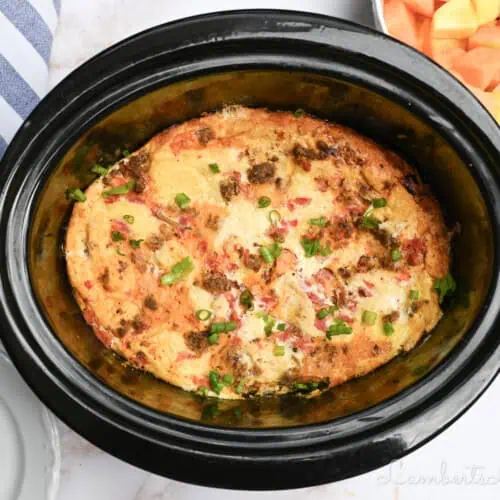
Love breakfast sweet treats? Be sure to check out my cake mix pancakes and doughnut bread pudding, too!
🥣 Ingredients
For cinnamon rolls:
- 1 quart whole milk
- 1 cup vegetable oil - I know vegetable oil sounds strange, but it works incredibly well to make sure you have a really soft, non-chewy dough.
- 1 cup white granulated sugar
- Two 0.25oz packages active dry yeast - If you use a larger jar, you can use approximately 4 ½ teaspoons of yeast.
- 9 cups all-purpose flour - This should be all-purpose, not self-rising. Important difference! I also like to have a cup or two of flour reserved for kneading and rolling.
- 1 teaspoon baking powder
- 1 teaspoon baking soda
- generous pinch of salt
For cream cheese cinnamon filling:
- Two 8oz packs of cream cheese - I usually put this on the counter when I start making the dough to allow it to soften for a few hours. It needs to be soft, not melted, when you're ready to make the filling!
- 2 sticks butter - Same here; put it out when you start making the dough to make it soft for mixing.
- 2 cups white granulated sugar
- ⅓ cup ground cinnamon
For cream cheese frosting:
- 8oz pack of cream cheese - You will melt this to make the icing, so no need to soften it.
- 1 32oz bag powdered sugar - This seems like a ton of sugar, but it works!
- 1 teaspoon vanilla extract
- ½ cup whole milk
- ¼ cup melted butter
- splash of coffee - I normally just use whatever's left in the coffee pot from that morning. 🙈
- pinch of salt
Variations and Additions
- Add nuts to the filling. Pecans and walnuts are the most popular variety to add. You could also add raisins. I'd recommend about a cup of any add-ins.
- Make these fruit-flavored. Omit half the cinnamon and 1 stick of butter from the filling and use ½ cup of juice or puree in its place. Orange rolls, pumpkin rolls, or strawberry rolls would be delicious!
Equipment Needed
Many of the items you'll need are found in most kitchens; the following items are things you might need to purchase:
- Instant Pot (for making dough; optional)
- Digital Thermometer (It's important that your milk is at a certain temperature when working with active yeast. A thermometer is really helpful!)
- Disposable Pans (At least 10-12)
👩🏻🍳 How to Make Cinnamon Rolls with Cream Cheese Frosting
Here, you'll find the step-by-step process (& pictures) for making cream cheese cinnamon rolls. If you're more of a condensed recipe card kind of person, you can find that at the bottom of the post!
Step 1: Scald the Milk.
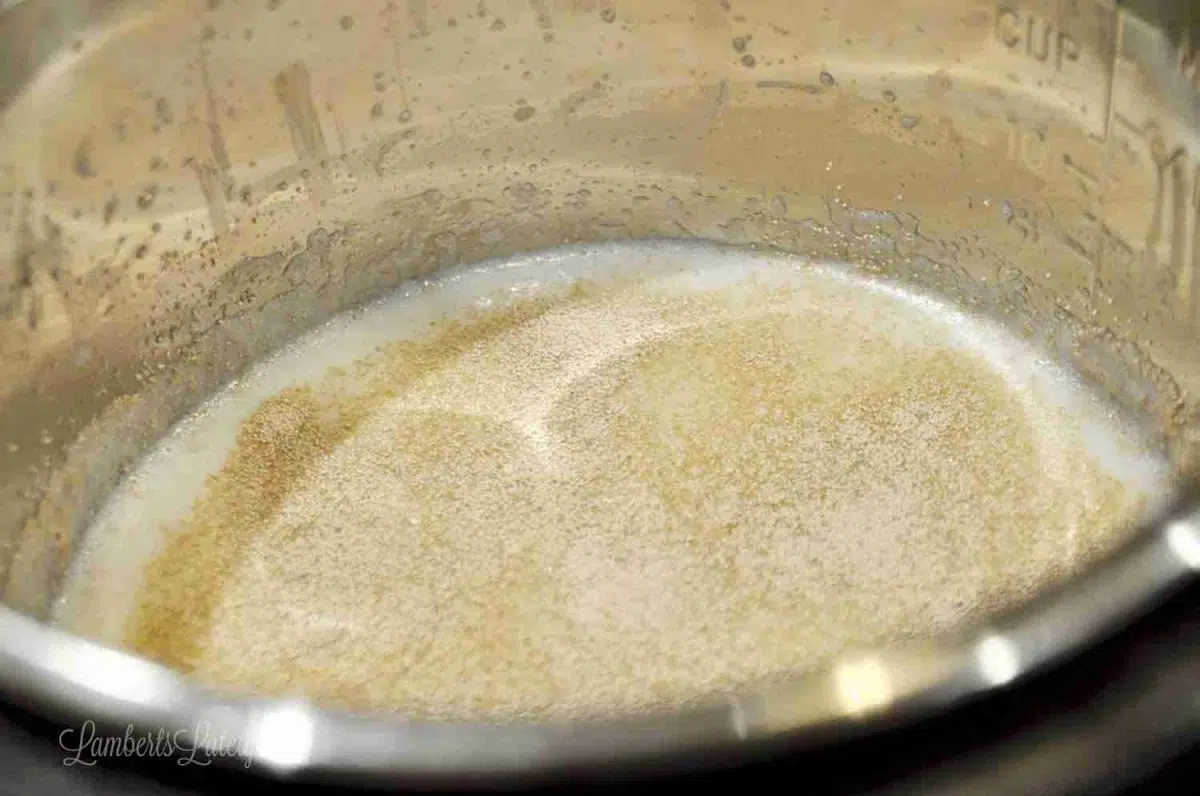
First, with an inner pot in your Instant Pot, add a quart of whole milk, 1 cup of vegetable oil, and 1 cup of sugar and stir well.
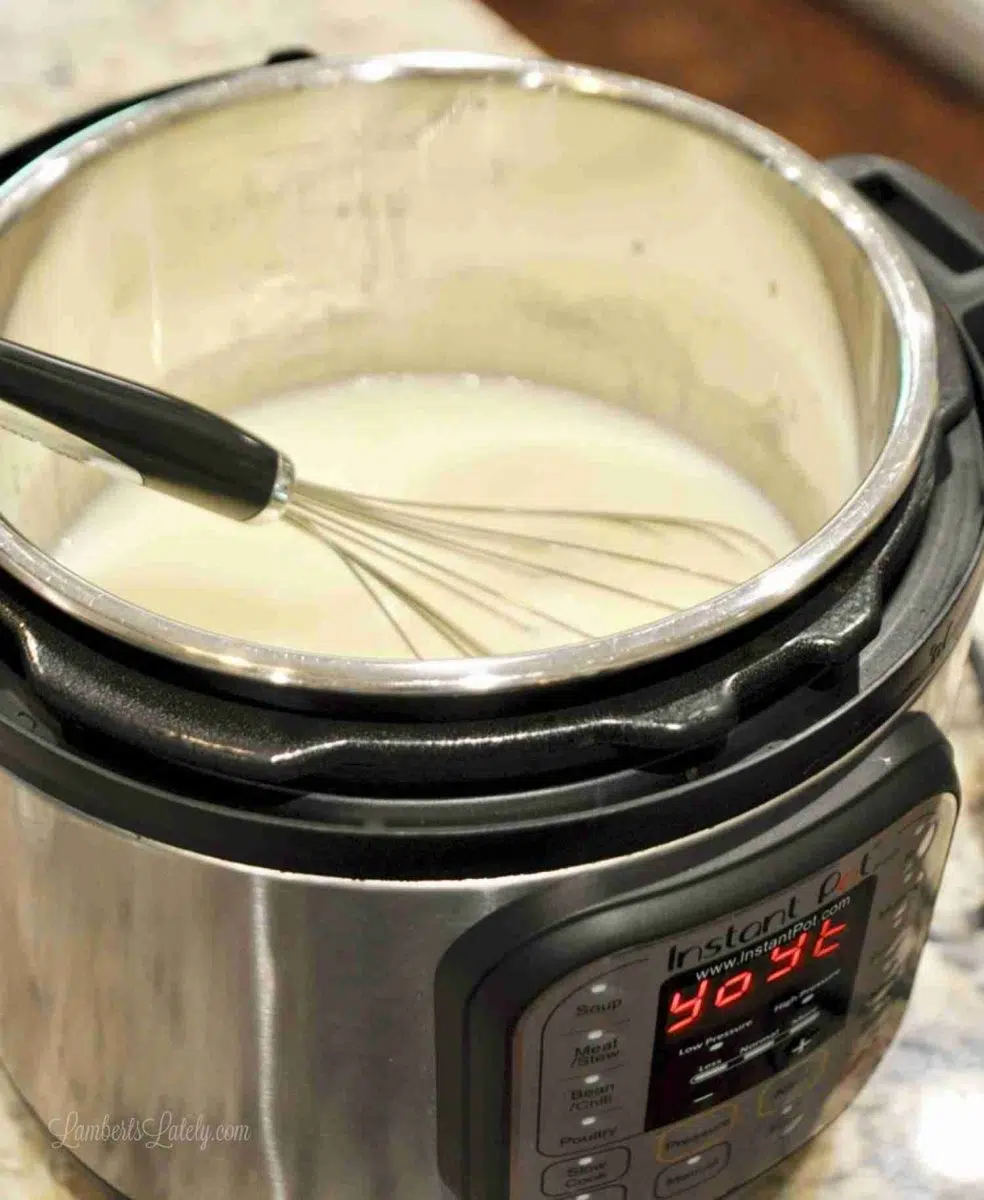
Use the yogurt setting (not available on some models...I have an Instant Pot DUO 6 quart) and press the "adjust" button until you see "boil" on your screen.
Place a lid on the pot if you have one (I use this glass lid) and allow the boil cycle to complete, taking about 10-15 minutes. It helps to whisk your milk every 3-5 minutes during this process.
Note: This part can also be done on a stovetop. Add milk, oil, and sugar to a large stock pot and bring to a low boil.
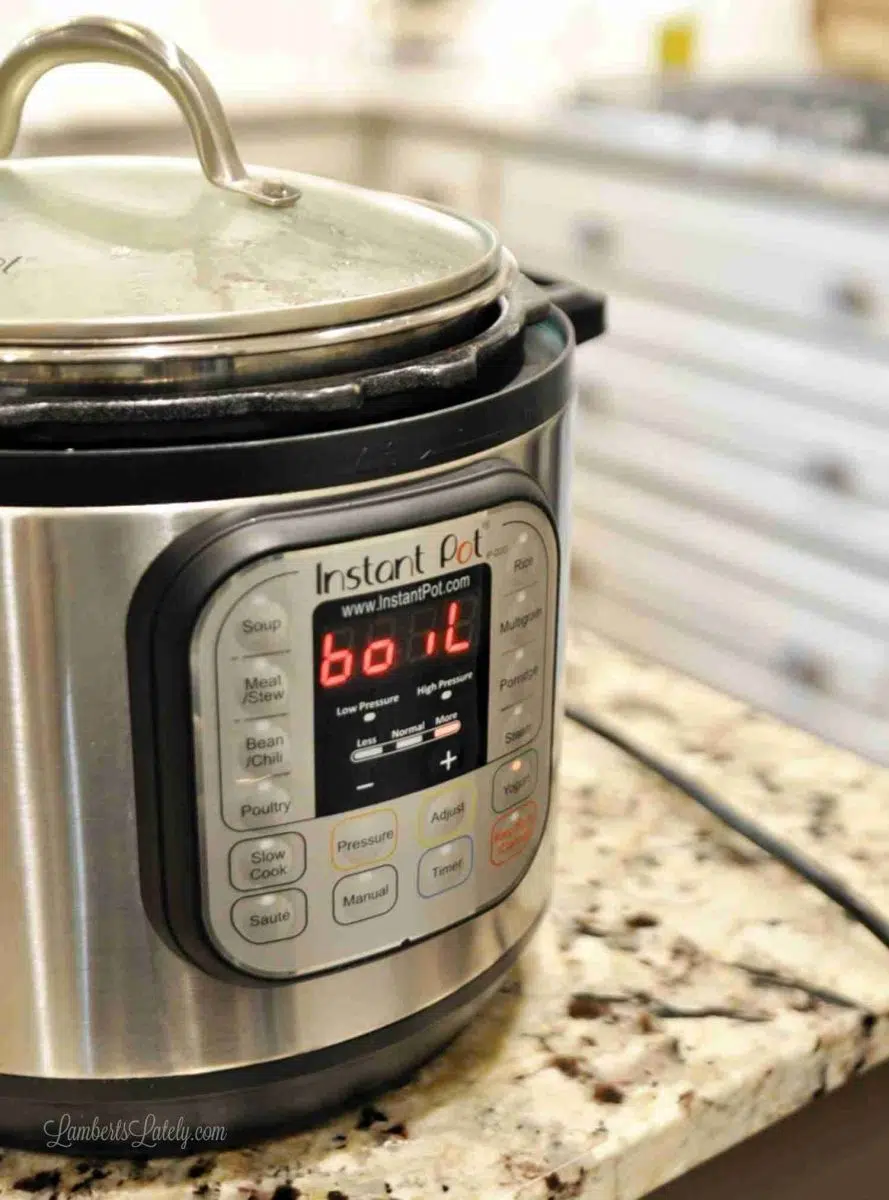
Once the boil cycle is complete (the Instant Pot will beep when it's done), test the milk. It shouldn't be boiling, but should feel warm if you hold your hand above it and should be giving off some steam. If you have a thermometer, it should be around 180 degrees.
If it's not, run another boil cycle, covering the inner pot while it heats and whisking regularly.
Step 2: Cool the Milk Mixture.
Once the milk is as warm as needed, allow it to cool. I like to put mine on our stove so it can cool on the stove grate.
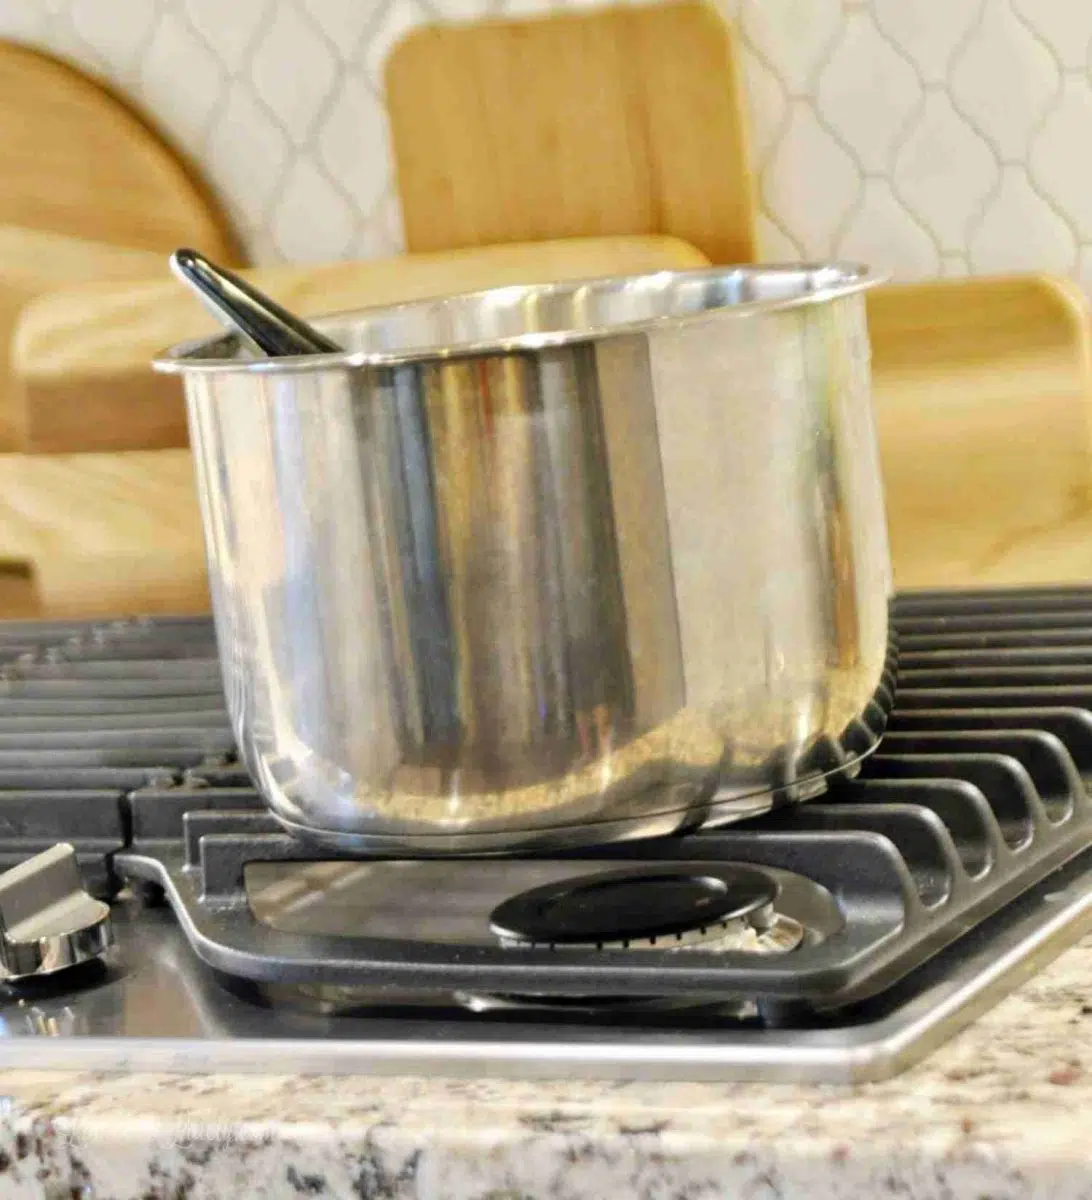
It will need to cool to lukewarm (but not hot) to the touch before moving on to the next step. If you have a digital thermometer, it needs to be under 110 degrees.
Step 3: Add Yeast and Dry Ingredients.
Once the milk is cool, sprinkle the yeast on top and let it activate for a minute or two. It should start to smell "yeasty" after a few seconds.
While the yeast activates, mix together dry ingredients (9 cups of flour, 1 teaspoon of baking powder, 1 teaspoon of baking soda, and a generous pinch of salt).
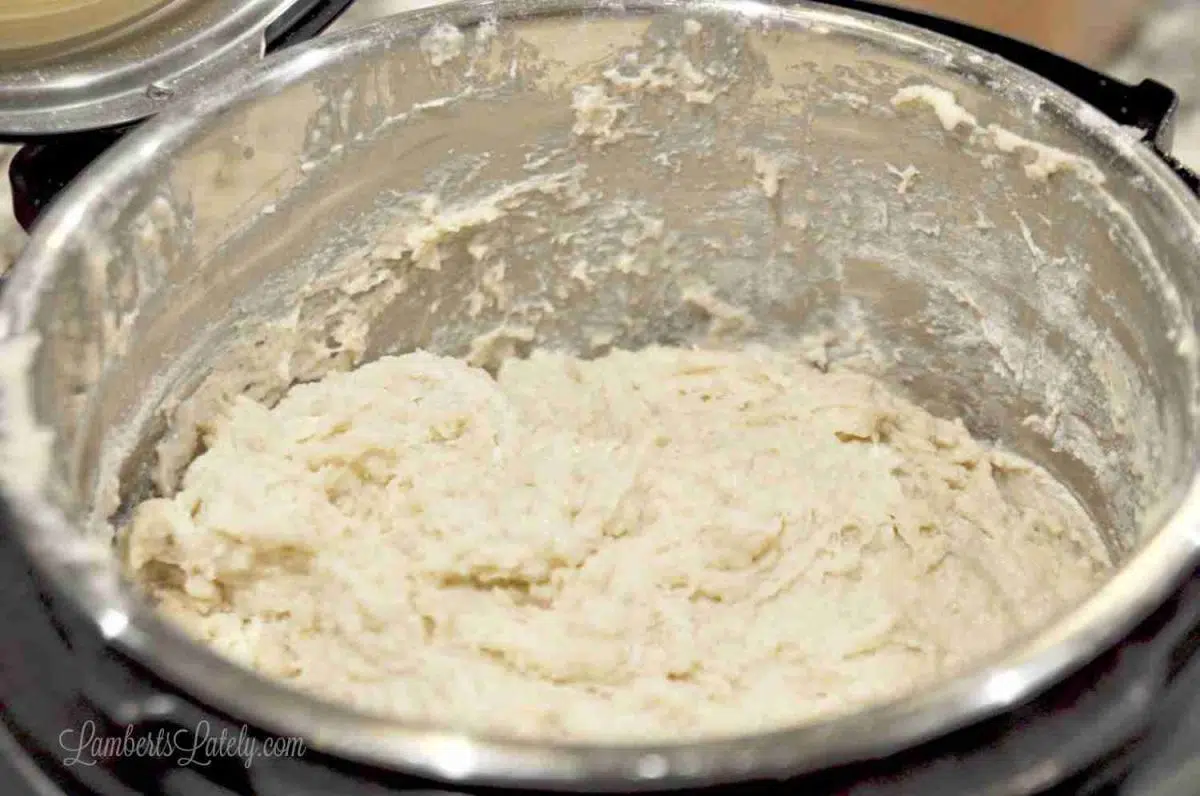
About a cup at a time, add dry ingredients to the milk/yeast mixture to form a dough. The dough shouldn't be mushy or very wet once all dry ingredients are added.
You can use a wooden spoon to mix at first if you'd like. I usually find that just using my hands to mix towards the end is easier.
Step 4: Allow Dough to Rise.
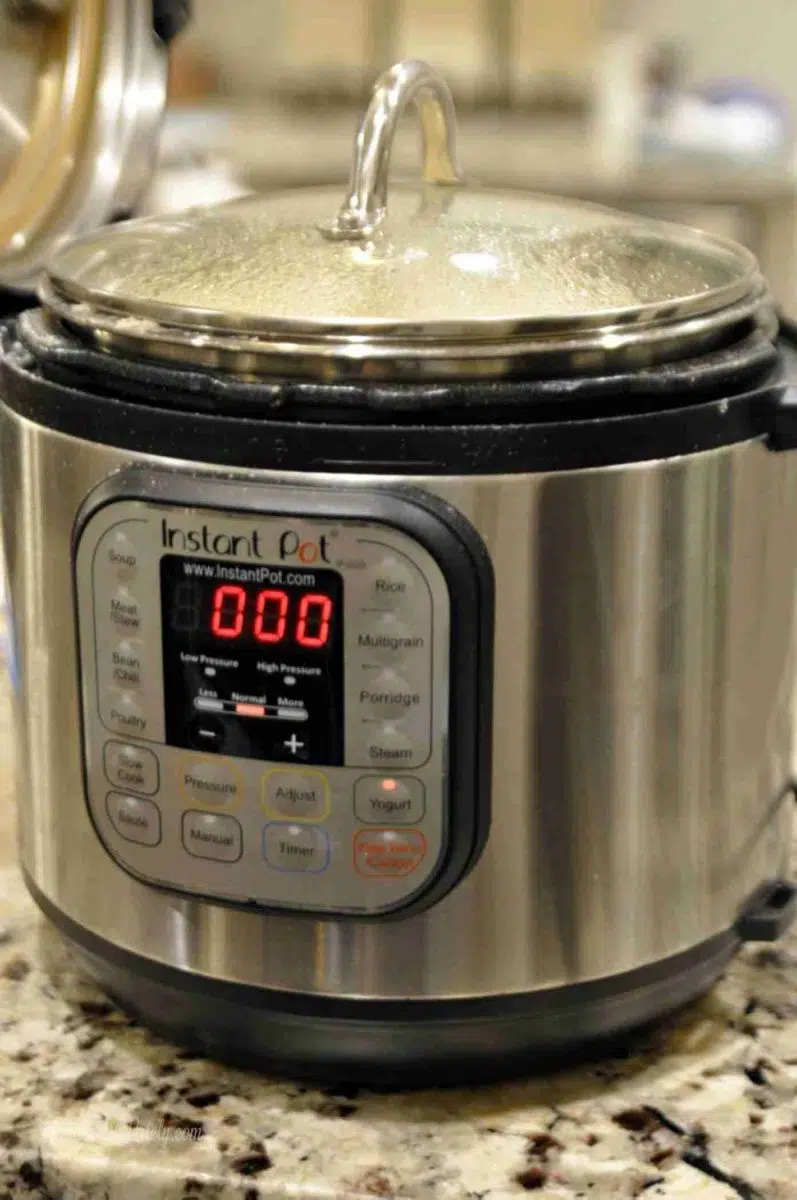
Put the inner liner back in the Instant Pot to allow your dough to rise.
To do this, use the yogurt setting and select the 8-hour option (you won't let it rise for this long, but this is the lowest automatic setting).
Allow dough to rise for at least an hour (you can do it for a few hours if desired). You might have to poke it down with a fork a couple of times to keep it from overflowing.
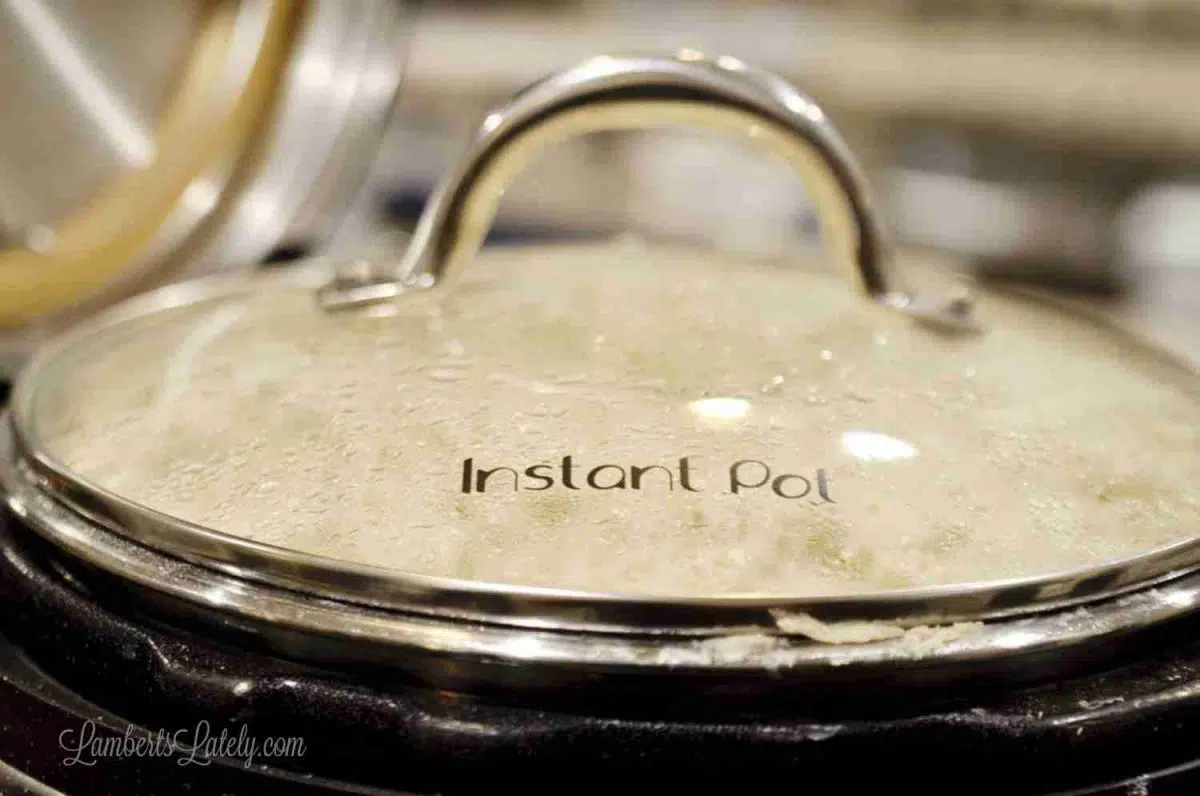
Note: several readers reiterated that the standard Instant Pot lid doesn't need to be used for this - the dough can rise into the pin and create a huge mess, even causing the lid to get stuck. I highly recommend the glass lid for this!
If you don't have an Instant Pot, you can allow the dough to rise in a warm area (like a window).
Step 5: Roll Out Cinnamon Roll Dough.
Once the dough has risen for at least an hour, refrigerate it for an hour or two to make for easier handling. I usually like to refrigerate my dough overnight before trying to roll it out.
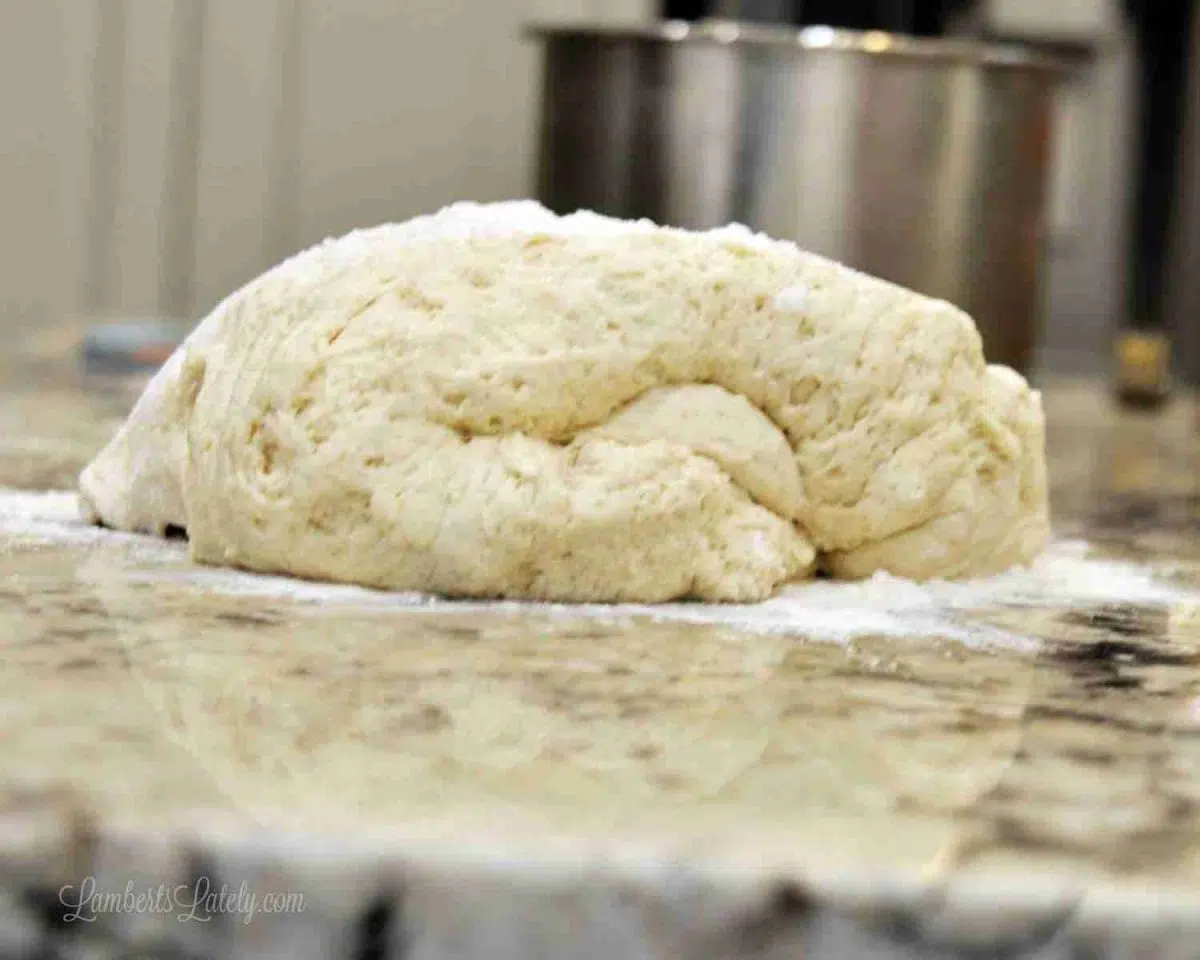
Once dough is cooled, plop (very technical term 😉 ) half of your dough onto a lightly floured surface and sprinkle with a little bit more flour. The surface of the dough should not be sticky; if it is, sprinkle with more flour.
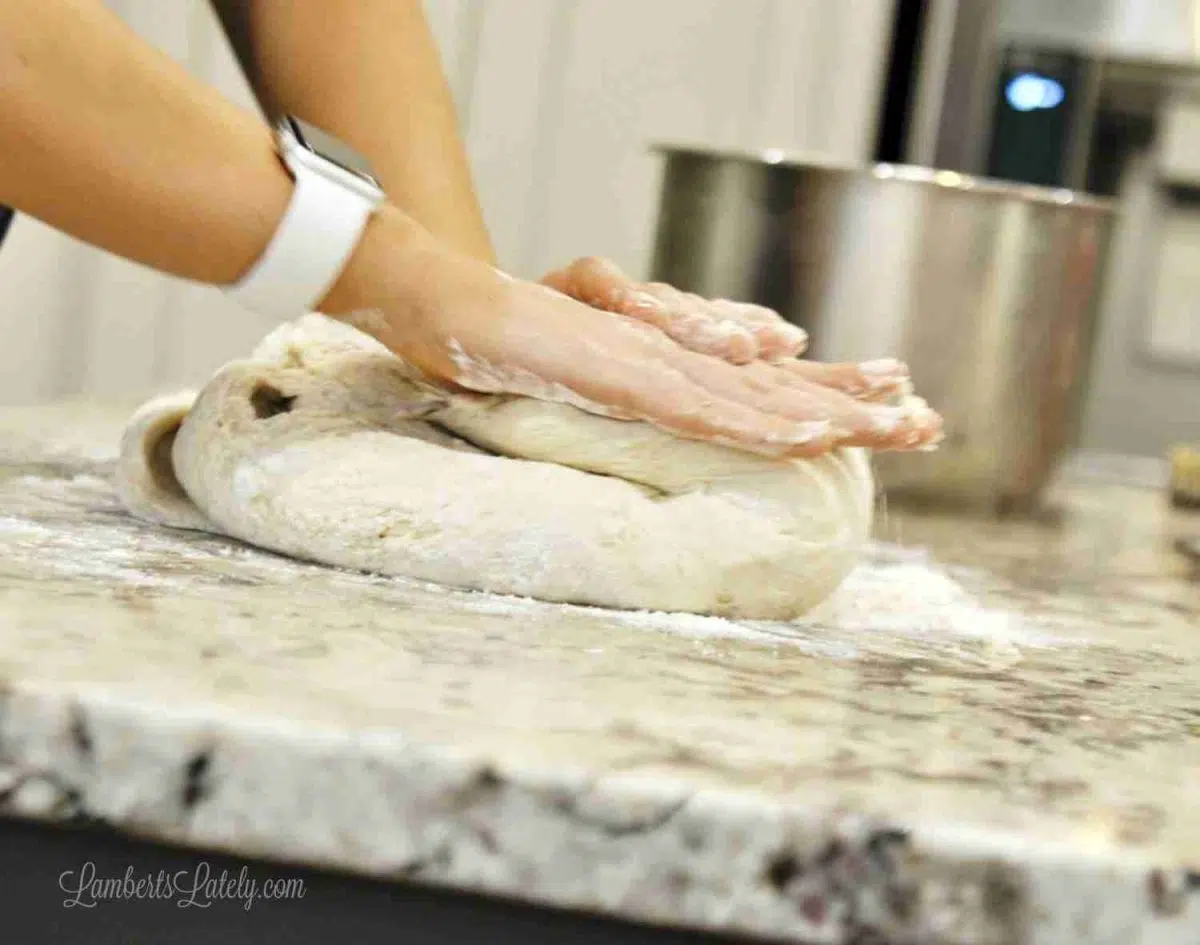
Knead dough until it is firm and easier to work with. You can add in more flour if needed.
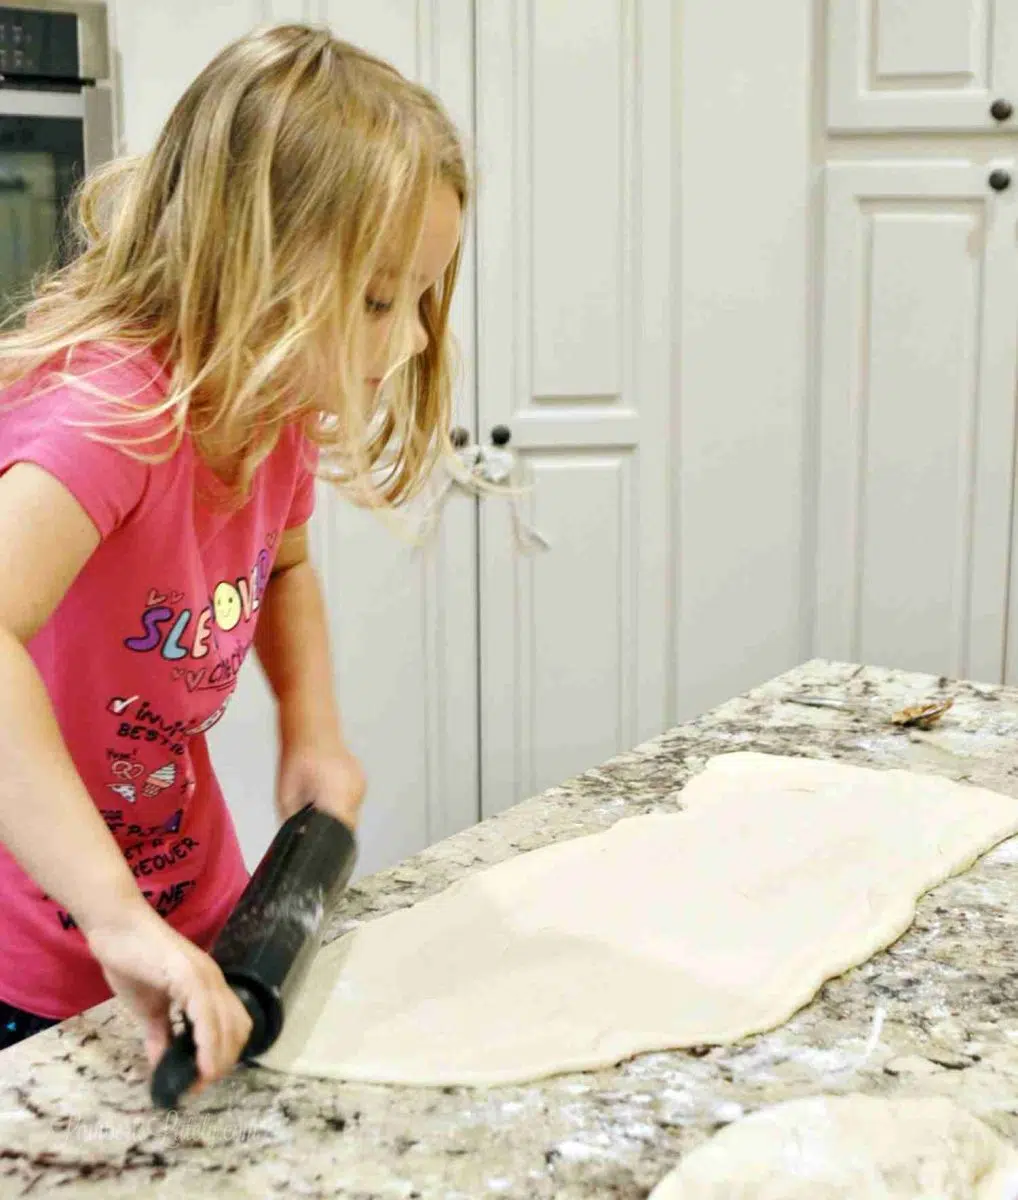
Then, roll out into a very long piece using a rolling pin. I usually make mine about 2 feet by 1 foot, with a thickness of maybe ¼". Little helpers love to get in on this step!
Step 6: Make Cinnamon Roll Filling.
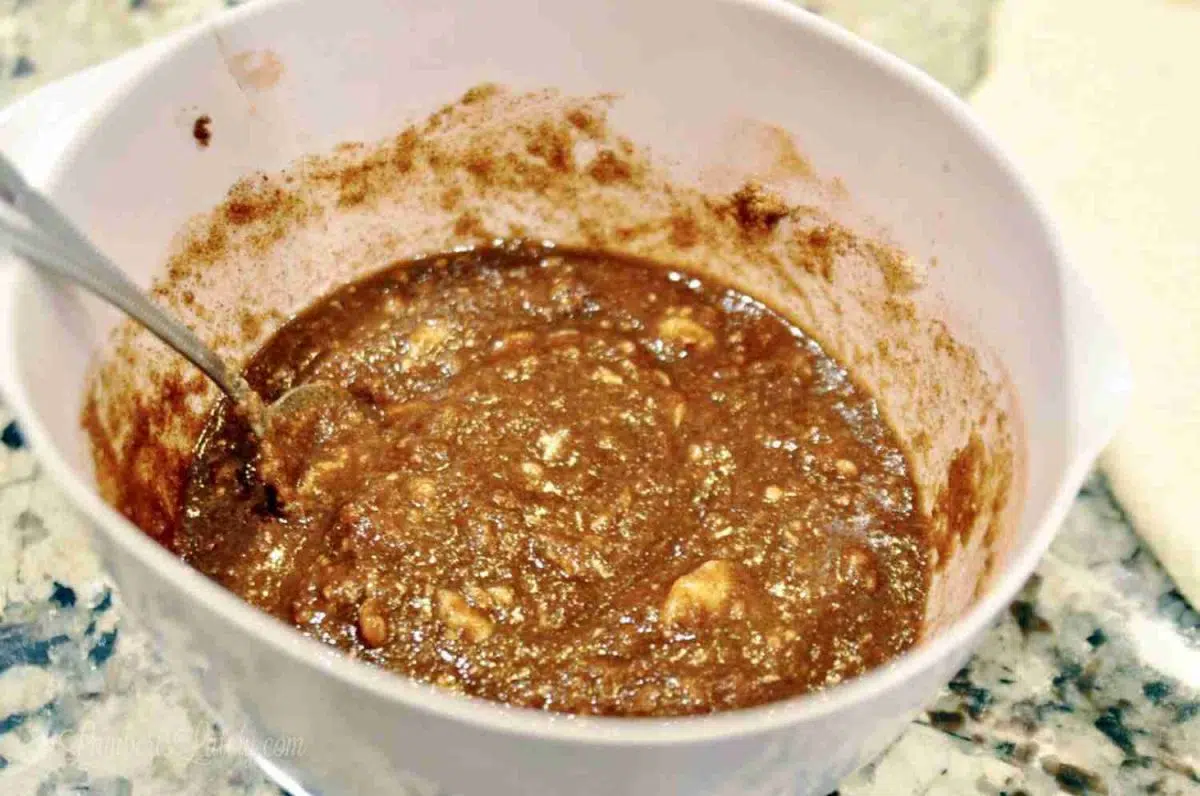
Next, make your filling. To do this, use a hand mixer to blend 2 8oz blocks of softened cream cheese and 2 sticks of softened butter. Once blended, mix in 2 cups of sugar and ⅓ cup of cinnamon. Blend well; a few lumps are normal and not an issue.
(You'll use this whole mixture on both halves of the dough, so make sure to reserve half of the filling for the second half of the dough.)
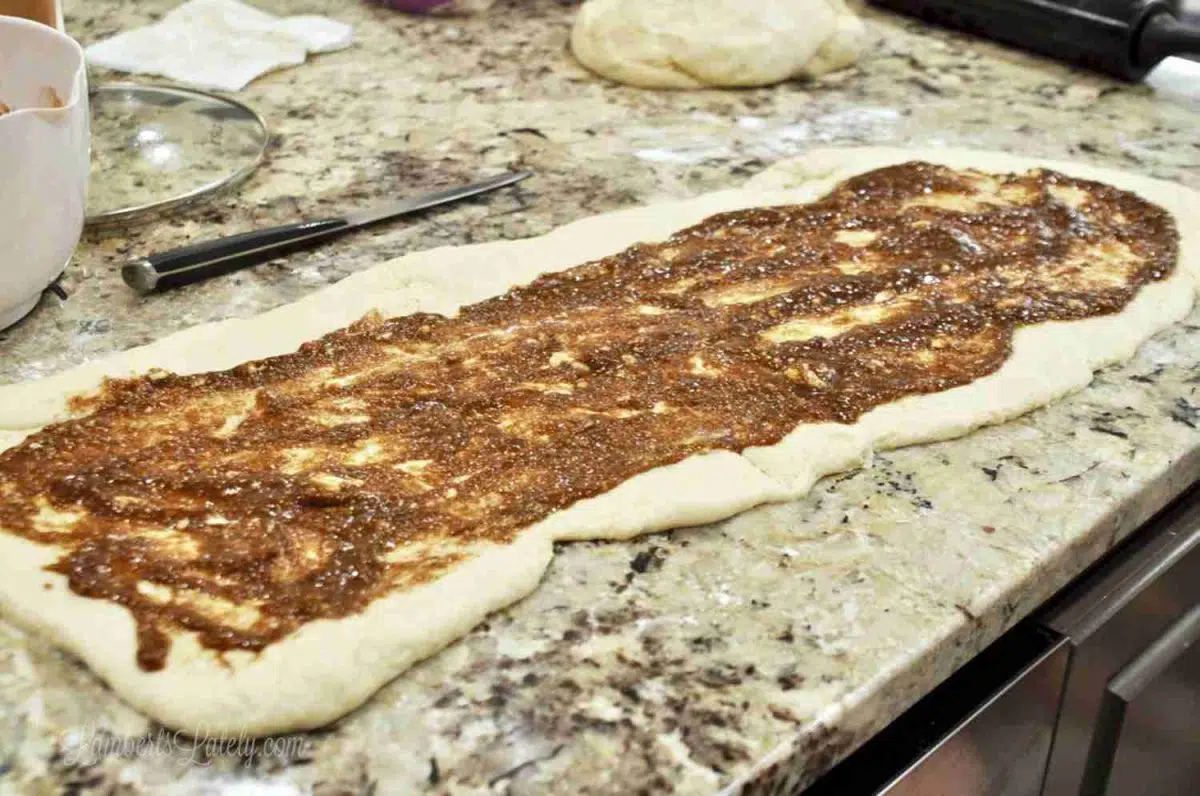
Spread half of the filling mixture on your first rolled half of dough.
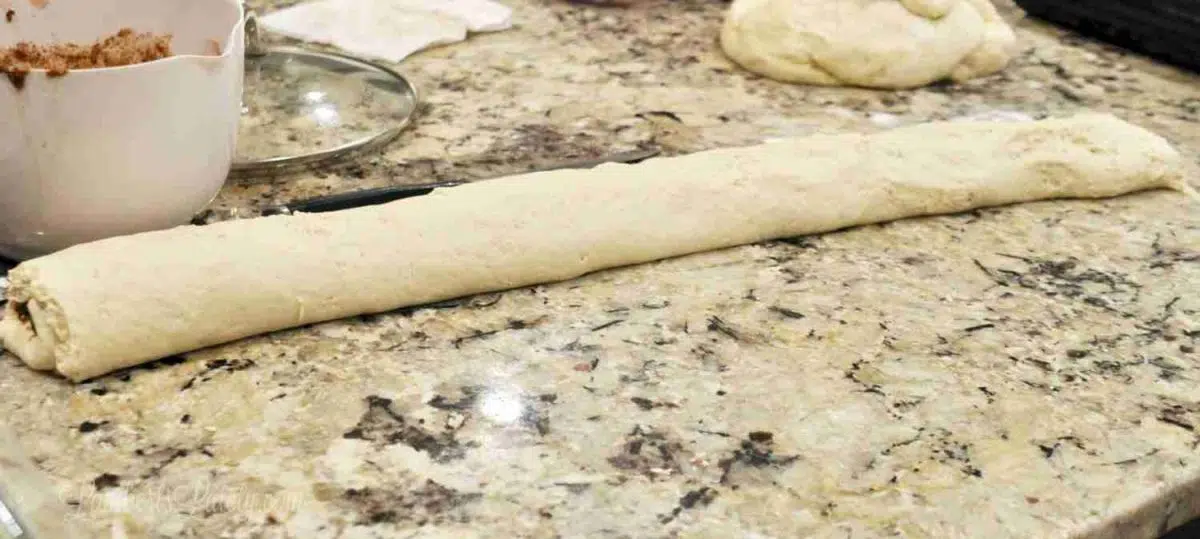
Then, gently, roll the end of the dough away from you into a log.
Step 7: Cut and Let Rise (Again).

Spray the baking dish with cooking spray. Cut log into 1" thick slices. Doing this with a floured, very sharp knife helps. I've also seen unflavored dental floss used (wrap around log and squeeze), but I've never had luck with that method.
Fill your containers to not quite full; there should be minimal space in each pan to allow for rising. (I normally use these pans, which hold 6-7 rolls each. But, I ran out this day, so I was filling every Pyrex dish I've got. 😉 )
Allow rolls to rise on your counter for 15-20 minutes while you preheat your oven to 375 degrees.
Step 8: Bake Rolls & Make Cream Cheese Icing.
Once rolls rise, bake for 20ish minutes, or until tops of rolls start to turn golden brown. Repeat rolling/spreading/cutting/rising for the other half of the dough and filling.
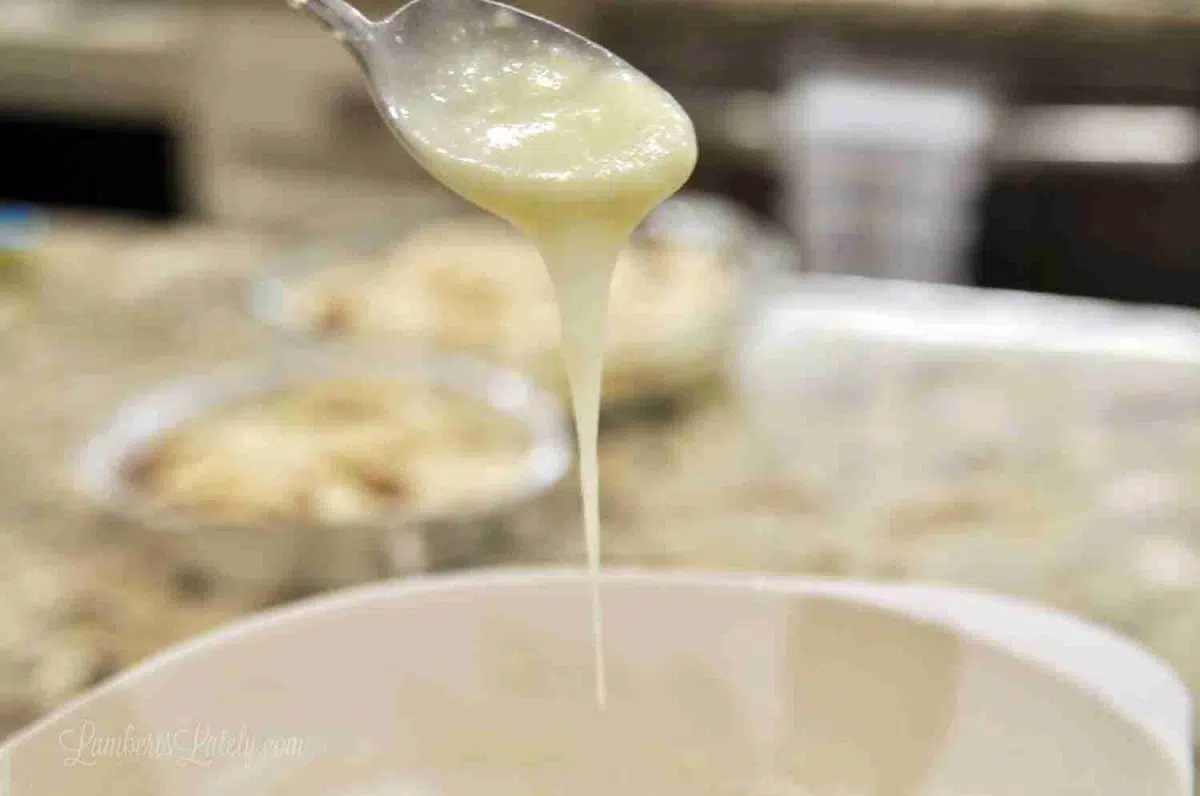
While rolls bake, mix the cream cheese frosting. Microwave an 8oz block of cream cheese and ½ stick butter for 30 seconds or so, until stirrable. Microwave another 30 seconds if needed.
Once you can stir the mixture easily, add 32oz of powdered sugar, 1 teaspoon of vanilla extract, milk, a splash of coffee, and a pinch of salt. Whisk together well, until there are no lumps.
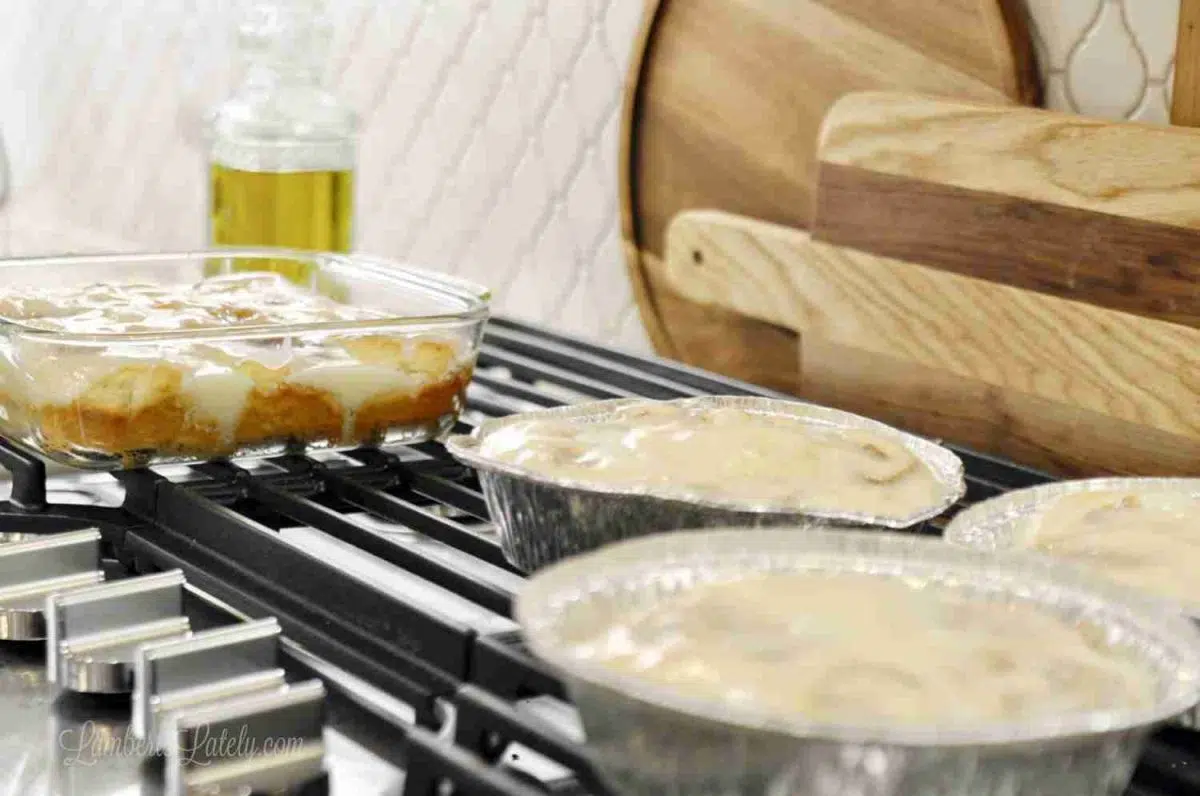
Once your rolls are out of the oven, pour frosting over them while still warm. You'll want it to get all in those nooks and crannies...that's what makes them so yummy!
🎥 Video: How to Make Cinnamon Rolls in an Instant Pot
🥡 Leftovers & Storage
Because of the cream cheese, you'll need to store these in the refrigerator after baking. They are best when enjoyed within 2-3 days of baking - past that, they tend to get kind of tough.
To reheat, place foil over your baking dish and bake at 350 degrees for 15-20 minutes.
Freezing Cinnamon Rolls
I love freezing bulk pans of these for easy weekend breakfasts! I love the process of making these with the kids, but it's not something I do every weekend. It's a long, drawn-out process...definitely a labor of love.
We typically make 8-10 pans at a time to freeze. I use these pans, which usually fit 6-7 rolls. You can also use rectangular pans if you want bigger servings.
Bake according to instructions, cool to room temperature, and freeze the cinnamon rolls with the top secured.
When you're ready to serve, remove from the freezer, remove lid, and cover with aluminum foil. (My husband recommends tenting the foil so the cream cheese icing doesn't stick.) Bake at 350 degrees for 45-50 minutes, until center rolls are warm.
They thaw and recook beautifully and you'd never know they were made weeks/months ago! And, trust me, all of the effort is so worth it - these are insanely delicious.
🙋🏻 Cinnamon Roll FAQs
More Breakfast Favorites

I hope you love this family favorite! If you give these cinnamon rolls a try, I'd love for you to rate ⭐️ and review 💭 the recipe in the comments below!
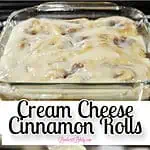
Cinnamon Rolls with Cream Cheese Frosting
Equipment
Ingredients
For Cinnamon Rolls
- 1 quart whole milk
- 1 cup sugar
- 1 cup vegetable oil
- .5 oz active dry yeast (2 packs; about 4.5 teaspoons)
- 9 cups all-purpose flour (plus 1-2 extra cups for kneading)
- 1 teaspoon baking powder
- 1 teaspoon baking soda
- pinch salt
For Cinnamon Roll Filling
- 16 oz cream cheese (softened)
- 2 sticks butter (softened)
- 2 cups white granulated sugar
- ⅓ cup ground cinnamon
For Cream Cheese Frosting
- 8 oz cream cheese
- 32 oz powdered sugar
- 1 teaspoon vanilla extract
- ½ cup milk
- ¼ cup butter
- splash coffee
- pinch salt
Instructions
Make Cinnamon Roll Dough
- With a liner in the Instant Pot, add a quart of whole milk, 1 cup of vegetable oil, and 1 cup of granulated sugar. Stir well.
- On the Instant Pot, use the yogurt setting and press the "adjust" button until you see "boil" on your screen. Place a glass lid on the pot if you have one and allow the boil cycle to complete, lasting about 10-15 minutes. It helps to whisk your milk every 3-5 minutes during this process. If you don't have an Instant Pot, bring this mixture to a low boil on the stovetop.
- Once the boil cycle is complete (your pot will beep when it's done), test the milk. It shouldn't be boiling, but should feel warm if you hold your hand above it and should be giving off some steam. If it's not, do another boil cycle, covering your pot while it heats and whisking regularly.
- Heat the milk until nearly boiling, then let it cool to lukewarm (below 110°F). I place mine on the stove grate to cool; it should feel warm but not hot before proceeding.
- Once the milk is cool, sprinkle the yeast on top and let it activate for a minute or two. It should start to smell "yeasty" after a few seconds.
- While the yeast activates, mix together dry ingredients (9 cups of flour, 1 teaspoon of baking powder, 1 teaspoon of baking soda, and a pinch of salt).
- About a cup at a time, add dry ingredients into the milk/yeast mixture to form a dough. The dough shouldn't be mushy or wet once all dry ingredients are added; if it is, add ½ cup flour at a time until at the desired consistency.
- Put the inner liner back into the Instant Pot to allow your dough to rise. To do this, use the yogurt setting and select the 8-hour option (you won't let it rise for this long, but this is the lowest automatic setting). If you don't have an Instant Pot, a warm area (like a window) will work.
- Allow dough to rise for at least an hour (you can do it for a few hours if desired). You might have to poke it down with a fork a couple of times to keep the cinnamon roll dough from overflowing.
- Once cinnamon roll dough has risen, refrigerate for an hour or two to make for easier handling. I usually like to refrigerate dough overnight before moving on to the next step.
Fill, Roll, and Bake
- Once the dough is cooled, place half of your dough onto a floured surface and sprinkle with a little bit more flour. The surface of the dough should not be sticky; if it is, sprinkle with more flour.
- Knead dough until it is firm and easier to work with. Add more flour if needed.
- Roll dough out into a very long piece. I usually make mine about 2 feet by 1 foot, with a thickness of maybe ¼".
- Make the cinnamon filling. To do this, use a hand mixer to blend 2 8oz blocks of cream cheese and 2 sticks of butter (all softened). Once blended, mix in 2 cups sugar and ⅓ cup cinnamon. Blend well; there will probably be lumps, this is normal.
- Spread half of the filling mixture on the first rolled half of dough.
- Gently, roll the end of the dough away from you into a log.
- Cut log into 1" pieces and place cut rolls in the containers sprayed with cooking spray.
- Allow cut cinnamon rolls to rise for 15-20 minutes while you preheat the oven to 375 degrees.
- Once rolls rise, bake for 20ish minutes, or until tops of rolls start to turn golden brown. Repeat for the other half of the dough and filling.
Add Cream Cheese Frosting
- While rolls bake, mix the frosting. Microwave an 8oz block of cream cheese and ½ stick butter for 30 seconds or so, until stirrable. Microwave another 30 seconds if needed. Once you can stir easily, add in 32oz powdered sugar, 1 teaspoon vanilla extract, ½ cup milk, a splash of coffee, and a pinch of salt. Whisk together well, until there are no lumps.
- Once the cinnamon rolls are out of the oven, pour icing over while still warm. You'll want it to get all in those nooks and crannies...that's what makes them good!
Notes
- These cinnamon rolls can be frozen. Bake according to instructions and cool to room temperature. Cover with the lid and freeze. Once ready to serve, remove from the freezer, remove lid, tent with aluminum foil, and bake at 350 degrees for 45-50 minutes.
- Frosting on top will not completely harden but will form a light crust over the top of the cinnamon rolls as it cools.
- The cinnamon rolls should be stored in the refrigerator after serving.
Nutrition Facts

Leslie Lambert is a lifestyle writer and content creator specializing in home organization, family recipes, and intentional living. With 17 years of experience in blogging and digital storytelling, she helps busy women create calm, purposeful homes they love.


Oh my goodness! I am in love with my Instant Pot all over again! Thank you for adapting your recipe - I love to cook and bake but have no imagination for developing or adapting recipes. So I very much appreciate your work! Homemade cinnamon rolls, here I come! Thanks!
You are so welcome...hope you love them!
Love this idea! For freezing, leave frosting off until re-warmed, yes? I know, I’m overthinking!..... Enjoying your blog, dreaming of implementing new things!
I always go on and put the frosting on when baking the first time!
In freezing, do you frost them before freezing? Or after the 2nd bake?
You can do it either way...I put it on the first time I bake!
My mouth is watering! Wow!
So the instant pot is used to mix and proof the dough then it's baked in the oven? Didn't know you could use one for this. Thanks.
Exactly. The rolls can be cooked in the Instant Pot using the PIP method, but I prefer to do that in the oven so you get that crunchy outside on them.
These look amazing. I think I'd eat almost the whole batch. We love cinnamon rolls for breakfast on Christmas morning too. Thanks for linking to our Keep In Touch link party.
I have yet to try using my InstaPot for making anything other than main dishes but these have tempted me! They look delicious. Featuring when my link party opens up tonight!
Thanks so much for the feature!
When frozen, what temp do you cook at?
I usually bake at 300-325 for 25-30 minutes. If you see that is not thawing the center, you can always crank it to 350 for the next batch! I do recommend covering with foil while reheating.
well, I'm really confused now. The post says to reheat at 300 degrees for 45 min. The tag says 350 degrees for 45 min. Now this reply says 300 -325 for 25 - 30 minutes. Which one is correct?
I usually go for 325 for 30ish minutes, possibly longer depending on the size of your pan and how defrosted the rolls are. Start with that and you can always add 10 minutes if needed.
I'd just like to leave a hint about cutting the dough. Instead of a floured knife, use dental floss instead. It works great for cutting dough! Just slide the floss under the dough to the right place, lift and cross the threads, pull together and it's cut. So fast and easy!
That's a great tip - I'm definitely trying it next time!
I always use dental floss or crochet thread (not yarn). They don't squish down this way!
So what to do if you don't have the yogurt setting?
Unfortunately I can't say - I get that question a lot, but I don't have experience with rising in the Instant Pot without that setting. I used to just put the dough in a window sill to rise before I had an IP.
If I dont have the yogurt setting what do I use for the 8 hour rise step?
I wish I could answer that - I get that question all the time! I've heard there are ways to set it without the yogurt setting, but I don't have any experience with it so I can't recommend it.
Try the website pressurecookingtoday.com. The ladies don’t like to use the preprogrammed setting buttons...I bet they’d have an idea.
How do you freeze them? They are absolutely delicious! Want to freeze them so they don't get freezer burnt. Won't thaw them until Christmas. Just thaw them and heat them normally?
I always fully cook and ice them before freezing. Then, just wrap tightly in aluminum foil before freezing - you could always wrap in plastic wrap first to give them another coat against freezer burn, but I've never really had an issue. On serve day, just cover in foil and bake for 30ish minutes!
If you defrost before baking what temp and time do you recommend? Same as the first bake?
I would probably do a few minutes less then first bake - maybe 20 minutes, and go down to 300 degrees. This is a total guess, so keep an eye on them!
Can you freeze the prepared rolls and then bake/frost afterward? If you freeze do you have to thaw or can you just make at 325? Thanks!
I've never personally done it, but I've had readers tell me they have! I can't vouch for cook times - it's one of those things I'd set for 350 and set for the lowest recommend cook time, watching closely. I'm sure thawing before cooking wouldn't be an issue.
What is the reason to heat the milk mixture to almost boiling just to cool it down to around 110°F? Why not just bring it to that temperature?
That process is called scalding the milk. It kills any bacteria that might interfere with the yeast and makes sure your dough rises properly. It's a really important step to making sure your dough cooperates!
Anyone know how this would work with GF flour?
Just personal preference probably but this was way too much icing for the three families I served. They loved the rolls but scraped off half of the icing. The icing is good but too much "sweetness."
Good to consider! They've always been just right to me, but to reduce sweetness the frosting could be reduced.
Why does the recipe have double on all the ingredients?
This recipe could always be halved if needed (not adjusting cook time).
I think Donna was referring to your recipe having all the ingredients listed twice - looks like it is a formatting issue of some sort 😉
Ah, I see...gotta love technology. 😉 No idea why it did that, but it's fixed now! Thanks for letting me know, guys.
Hi! Are you stirring in your dry ingredients by hand? I’ve onky made rolls with a mixer and a dough hook....wondering about how to do it the best way in the IP. Thanks!
The dry ingredients are usually just stirred with a fork - nothing major, just make sure they're incorporated! Then, when I put the dry ingredients in, I like stirring with a wooden spoon or spatula at first then getting in there with my hands to mix at the end - it's a little messy, but it makes sure they get mixed well.
Me too! I inherited a large kitchen aid mixer and would rather use it.
Can your recipe be cut in half?
You can! Same general process and cooking time for everything.
What are these liners you speak of?
Were you asking about the pans? There's a link in the post!
"First thing’s first…with a liner in your Instant Pot, add milk, oil, and sugar and stir well." What's the liner? Is it the pan?
That's just your inner pot!
Oh ok! I thought it was something like those slow cooker liners for easy clean up. Thanks for clarifying! Can't wait to try this!
Have you ever tried to use jams or Nutella instead of the cinnamon filling? Would it work?
No, but that sounds delicious! I'd thin the Nutella out with some milk to make it easier to spread.
I’m not a baker so forgive this elementary question....do I need to sift the flour first?
You can if you'd like - it would help with clumps - but I didn't.
Confused by yeast amount-How are you measuring 20.05 oz of yeast ? Usually measure yeast by the teaspoon so can't relate to this. Sounds like a lot of yeast for 9 cups of flour would love to try a half recipe but not sure of yeast amount
Thanks
It's two .25oz packs of yeast - sorry for the confusion! I updated the post to make it a little clearer.
It says 1 cup of sugar, then further down it says 2 cups! Is it 1 or 2?!
Hi Ashley! The 1 cup of sugar goes in the milk in the first step; the 2 cups is for the filling you'll spread on the dough before rolling it up.
Duh! Insert face palm lol. I tried them tonight! I do not have the yogurt button on mine, I did some researched and used the keep warm button. It took 3 times longer lol, but it worked. They are rolled out and in a pan to be cooked in the morning. Thank you!
These cinnamon rolls look absolutely heavenly! The cream cheese frosting is the perfect touch to elevate them. Can't wait to try this recipe! 🎉🍴
These cinnamon rolls look absolutely divine! I can almost smell them from here. The cream cheese frosting is the perfect touch—definitely going to try this recipe this weekend! Thanks for sharing!