
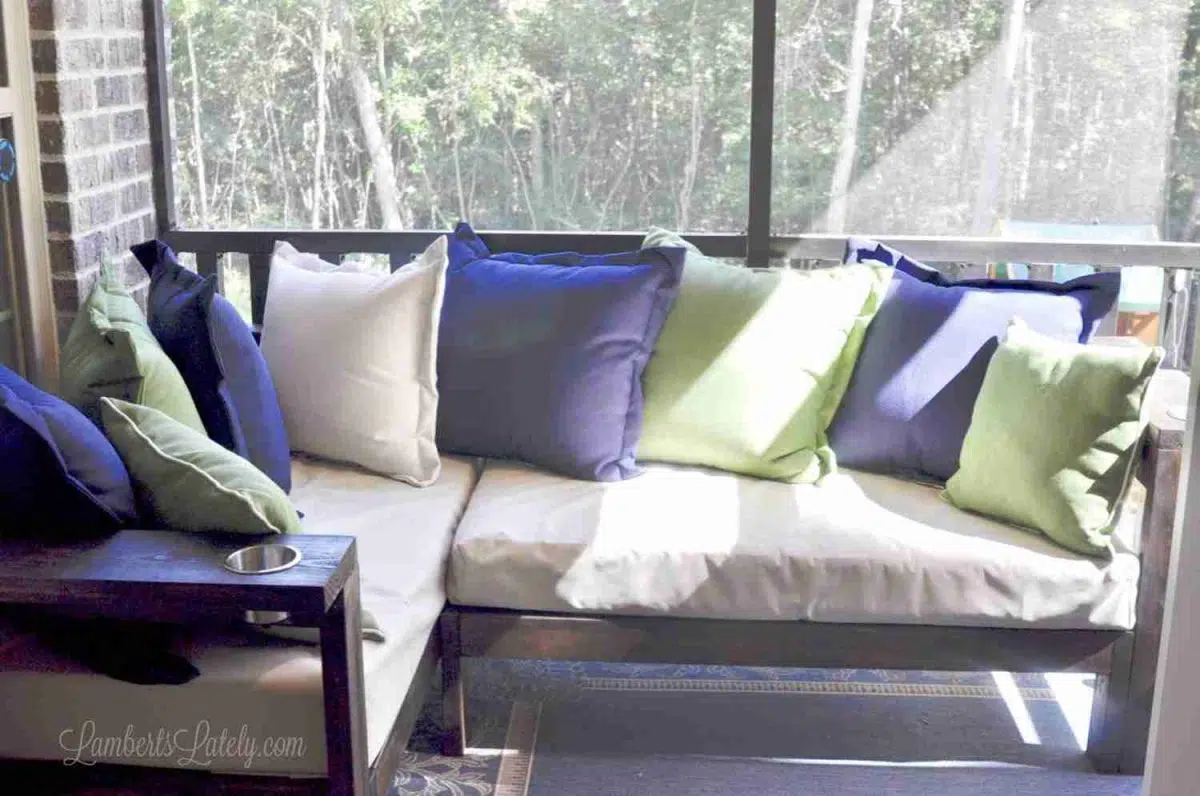
Yes, you can build furniture too! Get plans for your own DIY outdoor sectional couch that uses 2x4" lumber and crib mattresses as seat cushions. This corner sofa is great for a porch or patio.
Paid links used in this post. Read more about my link usage policies.
Of all of the DIY projects my husband and I have taken on over the years, I think I might be most proud of this one.
It took us a really long time to figure out our screened porch. It's on the smaller side and, because of windows, is kind of difficult for furniture placement. A few months ago, I stumbled upon an amazing online tutorial for how to make a sectional out of 2x4s. I knew this would be beyond perfect for our porch, so Noah and I decided to take it on!
Now I cannot take credit for the actual plans for this one. We got these free DIY plans from Ana White. This site completely walks you through the process of assembling the sectional. We just converted what was supposed to be an indoor kids' sofa to a DIY outdoor sectional.
What I will share is a few tips that made the process easier and what modifications we made to the plan to really make it ours. Think of this as a companion guide to that post. I've also added a tutorial for making the crib mattress covers to the bottom of the post, just in case you're using this outdoors.
Let's get going!
Supplies Needed
For this DIY outdoor sectional couch project, you'll need the following supplies:
For sectional couch
- 15 9′ 2×4″ studs
- 1 8′ 2×8″ (This is for a modification we made - I'll explain in a minute.)
- Cordless Drill
- Miter Saw
- Kreg Pocket Hole Jig (You definitely don't want to skip this!)
- 2.5″ Pocket Hole Screws (You'll need 132 total for this project)
- 2.5″ Self-Tapping Screws
- 3 ½″ hole saw (for optional cup holders - see note at the bottom)
- 2 marine drink holders (for optional cup holders)
- Rubber mallet
- Wood Filler
- Hand sander
- 1 quart Wood Stain (This one is my favorite.)
- 5-6 Sponge Brushes (to be thrown away after use)
- 3 cans Spray Polyurethane (I recommend this one, even though I didn't use it for this project - see notes below.)
(Note: these supplies are enough to make 2 individual couches and 3 arms that piece together to make the sectional I show above. On Ana White's tutorial, you'll get a material list to make just 1 couch and 1 arm.)
For crib mattress outdoor-friendly cushions
- 2 crib mattresses (totally ok to use a clean, used one)
- 4 yards outdoor canvas fabric
- Cutting mat, rotary cutter, and sewing ruler (all optional, but helpful)
- Sewing machine
- Straight pins
- Industrial Strength Velcro
Total Cost
As of this publish date, the pieces for the outdoor sofa (not counting power tools) will cost you around $200. Assuming about $25 for each used crib mattress, the cushions will run an extra $100 or so. You also might want to budget for outdoor pillows. So you're looking at about $400 for a full, solid-wood outdoor sectional. If you've ever priced these out, that's a pretty good deal!
How to Make a DIY Outdoor Sectional Sofa: Step-by-Step Instructions
Step 1: Measure lumber and make cuts.
Once you gather all of your supplies, make your cuts and organize the pieces.
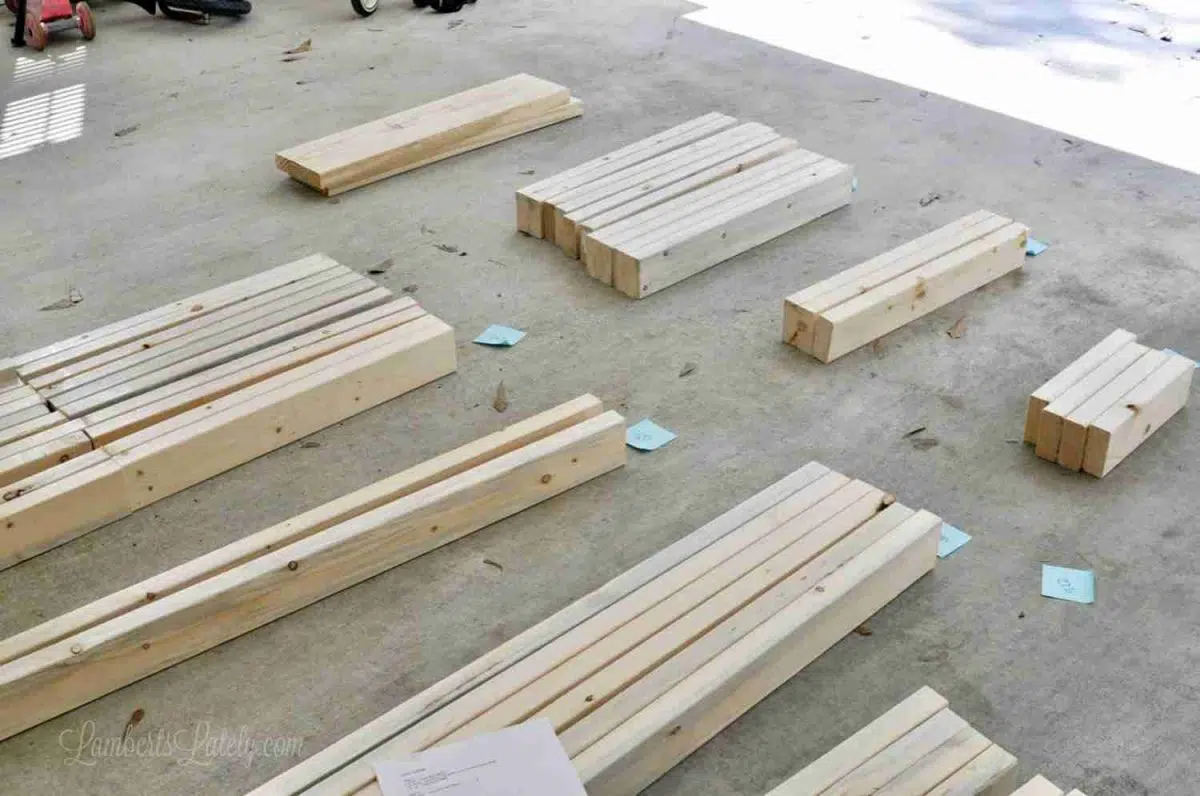
It is absolutely, totally essential to start out by planning out and making all cuts before you ever start assembly. Here's a list of cuts you'll need to make for 2 couches and 3 arms…
(Note: all cuts are in 9-foot 2×4″ studs unless noted.)
For 2 sectional pieces
Step 1 on plans
- 4 pieces @ 26" - back legs
- 4 pieces @ 23.5" - side apron (between the front and back legs)
- 4 pieces @ 12" - front legs
Step 2 on plans
- 6 pieces @ 48.5" - front and back connecting pieces
Step 3 on plans
- 2 pieces @ 51.5" - tops
Step 4 on plans
- 20 pieces @ 25.5" - support slats
For 3 arms
- 6 pieces @ 26" - legs
- 6 pieces @ 27.5" - sides
- 1 piece @ 30.5" - top for middle arm
- 2 2×8" pieces @ 30.5" - tops for side arm rests (Note: this is a modification we made to the plans so the ends of our couch were wider, almost like end tables. If you follow the plans on the site, these two cuts should be made in 2x4s.)
Organized cut list
If you're using 9' studs, this is how you can organize your cuts for this project. Most of these will even work if you can only find 104.5" studs.
- Stud 1 - 26″x4 (104" total)
- Stud 2 - 23.5″x4, 1×12″ (106" total)
- Stud 3 - 25.5″x2, 1×51.5″ (102.5" total)
- Stud 4 - 25.5″x2, 1×51.5″ (102.5" total)
- Stud 5 - 26″x4 (104" total)
- Stud 6 - 1×48.5″, 27.5″x2 (103.5" total)
- Stud 7 - 1×48.5″, 27.5″x2 (103.5" total)
- Stud 8 - 1×48.5″, 27.5″x2 (103.5" total)
- Stud 9 - 1×48.5″, 25.5″x2 (99.5" total)
- Stud 10 - 1×48.5″, 25.5″x2 (99.5" total)
- Stud 11 - 1×48.5″, 25.5″x2 (99.5" total)
- Stud 12- 25.5″x4 (102" total)
- Stud 13- 25.5″x4 (102" total)
- Stud 14 - 26″x2, 25.5×2 (103" total)
- Stud 15 - 12″x3 (36), 30.5 (66.5" total)
- One 2×8" - 2×30.5″ - side tops (61" total)
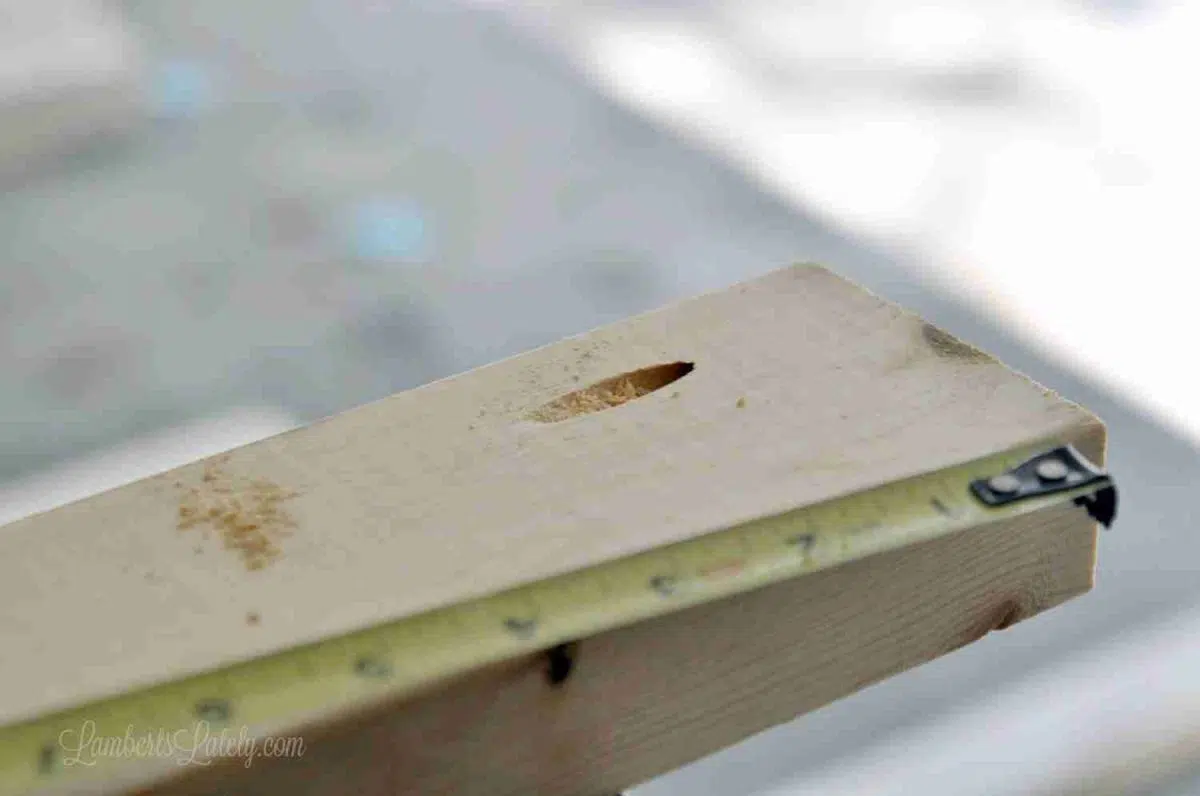
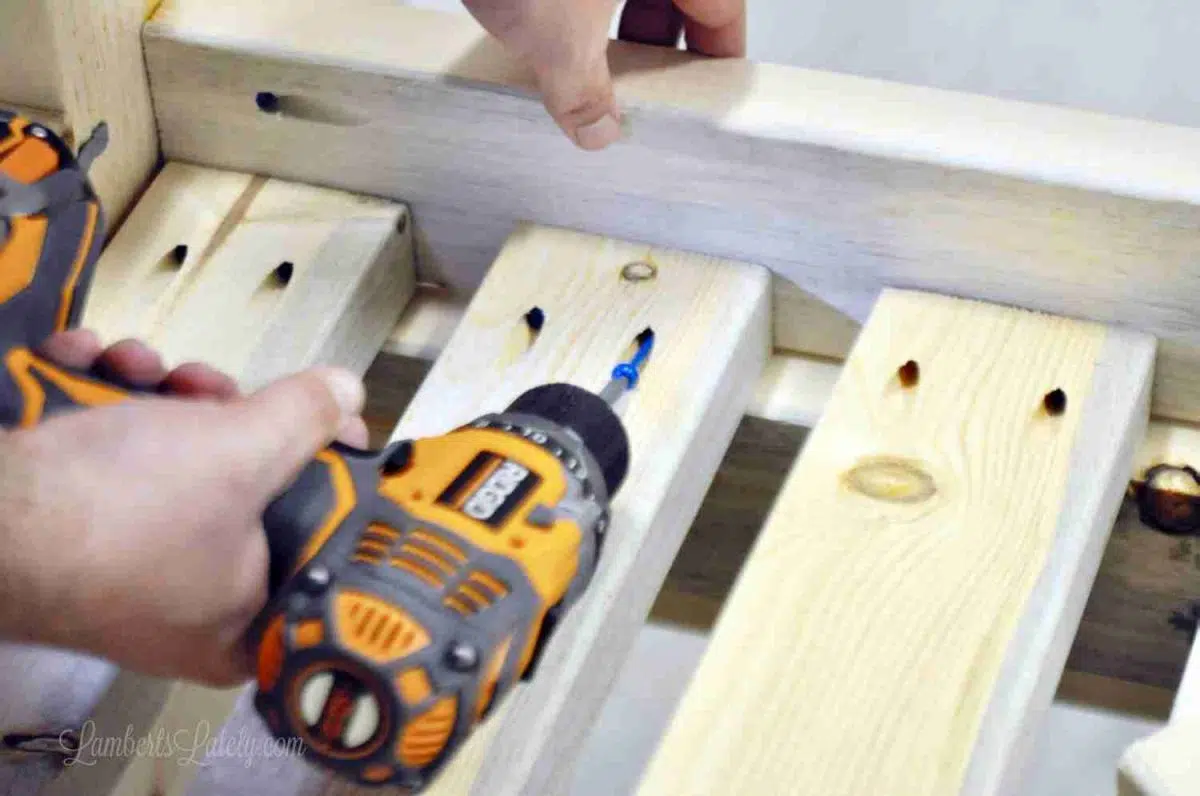
Step 2: Go on and drill (lots of) pocket holes.
This very well might be the step that takes the longest. This project requires a ton of pocket holes! It's worth it though; having those screws nice and hidden makes the finished couch look so nice.
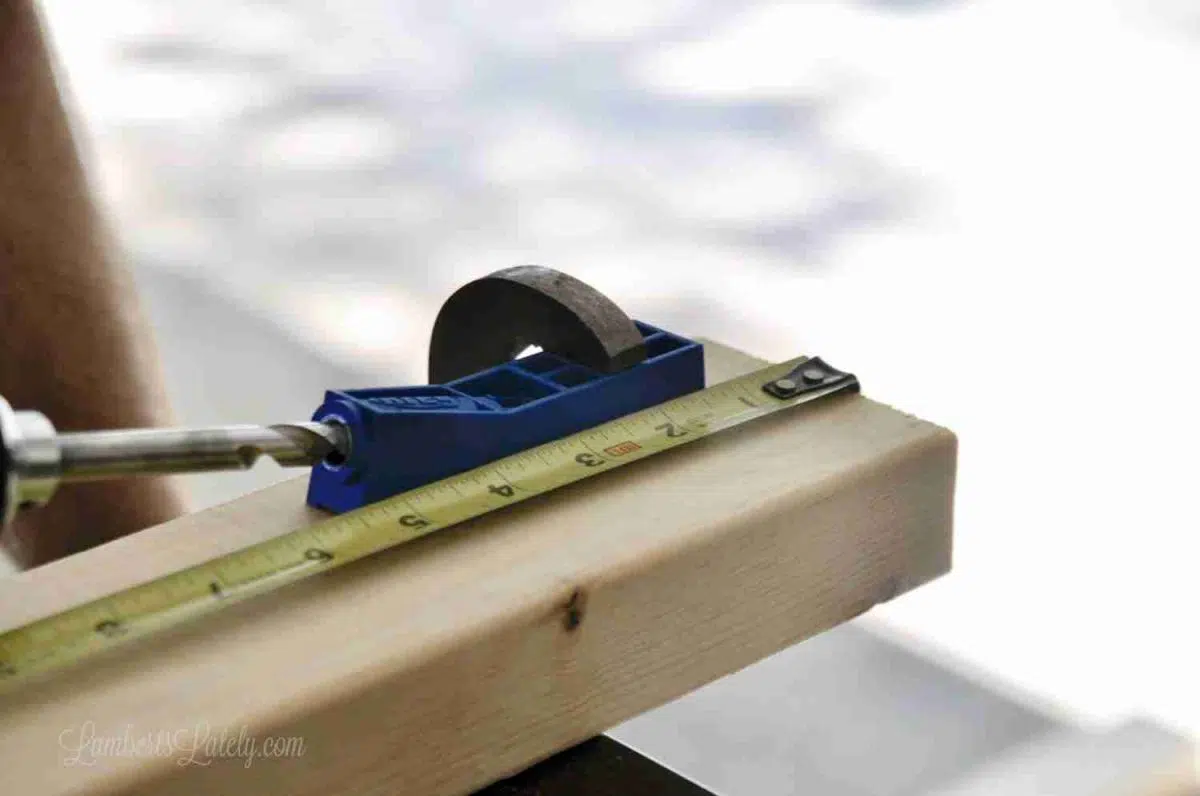
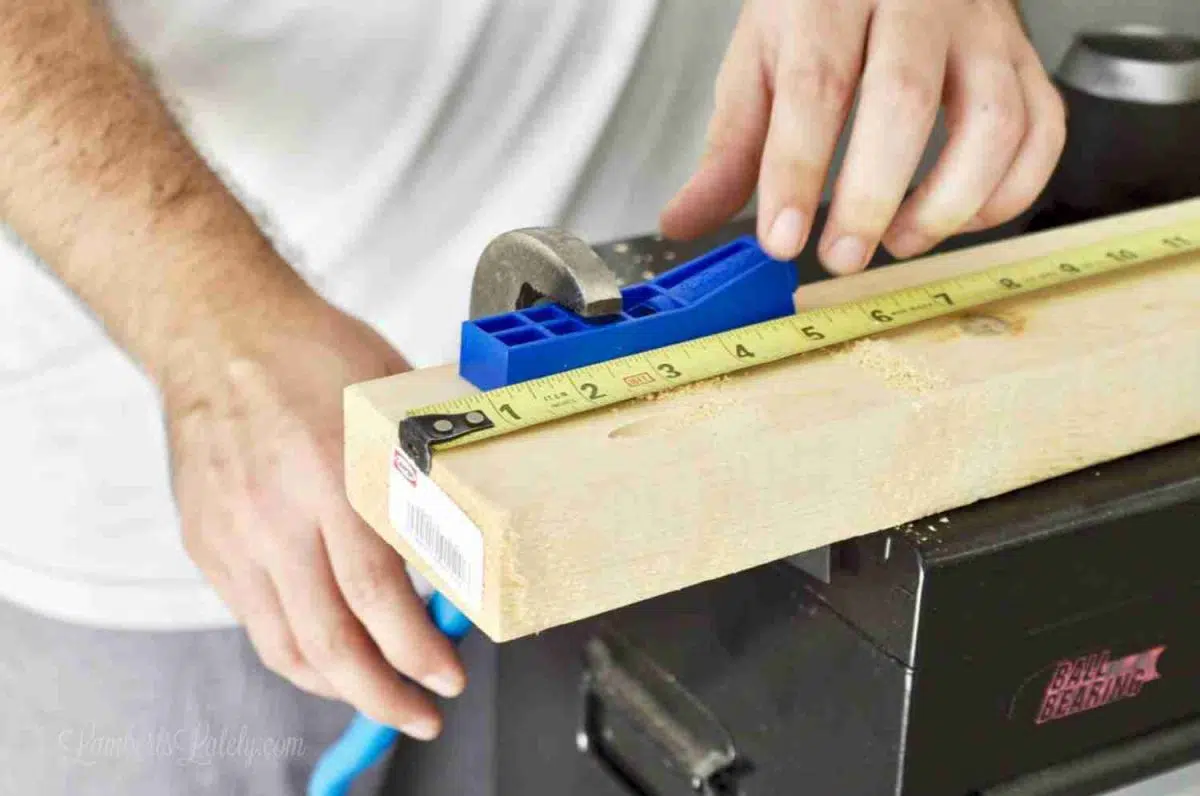
We positioned the Kreg jig 1.25" back from the end of the piece of lumber. It doesn't necessarily matter how far apart your 2 holes on each side are, but they need to be far enough apart to not compromise the stability of the wood between each hole. It's a good idea to put one about ⅓ of the way in and the second about ⅔ of the way in.
You'll need to drill pocket holes in the following pieces. There should be 2 holes on each end of each piece, total 4 holes per board (and these are all on the same side).
- All 20 of the 25.5″ support slats
- All 4 of the 23.5″ pieces
- All 3 of the 48.5″ pieces
- All 6 of the 27.5″ pieces
We used a smaller pocket hole jig set to do all of these, but if you happen to have the bigger one that does 2 holes at once on hand, it would be a huge time saver (I'd even say it's worth the extra expense to get the bigger one). You'll also need some kind of clamp to hold the jig on while you drill.
Step 3: Assemble the sectional couch.
I won't go into too much detail on this, since this process is laid out pretty well on Ana White's site - but I will give a few tips.
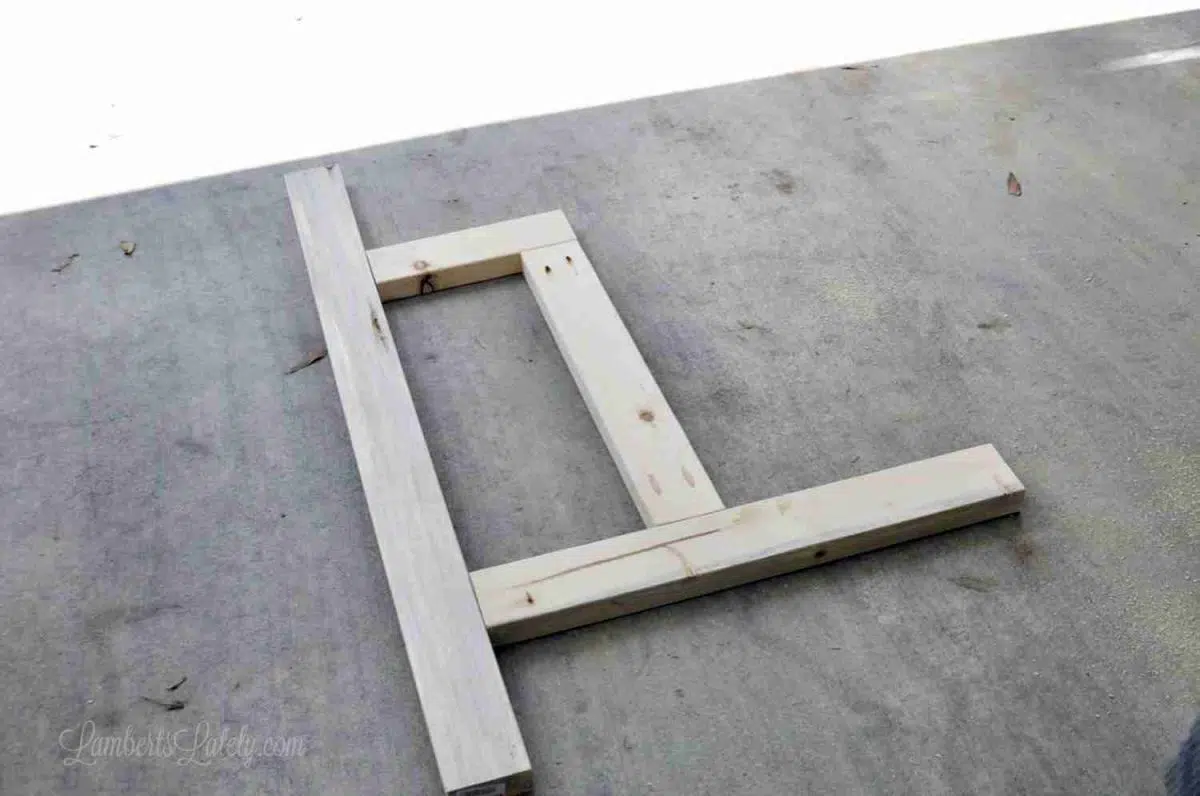
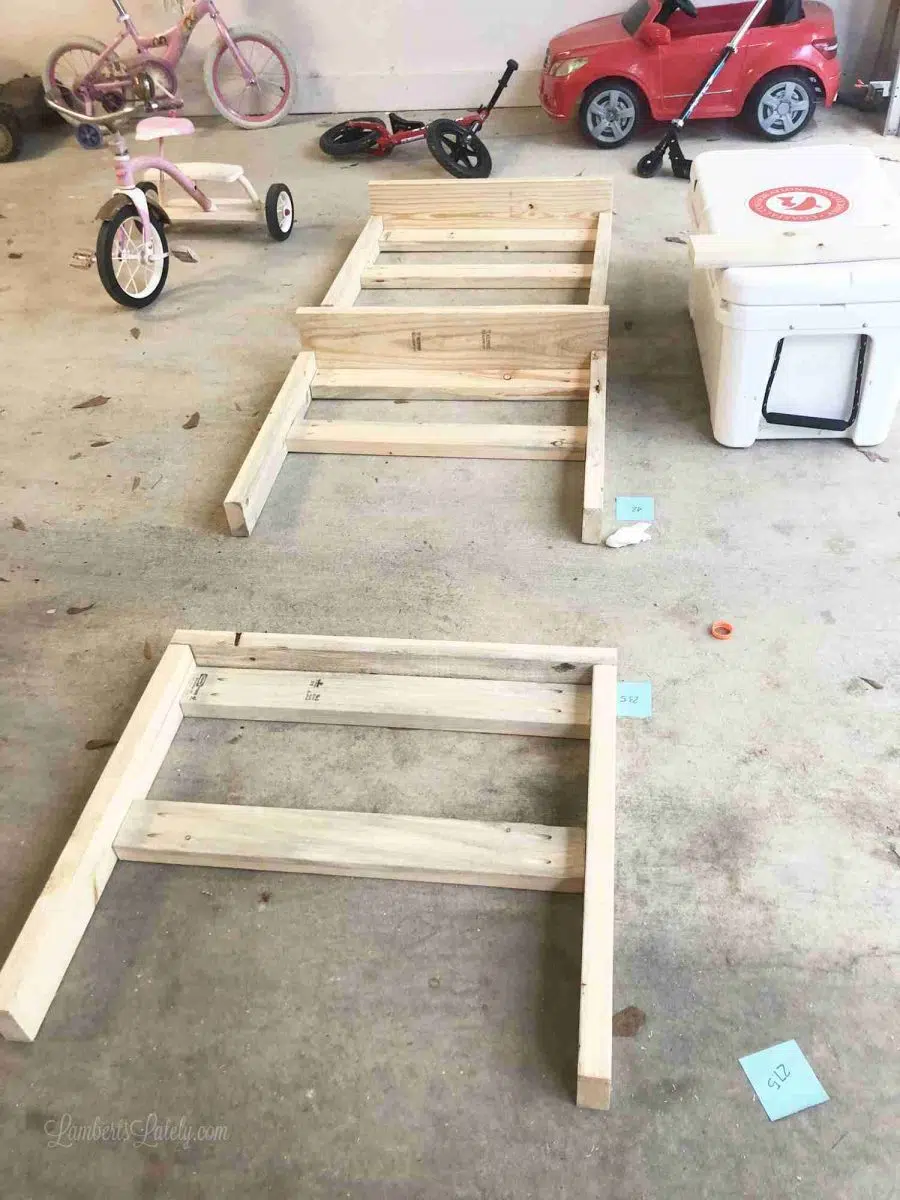
When assembling the side pieces in step 1, it helps a lot to lay it out like this, with an extra wood piece under the two legs to make sure they're even. Then, just drill your pocket hole screws in place on each end of the side apron.

When making the four side posts in step 1, also make sure that 2 of them have pocket holes facing one way and the other 2 have pocket holes facing the opposite way. You'll do this to ensure that pocket holes are nice and hidden in the final product. (Do as I say, not as I do - we totally forgot to make sure these were in the right place in step 2!)
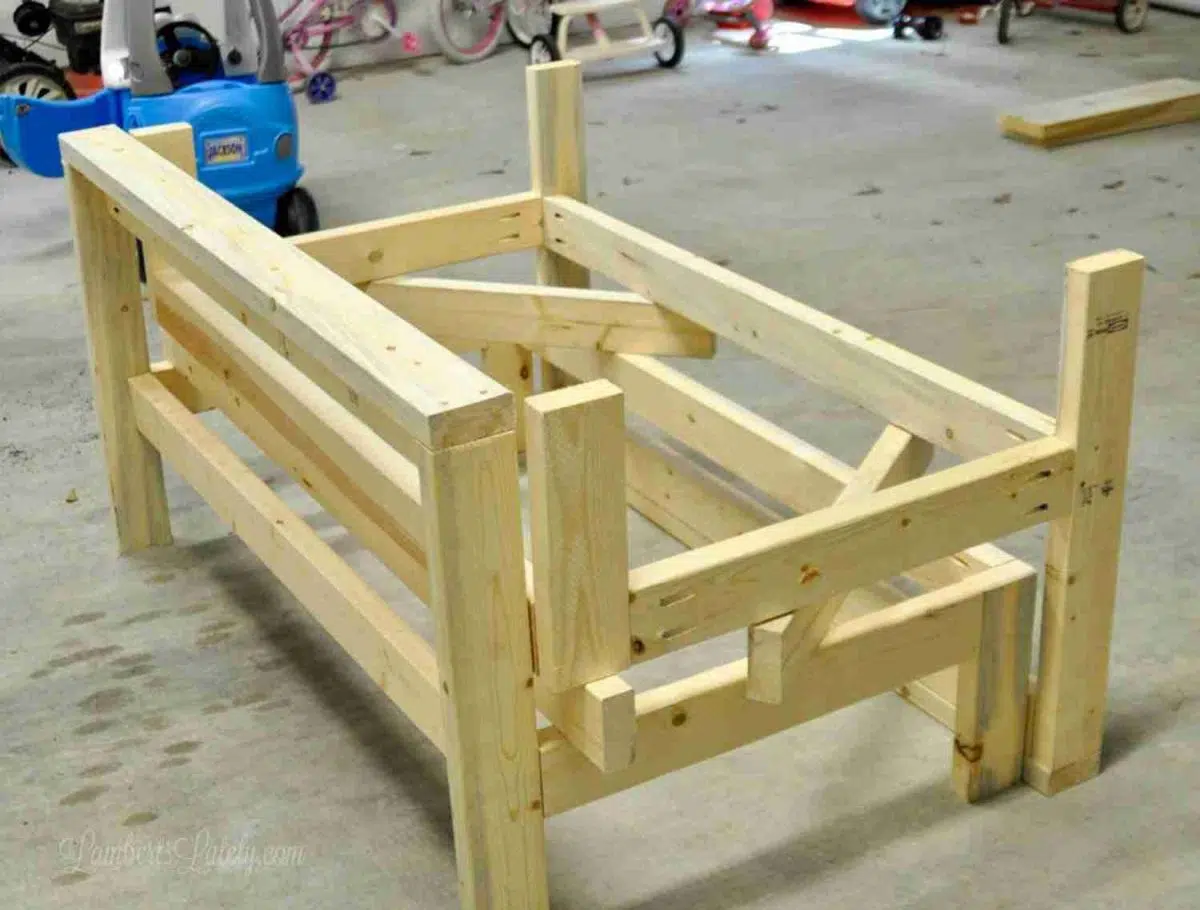
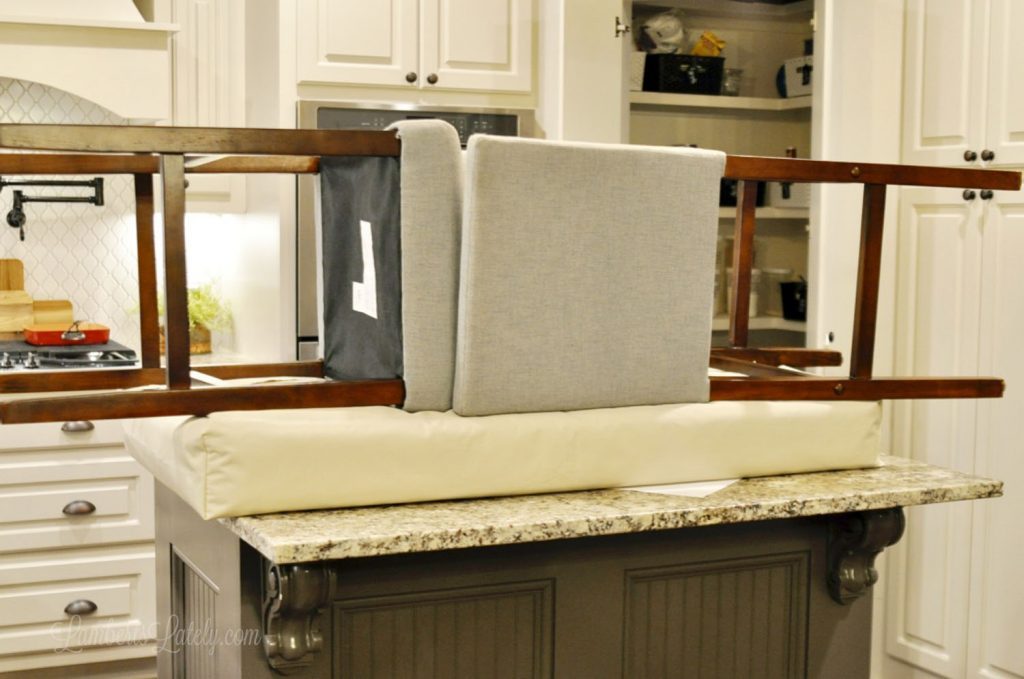
When putting in the support slats in step 4, it's kind of difficult to get the couch to lie the right way so the slats go in and stay put like they're supposed to. So, we made a little makeshift stand. Simply stack one couch on top of the other like this, putting extra 2x4s underneath the seat of the upper couch to balance it out.
That way, the slats didn't fall right through and held in place so they could be screwed in. (And note: the couches might feel really wobbly before putting in slats - it's ok. The slats will make it much more stable.)
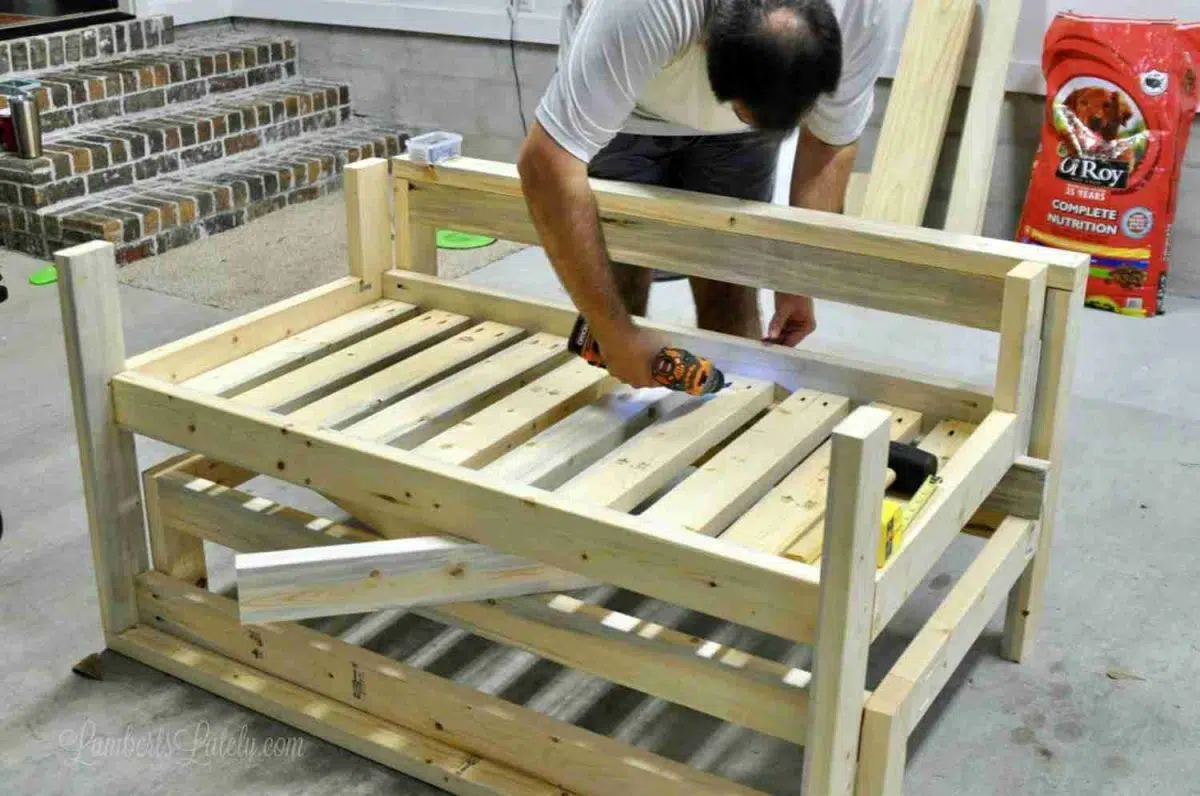
Just move the extra 2x4s around underneath as you're placing the slats so they stay in place!
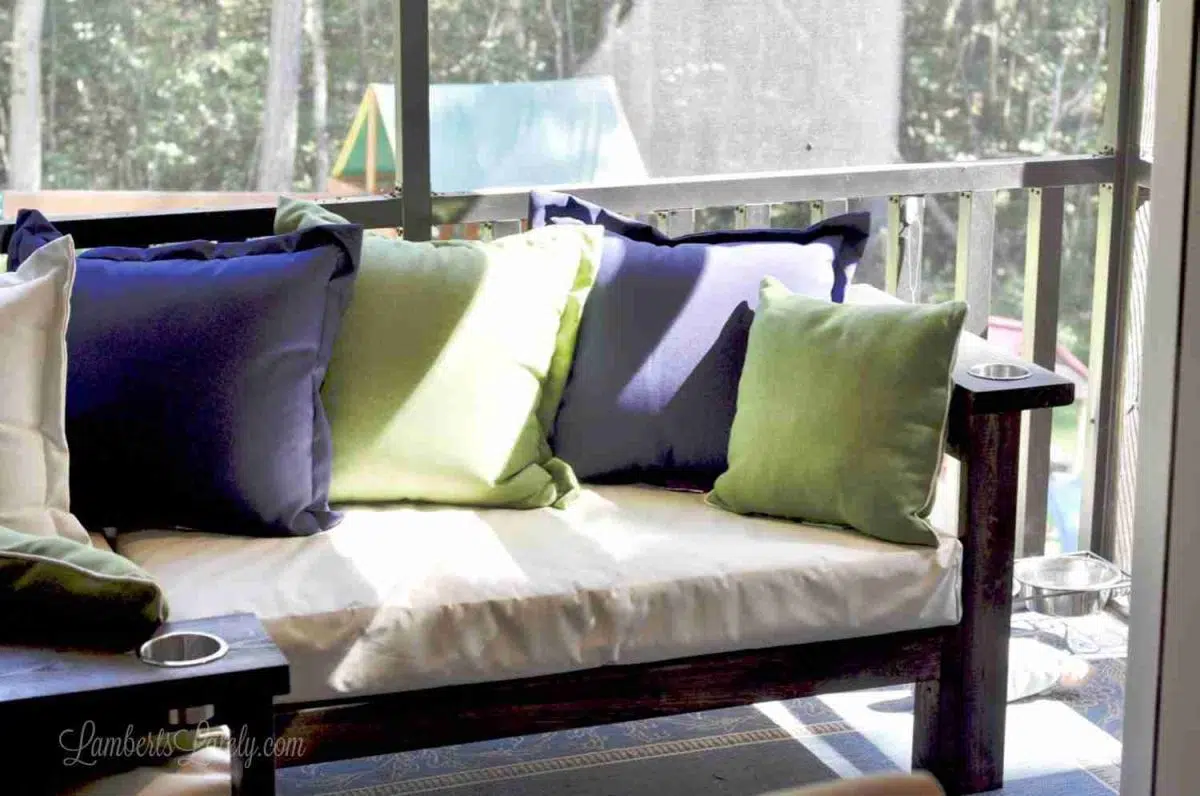
The only real modification we made to the plans from this site were to 2 of the arm pieces (this is step 5 of the plans). For the ones that were going to be on the ends of the couch, we changed the tops to 2x8s instead of 2x4s. Our porch doesn't really allow for end tables, so this way, we'd have some storage space built in. The middle arm needs to have a 2×4 topper though so it lines up with the rest of the couch tops.
Step 4: Add cup holders to sofa ends.
Note: This step is totally optional but highly recommended!
Ok, ignore the fact that the sofa is already stained in these pictures - we waited until the end to do this and it was a big mistake. It makes a huge mess, so do this somewhere that you can easily clean up sawdust. It can also mess up your stain, which is why I'd recommend doing this (totally optional) step now.
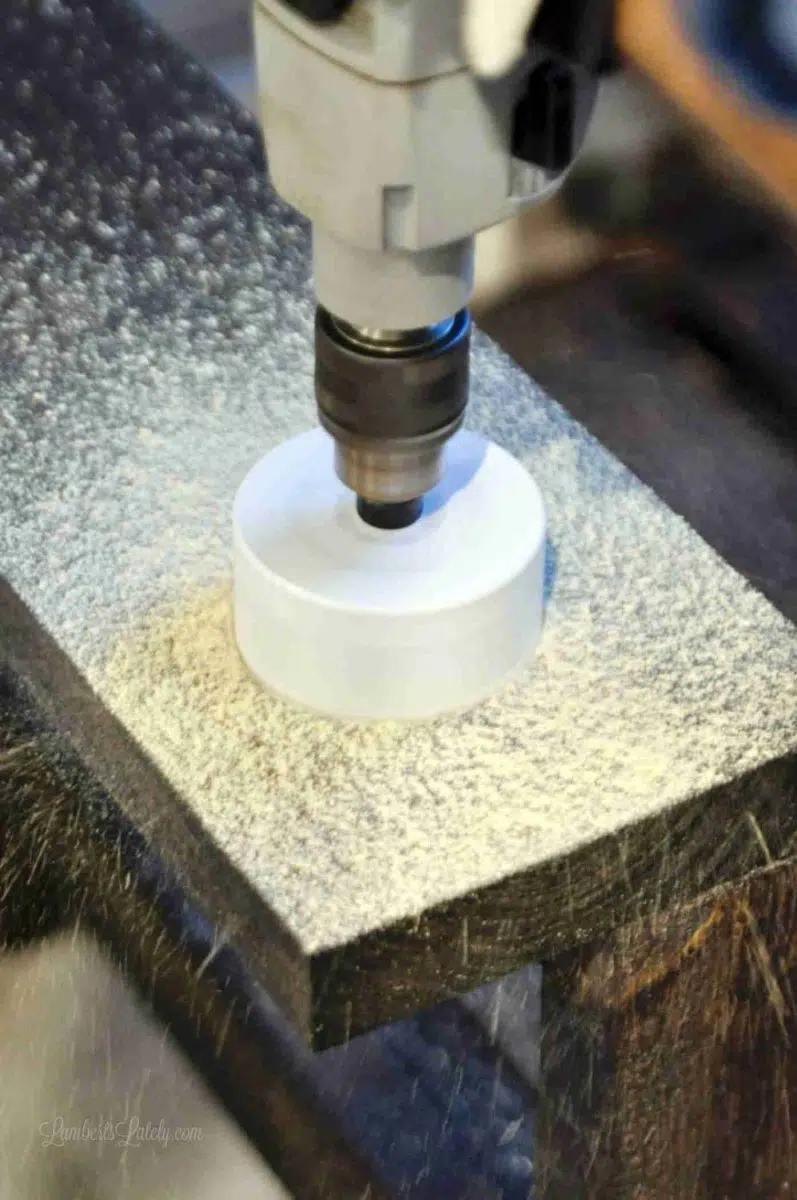
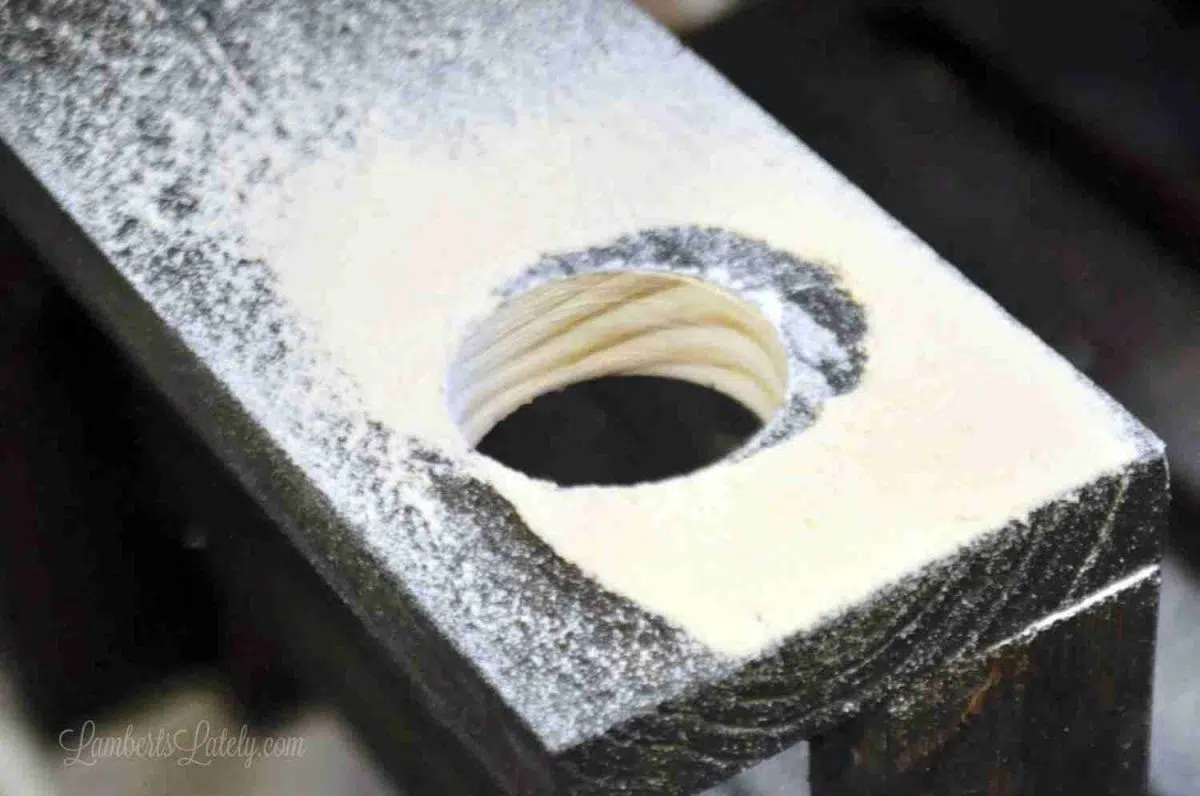
You'll need a 3 ½″ wide hole saw to make these holes in each one of the 2×8" ends. (This won't be possible if you use 2x4s for your ends.) We set the center of the hole to be 4″ back from the front of the wood and 3″ from the side.
Once that's drilled, we filled the holes with these marine drink holders that worked perfectly! Just use a rubber mallet to gently tap them in (preferably after you stain and seal).
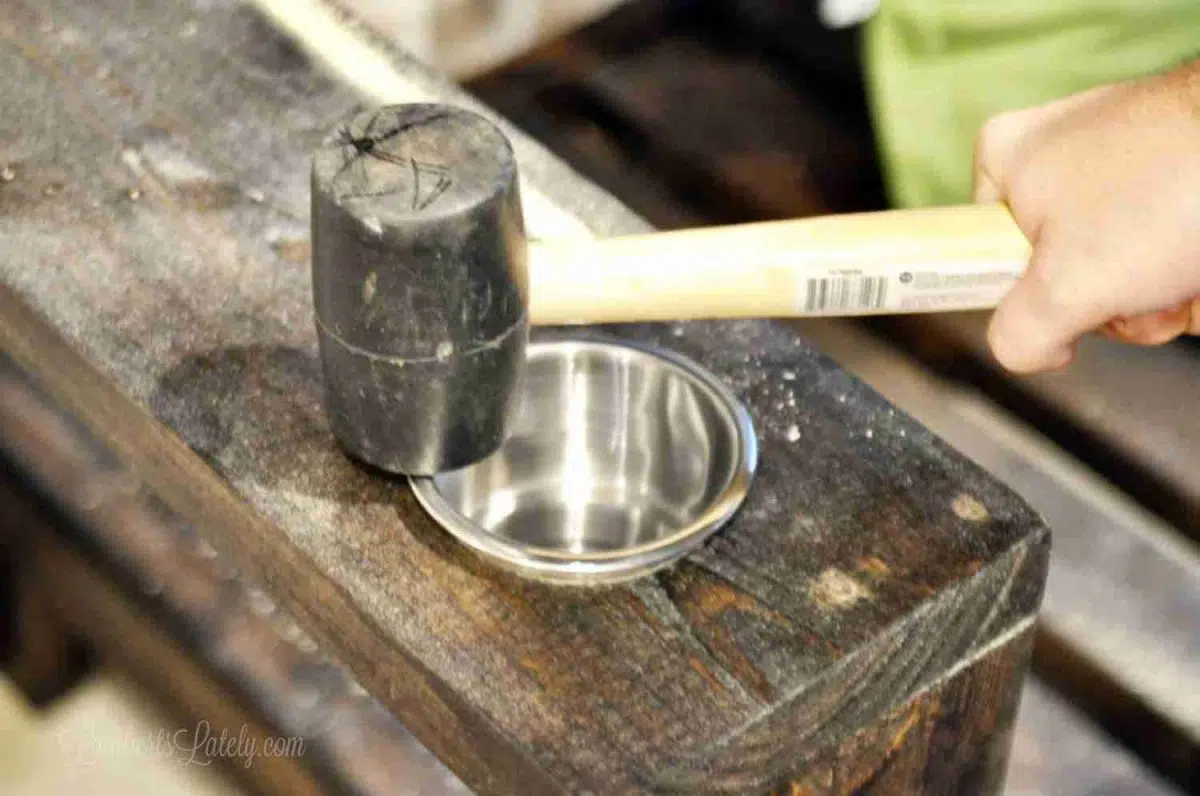
(Note: some have reported that this needs to be a 3 ¾″ hole. While 3.5" worked for us, it might be a good idea to get/measure your drink holders before buying any kind of hole saw.)
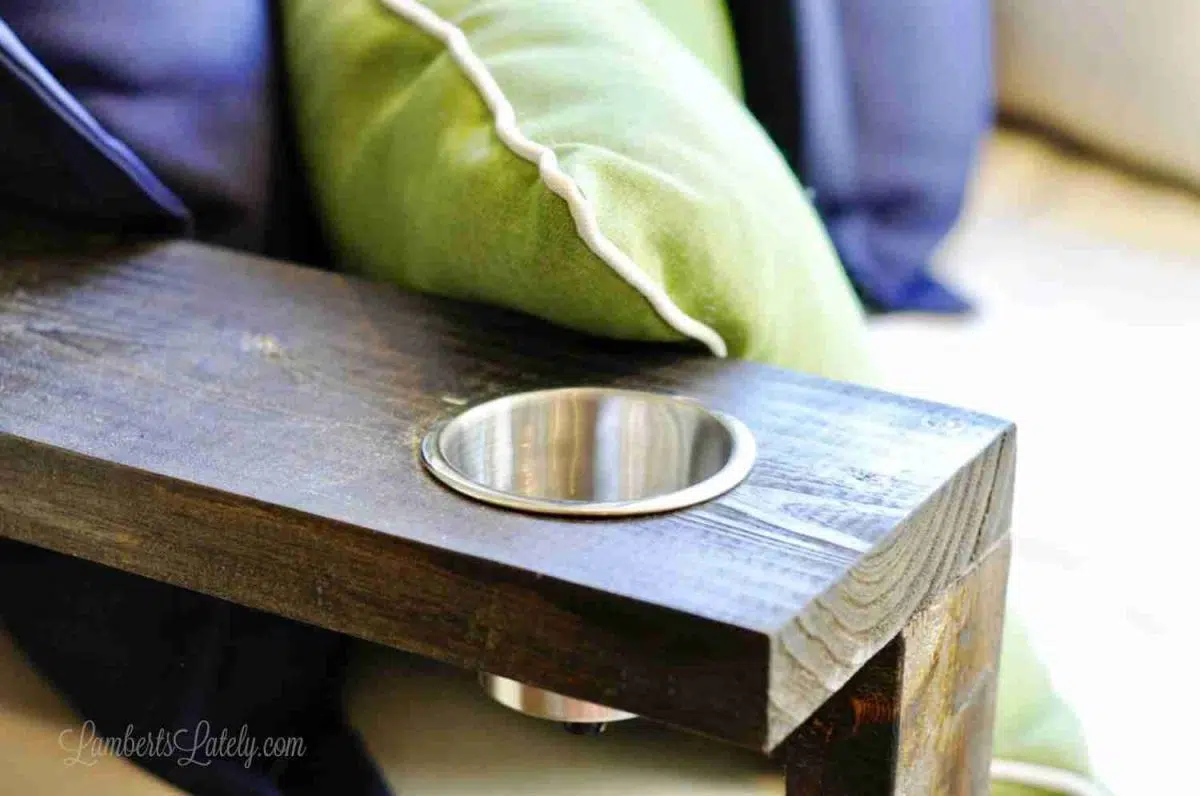
We both agreed that this made the piece look more professional than anything else we did. Plus, it's really nice having cup storage on the sides.
Step 5: Sand, stain, and seal.
First, fill any exposed screw holes with wood filler.
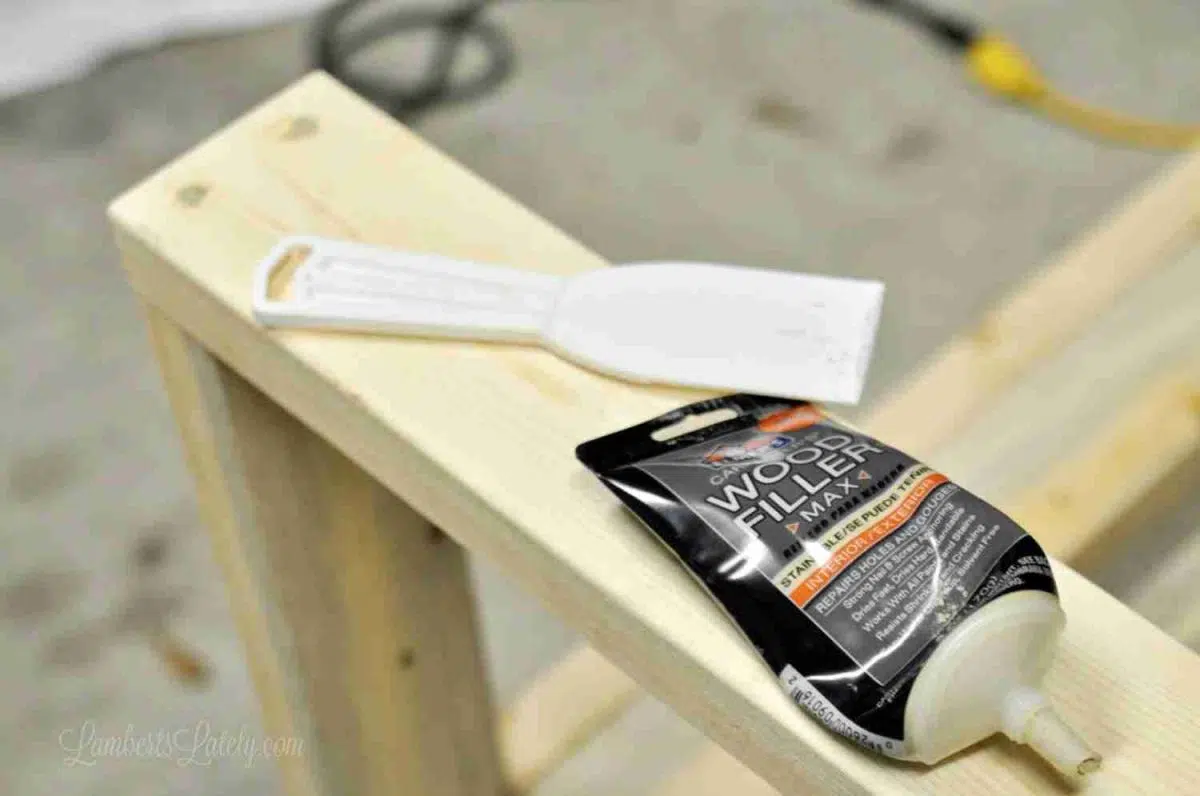
I didn't worry about the pocket holes because they were mostly hidden, but just make sure any exposed screws that are drilled right in go in a little deeper than the surface of the wood. Then, simply fill them and sand before staining.
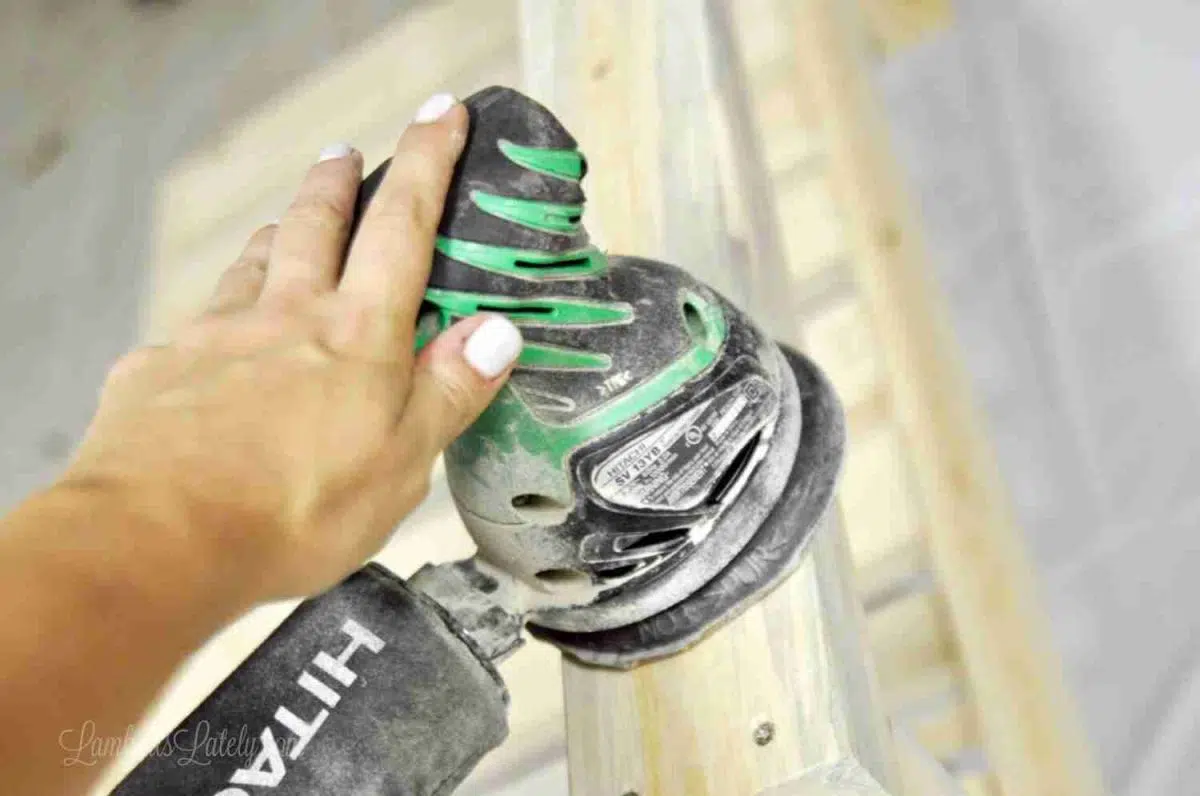
I gave the whole thing a quick sand, just to get rid of any splintered pieces and make sure it was nice and smooth.
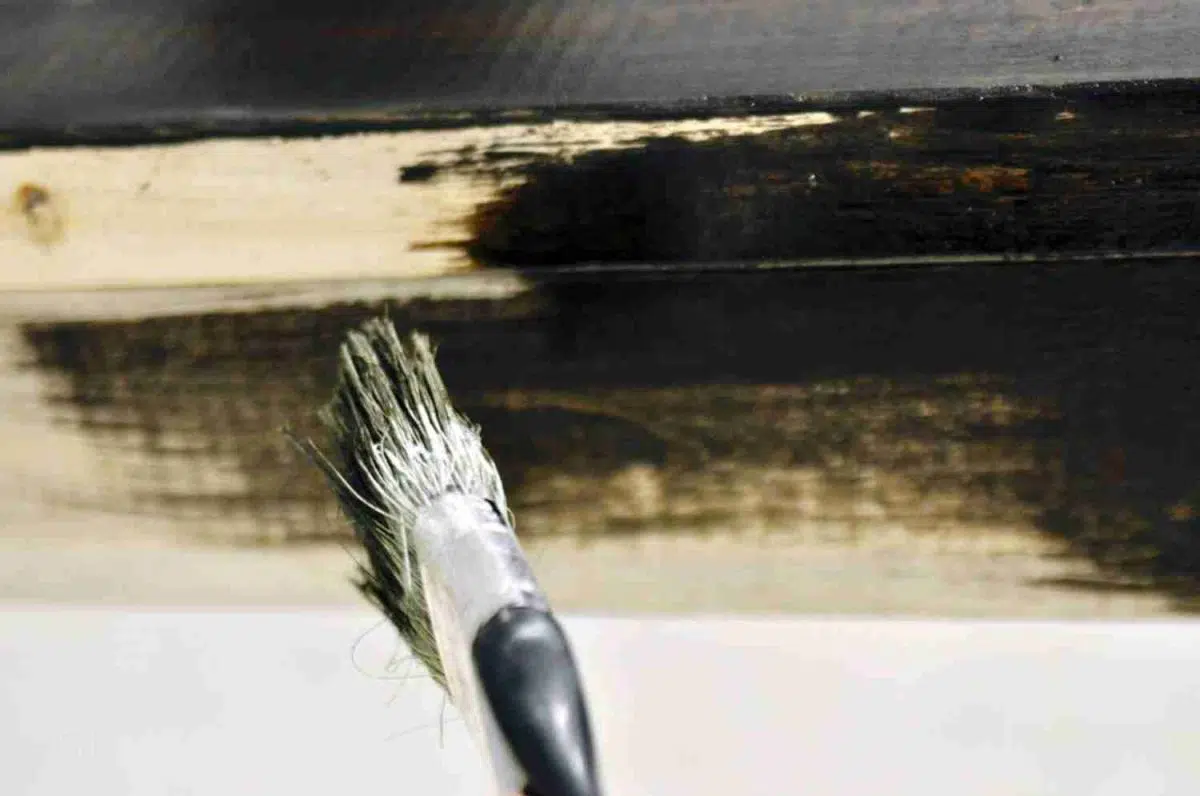
The staining part is pretty straight-forward. Instead of the bristle brush I used, I'd recommend using sponge brushes that can easily be thrown away after use. Stain makes a big mess…I wasn't able to save this brush!
Note: instead of staining, you could use exterior paint on your piece instead. This would make it look much more like a modern outdoor sectional.
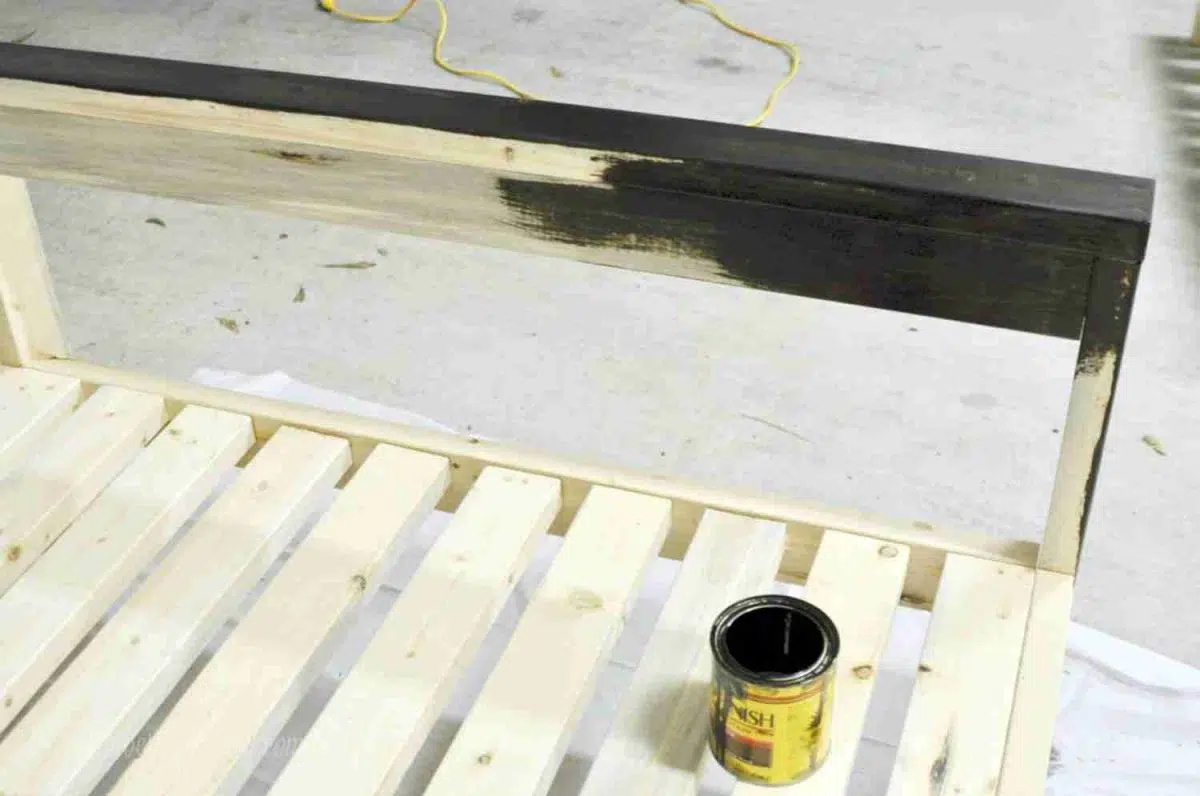
As I have for several other projects, I used Minwax Dark Walnut for my stain - it's my all-time favorite. Unlike my blanket ladder project, I left the stain on much longer for this one to get an almost painted look. I painted a section, left it on for 5-10 minutes, then barely wiped it off with an old towel (just to get any gunk off).
The finish is almost exactly like our DIY wood table refinishing project (since I knew the pieces would be sitting really close together). I absolutely love it!

I wasn't able to find the Minwax Polycrylic that I normally use (and love) in spray form at my local store, so I used this one instead. It was just ok. I loved that it dried quickly so I was able to put on 2-3 coats in no time, but it didn't give as much of a cover. After a few years of wear and tear, it has held up well, but not as well as the Polycrylic.
I would definitely recommend paying a little extra for spray instead of paint-on poly though. This piece has a lot of nooks and crannies, and painting each edge would take forever.
After everything is stained and sealed, you'll simply attach the pieces as indicated in the original tutorial!
Step 6: Put an outdoor-friendly cover on the crib mattresses.
The great thing about this project is that it fits 2 crib mattresses (as sofa cushions) perfectly. We used the one from my kids' old crib and found another inexpensive one on Facebook marketplace. Check your local garage sales or Craigslist for used ones that are usually pretty cheap.
To cover these, I used 4 yards total (2 yards each) of outdoor canvas fabric. Obviously, if you're using this l-shaped sectional indoors, crib sheets would be the perfect thing to use for covers - but, since this is on a porch, I wanted something that was a little more water-resistant. I found our fabric here.
(Most crib mattresses are a standard 27.25×51.625×6″, so these directions are written for that size. Double-check your mattresses first, though!)
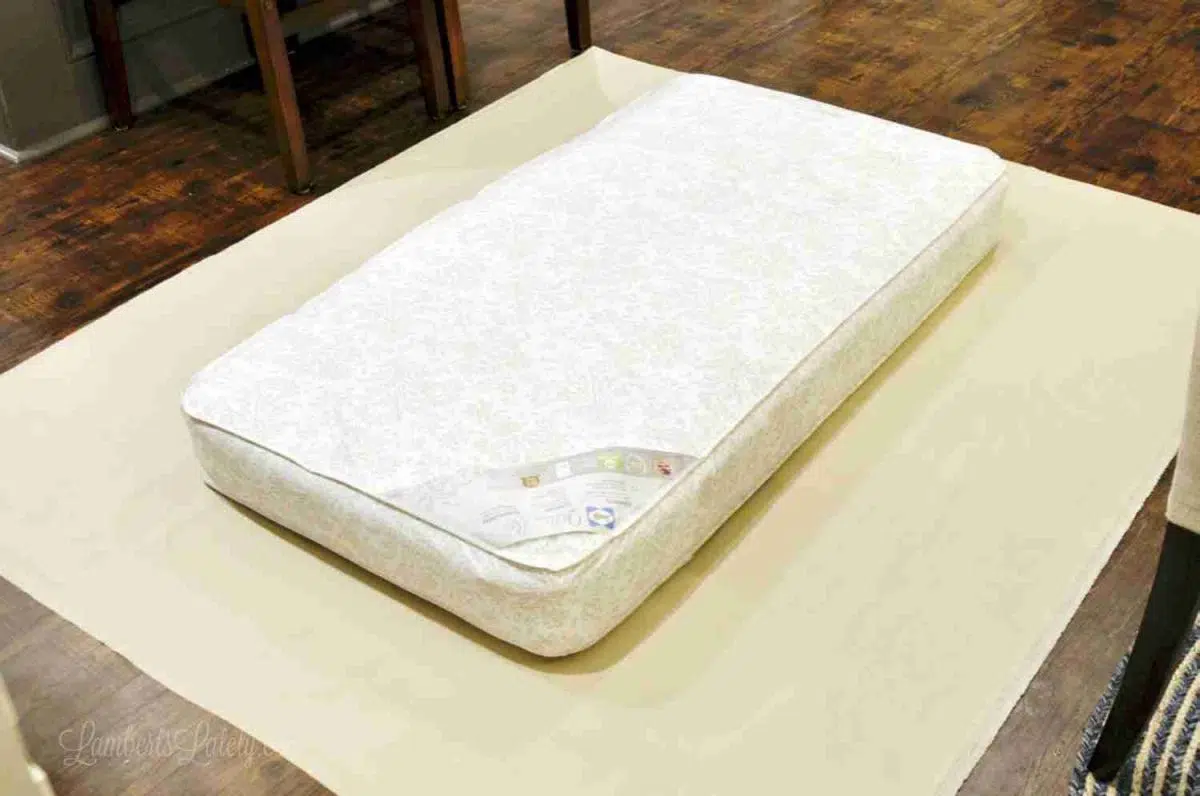
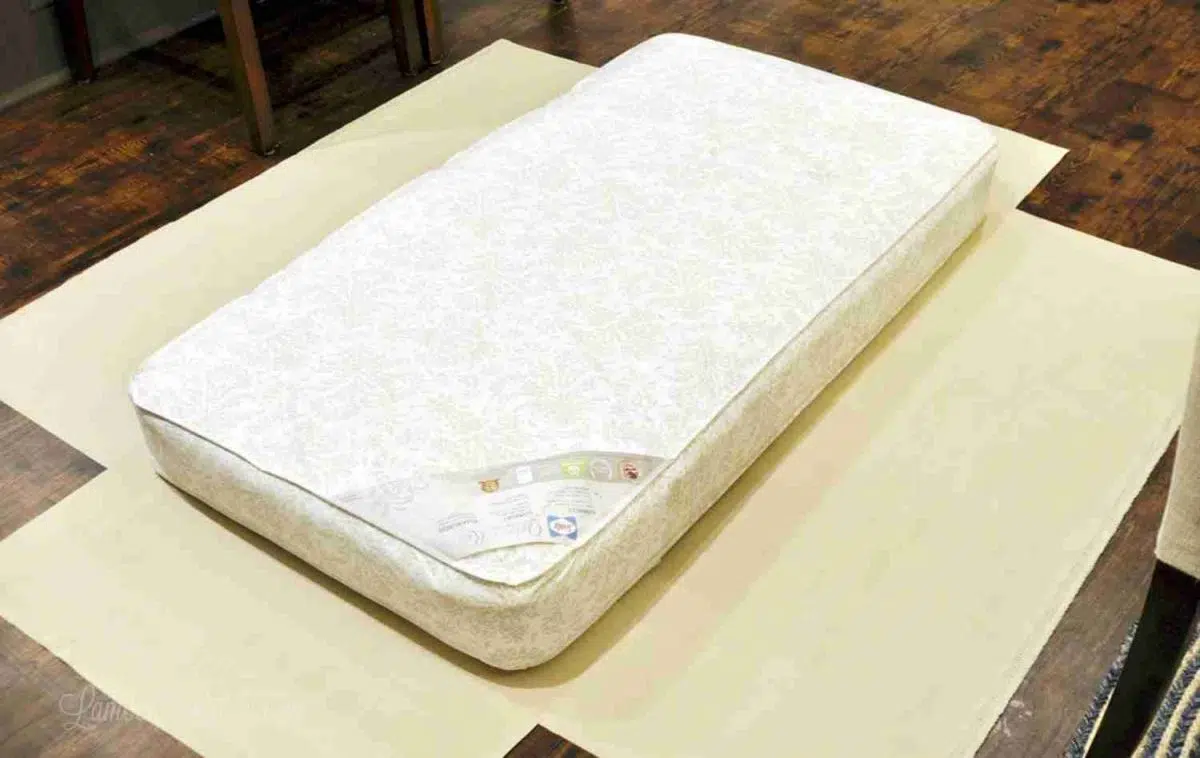
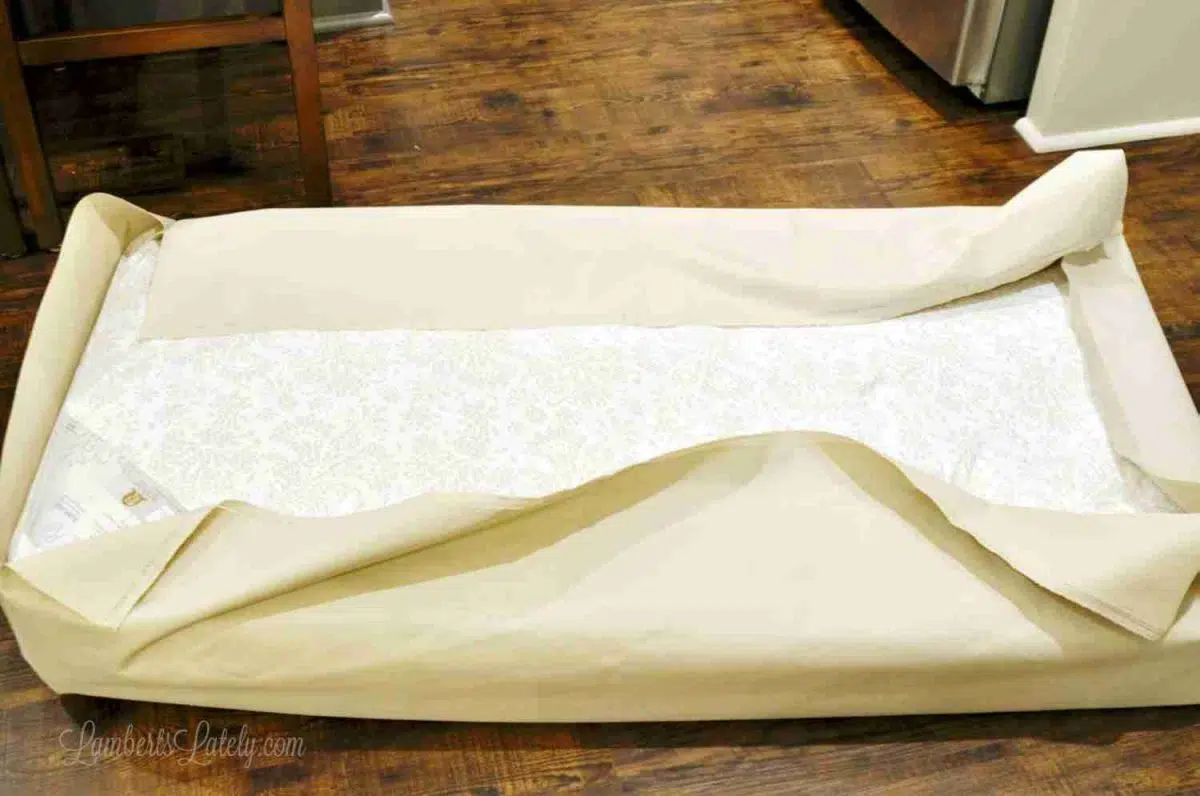
Cut 2 yards of fabric (with a width of 60″) and lay your crib mattress on top. The outside of the fabric should be facing up.
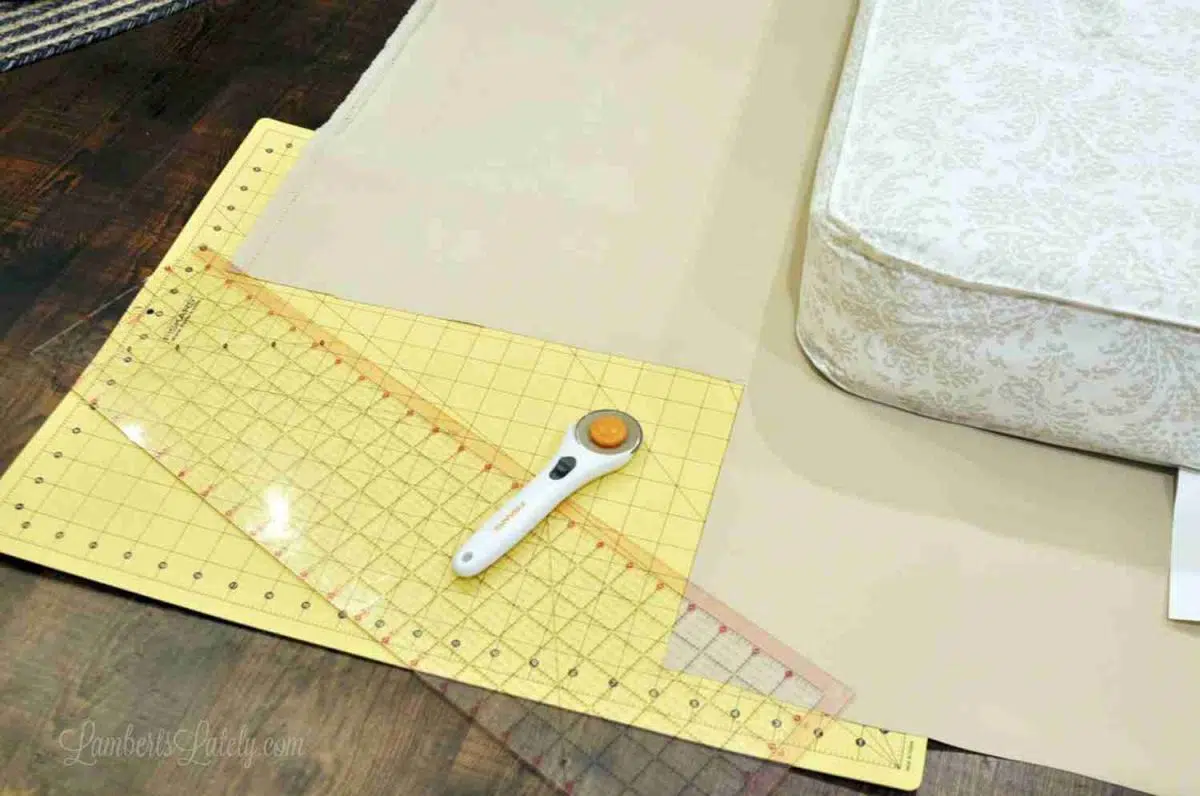
Go around the sides and measure about 1″ out from each end of the mattress; cut the corners out at that point. A cutting mat, sewing ruler, and rotary cutter help a lot with getting these cuts straight, but of course, this can be done with careful use of a sharp pair of scissors.
At this point, your fabric should look like a cross.
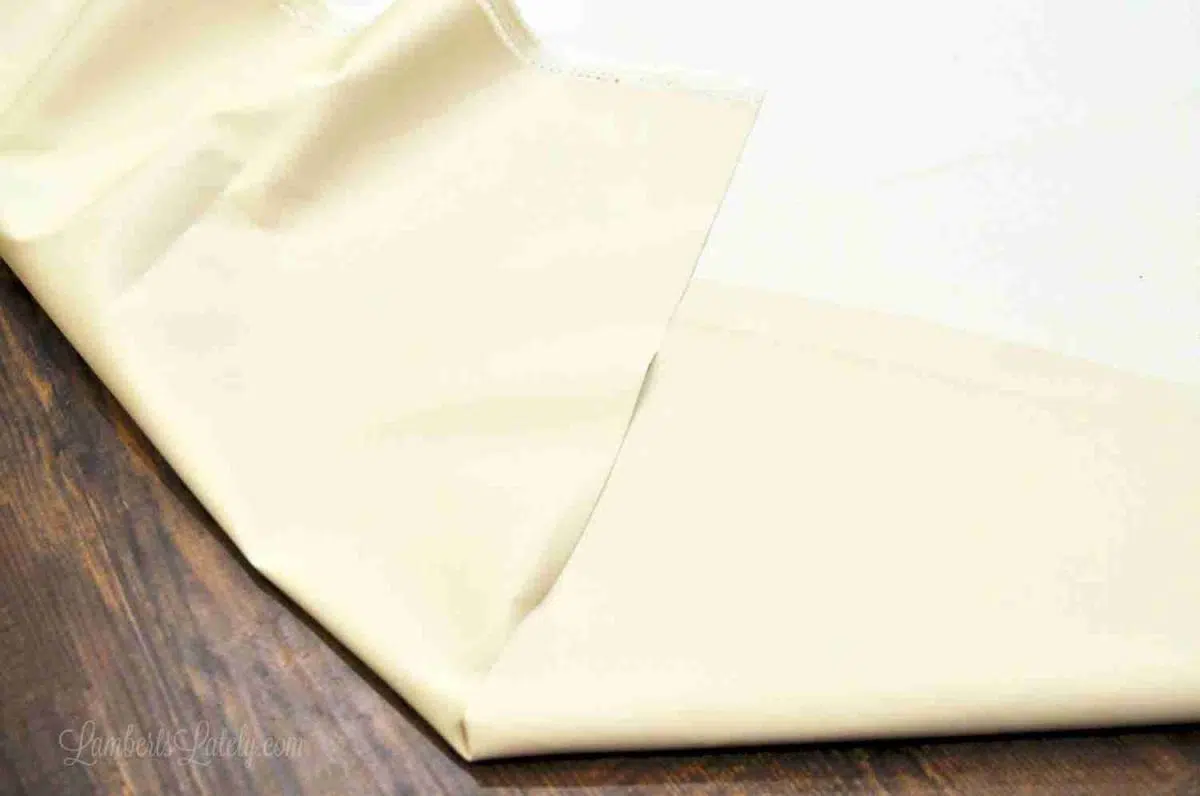
Now, fold the sides into where the edges you just cut face each other.
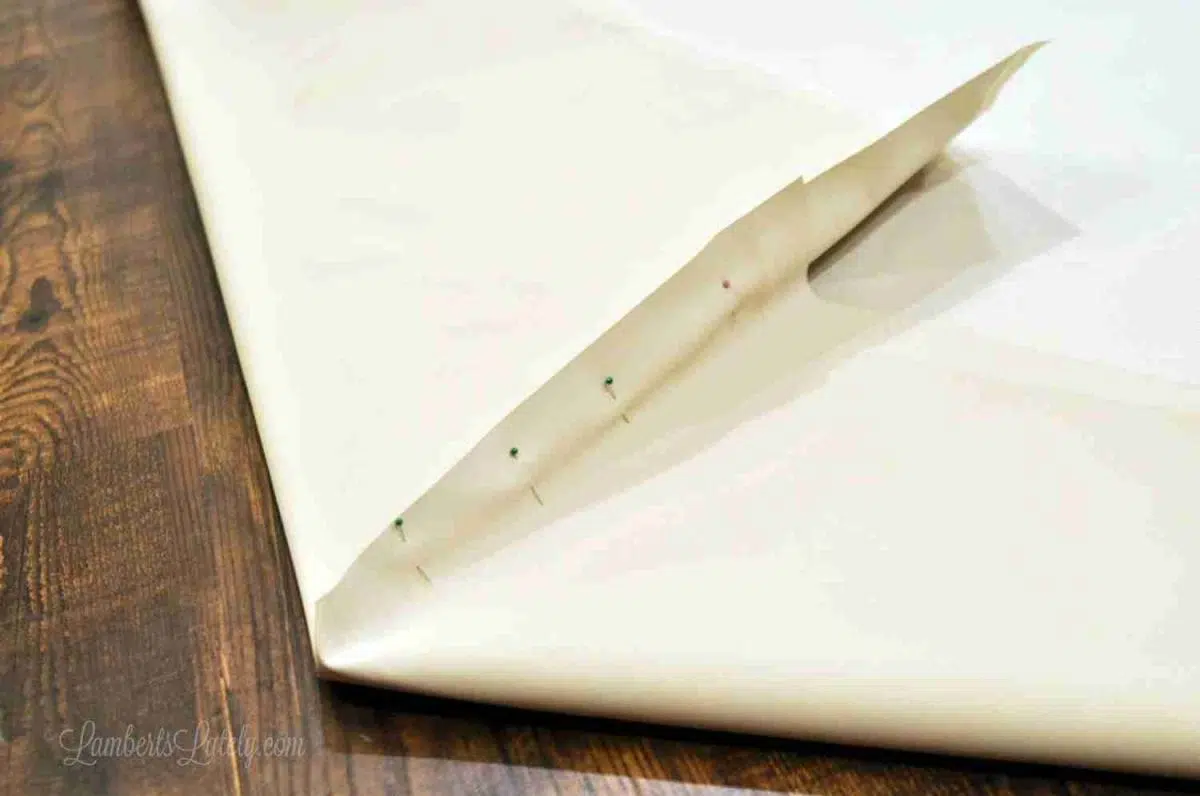
Pin those edges together.
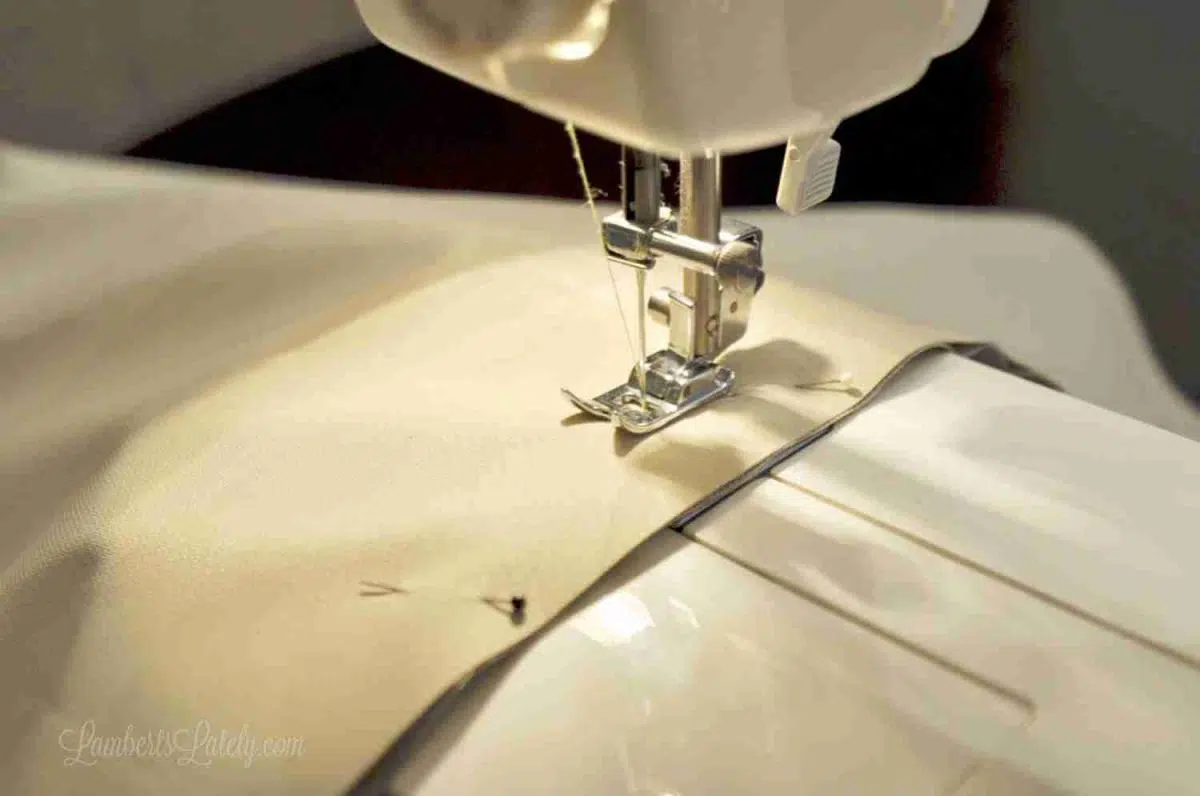
Then, sew right down the pinned edge with about a 1″ seam. (No need to surge or anything like that; this fabric is extremely fray-resistant.)
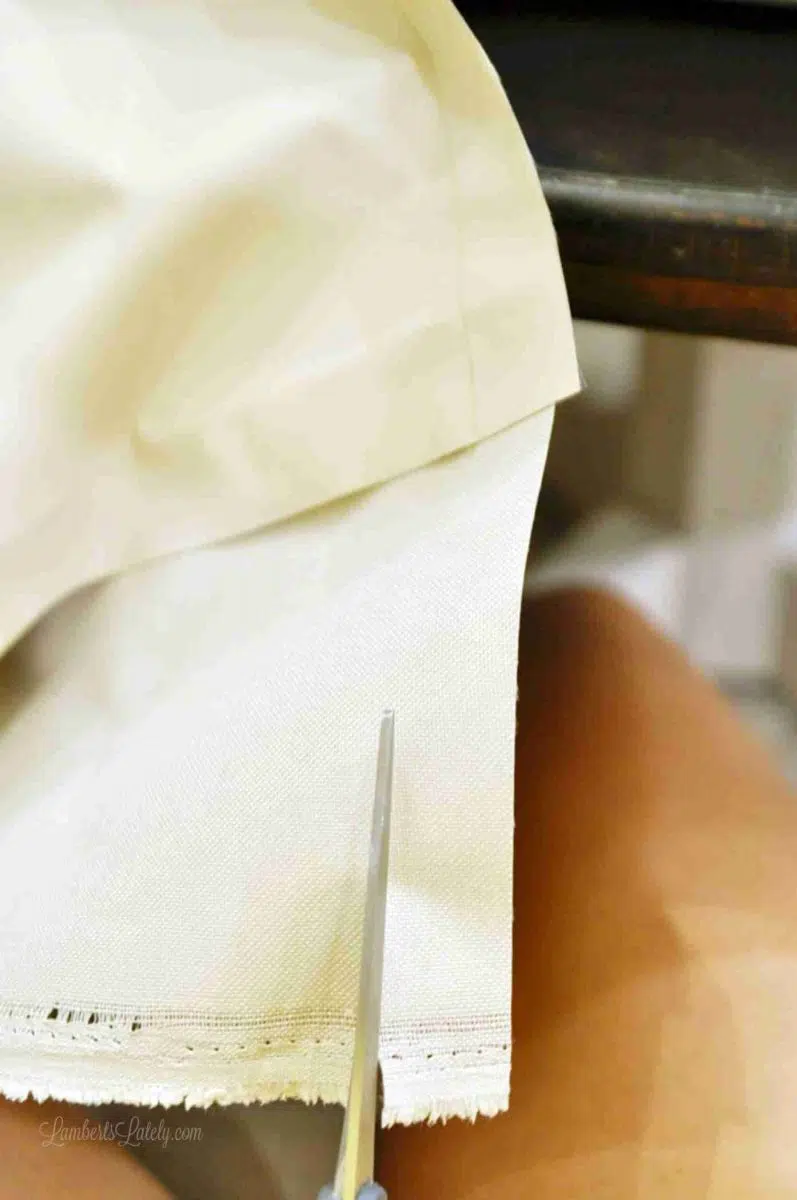
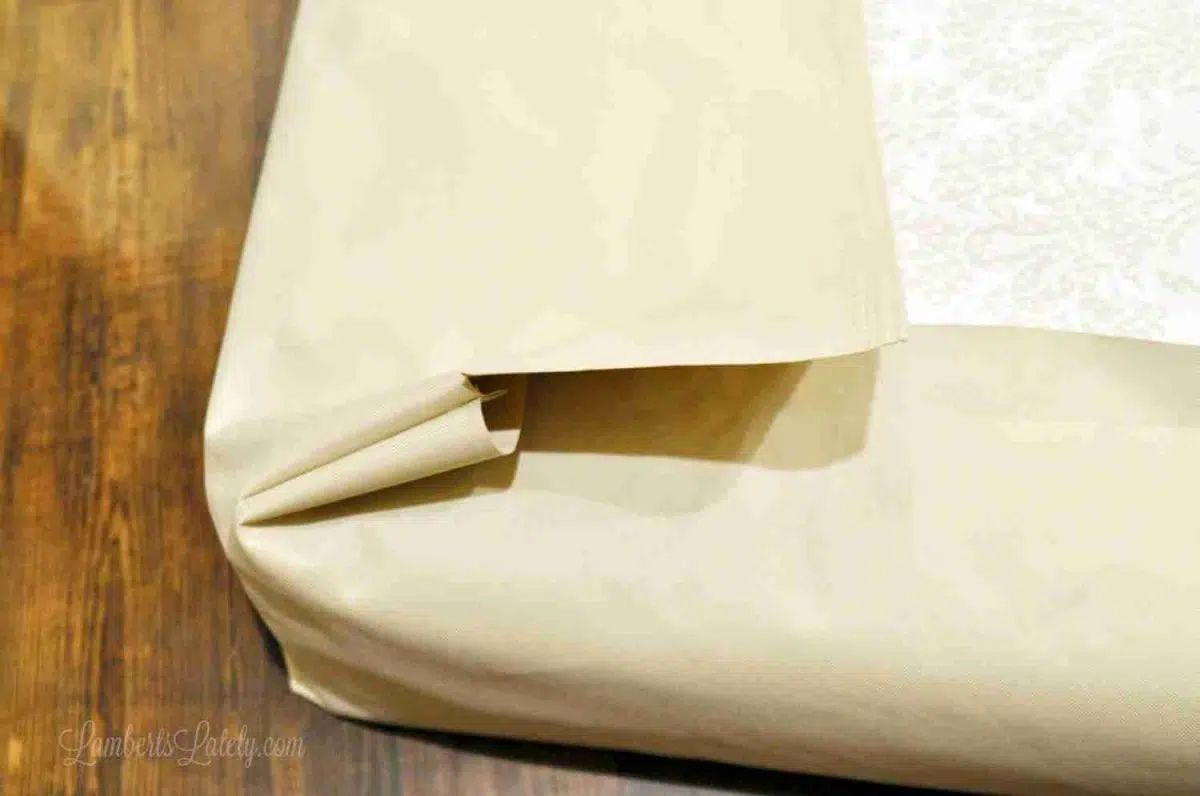
In the pieces you just sewed together, there's going to be a long piece and a short piece. Cut a 1" strip out of the edge of the long piece in to match the seam you just made (see picture below).
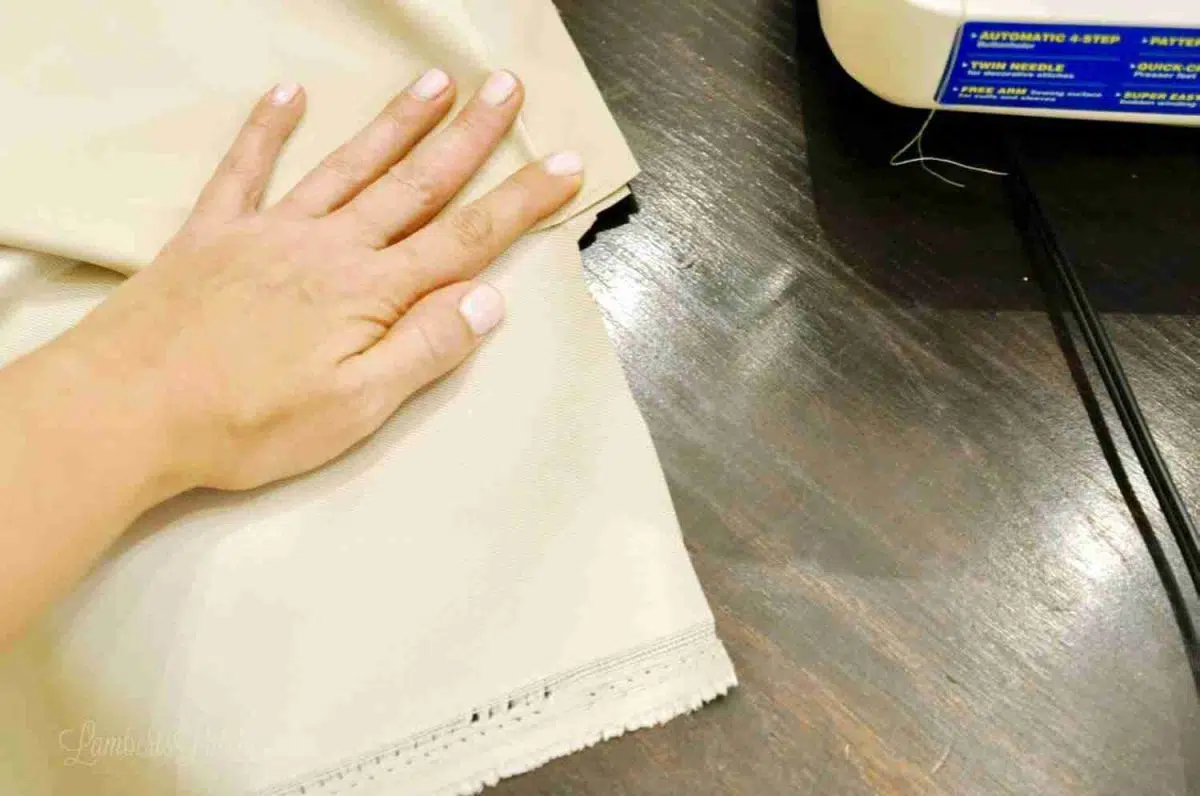
Each corner should now look something like this (it doesn't have to be pretty).
Remove the pins, turn with the outside of the fabric facing out, and try the new cover on your mattress. It should be fairly tight around the corners, but still fit (and there will be quite a bit extra fabric on the bottom).
Now, you're basically going to fold the edges in like you're wrapping a present. Fold in the short ends of the mattress first, then snugly wrap the long ends on top.
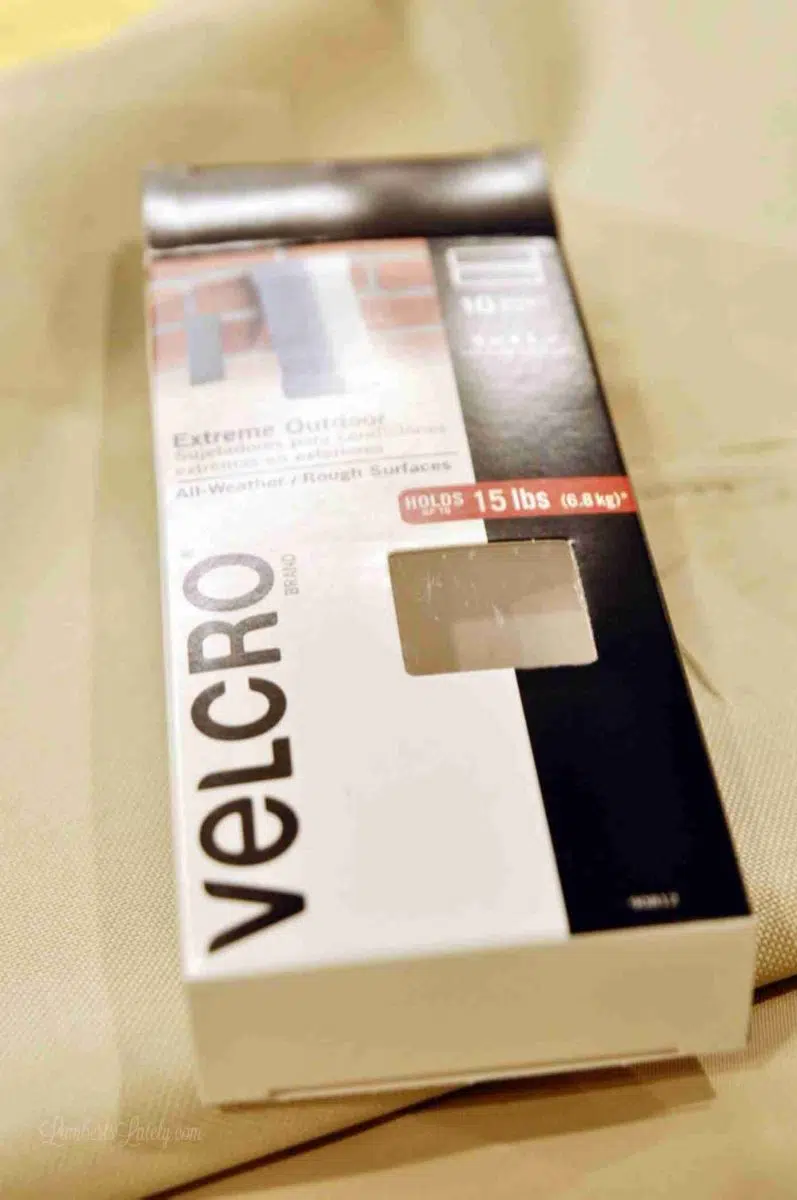
Then, you're simply going to velcro everything in place! I used this industrial strength pack that was perfect.
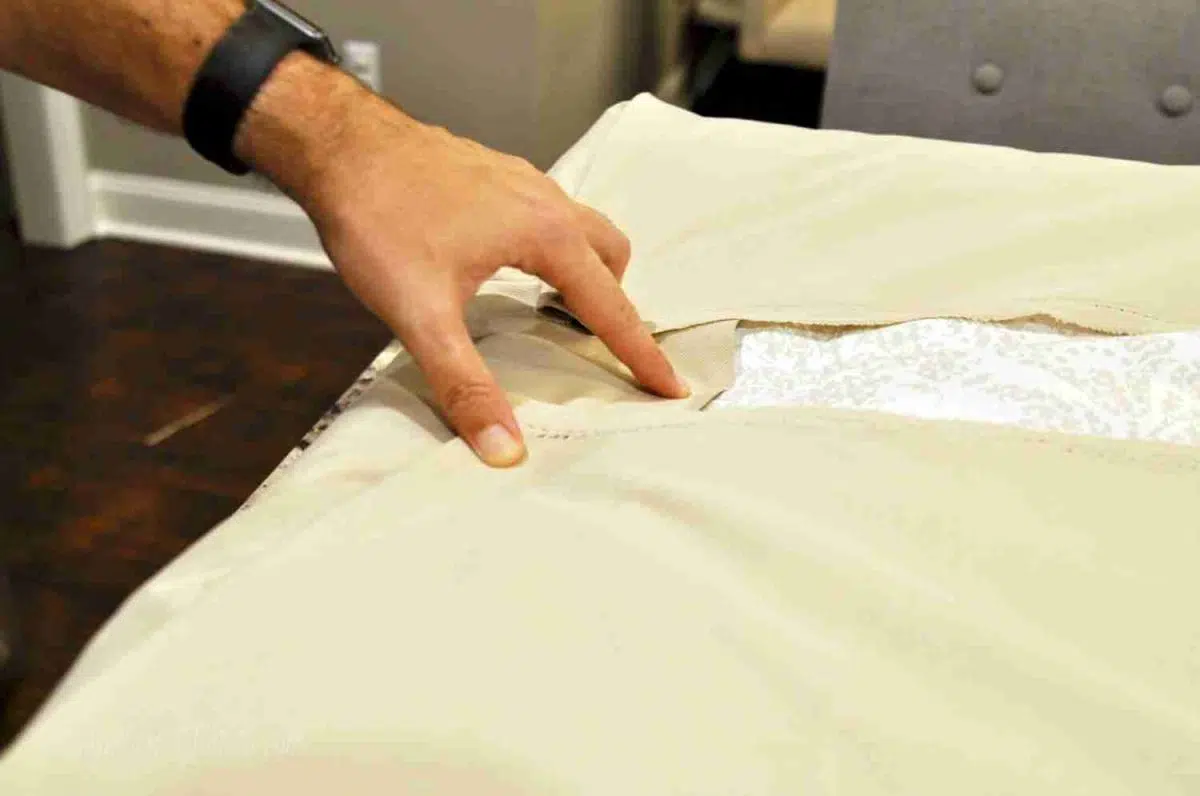
The velcro goes in the following places:
- Half a piece of velcro on the corners of the long pieces (where Noah's thumb and middle finger are in this picture) to secure them to the fabric below.
- A full piece where his index finger is to secure the short side to the mattress.
- A full piece in the middle of the long sides to secure the cover to the mattress.
Remember, this isn't going to look very pretty, but don't worry - you'll never see this part! It just needs to be secure. Make sure you tug the cover on really tightly before placing the velcro.
We used this very professional way of holding the velcro overnight to set it. 😂

I had every intention of making the back cushions too, but I found a phenomenal end-of-season sale on pillows and stocked up! I got them for much cheaper than I could have made them. But they can totally be made too - just make sure you use some kind of outdoor fabric if this is going to be in the elements.
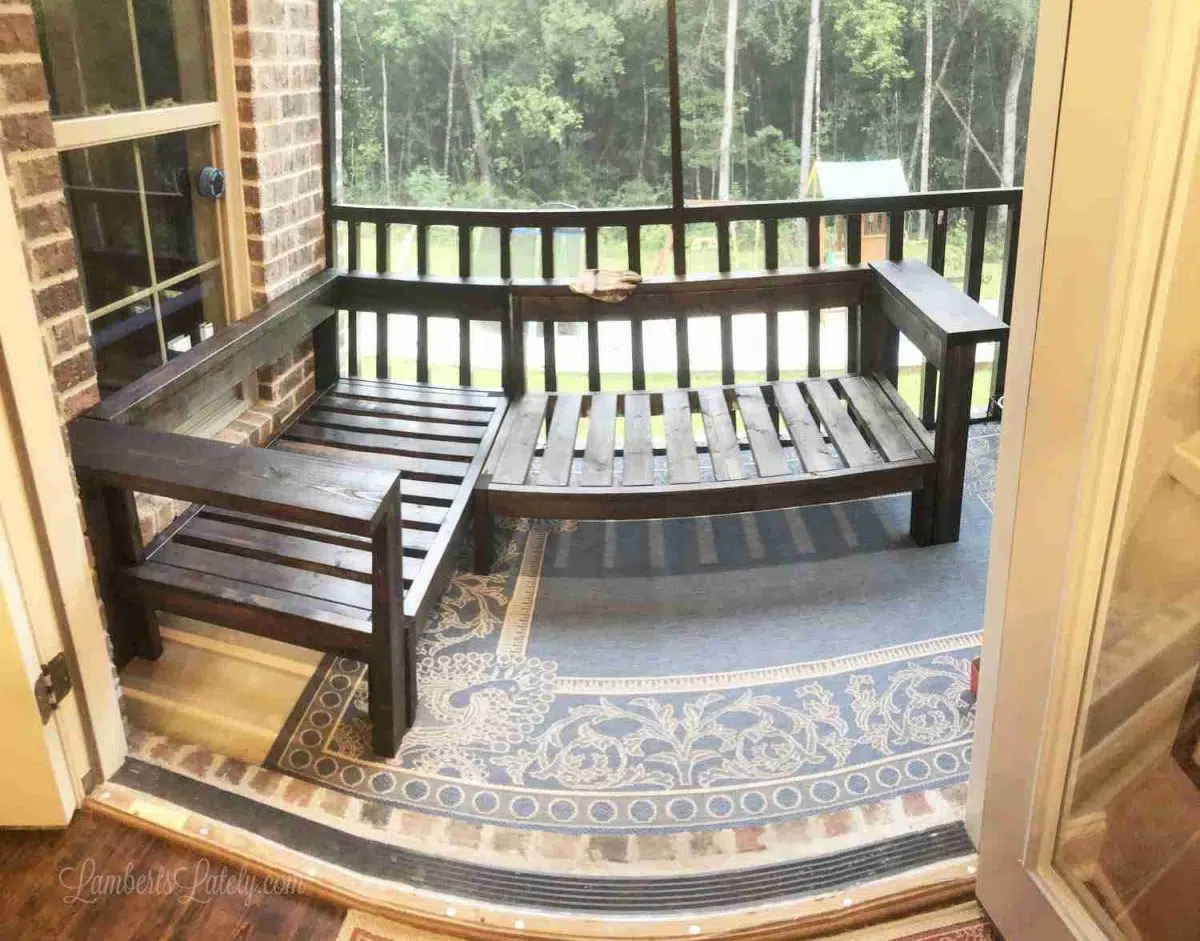
Final Results
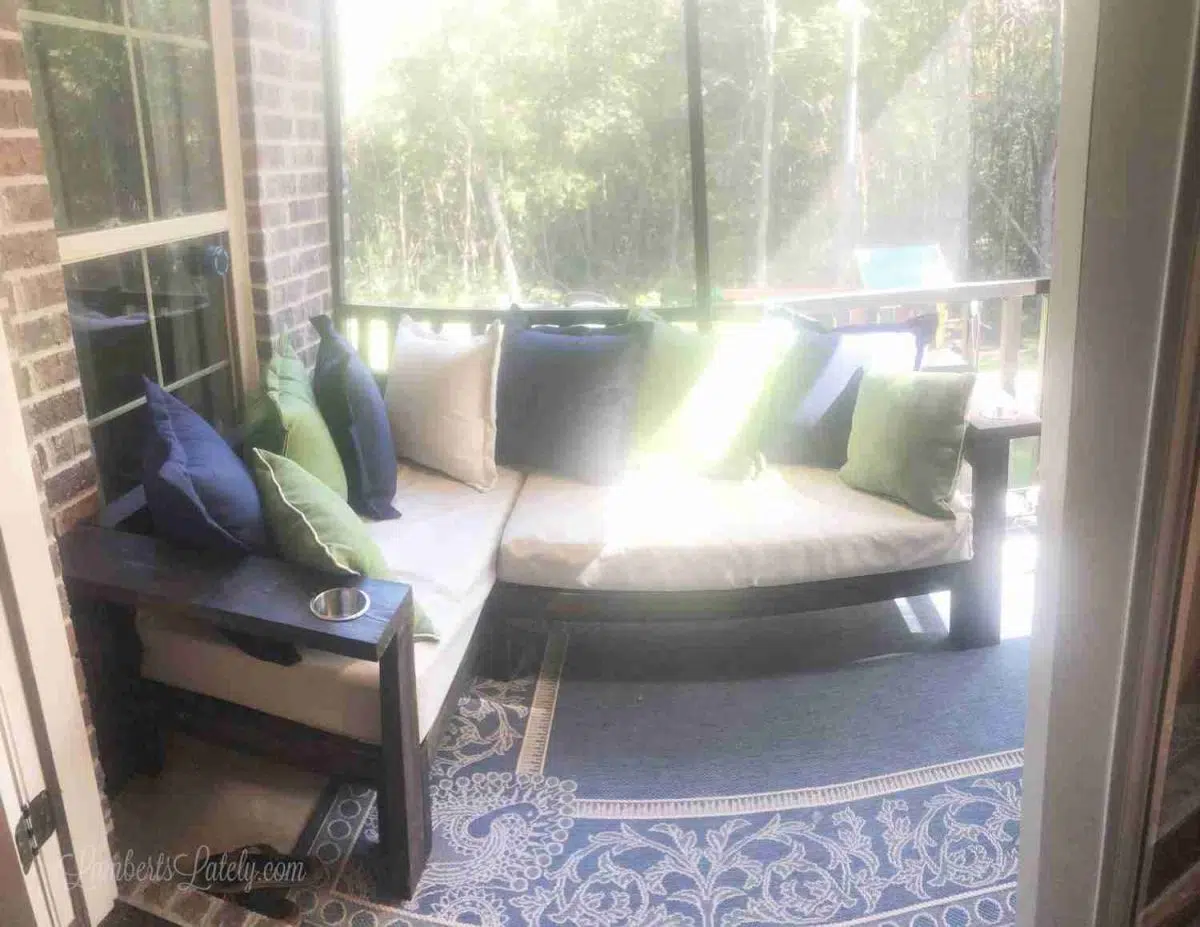
I cannot tell you how much we've already enjoyed this piece. I'm actually sitting on it as I'm typing this - this has been my "happy place" ever since we finished up! It's so nice to lounge on in the mornings while I'm checking email or working on a post. It was a lot of work, but it was worth every minute.
5 Year Update
This outdoor couch has now been on our screened porch for 5 years. It's showing minimal wear and is still so functional! I was just thinking a few days ago that it probably needs to be sealed again, but the actual stain has held up beautifully.
I don't think there's anything major I would change if we could go back and do this project again. I mentioned earlier that we would use a different kind of sealant - that's really it! It's proven to be super durable and actually really comfy. If you're thinking about doing a beginner woodworking project, this is a great one.
FAQs
More Outdoor Projects

Leslie Lambert is a lifestyle writer and content creator specializing in home organization, family recipes, and intentional living. With 17 years of experience in blogging and digital storytelling, she helps busy women create calm, purposeful homes they love.

We moved into a new home recently, and we had a new deck built as well. It's 15x36, and desperately in need of furniture. LOL I am going to build probably two couches, two chairs, and probably a table as well. My wife turned me on to this idea of the crib mattress couch, so that's what I'm going to do. As a suggestion, instead of having to make covers for the mattresses, there are also a lot of really neat mattress covers that can be bought and then changed at will for seasonal changes and such.