
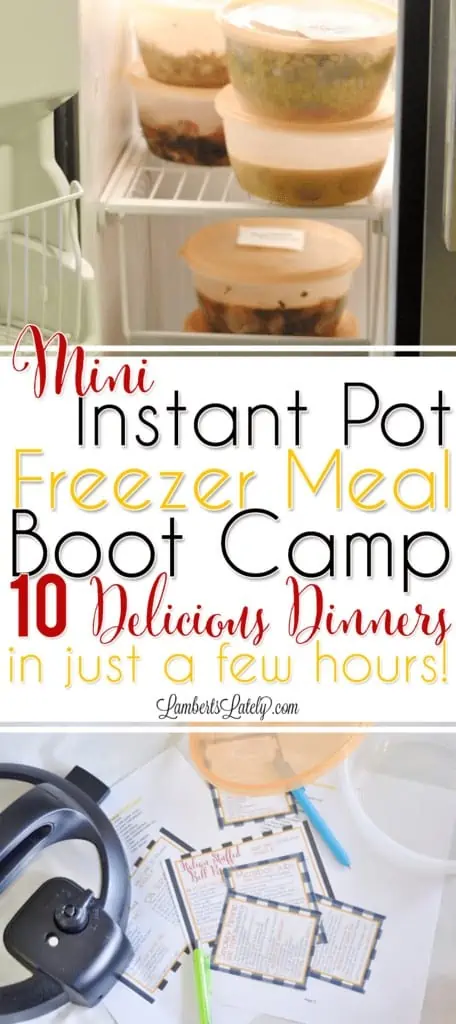
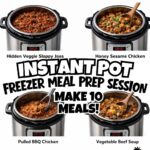
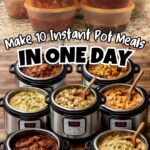
Get 10 Instant Pot make ahead meals in the freezer in just a few hours! Includes full instructions, printable labels, even a grocery list.
I think it's the understatement of the year to say that I had no clue how much attention the first edition of the Instant Pot Freezer Meal Boot Camp would get. Holy moly. Almost immediately, the post went viral on social media. As of right now (about 2 months after they were first published), it is already the fifth most popular post on my blog. Ever. That's nuts, guys!
Before I even published that first post, I knew I wanted to keep on doing these bulk meal planning sessions, both for myself and for my readers. This has totally changed the way I prepare meals. Not only does it save precious time in those chaotic afternoon hours, but it has saved us so much money on groceries. I feel like I'm using our resources much more efficiently now and, by buying more in bulk and only buying what I need, I'm wasting less food as well!
I've got a little running list of Instant Pot recipes I want to develop in my notes app now...and it's bursting at the seams. There are SO many ways to use this appliance and I can't wait to share them with you guys!
So let's keep it going! Today, I'm sharing kind of a mini version of my huge Boot Camp post...this time around, we'll only be making 10 meals in a few hours, but we'll follow the same general method as last time.
Naturally, when a post gets that popular, you're going to get a lot of feedback. I got some great suggestions after doing that post from blog readers all around the world. One of the big ones was that there were just so many recipes and that many people didn't have the time/space for everything. And I totally get that. I had two fridges and a deep freezer and still struggled to get everything organized. That's why I decided to do a mini version this time around.
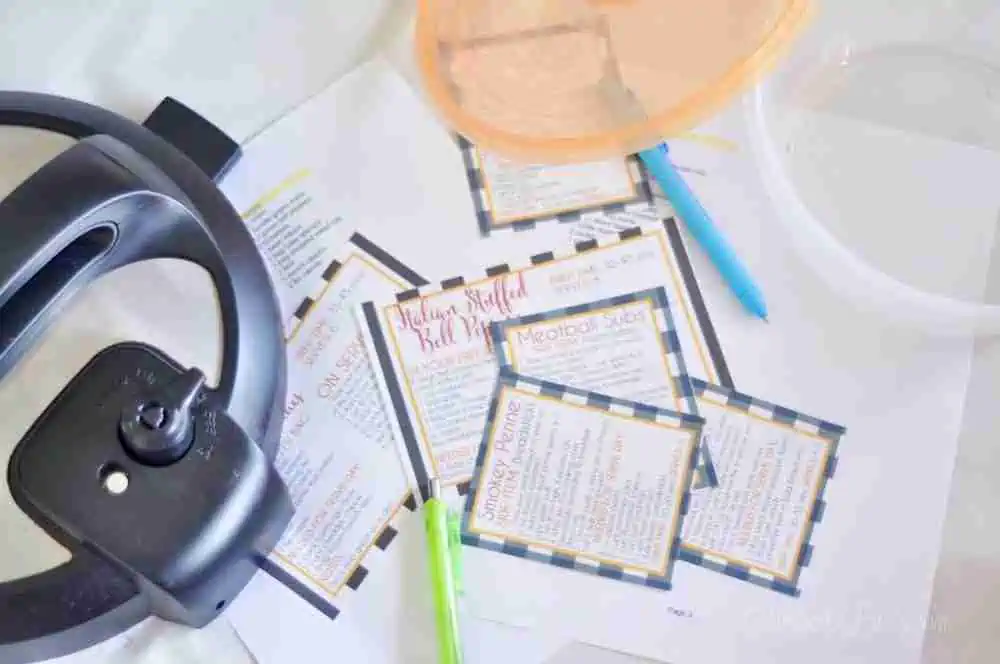
A few others asked for recipe cards and/or a way to print the recipes. Although you guys are always welcome to copy and paste from my blog into a word processing document for your own personal use, you know me...I like to make printables pretty if possible. So you'll see recipe cards on this post as well. There are a few other minor changes from last time in this post, mostly just integrating those great suggestions I got from readers. Thanks for that, friends!
(And, if you read the last boot camp, parts of this are going to be very similar to the last post. I know some people that find this post are first-time readers, and since the method is the same as the last post, there's no point in reinventing the wheel, right?)
Let's get going!
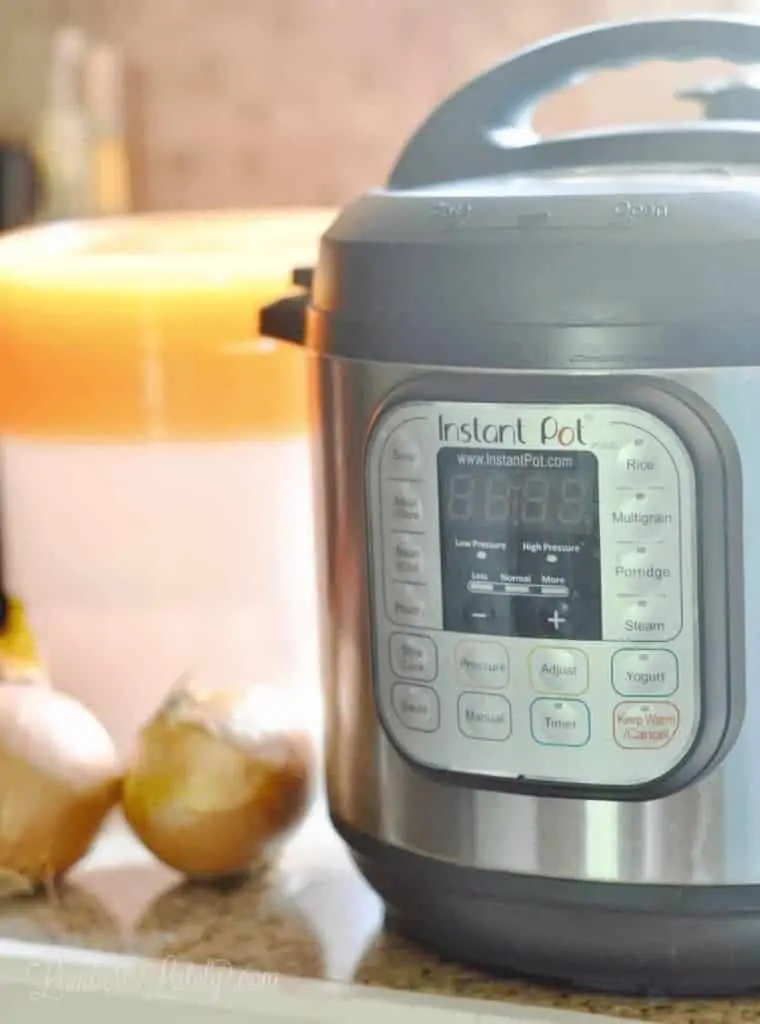
First, a little summary of the Instant Pot. It is a...
- pressure cooker
- slow cooker
- steamer
- yogurt maker
- saute pot
- rice cooker
- warmer
Basically, most anything you can do in the kitchen can be done with this beauty. My favorite thing about it is having the ability to cook foods from frozen (I'm talking frozen-to-table in an hour or two) and how little you have to babysit it. With a very busy one-year-old who likes to melt down around dinner time every night, this is clutch. I also love that just about any slow cooker recipe can be prepped in the Instant Pot in a fraction of the time. The one draw-back I've seen is that you can't get foods browned or crispy with the Instant Pot...but that can easily be fixed by popping your dish under the broiler to finish!
It lends itself so perfectly to freezer meals...which is the inspiration behind all of this meal planning! As soon as I bought it I knew it had huge potential to save tons of time in the kitchen.
Here's how I got 10 Instant Pot make-ahead meals in the freezer in just a few hours:
Step 1: Get your supplies ready.
This is the key to making this process as easy as possible. You don't need a ton of supplies for this (besides your Instant Pot, obviously...this is a link to my model, and FYI - it's in stock right now, so it's a great time to grab one if you haven't already!). The main purchase I'd urge you to make is a set of storage containers that fit into your Instant Pot. That way, you can freeze your meals in the containers, thaw them just enough to pop them out of the container, and drop the frozen meal in the Instant Pot to prep (this way, it will fit in the pot without thawing)!
This set from the Dollar Tree is perfect. You might be able to find them in store if you don't want to pay shipping, or this set of deli containers from Amazon works too. I would go on and get 10 of them if you can get your hands on them...I've reused my original ones from Dollar Tree a few times, so they're well worth the investment! If you choose to buy just a couple of containers, you can set gallon freezer bags in the containers to kind of shape your meals to fit in the pot while freezing them. Just set the bag into your container, put in your ingredients, and freeze the bag while still in the container so it retains the shape needed to fit into the Instant Pot while still frozen.
Go on and make sure you have your bag/container labels printed (scroll down for those labels) and cut...be ready to label those as soon as you finish making the meals (before they go in the freezer). I recommend sticking the labels on with packing tape, so make sure there's a roll of that handy. There's also a specialty Freezer Tape available that's made for sticking labels onto freezer dishes and has incredible reviews.
You won't need nearly as much freezer space for this boot camp...but I would still go on and make sure you had a sufficient amount for 10 meals. If you're planning on doing freezer meals for any period of time, I highly recommend a small chest freezer like this one. It's not a huge investment and it has been super useful for us over the years!
Summary: Make sure you have:
- Instant Pot-shaped containers (One set is more than enough for this boot camp.)
- Labels (scroll down for printables)
- Packing Tape or Freezer Tape
- Gallon Freezer Bags
- Freezer space
I strongly recommend these optional (but very convenient) accessories if you're going to be freezer Instant Pot cooking...
- An extra Instant Pot inner pot insert (so you can still prep dinners even when your other pot is dirty/in the fridge storing something else).
- An inner pot lid (helps you use your inner pot as storage after dinner!)
- An extra Instant Pot sealing ring (food flavors can really soak into the silicone sealing ring that's tucked in your lid of your pot. I have two rings...one for savory foods and one for sweet. That way, my sweet foods don't end up tasting funky!)
- A small pot for Pot In Pot cooking (see more on that in the notes section below)...I use a cake pan that is the same size as this one and it works great!
- A food chopper to make veggie prep easier.
Step 2: Make your grocery run.
I have a full grocery list for this boot camp (including things you'll need for serving day and side items) in the printable collection of my blog...that's exclusively available to my newsletter subscribers. You can sign up (for free!) by using the form below or by clicking here to get download instructions for the grocery list right to your email inbox. While you're visiting the printable collection, can also grab a fully printable version of this mini boot camp - this file is formatted like my premium Freezer Meal Boot Camp packs so you can really get a feel for what these popular meal planning sets are like! And it's totally free once you sign up.
Subscribe to the Lamberts Lately newsletter for the latest from the blog and access to my Freezer Meal Boot Camp grocery lists and printable packs!First NameEmail AddressWe use this field to detect spam bots. If you fill this in, you will be marked as a spammer.SubscribePowered by ConvertKitFor purchasing your groceries,I am a huge fan of using Walmart's Grocery Pickup service for bigger trips like this...just order your items online using the grocery list I have in the printable collection and pickup from your local store at no extra charge! It's incredibly convenient and a great way to organize your groceries to ensure you get everything. Click here to get a $10 off coupon for trying it out!
And don't worry, this one doesn't sting all that much in the wallet! I only ended up spending about $150 for all of the groceries for this boot camp. The serving amount was higher per meal than in the first set of Instant Pot freezer meals (I'd estimate around 6-8 people can be fed from each one of the meals...more specific numbers on the recipe cards below), so estimating a total serving amount of 70 meals, you're only looking at a little over $2 per serving...not bad at all!
Step 3: Print and cut your labels.
The labels you'll download below have every bit of info you'll need for serving day. Just stick these on your freezer containers as you prep your dishes! I've included the recommended side dish, prep instructions from frozen, and extra ingredients you'll need on serving day. (You should already have these extra items if you follow the grocery list above.)
Click here to download your labels!
After the labels are printed, just cut them out (I love this paper cutter for making the process easier) and have them ready to attach to your containers with packing tape or painter's tape before you freeze. I made the mistake of waiting until after they were frozen to try to attach the labels...doesn't work. The frost made the tape fall right off. So make sure they're labeled before they ever go in the freezer.
Step 4: Prep your veggies.
Alright, you've got your supplies, you've got your groceries, you've got your labels...it's finally prep time!
Here's the order in which I prepped all of the veggies for the meals:
1. Slice 2 onions into ¼-1/2" pieces.
2. Slice 1 green bell pepper into ¼-1/2" pieces.
3. Chop 4 onions into smaller chunks (equaling roughly 5 cups).
4. Chop 3 green bell peppers into smaller chunks (equaling roughly 3 cups).
5. Cut top off of 6 bell peppers and remove ribs/seeds.
6. Chop 1 cup green onion.
7. Peel and grate 8 carrots (roughly 2 cups grated).
8. Chop ½ cup cilantro.
9. Boil 1 bag of rice in microwave for 5-6 minutes.
Once this is all done, I find a larger area of my counter and set out all of the veggies buffet-style to make for easy assembly. I also use a Vidalia Chop Wizard (c/o) to make this process much, much easier.
Step 5: Prep your meat.
You're going to cook some of the meat before freezing. Here's the order of how I prepared the meat part of the meals...
1. Brown 3 lbs of ground beef and drain.
2. Chop 5 chicken breasts in half.
3. Chop 3 chicken breasts into 1" pieces.
4. Slice 2lbs of smoked sausage into 1" slices and brown.
5. Brown 12 slices bacon and drain.
6. Brown 1lb of italian sausage, crumbling the meat (remove casings if needed), and drain.
7. Slice 2 lbs sirloin steak into 1" slices.
You'll also put these out buffet-style for assembly. I recommend having a separate part of your counter if possible for the meat to prevent cross-contamination.
Step 6: Put everything together!
Let's start assembling your meals!
Lots of readers requested recipe cards for the boot camp last time. They're all available in one file over in my newsletter-exclusive area of the blog, as well as in the boot camp preview pack you can get over there. Click here to sign up for access to that!
Once you have your freezer containers labeled, put the following in each dish:
Meal #1 - Beef and Broccoli
In the freezer container:
All of the sliced sirloin steak
1 tablespoon sesame oil
1 tablespoon olive oil
1 cup chopped onion (⅕ of the chopped onion)
½ cup chopped green onion (half of the chopped green onion)
2 tablespoon minced garlic
1 teaspoon better than bullion beef
½ cup Teryaki sauce
1 teaspoon ground ginger
1 teaspoon red pepper flakes
⅓ cup brown sugar
Cooking directions for serve day:
1. Thaw your meal enough to pop out of the freezer container.
2. Add frozen meal & 1 cup water to IP.
3. Set IP for high, 8 minutes, NPR.
4. Meanwhile, steam frozen broccoli in microwave for 3-5 minutes with 1 cup water.
5. Prepare boil-in-bag rice in microwave.
6. Once IP cycle is done, mix corn starch with ¼ cup liquid from the IP and mix slurry back into IP. Stir well.
7. Stir in broccoli and serve over rice.
Extra items needed for meal:
1 14oz pack frozen broccoli florets
1 tablespoon corn starch
2 pouches boil in bag brown rice
Side item: Brown Rice
Meal #2 - Taco Salads
In the freezer container:
3 cups (about 1.5 lbs) ground beef, cooked (half of the cooked ground beef)
2 packs taco seasoning
1 cup chopped green bell pepper (⅓ of the chopped green bell pepper)
1 cup chopped onion (¼ of the remaining chopped onion)
2 tablespoon minced garlic
Cooking directions for serve day:
1. Thaw your meal enough to pop out of the freezer container.
2. Add frozen meal & 1 cup water to IP.
3. Set IP for high, 8 minutes, NPR.
4. Meanwhile, chop lettuce, tomatoes, and green bell pepper and mix for your salad base.
5. Prep cornbread according to package directions
5. Once IP cycle is done, scoop meat out of pot (leaving very little sauce in the meat mixture).
6. Top salads with meat, cheese, and salsa.
Extra items needed for meal:
2 cups cheddar cheese
1 head lettuce
2 tomatoes
1 green bell pepper
1 cup salsa
1 pack of Mexican cornbread
Side item: Mexican cornbread
Meal #3 - Meatball Subs
In the freezer container:
All of the sliced green bell peppers
All of the sliced onions
20 pre-frozen meatballs (not thawed)
1 24oz can spaghetti sauce
2 teaspoon salt
2 teaspoon pepper
Cooking directions for serve day:
1. Thaw your meal enough to pop out of the freezer container.
2. Add frozen meal & 1 cup water to IP.
3. Set IP for high, 10 minutes, NPR.
4. While the IP is cooking, prepare your pasta salad according to package directions.
5. Once IP cycle is done, scoop 3 meatballs, some of the peppers/onions, and a little bit of sauce into each hoagie roll. Top with cheese.
6. Toast hoagies for about 5 minutes, or until cheese is melted.
Extra items needed for meal:
1 6-pack hoagie buns
1 pack Provolone cheese
1 box pasta salad
Side item: Pasta Salad
Meal #4 - Smokey Penne
In the freezer container:
Half of the browned smoked sausage
1 ½ cups chopped onion (half of the remaining chopped onion)
1 cup chopped bell pepper (half of the remaining chopped green bell pepper)
2 tablespoon minced garlic
¼ cup (jarred) sun-dried tomatoes
1 cup water
2 teaspoon chicken better than bullion
1 10oz jar roasted red peppers (not drained)
1 teaspoon salt
1 teaspoon pepper
Cooking directions for serve day:
1. Thaw your meal enough to pop out of the freezer container.
2. Add frozen meal, penne pasta, & 2 cups water to IP.
3. Set IP for high, 4 minutes, QR.
4. While the IP is cooking, cook breadsticks according to package directions.
5. Once IP cycle is done, stir in cheeses, half & half, and spinach.
Extra items needed for meal:
8 oz penne pasta
2 cups monterey jack
1 cup Parmesan cheese
1 cup half and half
2 cups fresh spinach
1 box frozen breadsticks
Side item: Breadsticks
Meal #5 - Italian Stuffed Bell Peppers
In the freezer container:
6 large bell peppers, tops removed and cored, stuffed with…
1 cup chopped onions
1 tablespoon garlic
1 lb Italian Sausage, cooked
1 bag boil in bag rice (white or brown)
1 14.5oz can Italian tomatoes, drained, broken up slightly
8oz shredded parmesan cheese
Cooking directions for serve day:
1. Place 3 peppers at a time in your IP (on the trivet). Pour 1 cup of water into the bottom of the IP.
2. Set IP for high, 8 minutes, QR.
3. While peppers are cooking, prepare your salad.
Extra items needed for meal:
1 bag chopped salad mix
Favorite dressing
Side item: Salad
Meal #6 - Cheesy Chicken and Bacon Sandwiches
In the freezer container:
5 chicken breast halves (half of the chicken breast halves)
8oz cream cheese, softened
2 packs ranch dressing mix
All of the cooked/crumbled bacon
1 teaspoon chicken better than bullion
1 teaspoon salt
1 teaspoon pepper
Cooking directions for serve day:
1. Thaw your meal enough to pop out of the freezer container.
2. Add frozen meal & 1 cup water to IP.
3. Set IP for high, 15 minutes, NPR.
4. While IP cooks, cook fries according to package directions and toast buns.
5. Once IP cycle is done, shred chicken and stir in cheddar cheese.
6. Serve chicken on buns.
Extra items needed for meal:
1 pack hamburger buns
2 cups cheddar cheese
1 bag frozen French fries
Side item: French Fries
Meal #7 - Creamy White Chicken Chili
In the freezer container:
5 Chicken breast halves (all of the remaining chicken breast halves)
1 cup chopped onion (⅔ of the remaining chopped onion)
1 tablespoon minced garlic
2 teaspoon better than bullion chicken
1 15.5oz can chick peas, drained
1 15.5oz can great northern beans, drained
8oz chopped green chiles
Juice of 1 lime
½ cup chopped cilantro (all of the chopped cilantro)
1 14.5oz can corn, not drained
1 tablespoon cumin
2 teaspoon salt
2 teaspoon pepper
Cooking directions for serve day:
1. Thaw your meal enough to pop out of the freezer container.
2. Add frozen meal & 1 cup water to IP.
3. Set IP for high, 25 minutes, NPR.
4. White IP cycle runs, make grilled cheese sandwiches using half of the cream cheese and half of the pepper jack.
5. Once IP cycle is finished, shred chicken and stir in half of the cream cheese, half of the pepper jack, and 1 cup of half and half.
Extra items needed for meal:
1 cup half and half
8oz cream cheese, softened
8 oz shredded pepper jack cheese
1 loaf bread
Side item: Spicy Grilled Cheese
Meal #8 - Sausage Mac & Cheese
In the freezer container:
All of the remaining browned sliced smoked sausage
5 teaspoon chicken better than bullion
2 cups water
2 tablespoon hot sauce
2 tablespoon yellow mustard
Cooking directions for serve day:
1. Thaw your meal enough to pop out of the freezer container.
2. Add frozen meal, macaroni, & 2 cups water to IP.
3. Set IP for high, 5 minutes, NPR.
4. Meanwhile, peel/cut carrots and mix on a cookie sheet with green beans. Season with salt, pepper, and olive oil.
5. Roast veggies for 25-30 minutes.
6. Once IP cycle is done, add in cheeses, butter, and half and half. Stir well.
Extra items needed for meal:
12oz macaroni
2 cups cheddar
1 cup monterey jack
1 cup half and half
3 tablespoon butter
1 bag frozen green beans
1 lb carrots
Side item: Roasted veggies
Meal #9 - Hidden Veggie Sloppy Joes
In the freezer container:
3 cups (about 1.5 lbs) ground beef, cooked (all of the remaining cooked ground beef)
2 cups grated carrots (all of the grated carrots)
½ cup chopped onion (all of the remaining chopped onion)
1 cup chopped green bell pepper (all of the remaining chopped green bell pepper)
⅔ cup ketchup
⅓ cup yellow mustard
1 6oz can tomato paste
2 tablespoon Worcestershire sauce
2 tablespoon Apple Cider Vinegar
2 teaspoon garlic powder
Cooking directions for serve day:
1. Thaw your meal enough to pop out of the freezer container.
2. Add frozen meal & 1 cup water to IP.
3. Set IP for high, 10 minutes, QR.
4. Toast buns while IP is cooking.
5. Once IP cycle is done, stir well. Serve mix on buns.
Extra items needed for meal:
1 pack Hamburger buns
1 tub deli potato salad
Side item: Potato Salad
Meal #10 - Honey Sesame Chicken
In the freezer container:
3 chicken breasts, chopped into 1" pieces (all of the chopped chicken pieces)
1 teaspoon chicken better than bullion
1 tablespoon sesame seeds
¼ cup chopped green onion (all of the remaining chopped green onion)
½ cup water
½ cup soy sauce
2 teaspoon sesame oil
2 tablespoon rice vinegar
¼ cup honey
2 tablespoon minced garlic
2 teaspoon ground ginger
¼ cup ketchup
1 teaspoon pepper
Cooking directions for serve day:
1. Thaw your meal enough to pop out of the freezer container.
2. Add frozen meal & 1 cup water to IP.
3. Add trivet and PIP dish to pot. Fill with 1.5 cups brown rice & 2 cups water.
4. Set IP for high, 14 minutes, NPR.
5. Remove 1 cup liquid from pot and mix with corn starch. Add slurry to pot.
6. Stir well and serve over rice.
Extra items needed for meal:
1 tablespoon corn starch
1.5 cups brown rice
Side item: Brown Rice
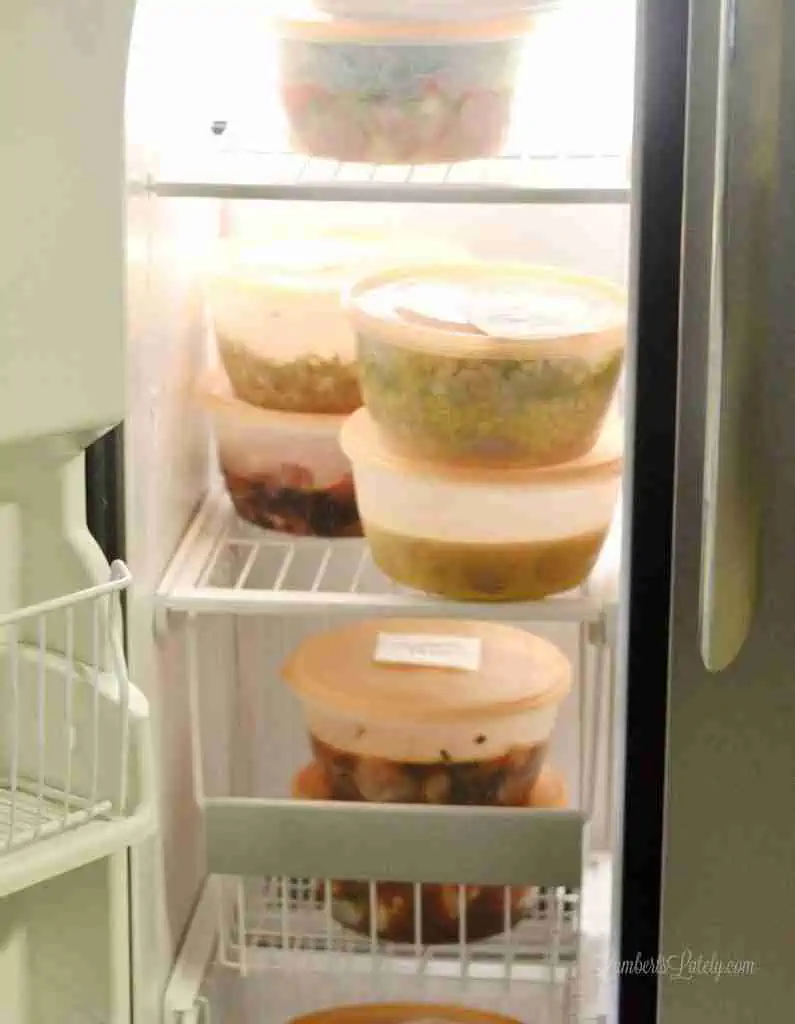
And that's it...you've got 10 Instant Pot make ahead meals ready to go! That makes about 2 weeks of super easy dinners for you and your family. Congratulations to you!!!
Important Notes (PLEASE READ):
NPR stands for natural pressure release. That means, instead of immediately releasing the pressure from your Instant Pot after the cooking time is up, give it about 10 minutes to release on its own. Then, flip the nozzle and release the pressure (careful though...that's pressurized steam coming out!)
QR stands for quick release. That means you release the pressure and open the pot as soon as the cooking time is over.
So, if you're reading my cooking labels, you'll often see that the directions look like this: "manual, high pressure, 100 minutes, NPR." That means you'll use the manual setting on your pot to put in 100 minutes yourself, then let the pot have a natural pressure release (for about 10 minutes) after the pot beeps when that 100 minute cycle is over.
PIP stands for Pot in Pot cooking. That means you're cooking two dishes at the same time by stacking a separate pot on top of a trivet in the inner pot.
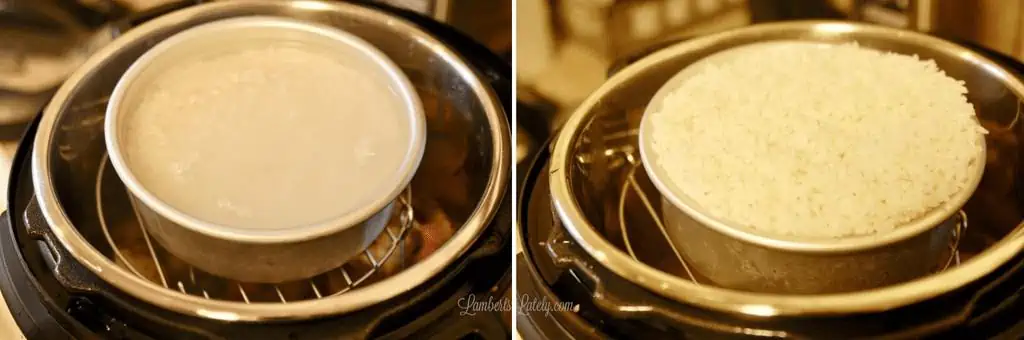
It's a great way to cook rice, veggies, or several other different types of side dishes!
Here's how I do it: insert the trivet that comes with your instant pot, putting the legs on either side of whatever you're cooking in the bottom of the pot. Then, put your pot in pot dish (I use a cake pan similar to this one and it works great for the recipes I've listed) on top of the trivet and add whatever you're cooking. Seal the lid and cook away! The cook times for the PIP cooking are all included in my meal labels above.
You will set the same time on your Instant Pot for frozen and non-frozen meals. So, let's say there's a meal or two you decide not to freeze and just store in the fridge for a day or two. Don't adjust your cooking time! I know that seems kind of weird, but the pressurizing process thaws your frozen meal. The time that it takes your pot to come to pressure will be much longer for frozen meals (I found it to be around 20-25 minutes for a frozen meal, depending on the size of what's frozen, as opposed to 5-10 minutes usually for a non-frozen dish).
After the success of my first Instant Pot Freezer Meal Boot Camp, I've decided to offer a wide selection of premium Freezer Meal Boot Camp packs for purchase on my blog! They will be similar to this post and the previous boot camp and will come in different sizes - anywhere from 5 meals to 30. In these packs, I'll include meal labels, recipe cards, grocery lists, and prep instructions. You'll get all of the info you need to prep your own boot camps at home!
The first couple of sessions are now available! You can check out the full selection of Boot Camp packs by clicking here!

Leslie Lambert is a lifestyle writer and content creator specializing in home organization, family recipes, and intentional living. With 17 years of experience in blogging and digital storytelling, she helps busy women create calm, purposeful homes they love.


Hi Leslie! If I wanted to make smaller servings (only 2 of us...& we've had WLS), would I need to change anything except to make this in twice as many containers? I've just started using my Instant Pot, and I'm unsure of how long to cook a smaller quantity when we're planning to eat these yummy sounding meals from the freezer. Thanks!
Right...you really wouldn't need to change the cook times (maybe take a minute or two off if you prefer your veggies on the firmer side)!
Okay, I could not love this post any more even if I TRIED!!! Love, love, love, love, love!!! Sharing on Pinterest, and Facebook, and anywhere else I can. 🙂 Can't wait to try out the recipes. Posts like this require a LOT of work behind the scenes, so thank you so much for being willing to share this awesomeness with all of us!
I've cooked three of the mini boot camp meals, and all three were a hit.
Smoky Penne- 3 of 4 loved it (#4 is picky and anti-tomato. Evidently, sundried tomatoes count).
Hidden Veggie Sloppy Joes- Delicious and pretty healthy with all those carrots.
Honey Sesame Chicken- My people loved it. I wasn't sold, but it was my fault. Long story short, I screwed it up.
I have a Power Cooker Plus, not an Instant Pot, so my settings are a little different. I'm still trying to figure the thing out! However, I've been so pleased with the meals. We plan to eat the rest soon and then do another boot camp.
I'm so glad Denise! Thanks for the reviews.
This is great, thank you for creating this!
I split the recipes in half since there's only my husband and me. When I cook the frozen meals in the IP sould I still use a full cup of water or just half a cup?
It takes a full cup of water to create enough steam to bring the pot to pressure, so you'll still want to use that full cup. Just know your meal might be a little watery, but it's possible to drain the liquid off of most of the meals before serving!
Have you ever tried cooking one of the frozen dishes themselves pot-in-pot, instead of directly in the water at the bottom of the IP? I'm wondering if this will work for the final prep for a frozen meal...
I haven't...the main reason being that I don't have a pot-in-pot dish that would be big enough for the meals. (I have a meatloaf in my premium FMBC packs that I have cooked pot-in-pot, but that's the only exception.) I wrote these recipes so that most would need an extra cup of water before serving...that way the dish doesn't get too watery during the cooking process in the IP.
I have tried twice to purchase all four bootcamps. When I click o Paypal to pay, the info box turns around and all the info in backwards!!! Please help!
I'm so sorry Cherylle! Would you mind emailing me at leslie at lambertslately dot com? I'll be glad to send you a direct invoice and download!
A little hint... use blue tape (the one for painting)... It is a lot cheaper that freezer tape...and work perfectly.
Hi! Would anything change if I have an 8-quart pot? Thanks!
No, you should be good! It might take slightly longer to come to pressure (8qts just generally take longer to come to pressure than the 6qt variety), but that should be the only difference...I doubt it will make a big difference in your final meal.
Same for the 3qt then, same time, just smaller amounts?
Yes, I usually recommend halving recipes for the 3qt! You'll use the same cook time (thought it might come to pressure faster because of smaller amounts).
Thank you, Leslie! Going to try all of these. One question regarding Sausage Mac, I'm putting two cups of water in the bag to freeze, then another two cups at cooking time? Could I do four cups at cook time instead?
You could absolutely just put all four cups in when you cook!
I'd like to try the recipes before I do the whole freezer thing. Does the cooking time need to be adjusted if I am cooking it right away and not freezing it?
It doesn't! The meals will come to pressure a little bit quicker than when frozen, reducing the overall cook time, but you'll still set the same amount of time on your Instant Pot.
Thanks for the quick reply. Can't wait to try them!
So how were the meals?p
I have the 6 quart pot and I plan to try some of these freezer ideas. I just bought the mini 3 quart for smaller servings and side dishes. I also purchased one as a house warming gift for my newly single friend who needs to save money and eat healthy. We had a cooking class the other day - I helped her with the water test, and we made two kinds of soup. She LOVES it. My quest is - would you recommend just splitting the ingredients between two containers? That way she'll have leftovers and dinner? Thanks so much!
Yes, definitely...if she's just cooking for 1, halving these recipes should be perfect for having a good serving and having 1-2 leftover meals! Cook time should remain the same for those as well.
I'm loving all of your labels and lists! Although I'm wondering how many chicken breasts do I need for the Mini Boot Camp Freezer meals? It just says 8 breasts. I saw some tenderloins at Coscto and wanted to buy some but I just don't know how much to use in the meals. I'm wondering how much lbs? I like how the other meats are labeled by lbs. in the shopping list. Thank you!
I typically estimate that there are 1-2 chicken breasts per pound, so for 8 chicken breasts, I'd go with about 6-7 pounds!
Where in the world is the grocery list for the mini-boot camp?? I feel like I’ve looked everywhere!
Hi Lisa! You should have a link in your email inbox to the printable collection - let me know if that email didn't go through for some reason and I'll be glad to help!
I found it. I kept looking through the blog. 🤦🏻♀️ We just got our groceries and are heading home to cook! I’m so excited! Thank you so much for responding!
What would you say would be a good substitution for the chicken better then bullion in case I cant find it at my local store.
You can always use regular chicken bouillon cubes if needed!
would you say one cube for the chicken and ranch sandwiches?
Yes, I'd use whatever makes about a cup of broth (usually half a cube, up to a full cube for a richer flavor).
My friend only has a Crockpot and wondered if she could convert these recipes to the Crockpot. Would like work? Just minus the extra liquid added and then 6 hours on low??
You should be able to convert most of them!
I prepped cilantro but don't see which meal it goes into! I'm assuming taco salad but I usually put cilantro in after cooking. Should it go in the freezer bag?
The cilantro goes in the creamy white chicken chili as you're freezing!
If I just boiled regular rice for 5-6 minutes then drained it, could i use that in place of boil in bag rice? If so, about how much rice is usually in a single bag of boil in bag rice?
Absolutely! I would say each bag has about a cup of cooked rice.
We're loving all of these recipes!! Quick question - the Smokey Penne (while delicious) was really soupy. Was it supposed to be? Now I'm worried the same thing will happen the Mac and Cheese.
It should thicken up some as the starch from the pasta mixes in with the sauce. If a sauce is ever too thin for your liking, you can turn the saute mode on for a few minutes and stir well!
Thanks Leslie! I did just that, and it helped some but it was still pretty soupy. Maybe I didn't use enough pasta? The recipe called for 8oz I think so I had to half the box.
Another question -- tonight I'm making the Chessy Chicken and Bacon. After the 15 min IP cycle, the chicken was not cooked in the middle and sort of frozen. I separated and gave everything a stir, and put it back for 7 minutes. Any recommendations for the next time? Should all of the ingredients be mixed well together before freezing?
Hi I'm new to the game. Recipe #5 Stuffed Bell Peppers. It says to stuff the pepper with 1 bag boil in bag rice (white or brown). I don't understand this? Could you help me? Does it mean put the rice into the pepper of just use the boil in bag when I cook the whole meal? Thanks
Rachel
Hi Rachel! You'll boil the boil-in-bag rice and put the cooked rice in your stuffed bell pepper prior to serving.
Hello. I also was confused at these directions for the stuffed peppers. The way the directions read it makes it seem that you simply put the contents of boil-in-bag rice into the sausage mix that stuffs the peppers. Which if you do that seems that you would have crunchy rice. I am guessing that we are to follow the directions to prepare the rice first and then mix into the sausage mix, stuff the peppers and then freeze?
Hi There! In the veggie prep part, it mentions boiling one of the bags of rice in the microwave...that's the bag you'll use in this! So your rice is cooked when you put it into the peppers to freeze.
This is the best group of recipes that I've encountered! My picky family have liked every one.
I want to make the White Chicken Chili for a crowd and am wondering how to double it. I would just make it fresh, not frozen, double the ingredients, and keep the stated water and cook time. My understanding is that the IP only needs 1 cup of water and that the cook time remains the same. Is this correct?
I'm so glad you're loving them! 🙂 The only problem with doubling the recipe is the size of your IP. If you have an 8 quart it should be fine, but I think anything smaller would be too full to cook properly. But yes, as long as the recipe fits, cook time remains the same!
I can't seem to find the mini grocery list link. Can you help me?
Hi Ashlee! That should be in the printable collection for email subscribers - you can subscribe to that in this post. Let me know if you have any trouble finding it after you get your confirmation email!
Hi Leslie.. I'm already an email subscriber but I can't log in... so i keep signing up for the email lists... but still cant access the grocery list or recipe cards 🙁
Would you mind emailing me at leslie at lambertslately dot com?
I'm excited to see recipes made for the Instant Pot Mini, but some of these volumes seem a little to much for a 3 quart, and the cake pan you recommended is too large to fit in it for pot in pot.
So sorry for any confusion, Connie! These recipes are designed for a 6 quart or larger, not for the mini IP.
I did the same thing, Connie - saw the title, and thought it was talking about the Instant Pot Mini - took a bit of reading through to see it was a 'Mini Boot Camp for the Instant Pot', not a 'Boot Camp for the Mini Instant Pot' ! 😉
I double checked your equipment list, the cake pan will fit in my IP mini, but I really don't see how I can fit all the ingredients in it for at least 2 of these meals. They say not to fill the pots past the 2/3 mark, but I'll go ahead and try it.
These recipes were designed for a 6 quart or larger (the mini didn't exist when I started doing boot camps), so I would probably recommend halving the recipes if you're using a mini.
I'm looking into buying something like your Vidalia Chop Wizard....how long have you had it, and how do you like it? Ease of use, ease of cleaning - that kind of thing....
I've had mine for a year and it's still going strong! They include a cleaning tool that makes getting the smaller pieces of veggies out so easy. I'd highly recommend it...I use it every time I do freezer meal prep sessions.
I have a 3 qt IP and am going to cut the recipes in half. Will the cook times change? If so, what will they be or how do you calculate that?
Nope, that shouldn't change the cook times at all!
Thank. You. So. Much!!!! The time you put into these (I've just been looking at Freezer/IP Boot Camp 1&2) is amazing! I've just started grad school after staying home with my kids for the past 15 years... now that my youngest is in school and I'm in school too, dinner is often an after thought! These GENIUS posts will go far in easing my mom guilt!! Can't wait to check out the rest of your blog--thanks again!
This made me so happy to see, Julie! Hope you love the meals.
I'm wanting to make the pepper steak meal in my instant pot before freezing it. How would my cooking times be different? Is there a place where these boot camp meals have a notation about that?
Cooking time should be the same! Your time to come to pressure will be shorter when you cook from thawed, making the overall cook time shorter, but the time you set on the pot won't be different. (I think I've got that noted in the boot camps? Not sure, I'm losing track by this point. 😉 )
I have a question about the sausage Mac and cheese. If I am using a chicken bullion cube since I can't find the paste, would I dissolve the cube in water before freezing or leave whole as it will melt down while cooking? TIA
I've done that before...just leave it whole! It will boil down when your meal cooks.
If I wanted to make any of these recipes fresh, without freezing them first, should I reduce the cooking time? Thanks.
Good question! No, cook time will stay the same, but your pot will come to pressure faster since it doesn't have to thaw the meal.
What kind of labels do you print on? I have a really hard time finding whole page labels so I have to use either 2 labels per page or 4 labels per page and the printables do not work on these at all. I have to screen shot each individual label and paste it into a separate formatted word document. It is so time consuming. Just curious how everyone else is printing labels?
I just do regular paper and attach them with painter's tape or packing tape! You can also put them in ziplock bags so the ink doesn't run.
Hello! I am new to the instant pot and prepped the mini boot camp meals this weekend. I have the IP DUO60 V3 and unfortunately both meals that I've cooked so far have been still somewhat frozen when the recommended cook times have elapsed (using the settings as recommended on the recipe cards). Both times I've just added more cook time, which worked, but I'm wondering if you have any other thoughts or tricks for cooking the meals through on the first go. Otherwise, they've been great. Thank you!
Hmm - not sure what could be going on. Have you been stirring the meals before freezing? Sometimes, especially if meats are frozen in chunks, they take longer to thaw and cook (resulting in uncooked ingredients).
I love your site. I was a little intimidated by my Insta-Pot but you have helped me learn to love it. I can't figure out how to sign in. I see the places to sign up but I bought the all access and don't see where I need to sign in to the site. Please help
Hi Rhonda, so glad you're loving it! Could you email me at leslie at lambertslately dot com? I'll be glad to help.
I'm new to meal prepping. Do you (or do you know) of a gluten free prep? I do not have celiac, but gluten sensitivity, so it's not a life threatening situation. But pastas don't work in my home. Have you ever done these with gluten free pasta? The husband won't eat those. 🙁
Hi Lesa! I don't currently have a gluten free prep session, but that's definitely something I'll keep in mind for the future.
I don't have much experience with gluten free pasta - so sorry I can't be more help with that! I do know that the cooking time is going to vary with gluten free pasta, it tends to cook a little quicker.