
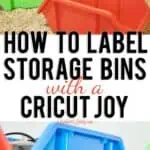
Learn how to make DIY storage bin labels (using dollar store containers) using a Cricut Joy machine. Make labels with vinyl for garage, kitchen, or attic organization!
This is a sponsored post written by me on behalf of Cricut. All opinions are 100% mine. Affiliate links used.
I think there's a lot of intimidation around using vinyl cutting machines. They seem like some kind of advanced, hard-to-learn crafting gadget that make most people think they're not worth the investment.
And yeah, when they were first introduced, I'd agree with you. The older machines can be difficult to learn, with clunky software and unreliable cutting. But they're making these machines with such amazing features now that there's no excuse not to use one. And they're definitely not just for crafting; if you're into organization, you need one in your life!
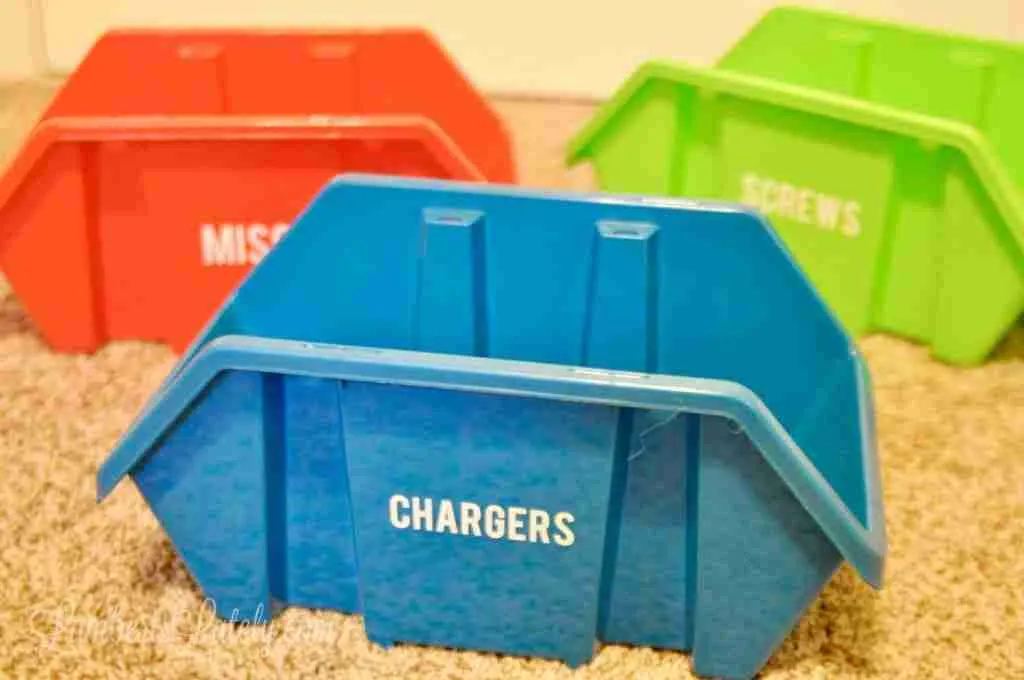
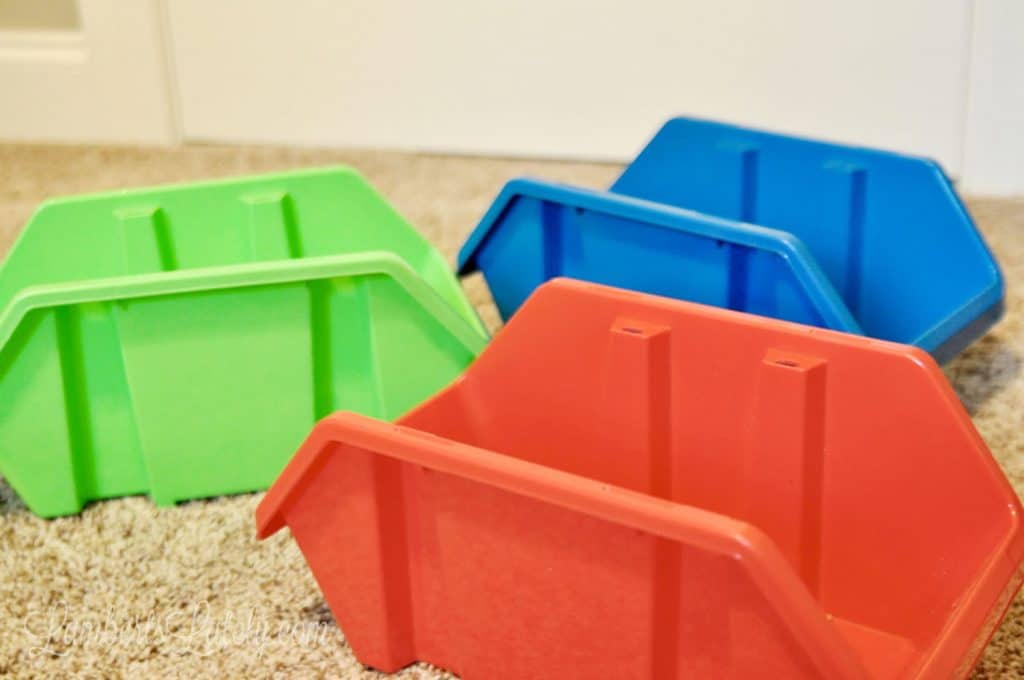
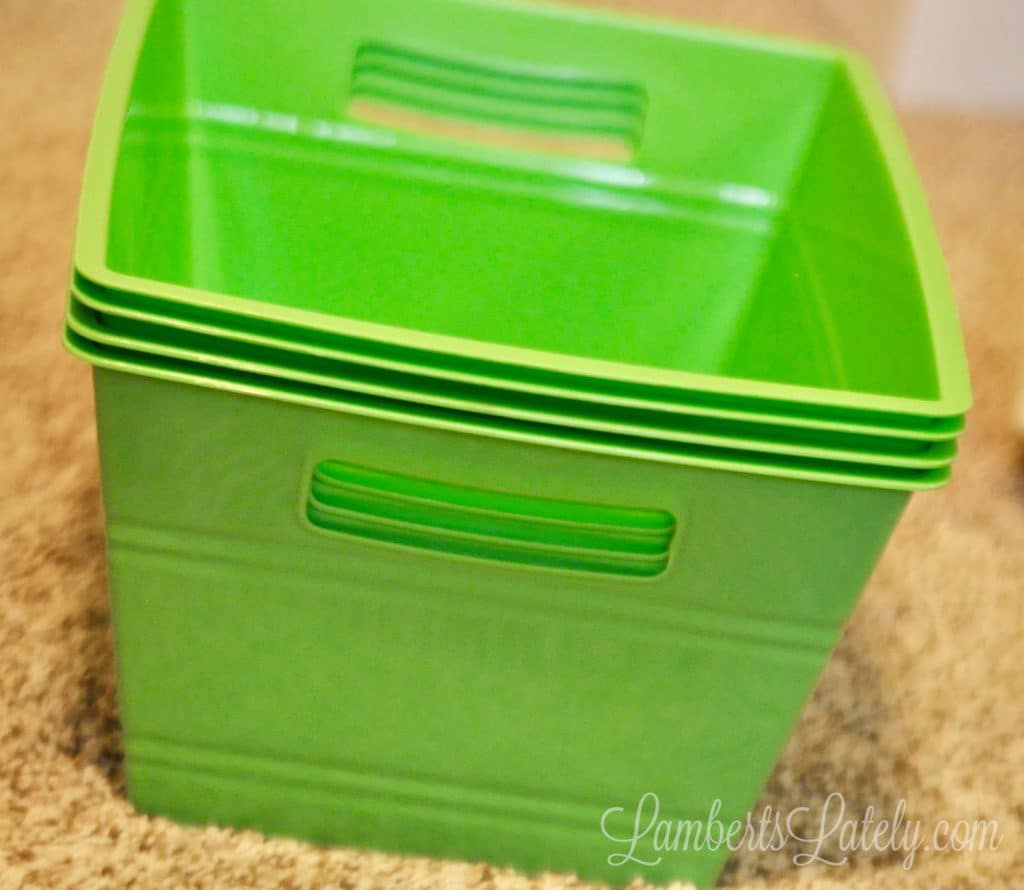
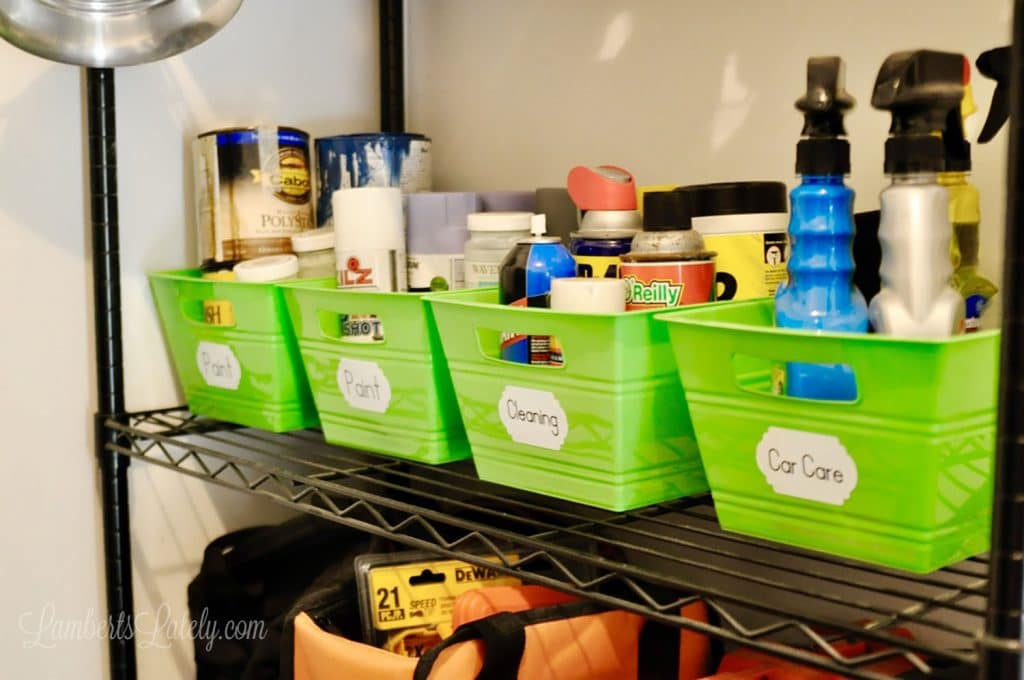
Today, I'm here to show you just how simple it can be to create labels for storage all around your home. To make it even better, I'm exclusively using storage bins from the dollar store for this post. It can really be so inexpensive to organize everything in your home! I'm using the bins you see today in our garage, but I can't think of a room in the home where these wouldn't be useful.
Looking to organize, but don't know where to start? Check out some of my favorite organization methods!
How to Make a Vinyl Storage Bin Label
Supplies Needed
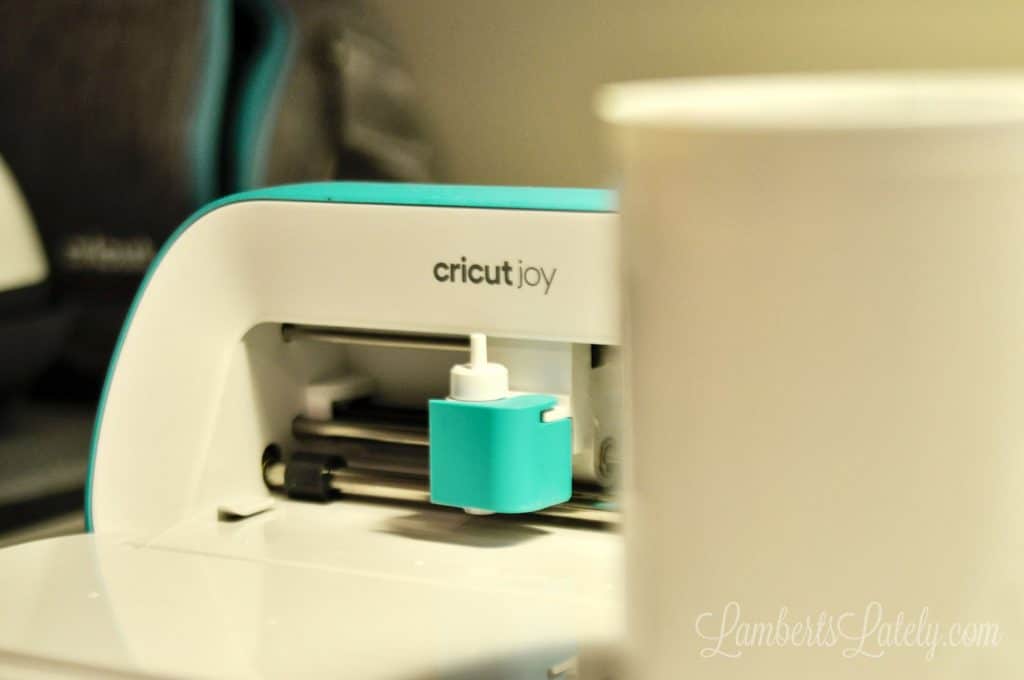
- Cricut Joy Machine
- Cricut Permanent Smart Vinyl
- Cricut Transfer Tape
- Cricut Starter Tool Set
- Plastic Storage Bins
- Ruler
- Scissors
- Cricut Design Space Software (free on both desktop and mobile devices)
Step 1: Measure the label space on your storage bins.
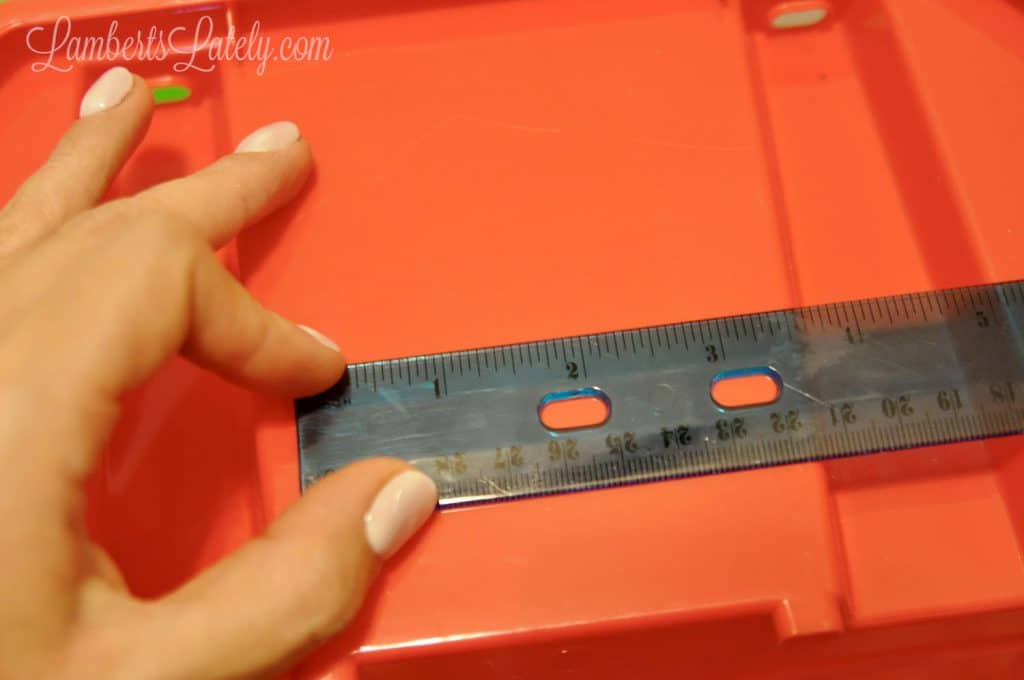
This is an easy step to forget - but don't skip it, unless you want to go through the cutting process several times. Make sure to measure both the length and the height of the maximum space for your storage bin label.
As you can see, the width of my label needs to be under 3" when I design it. It's really easy to resize your wording as needed in the next step.
Step 2: Design Your label in Cricut Design Space.
Ok, I'm here to tell you: cutting software does't get easier than Cricut Design Space. The interface is an absolute no-brainer - if you can use any basic paint program, you can use this software.
For these dollar store bins, I'm just making labels with words (see below for a more complex project). To do this, I simply open my Cricut Design Space software - this is from my computer, but in project #2 of this post, I show how to do it from your phone as well.
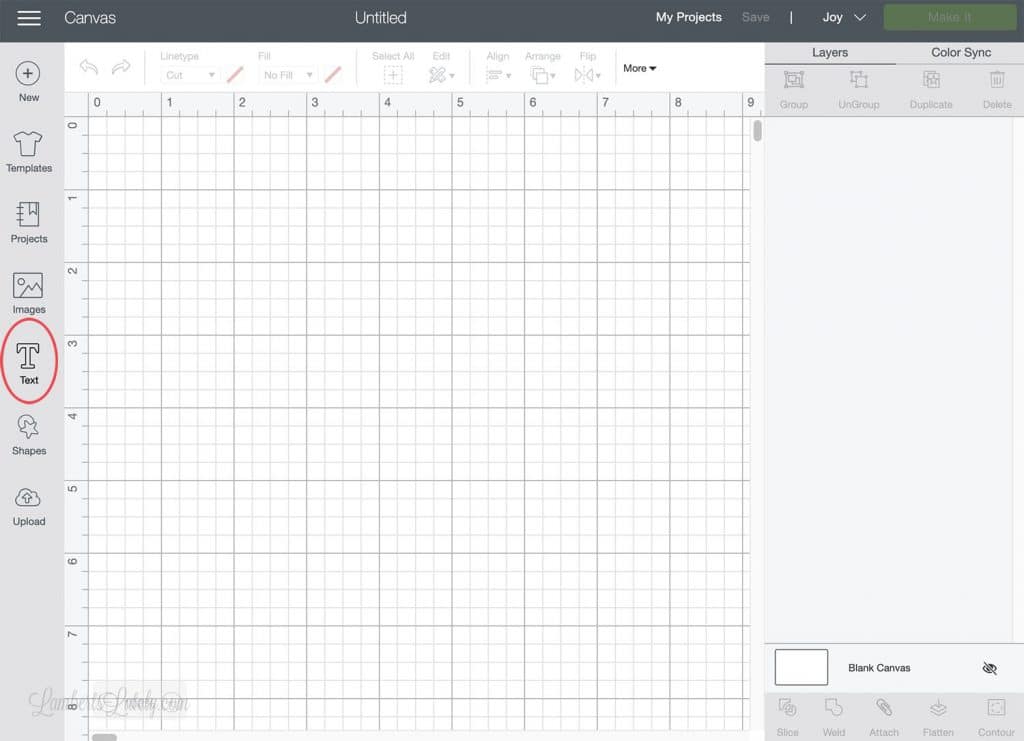
We're only doing text for this post, so select text from the left side (circled above).
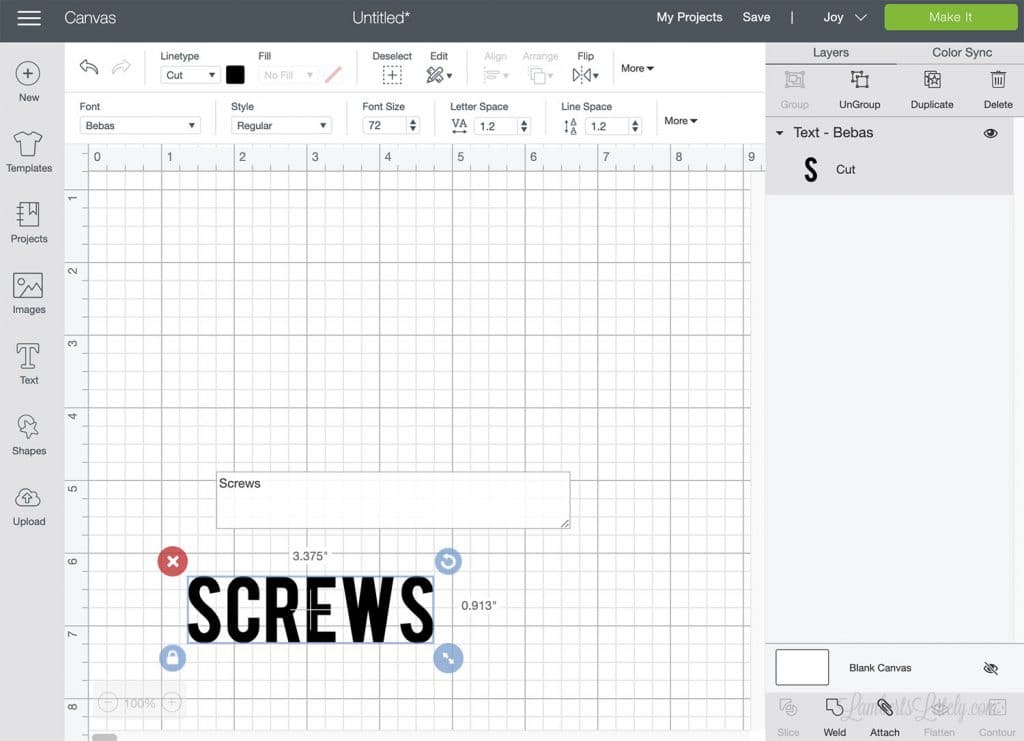
Type out your label wording and select your font from the drop-down at the top. You can use the fonts loaded on your computer or select from the fonts in Cricut's library - some cost extra, but many are free. For this label, I'm using one of my own fonts (Bebas, one of my favorites - it's nice and thick for labels!)
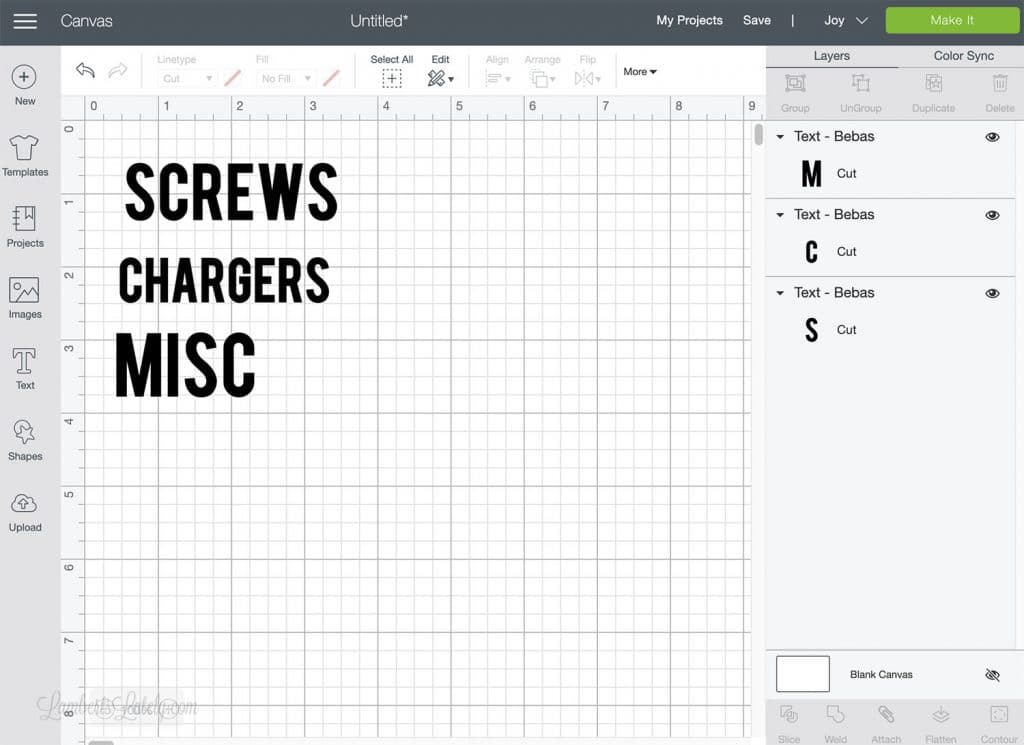
Repeat this for all of the labels you need, making sure each word is no bigger than the maximum size for your label (in my case, 3" wide). You can easily resize the words by selecting them and dragging bigger/smaller to the desired width. There's really no need to move the labels around...Cricut's software will give you a suggested optimized layout for cutting in the next step.
Once your labels are written out, select "Make It" at the top right corner.
Step 3: Print your labels.
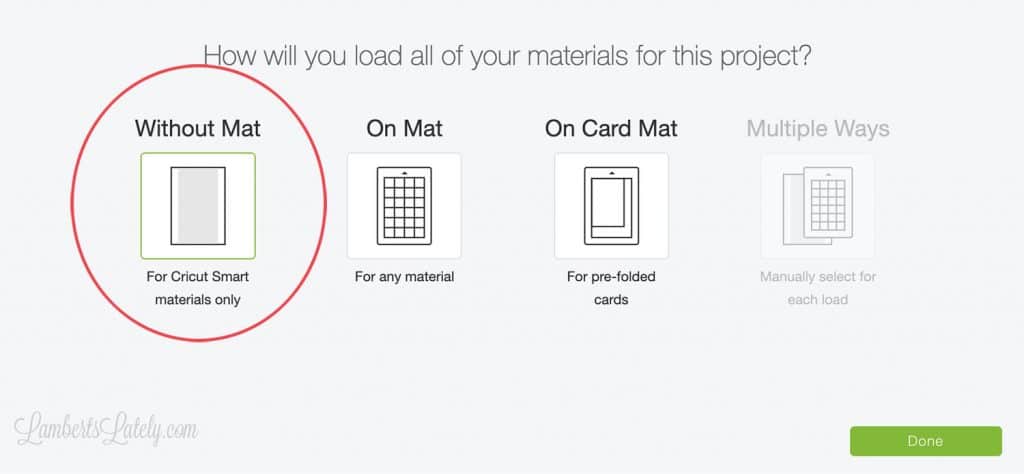
From there, you'll see this screen. Select your cutting style - since I'm using Cricut Smart Vinyl for this project, I've selected the option circled. If you're using your own non-Cricut vinyl (or another material), you can put it on a sticky mat and select the second option.
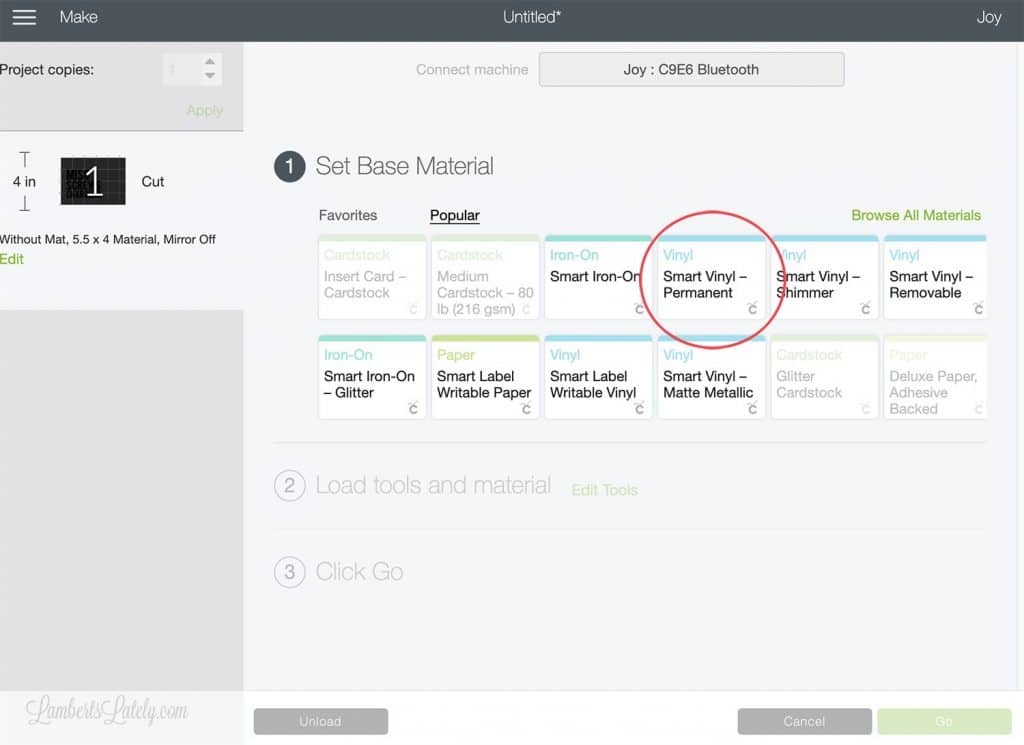
Cricut Design Space walks you right through the cutting process. Select the kind of vinyl you're using...
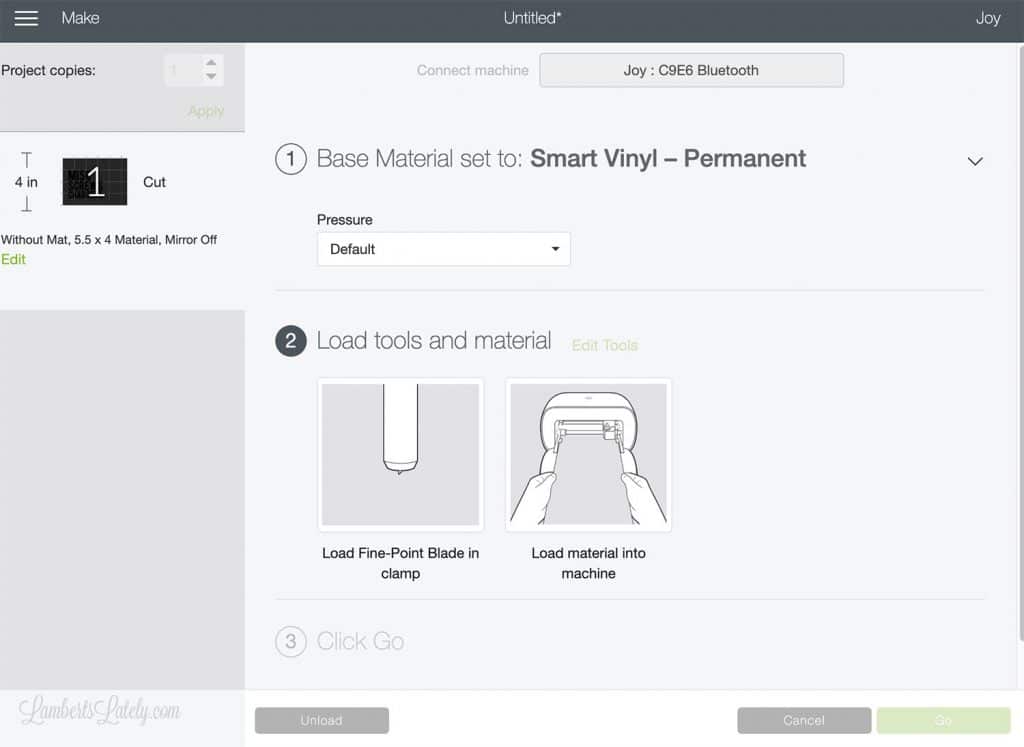
...then load your blade and material. Notice over to the left that the software tells you how much vinyl to cut and load into the machine.
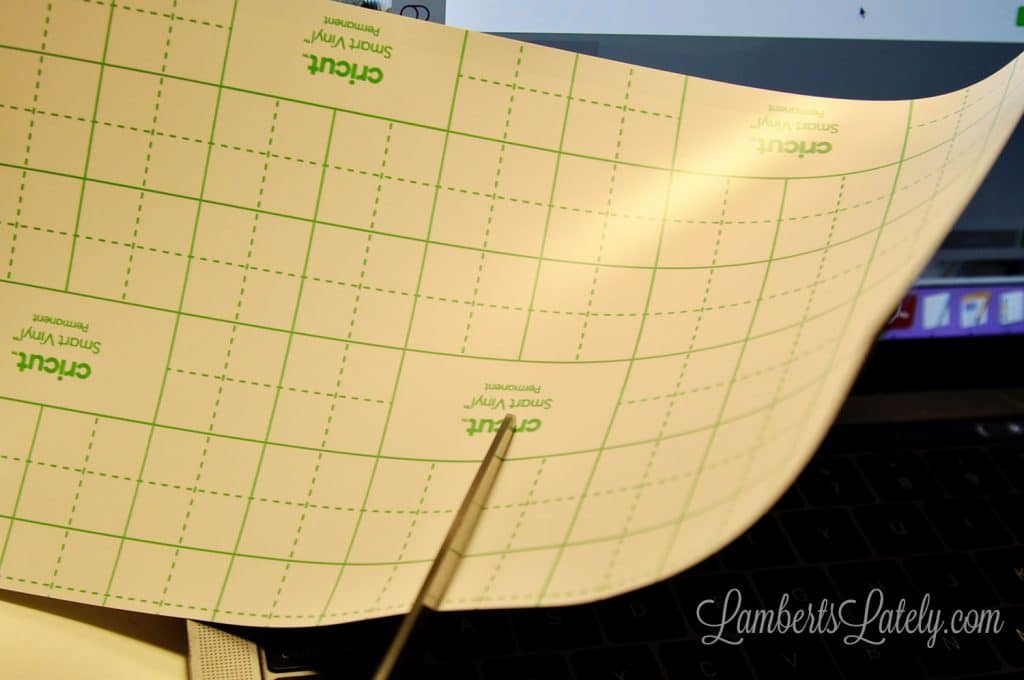
Cut that amount of vinyl...
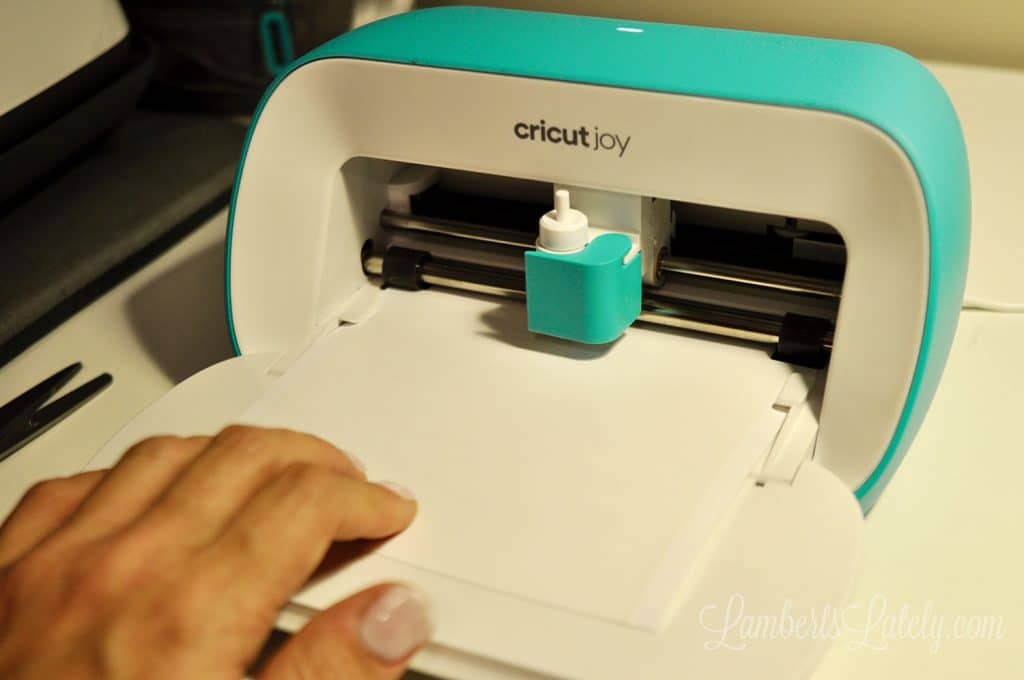
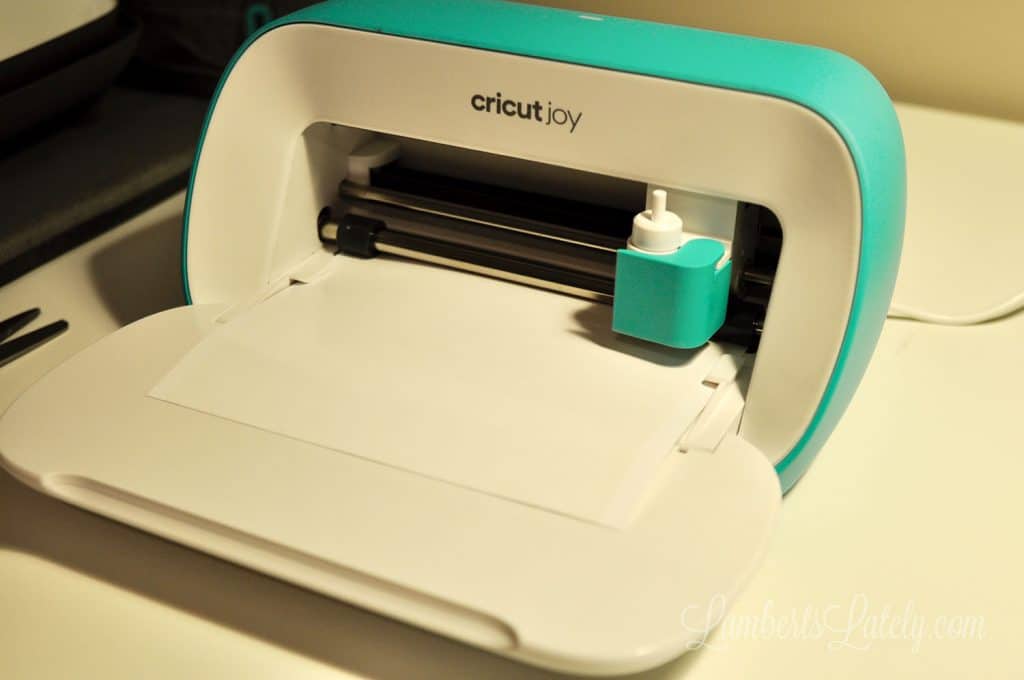
...then feed your vinyl into the machine. The Cricut Joy checks the Smart Vinyl to make sure there is enough for the project.
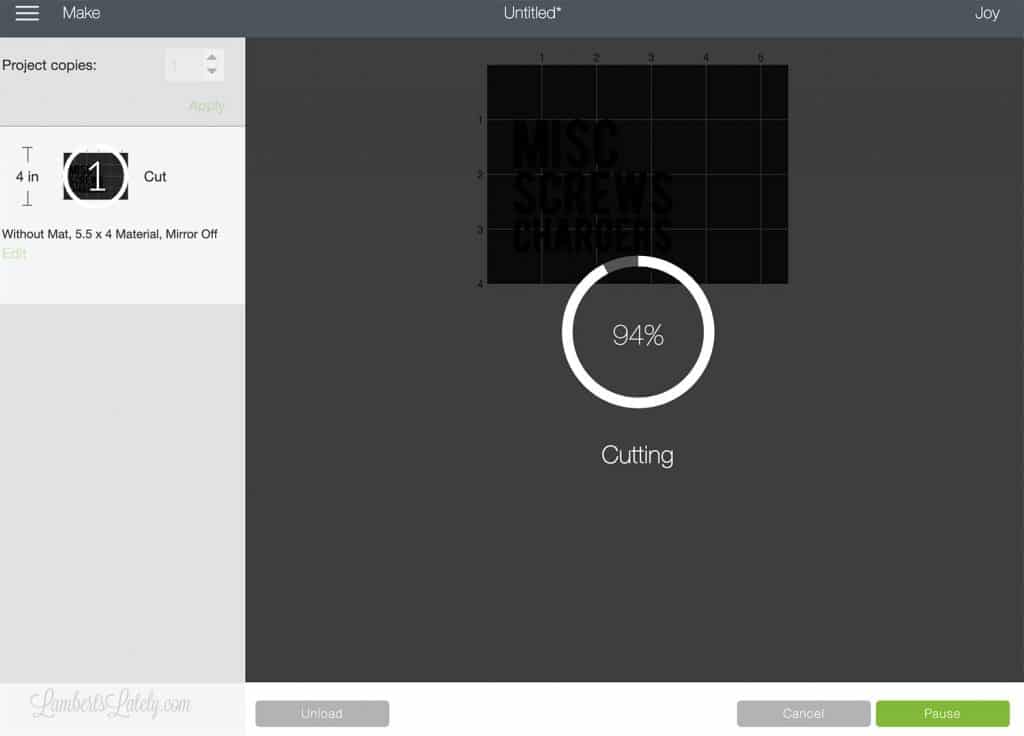
Once your computer recognizes that the vinyl is loaded, simply press send! The Cricut Joy connects to your computer via Bluetooth, sending your design to the machine wirelessly.
The software part of the project is done!
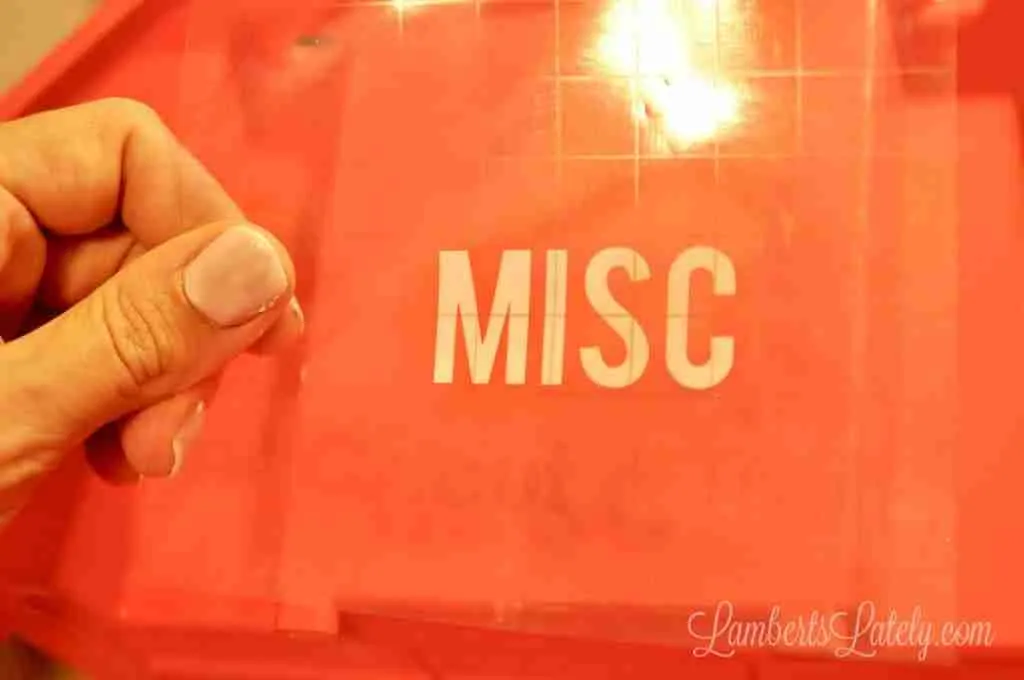
Step 4: Transfer the label to your storage bin.
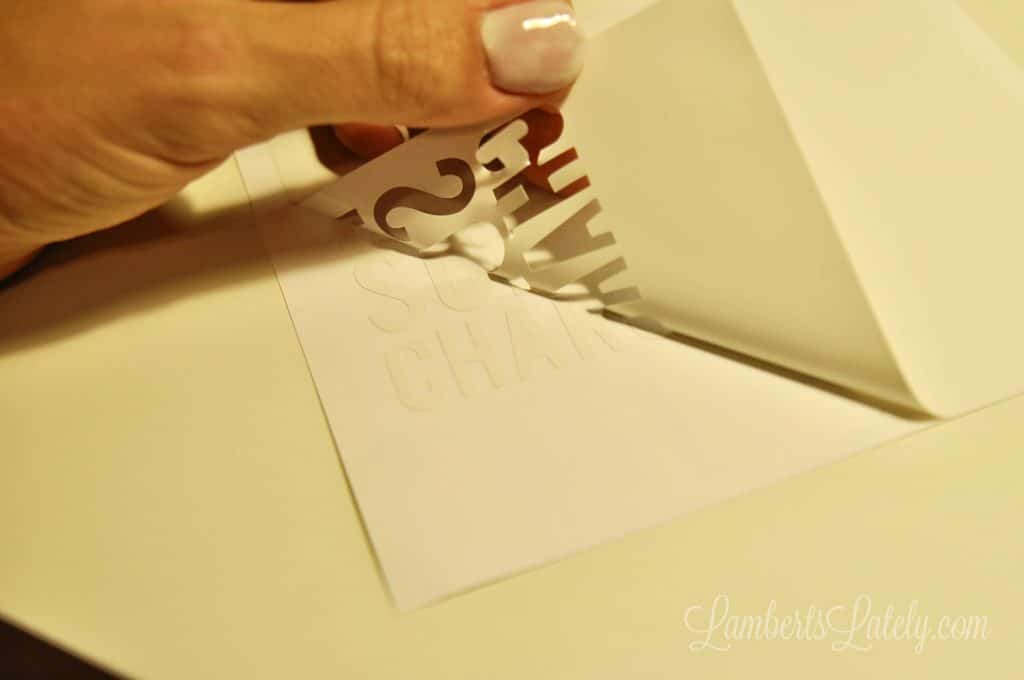
From here, it's weeding time. Carefully peel the outside of the words off of your vinyl sheet, making sure you don't take up any of the words with the excess.
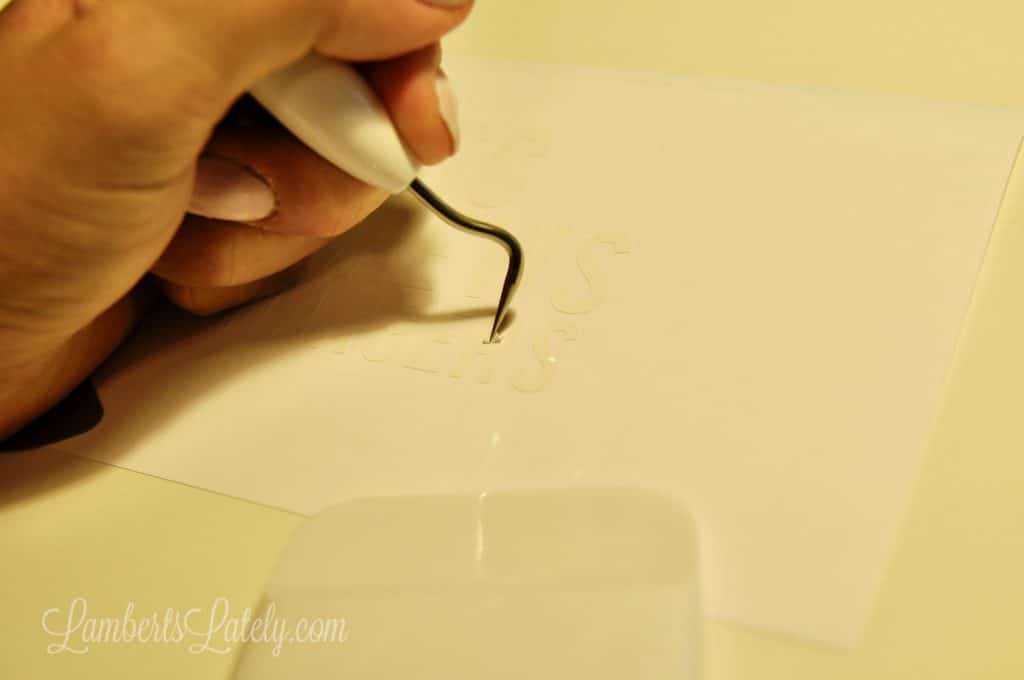
Use your weeding tool (in the starter tool set) to get the smaller excess (like the inside of letters) off of your labels.
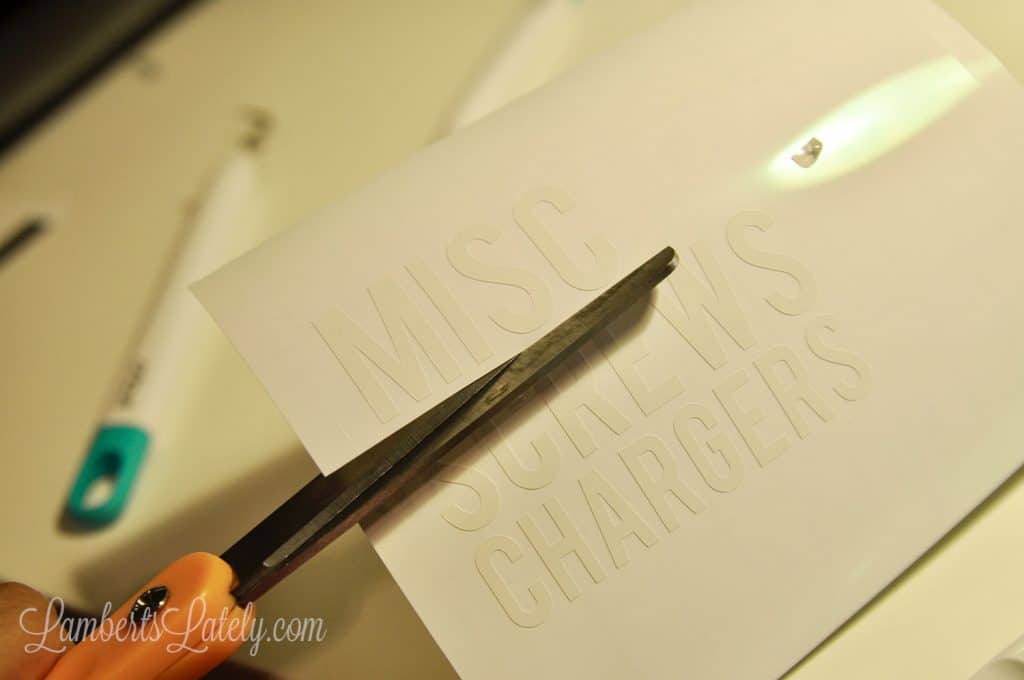
If you have multiple labels, cut the individual words apart.
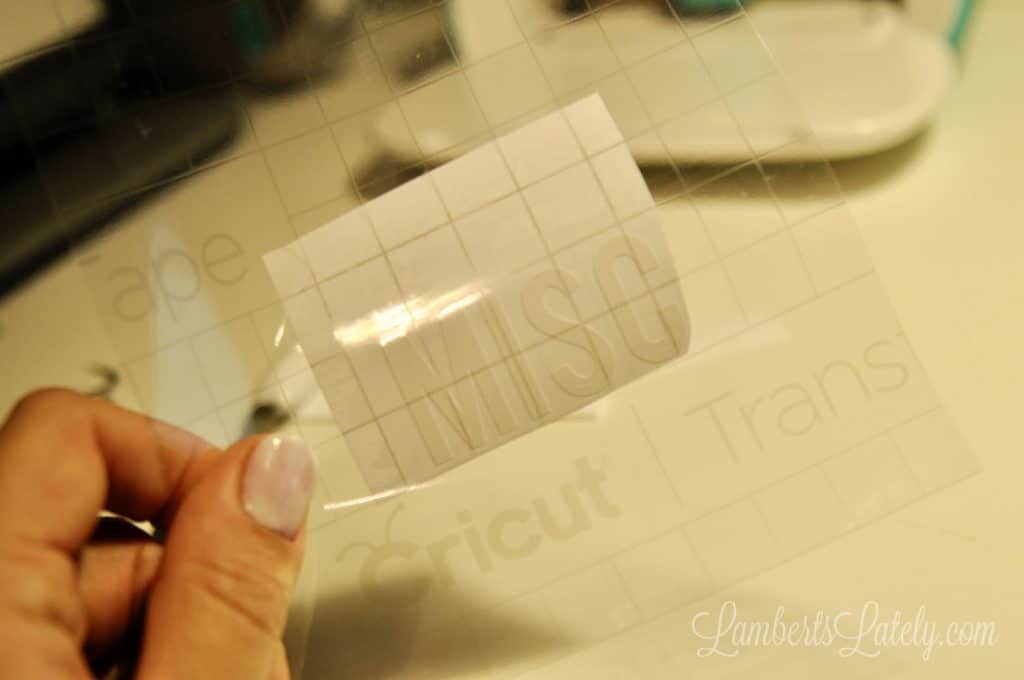
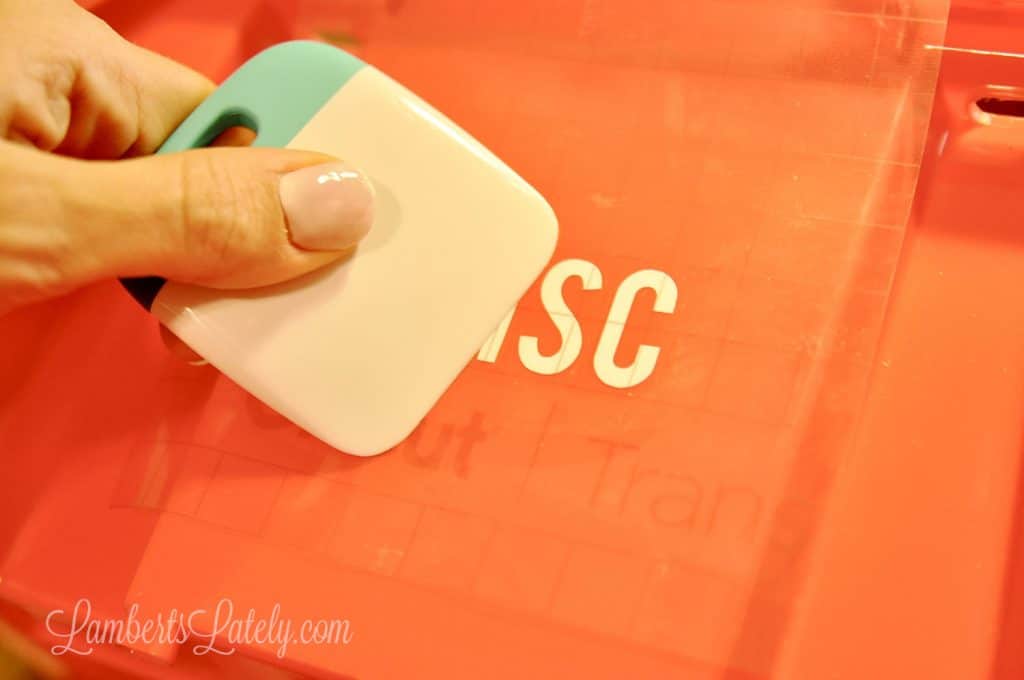
Next, use Cricut Transfer Tape to peel your words off of the cutting paper. Transfer tape makes sure your letters stay in place while transferring - trust me, you don't want to try to transfer designs with lots of pieces without transfer tape.
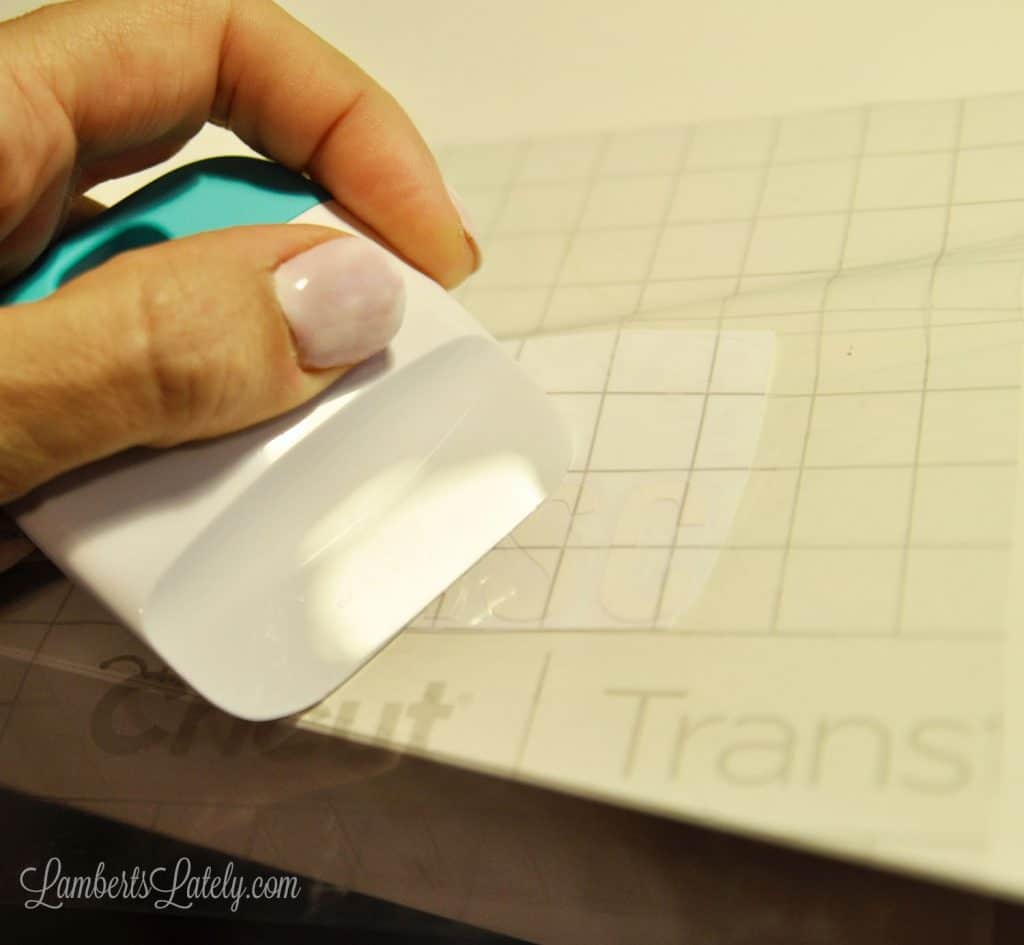
I like to use a scraping tool (also in the starter tool set) to really press the vinyl to the transfer tape.
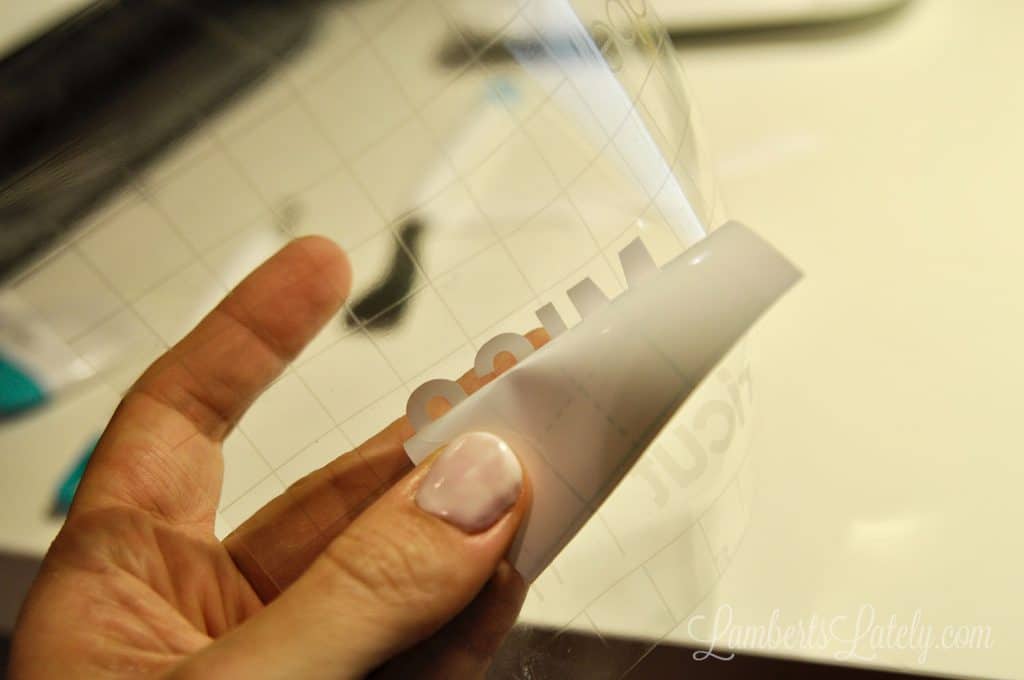
Peel your backing paper off of the vinyl.
Now, center your label on the storage bin (this might be the the most stressful part of the whole project for me 😂). Scrape it down well...
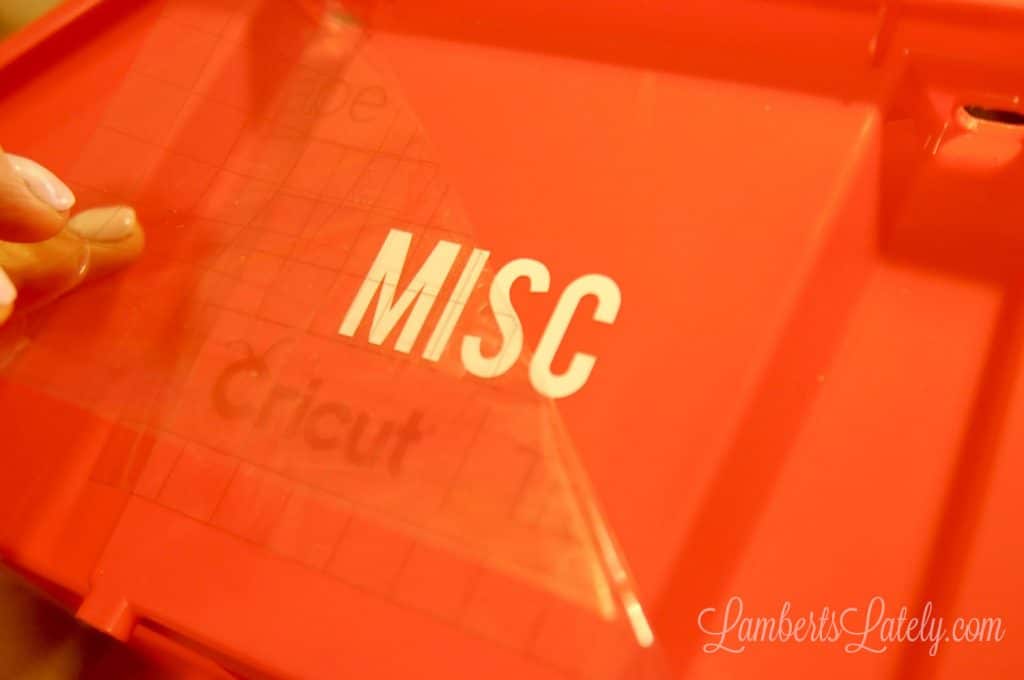
...and slowly peel the transfer tape off! (And yes, I normally use transfer tape for several projects - as long as it's still sticky, you can reuse it a couple of times.)
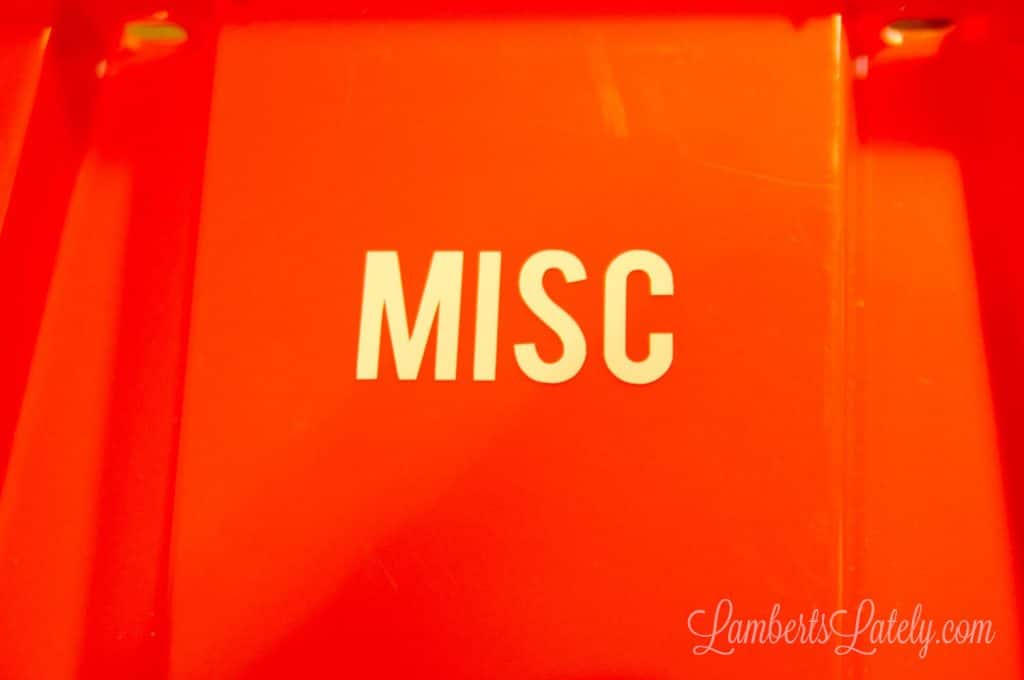
You would never know that these storage bin labels are a beginner vinyl machine project. This is a great way to give inexpensive storage solutions a really professional look around the house.

Now that we've looked at a beginner project, let's look at what I'll call an "advanced beginner project" - still easy to do and a great way to kind of flex your vinyl cutting muscles!
How to Make a Vinyl Label with Writing
Supplies Needed
- Cricut Joy Machine
- Cricut Smart Label Writable Vinyl
- Cricut Fine Point Pen (included with the Cricut Joy)
- Cricut Starter Tool Set
- Plastic Storage Bins (the ones used in this project are from the dollar store)
- Ruler
- Scissors
- Cricut Design Space (free on both desktop and mobile devices)
Step 1: Measure your bins.
This tutorial is going to look very similar in some ways to the first one - once you get used to the process of label making, it really does become second nature. First, measure how big your labels can be. For this one, I'm working with the front of these dollar store bins (about 2" wide).
Step 2: Design the labels on your phone.
I chose to do the more complicated tutorial on my phone to show you just how easy it is to use this software. Cricut Design Space makes it easy to design even from a mobile device!
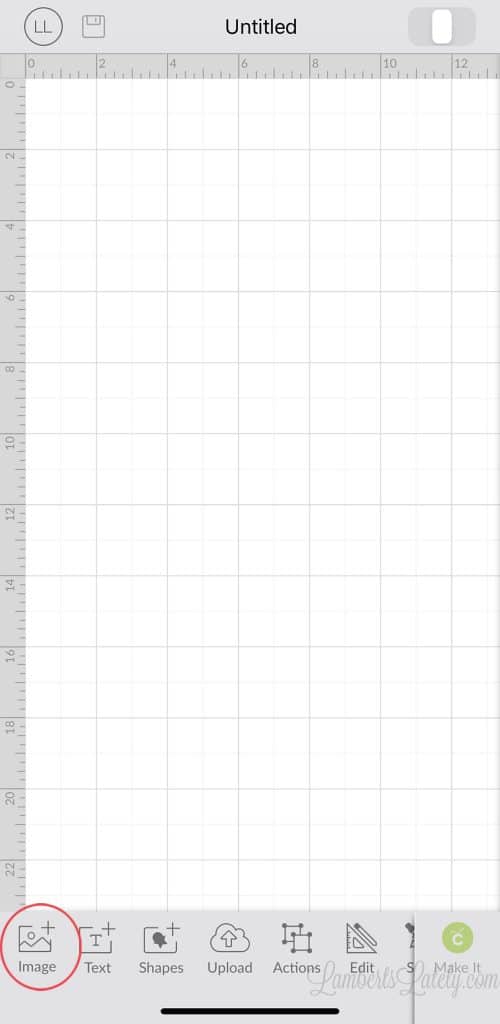
Open Cricut Design Space on your phone (I'm using an iPhone). Start a new project and, for a label, select "image" at the bottom.
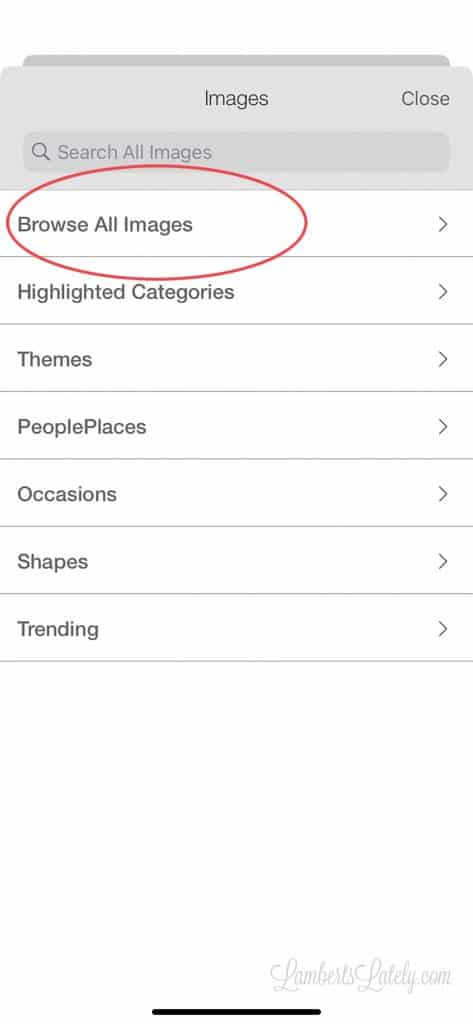
Select "Browse All Images" to see Cricut's library of designs. Here, you'll see thousands of things to use in your designs - calendars, phrases, labels, etc. There's so much to choose from!
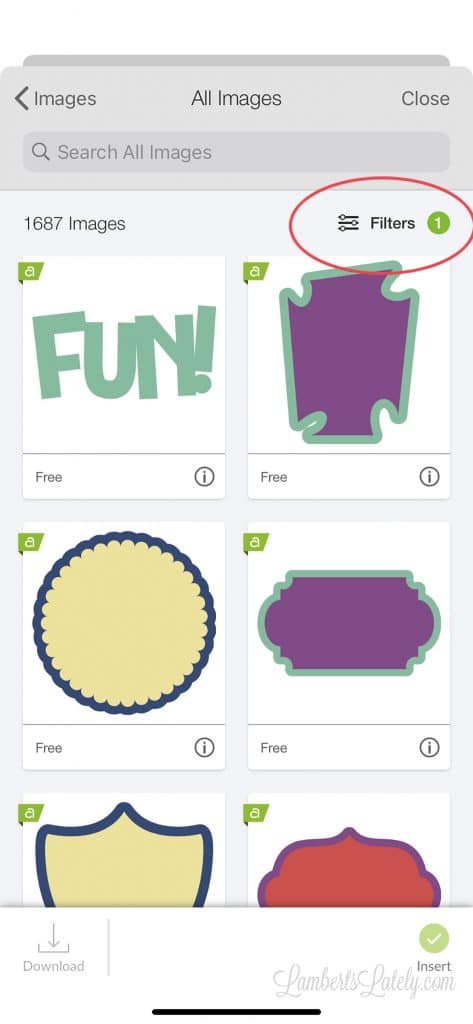
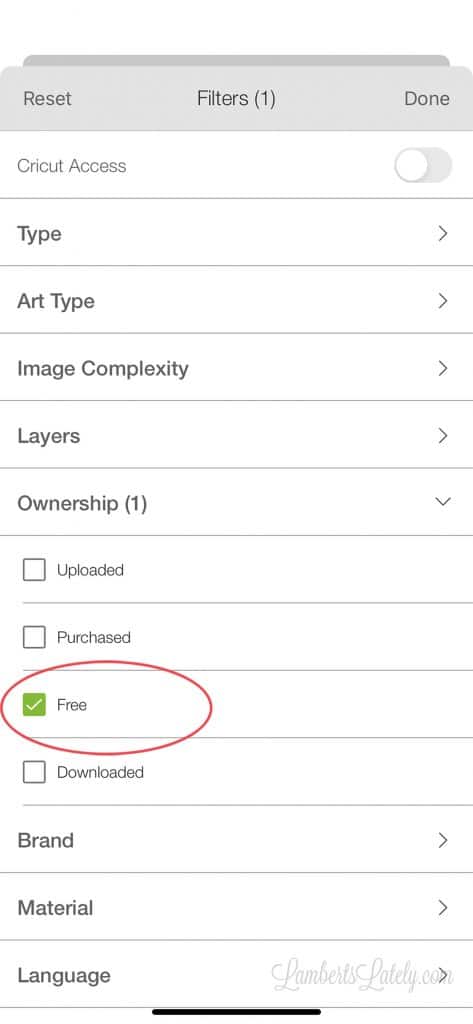
Many of the designs you'll see cost extra, but there are also lots of free options. To find those, click "filter" at the top of the image page and select the free option as seen above.
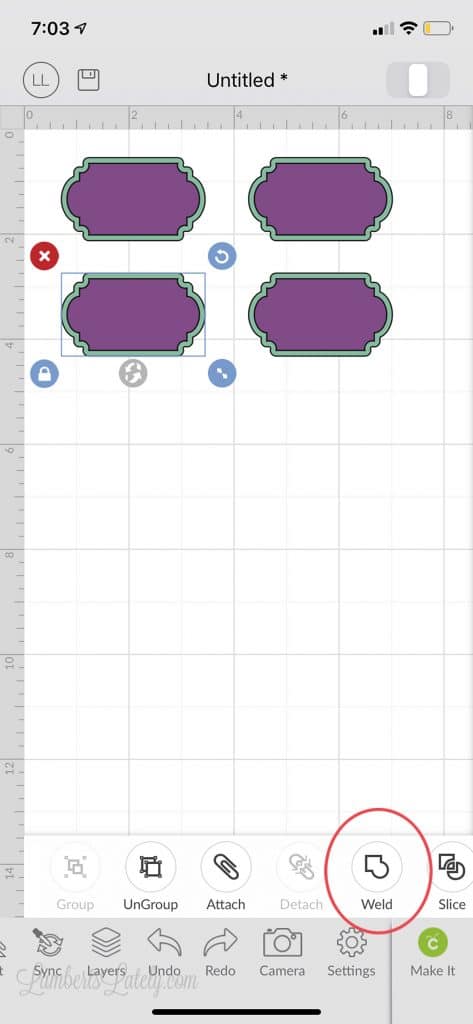
Once you find a label you like, copy and paste it (by selecting "actions, duplicate" at the bottom) as many times as you need. Next, if you don't actually want to print multiple layers of different colors of vinyl, you can select a label and choose "weld" under the actions menu to take it down to just the outer layer for each label.
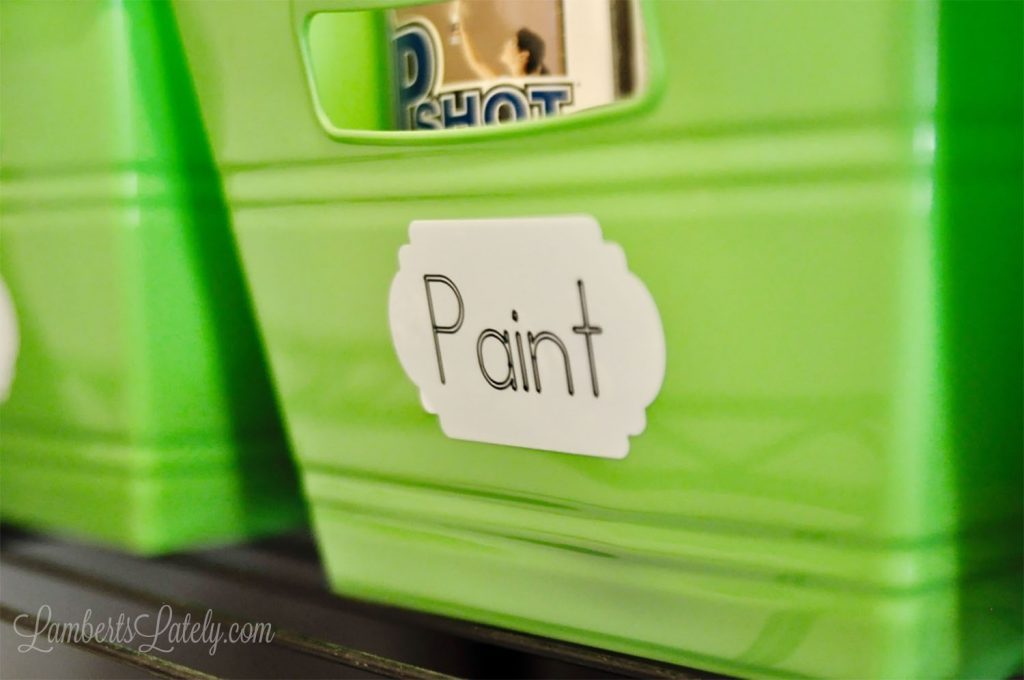
Now, let's add the writing! It is possible (and easy) to add writing over your vinyl label.
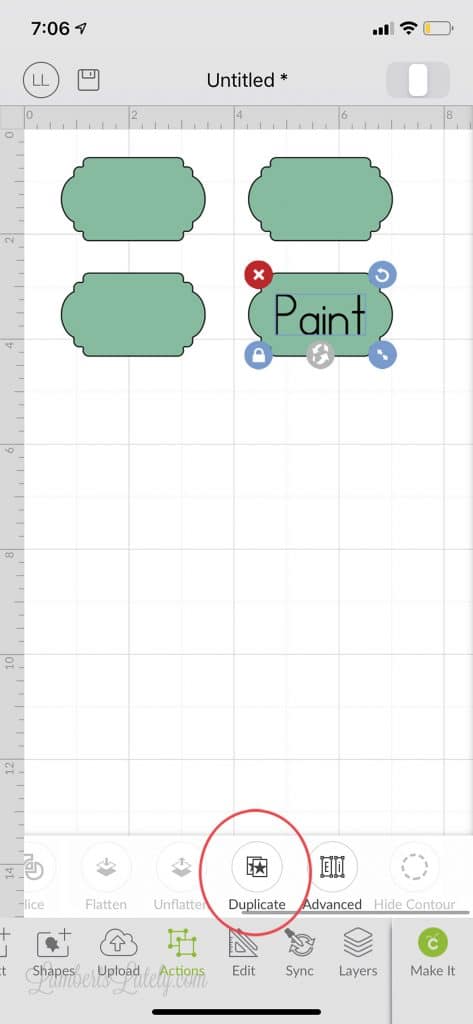
Simply select text from the bottom menu, select your font (from your phone or Cricut's library), and position the text over your label. Select "duplicate" under the actions menu to copy and paste the writing into each additional label - then, just change the words as needed.
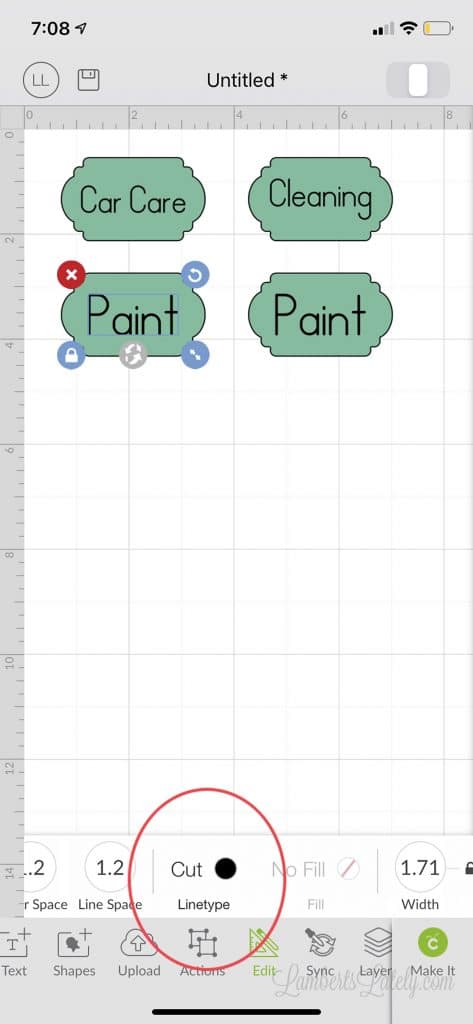
Once you have the writing in place, you'll need to tell your Cricut that you'd like to draw the wording with a marker instead of cutting it. To do this, select one label's worth of text, click "edit" at the bottom, and select the cut button you see circled above.
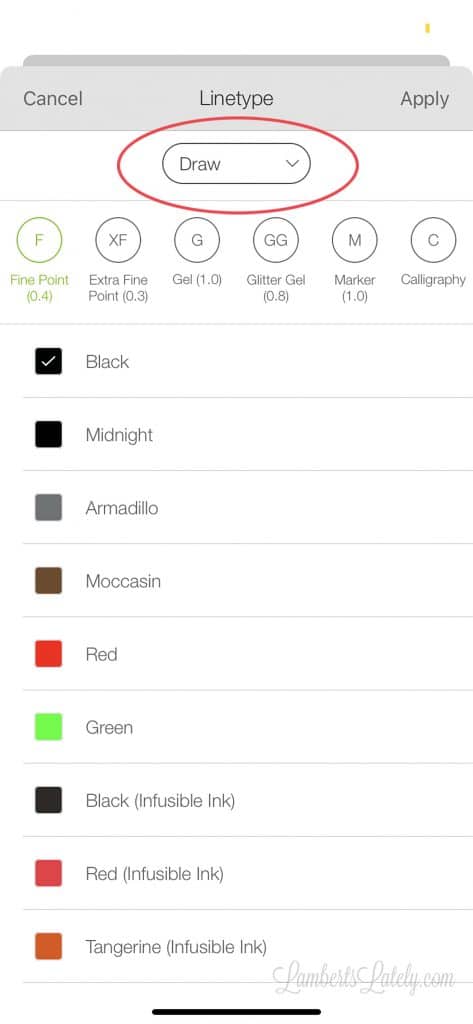
Change the drop-down at the top to "draw." Specify the pen type (you can find this on the side of your Cricut Marker). You can even add multiple colors if needed (if you're only using one color of writing, this isn't necessary - this would just tell the machine to let you change the marker before moving on to the next color).
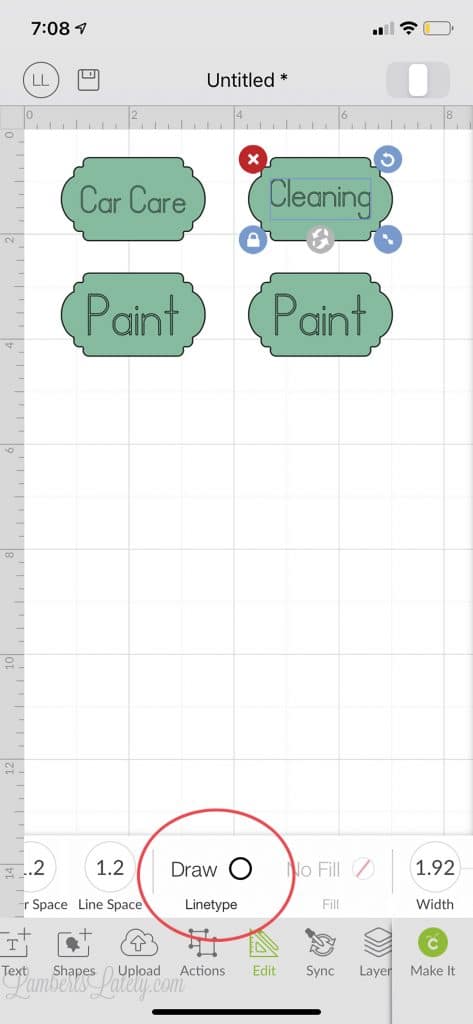
Your writing portions of the labels should now have "draw" under the edit button. Repeat this step for all of the writing. Make sure to keep the outer border portion of the label set to "cut."
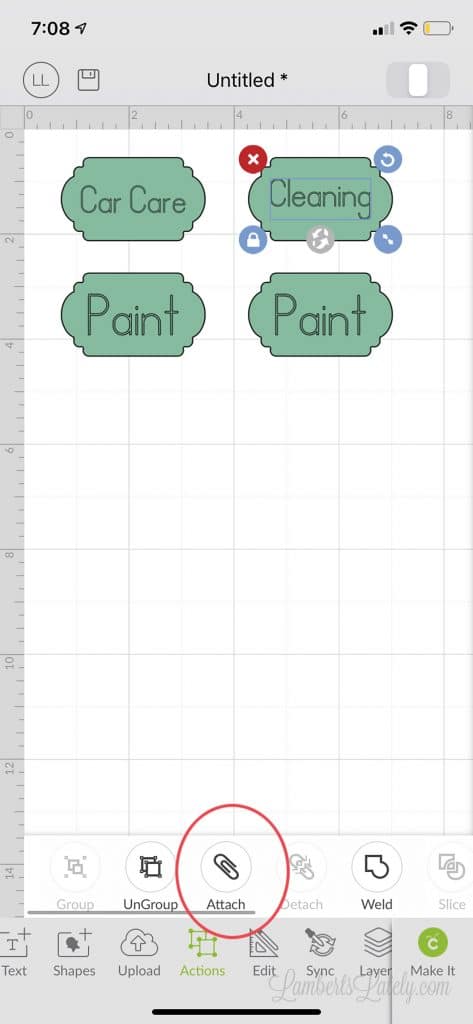
One last edit - highlight both the wording and the bordering for each individual label (by dragging your finger over each set to highlight) and select "attach" from the actions menu at the bottom. This will make sure the Cricut knows to keep that label border with that wording.
Now, you're ready to draw and cut!
Step 3: Let the Cricut Joy do the cutting and drawing for you!
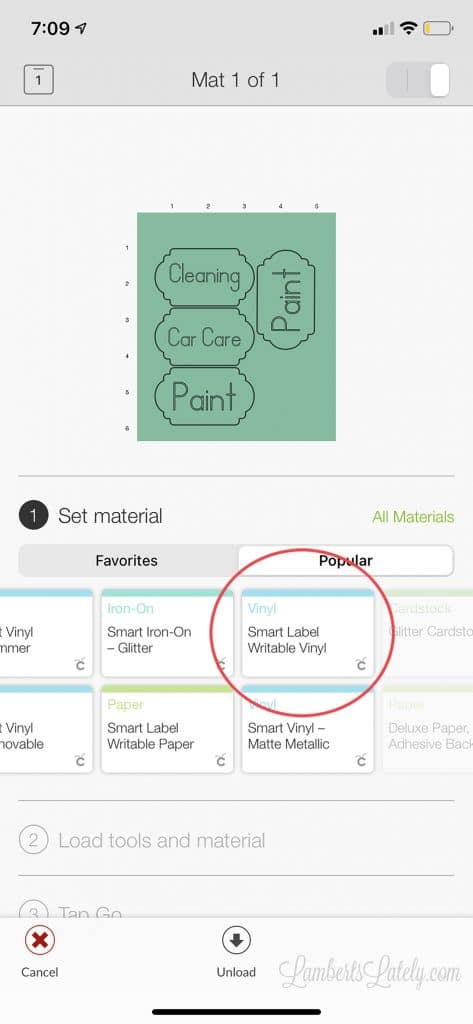
Click "make" in the top right corner of the app. This screen will pop up - select "Smart Label Writable Vinyl" (the material recommended for this project). The app will suggest an optimal layout for cutting, but I repositioned them a little to save as much vinyl as possible - that stuff is valuable! 😉
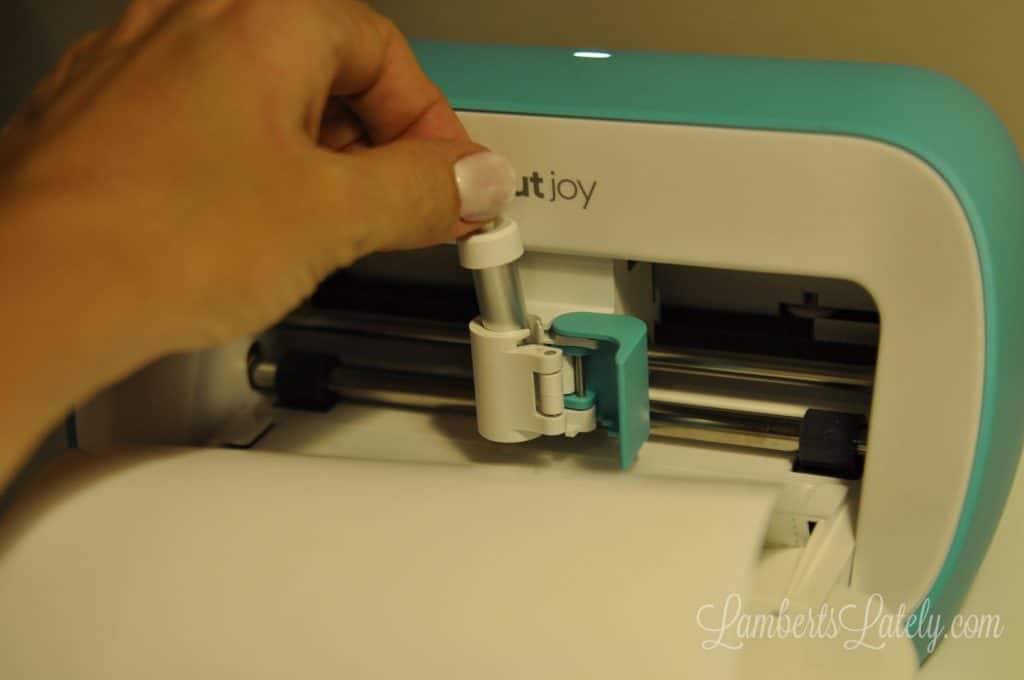
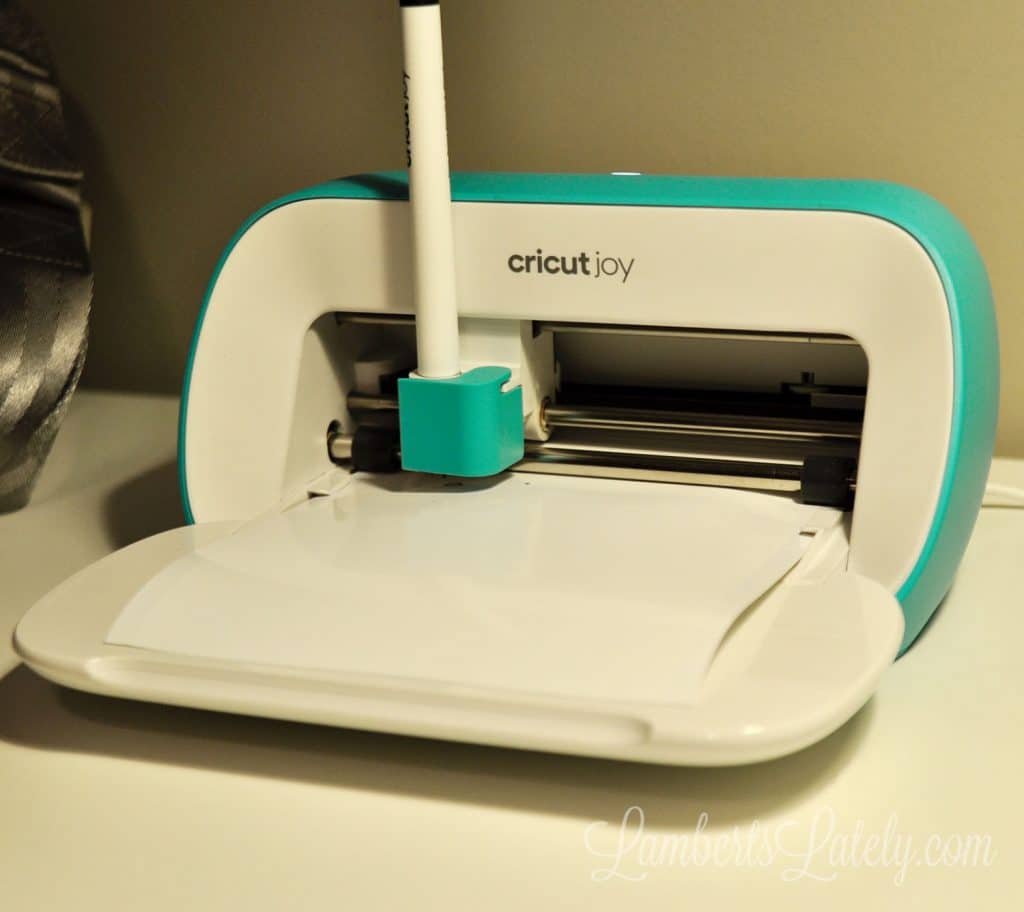
Change your machine out to your fine point pen, instead of your blade...the pen should snap right into the blade holder. Load the recommended amount of Smart Label Writable Vinyl, and click go on your phone.
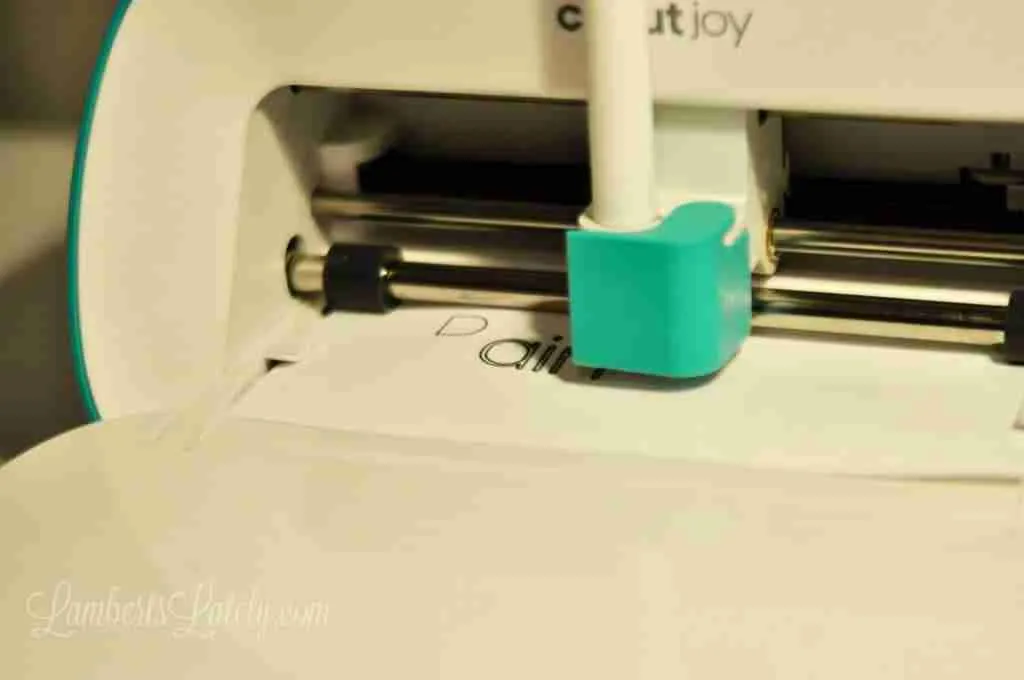
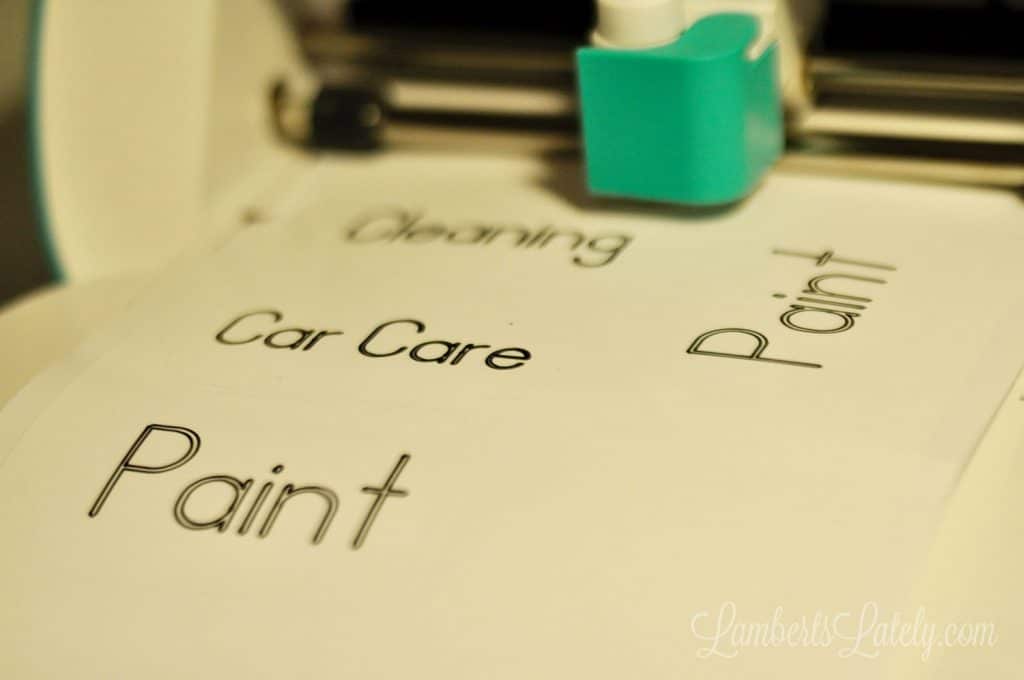
Your Cricut Joy will write the wording first and let you know when to remove the marker/place the blade in the machine. After that, your label borders will be cut outside of the writing, just as shown in the Design Space software.
Step 4: Attach labels
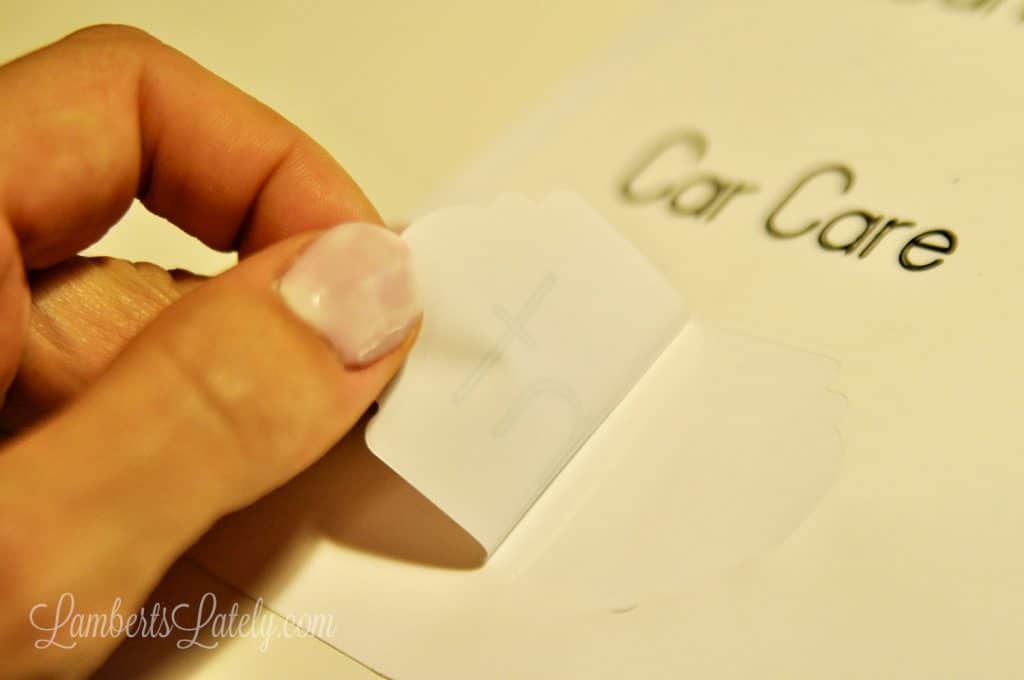
From there, simply remove the labels by hand (no transfer tape needed - it can damage the Smart Label surface) and place on your storage bin, giving it a little bit of light pressure and smoothing the bubbles with the scraper tool.

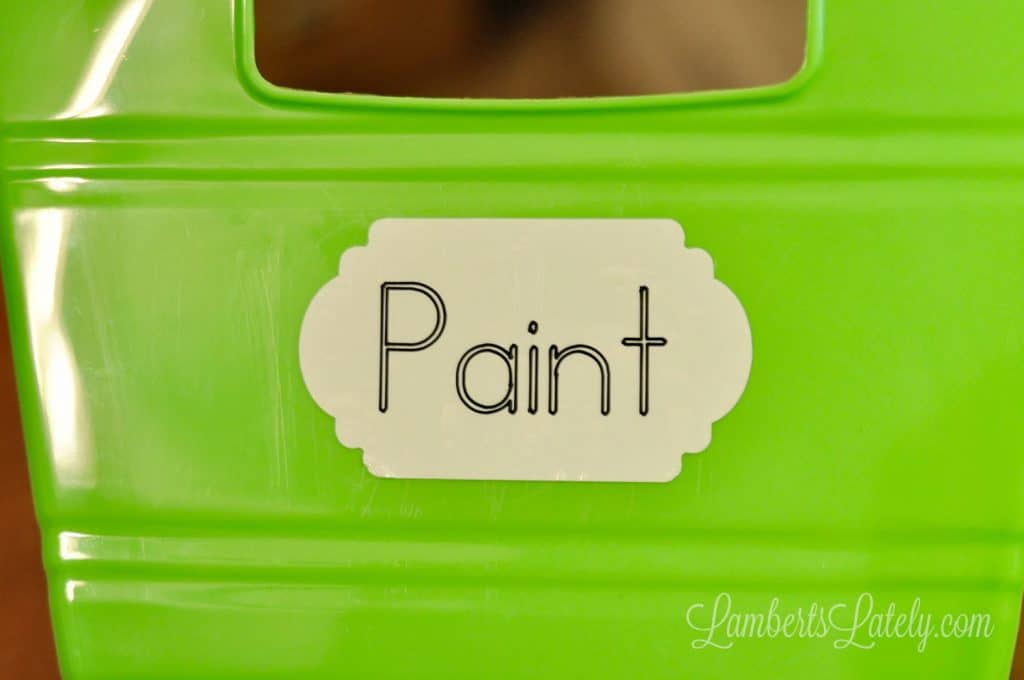
I love that these labels give each bin a hand-written (but incredibly neat and uniform) look - they are perfect for sorting the many, many bottles and cans in our garage storage room.
So, see? No excuse not to get in on the vinyl cutting crazy when it's this easy! The many materials and supplies available for the Cricut Joy make designing crafts and organizational tools an absolute breeze.
Great idea for the garage! I sold mine once I stopped teaching, but I should’ve kept it and upgraded. Thanks for the ideas! Thank you, Leslie!
It's such a versatile machine; I love that it can help you organize in so many rooms!