
This post has easy step-by-step instructions for building DIY farmhouse-style console table...great to use as an entry table! Grab free plans, a supply list, & wood cuts.
Paid links used in this post. Read more about my link usage policies.
Ever have one of those easy home projects that somehow takes you months to complete?
For us, that's this table. We bought the supplies right before the holidays with the best of intentions. But you know how that goes - those supplies went in the corner of the garage and weren't looked at for months. One weekend, we finally buckled down and completed this project, and couldn't believe how easy it was.
This whole project probably took 5-6 hours to complete...and the results are completely worth it!
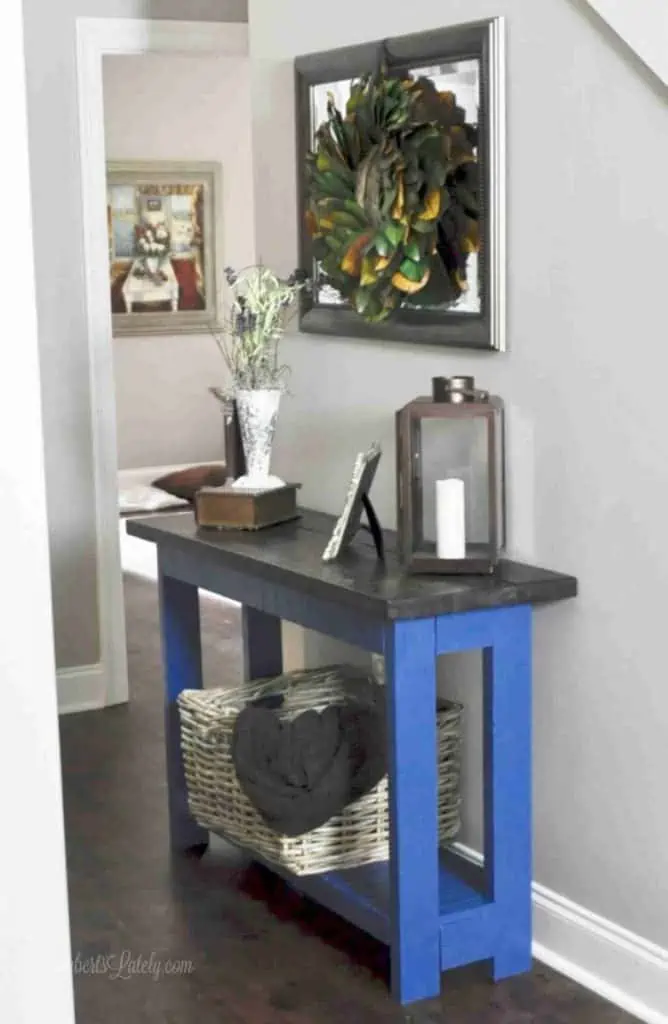
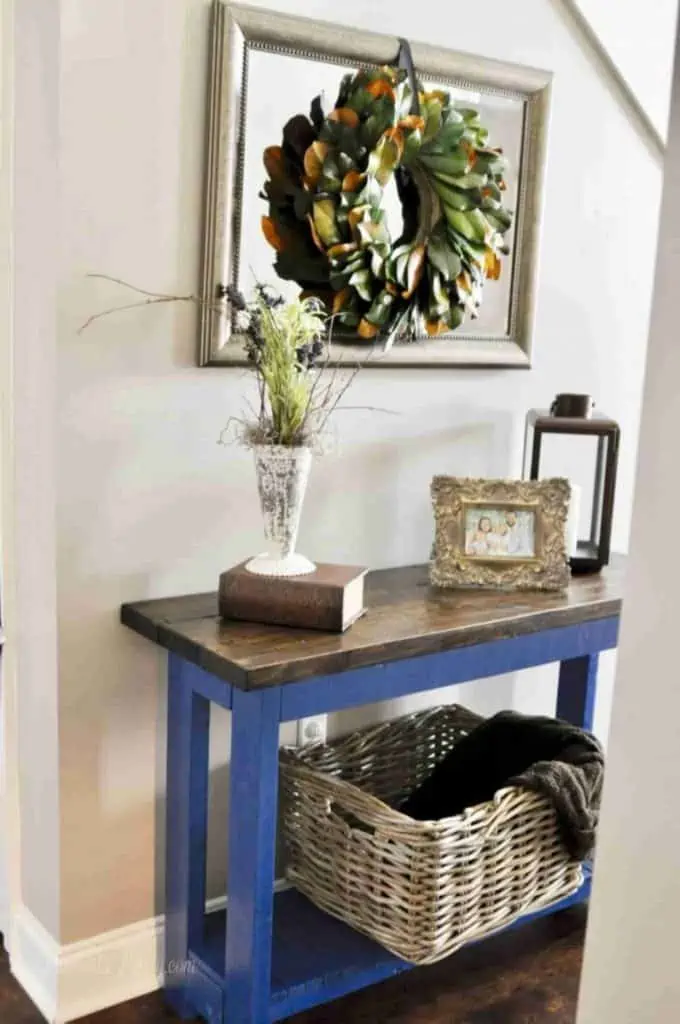
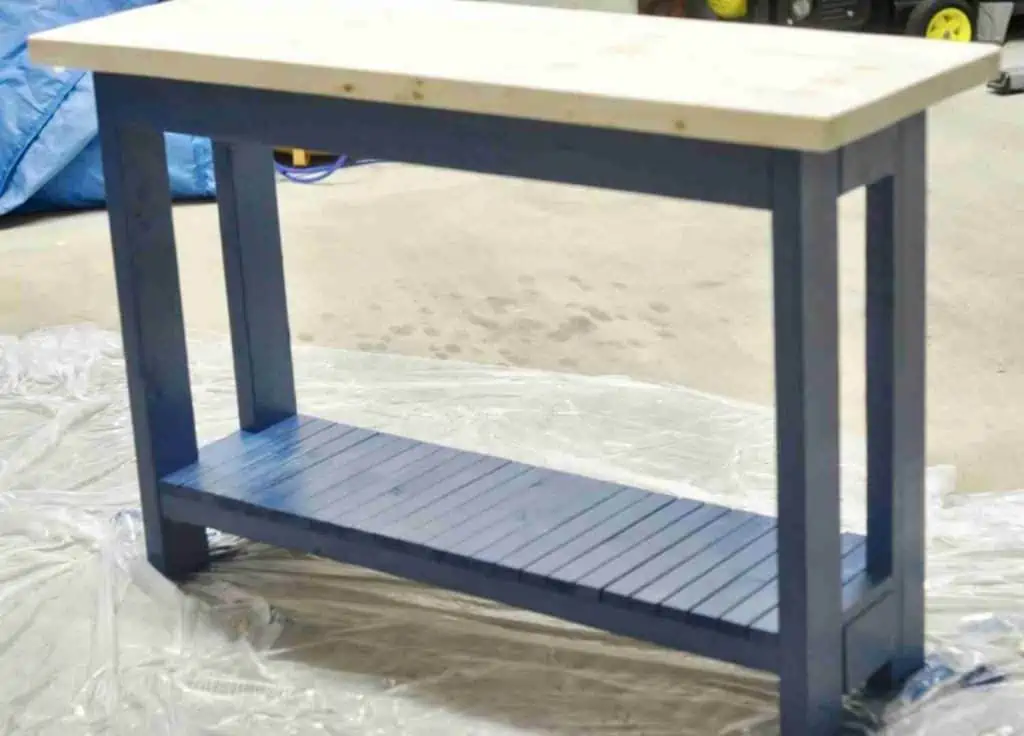
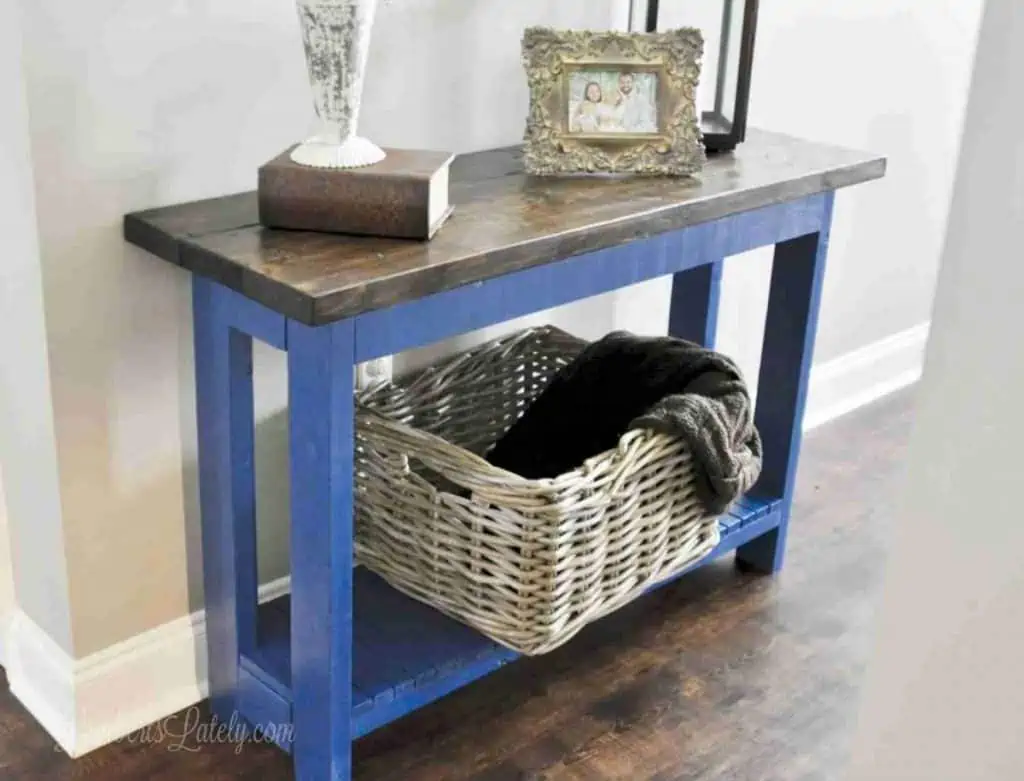
I am just so thrilled with this modern farmhouse table. I wanted a little pop of color with the piece, and I think I achieved it. 😉 It's a gorgeous, bright blue that really stands out. I've thought about staining it to mute it down a little, but most of my followers on Instagram voted for me not to when I put up a poll a while back. So, bright blue it is.
I love the rustic charm of this console table. It really matches what we've got going on in the rest of the house and has become such a focal piece for the foyer. And I love knowing we made it ourselves (for much cheaper than we could have purchased it).
Want to make one of these beauties for yourself? It's a great DIY project for a woodworking beginner! I've outlined exactly how we did it below.
Supplies Needed
For this project, you'll need to put the following supplies on your shopping list:
- Circular Saw
- Four 8' 2x4s
- Four 8' 1x2s
- Two 8' 2x6s
- Pocket hole Kreg jig
- Drill
- 2.5" pocket screws
- Air compressor nail gun if available, if not use 1.5" nails
- 2.5" self-tapping wood screws
- Wood filler
- Sander
- 1 pint stain of your choice (this is the one we used)
- 1 regular bristled paintbrush
- 2-3 cheap sponge brushes
- 1-quart paint of your choice
- ½ pint polyurethane finish
Final Cost
For the cost of just the supplies to complete this project (not including power tools), you'll pay around $100 as of publish date. For a solid wood table, that's not too shabby.
Step-by-Step Instructions
Step 1: Make cuts in lumber and drill pocket holes.
Before I ever start, I like to go on and get all of my wood cuts out of the way. It seems to make the rest of the project so much easier...just pull the pieces as you need them.
Of course, a miter saw makes this process a hundred times easier. You can also ask your home improvement store to make thee cuts for you (sometimes they will, sometimes, they won't...but it's worth a try).
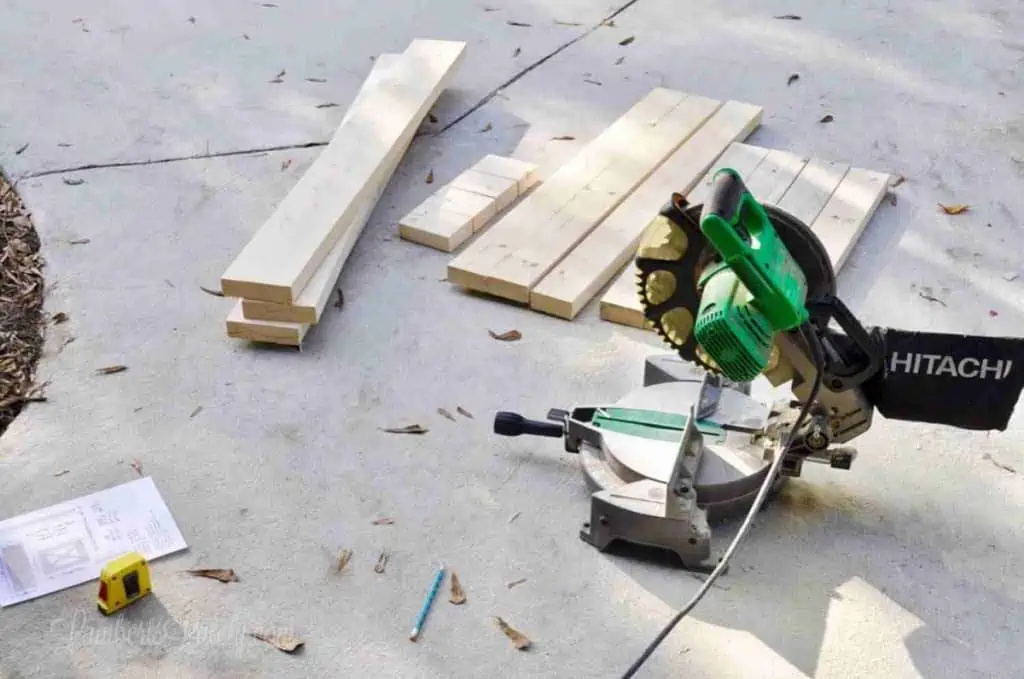
DIY Farmhouse Table Plans
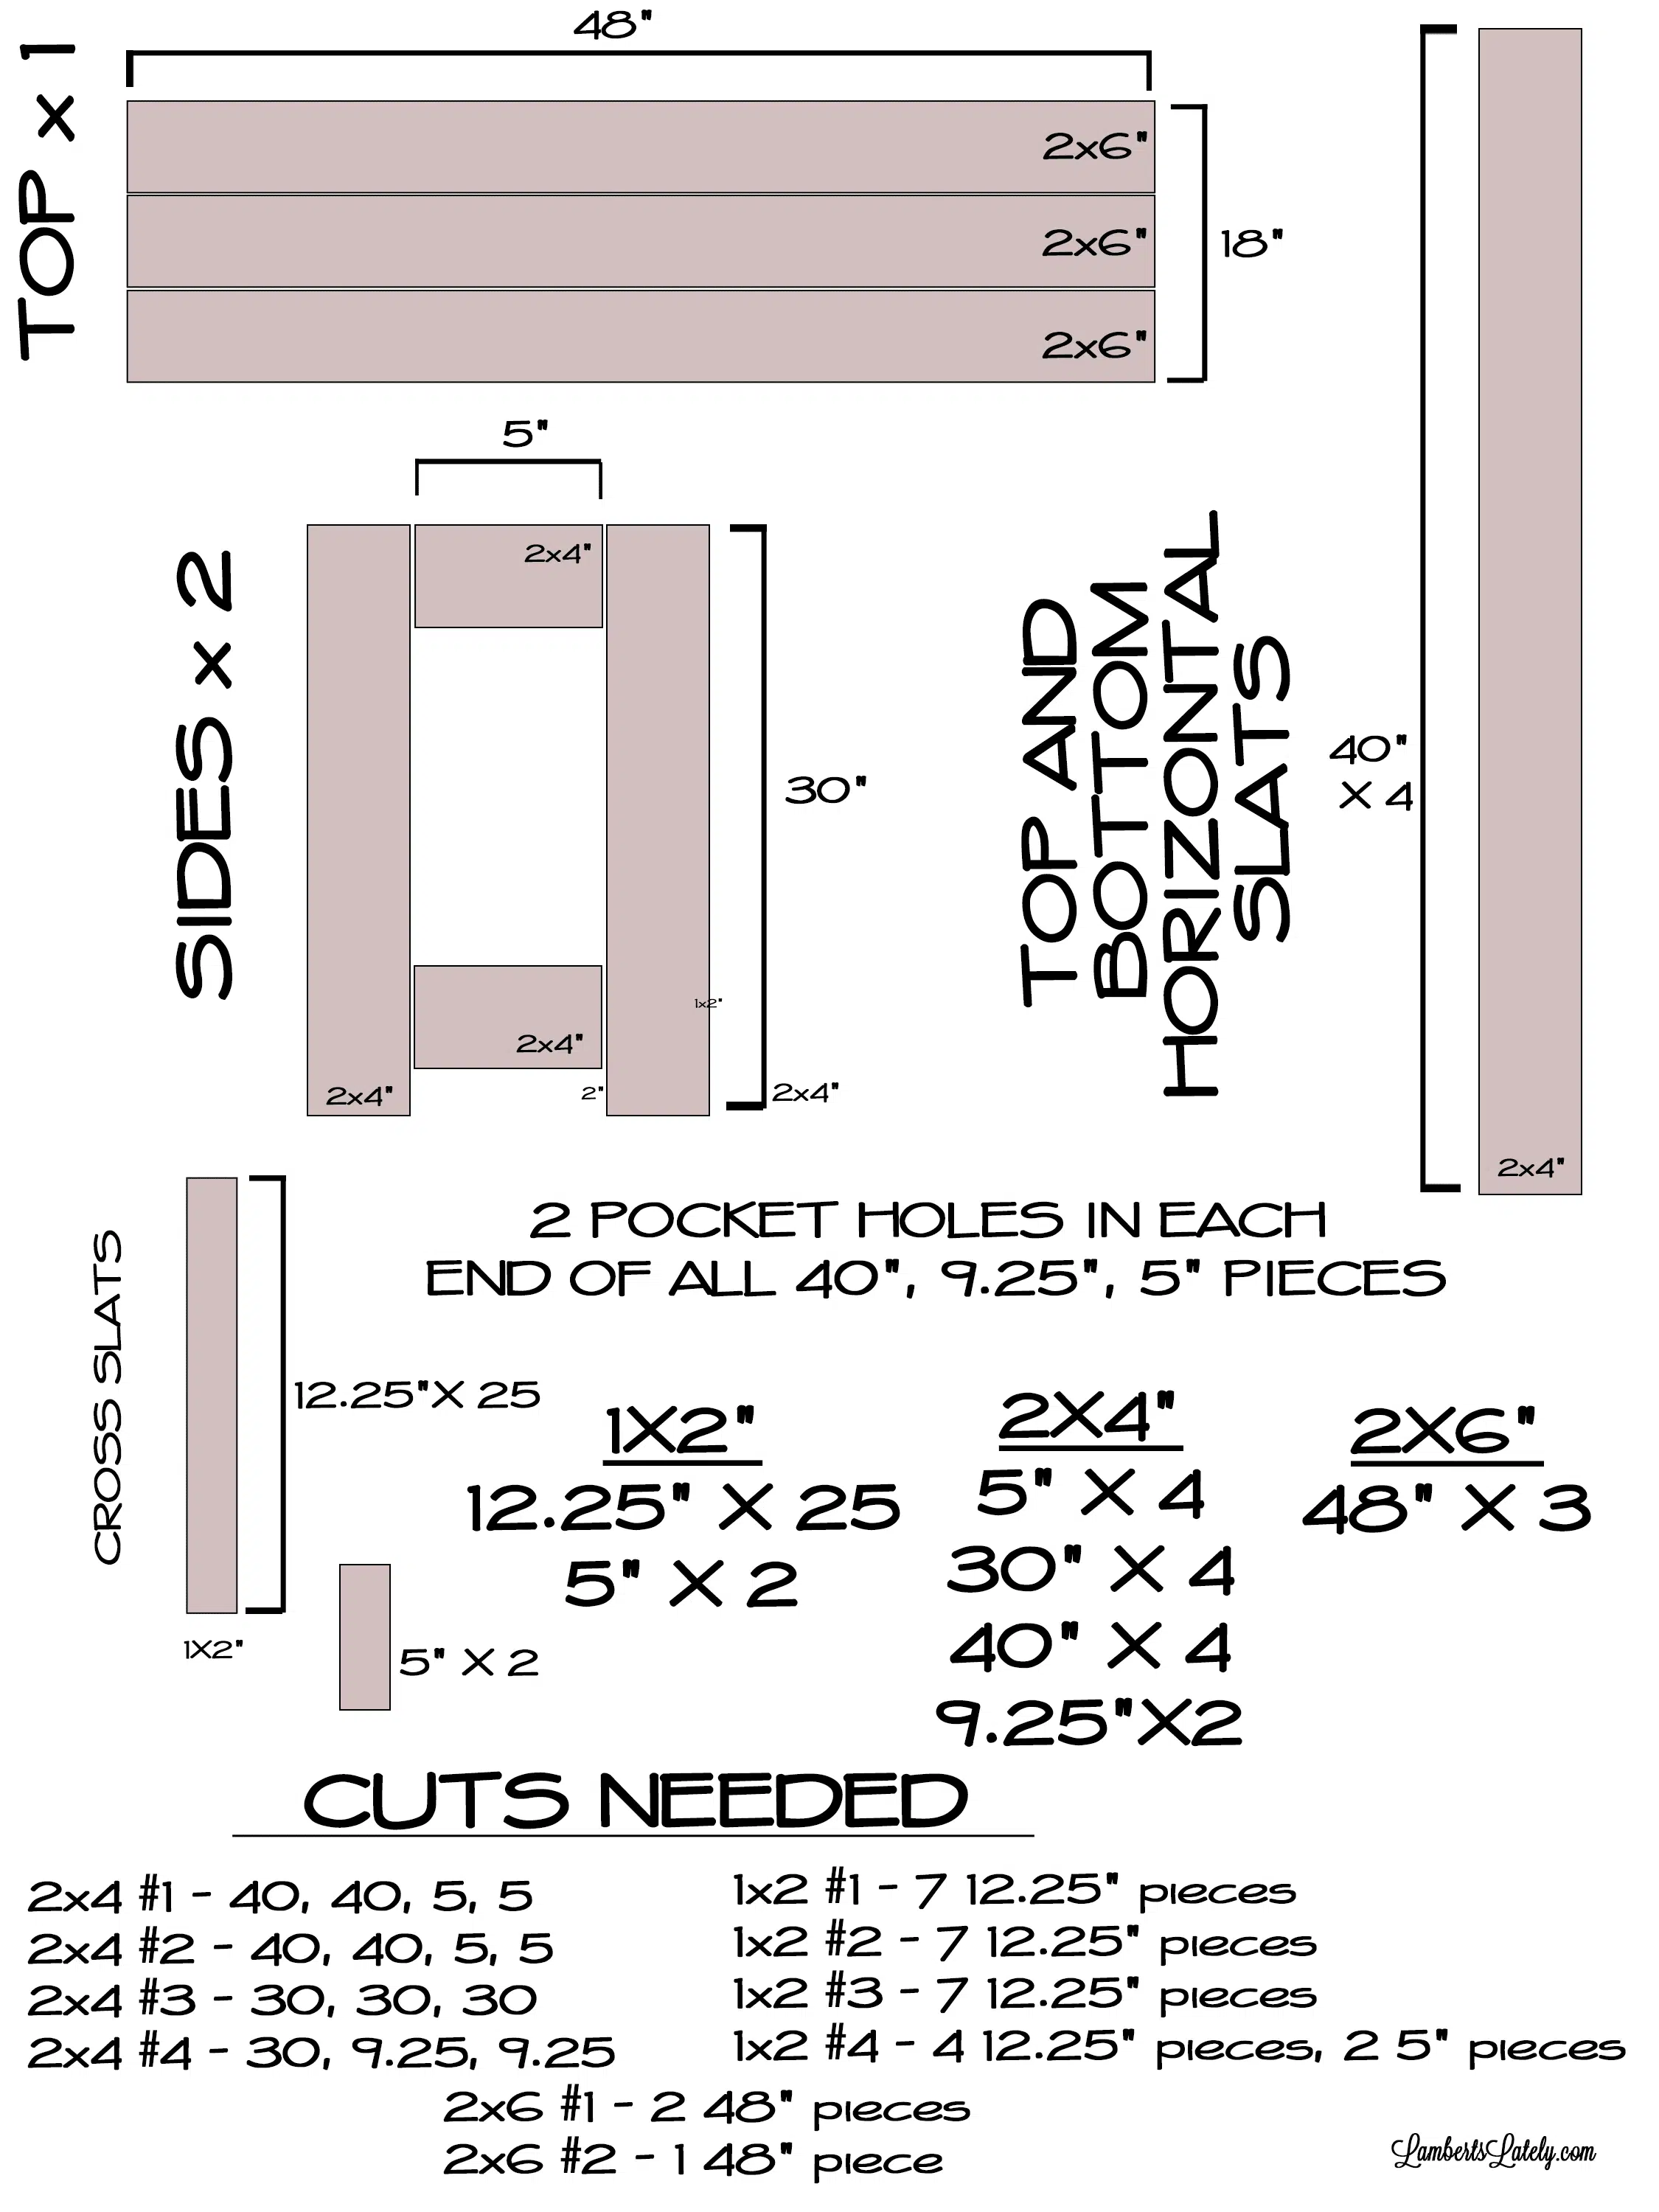
This is the plan I used for the cuts. You can also follow this list:
Wood Cuts
- 1st 2x4: 40", 40", 5", 5"
- 2nd 2x4: 40", 40", 5", 5"
- 3rd 2x4: 30", 30", 30"
- 4th 2x4: 30", 9.25", 9.25"
- 1st 1x2: 7 12.25" pieces
- 2nd 1x2: 7 12.25" pieces
- 3rd 1x2: 7 12.25" pieces
- 4th 1x2: 4 12.25" pieces, 2 5" pieces
- 1st 2x6: 2 48" pieces
- 2nd 2x6: 1 48" piece
Note: When in doubt, make those 1x2 12.25" cuts a little long. I originally planned on those being 13", but I had to go back later and cut some off to fit the table. You can always cut off a little later, but you can't add back!
Follow the same idea with the 9.25" pieces. I had to take a smidge off to fit our table, but that can be done later if needed.
Table Dimensions
The plans you see above will give you a table with the following dimensions: 48" wide, 18" deep, and about 42" tall.
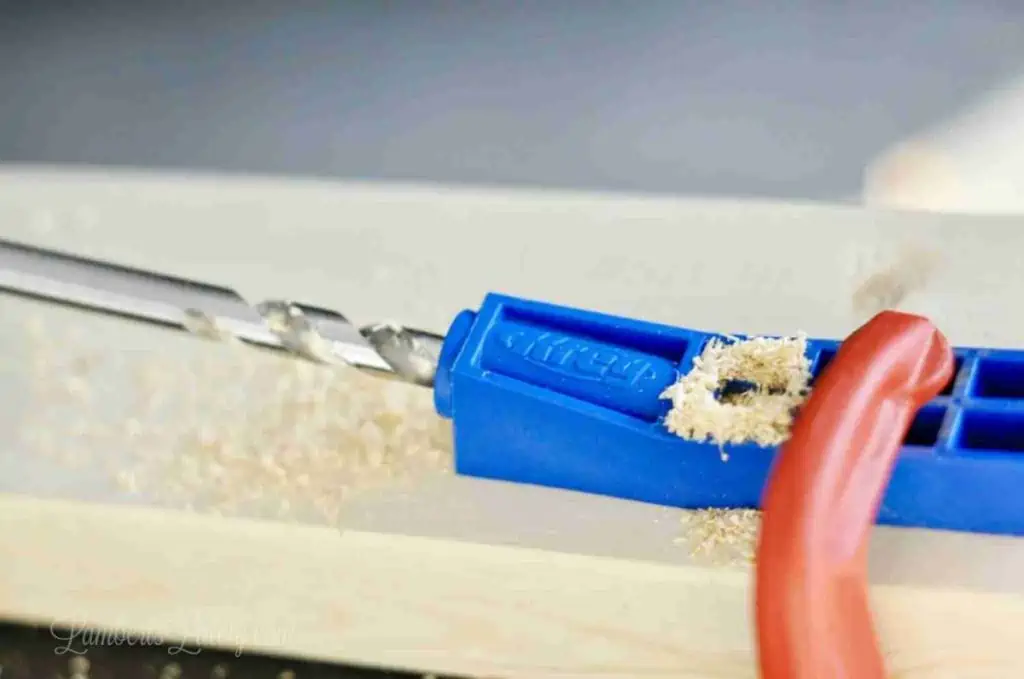
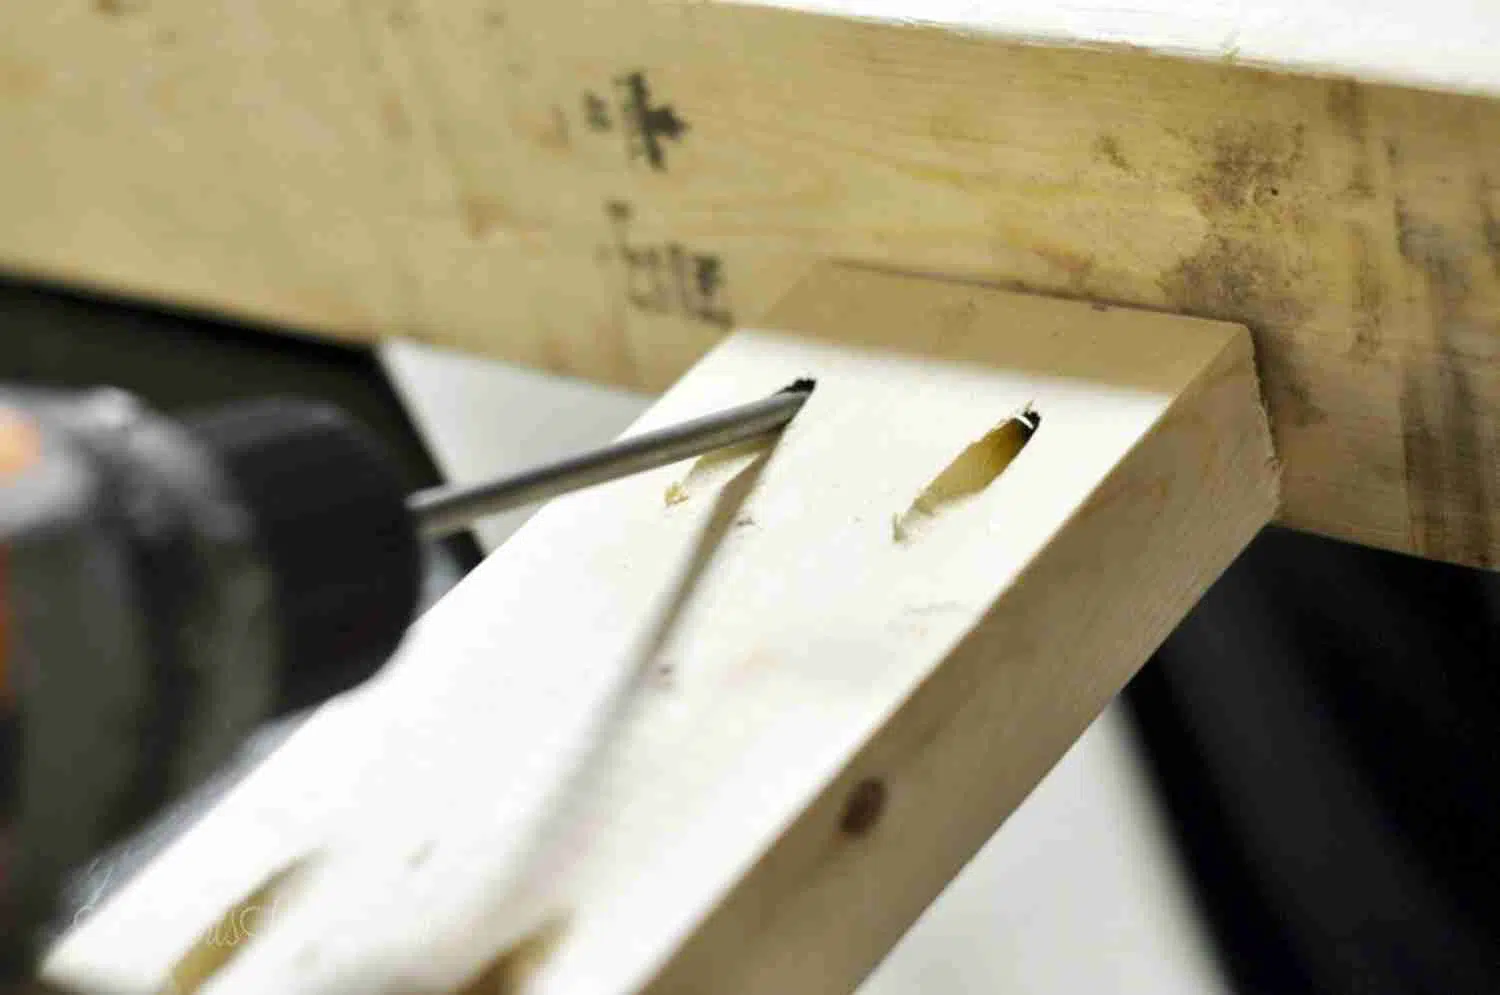
Once the wood is cut, go on and drill all of your pocket holes (using a Kreg jig) as well. You'll need 2 pocket holes on the ends of each 40" and 9.25" 2x4s (so 4 total in each piece). It's kind of a tight fit to put 4 total pocket holes in each 5" piece (2 at each end), but it is doable. You can see the picture below to see how close we had to put them.
Step 2: Assemble table ends and attach them to make the table frame.
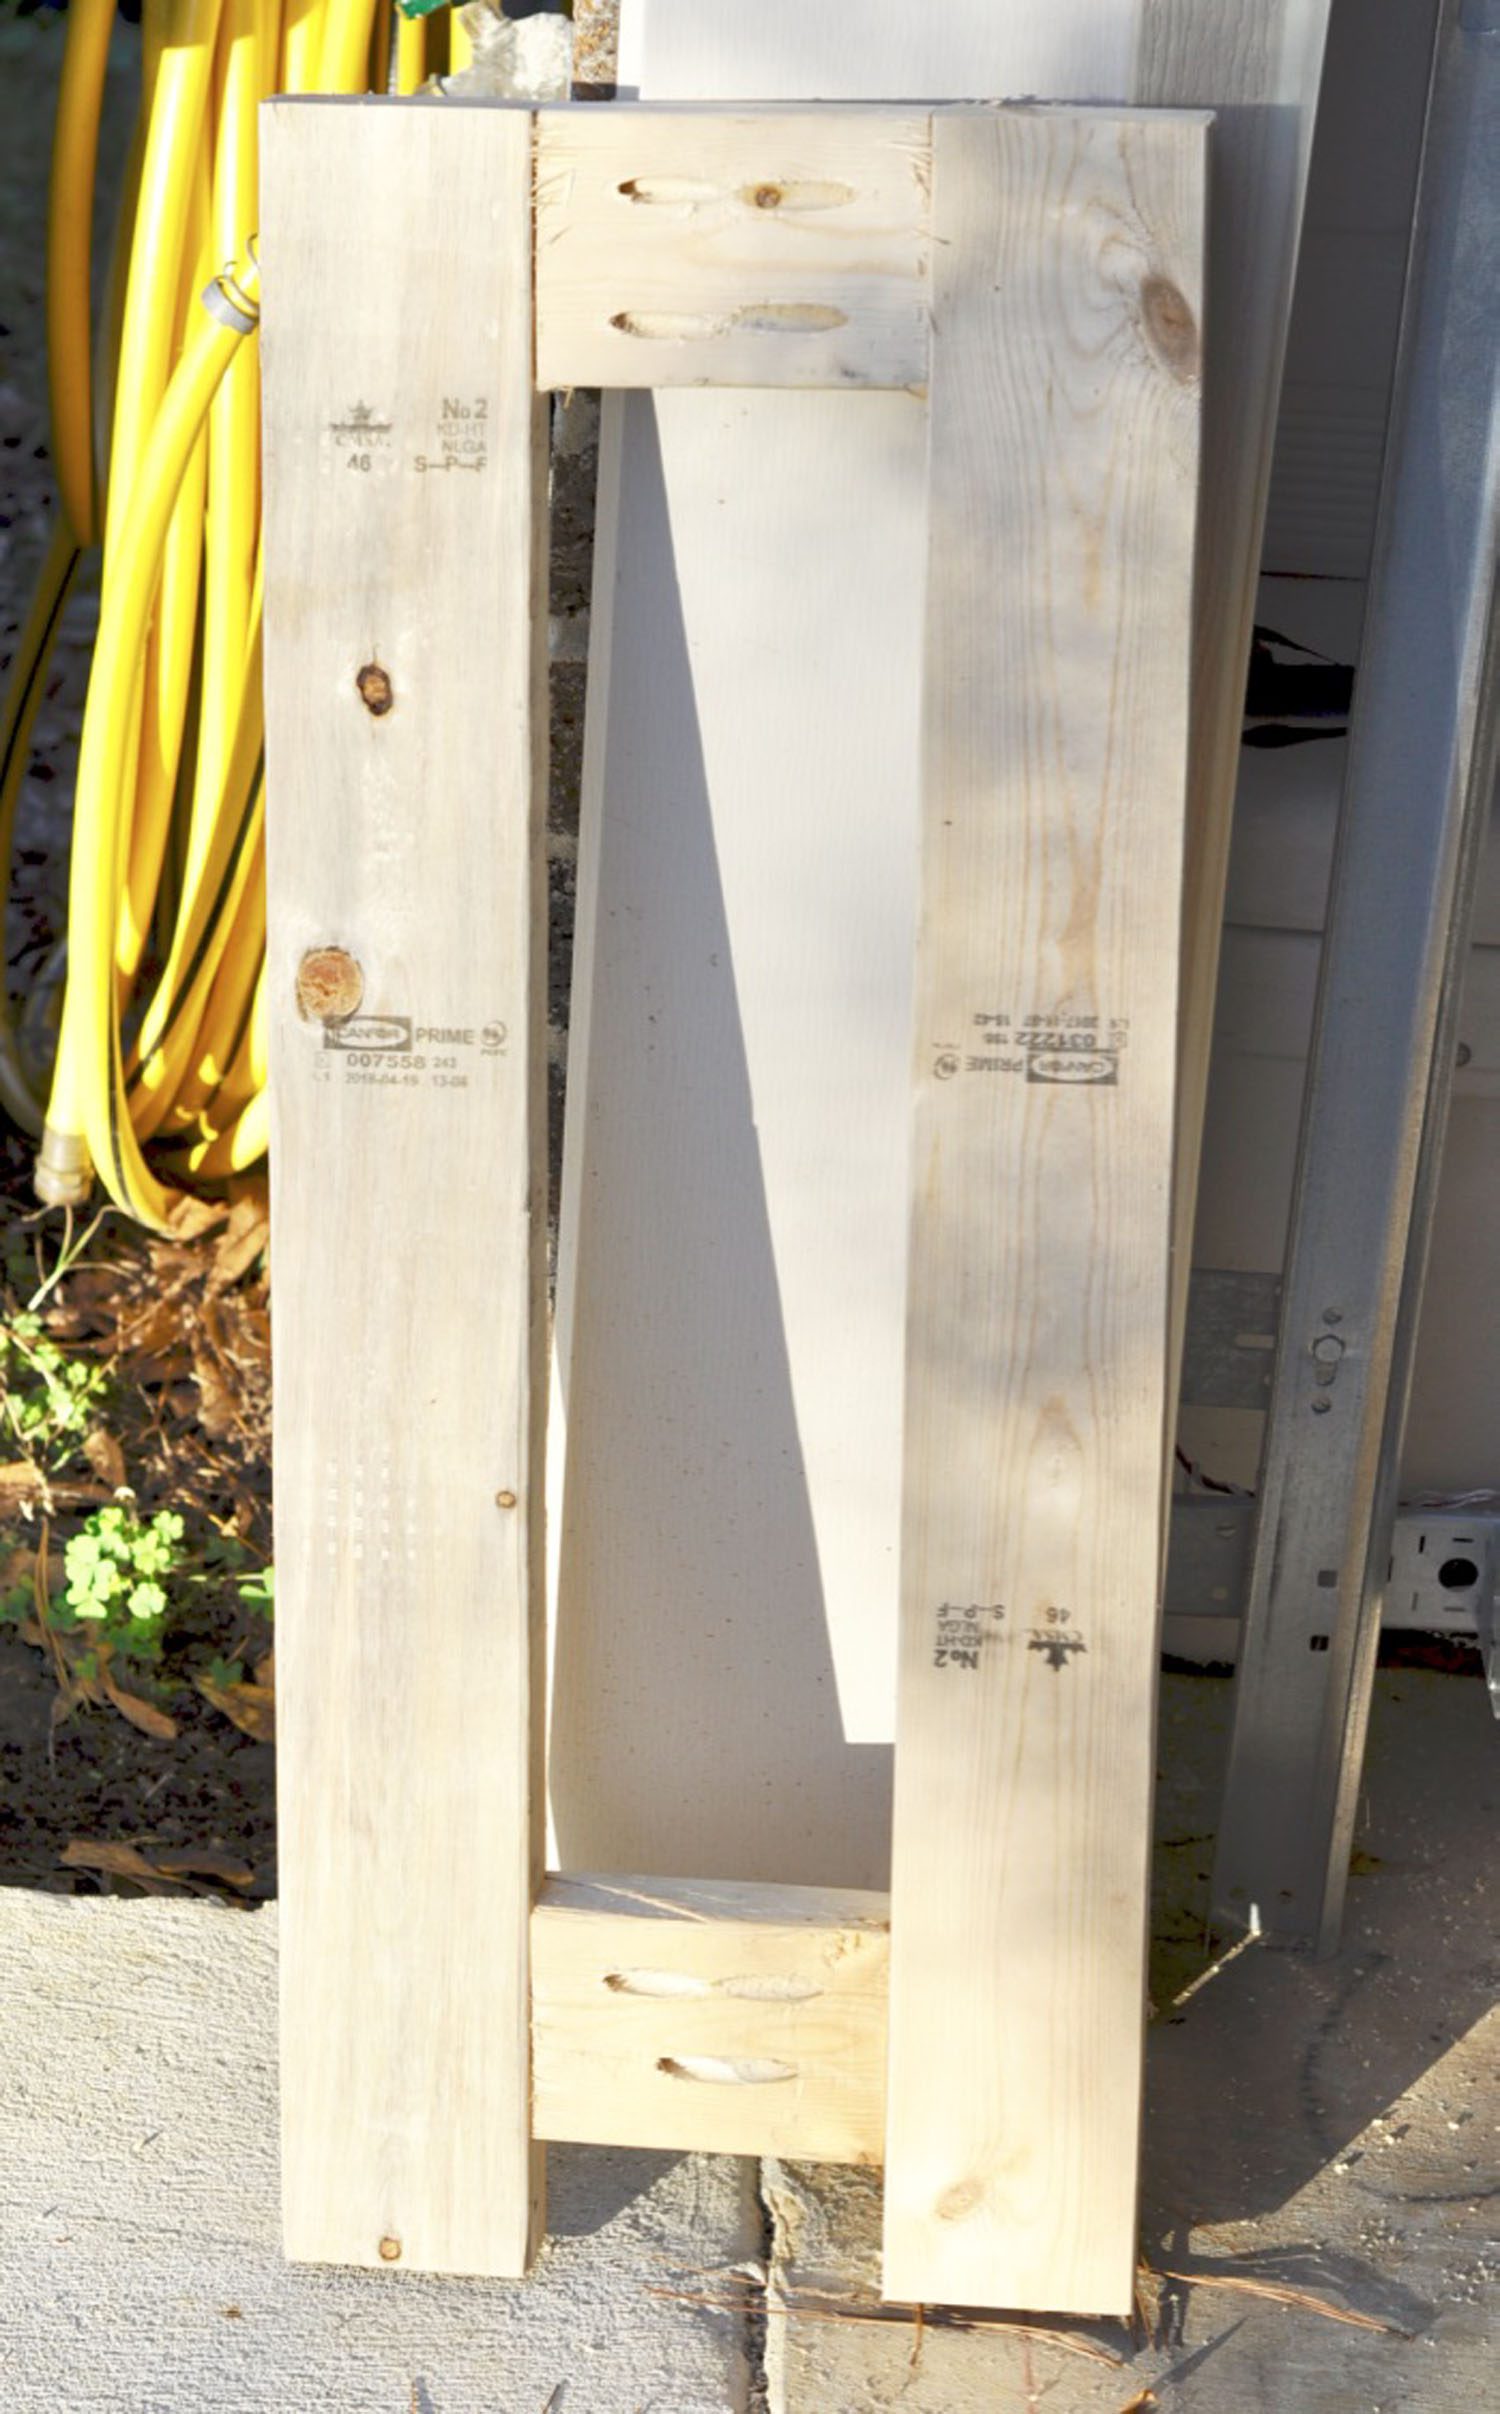
Now, the assembly can start! Take 2 of the 30" 2x4 table legs and attach them with 2 of the 5" pieces (as seen above). It helped me to lay all 4 pieces in place flat on the floor and to push what will be the top of the table up against the wall. This helps make sure the 5" piece at the top is flush with the top of the 2 30" pieces (so you'll have a nice flat table top).
Drill the 2.5" pocket hole screws into each pre-drilled pocket hole in the 5" pieces to attach the four pieces of wood. The top 5" piece is flush with the top of the 30" pieces; the bottom 5" piece is 2" away from the bottom of the 30" pieces to give the table feet.
You'll assemble 2 of these end pieces; one for each side of the table.
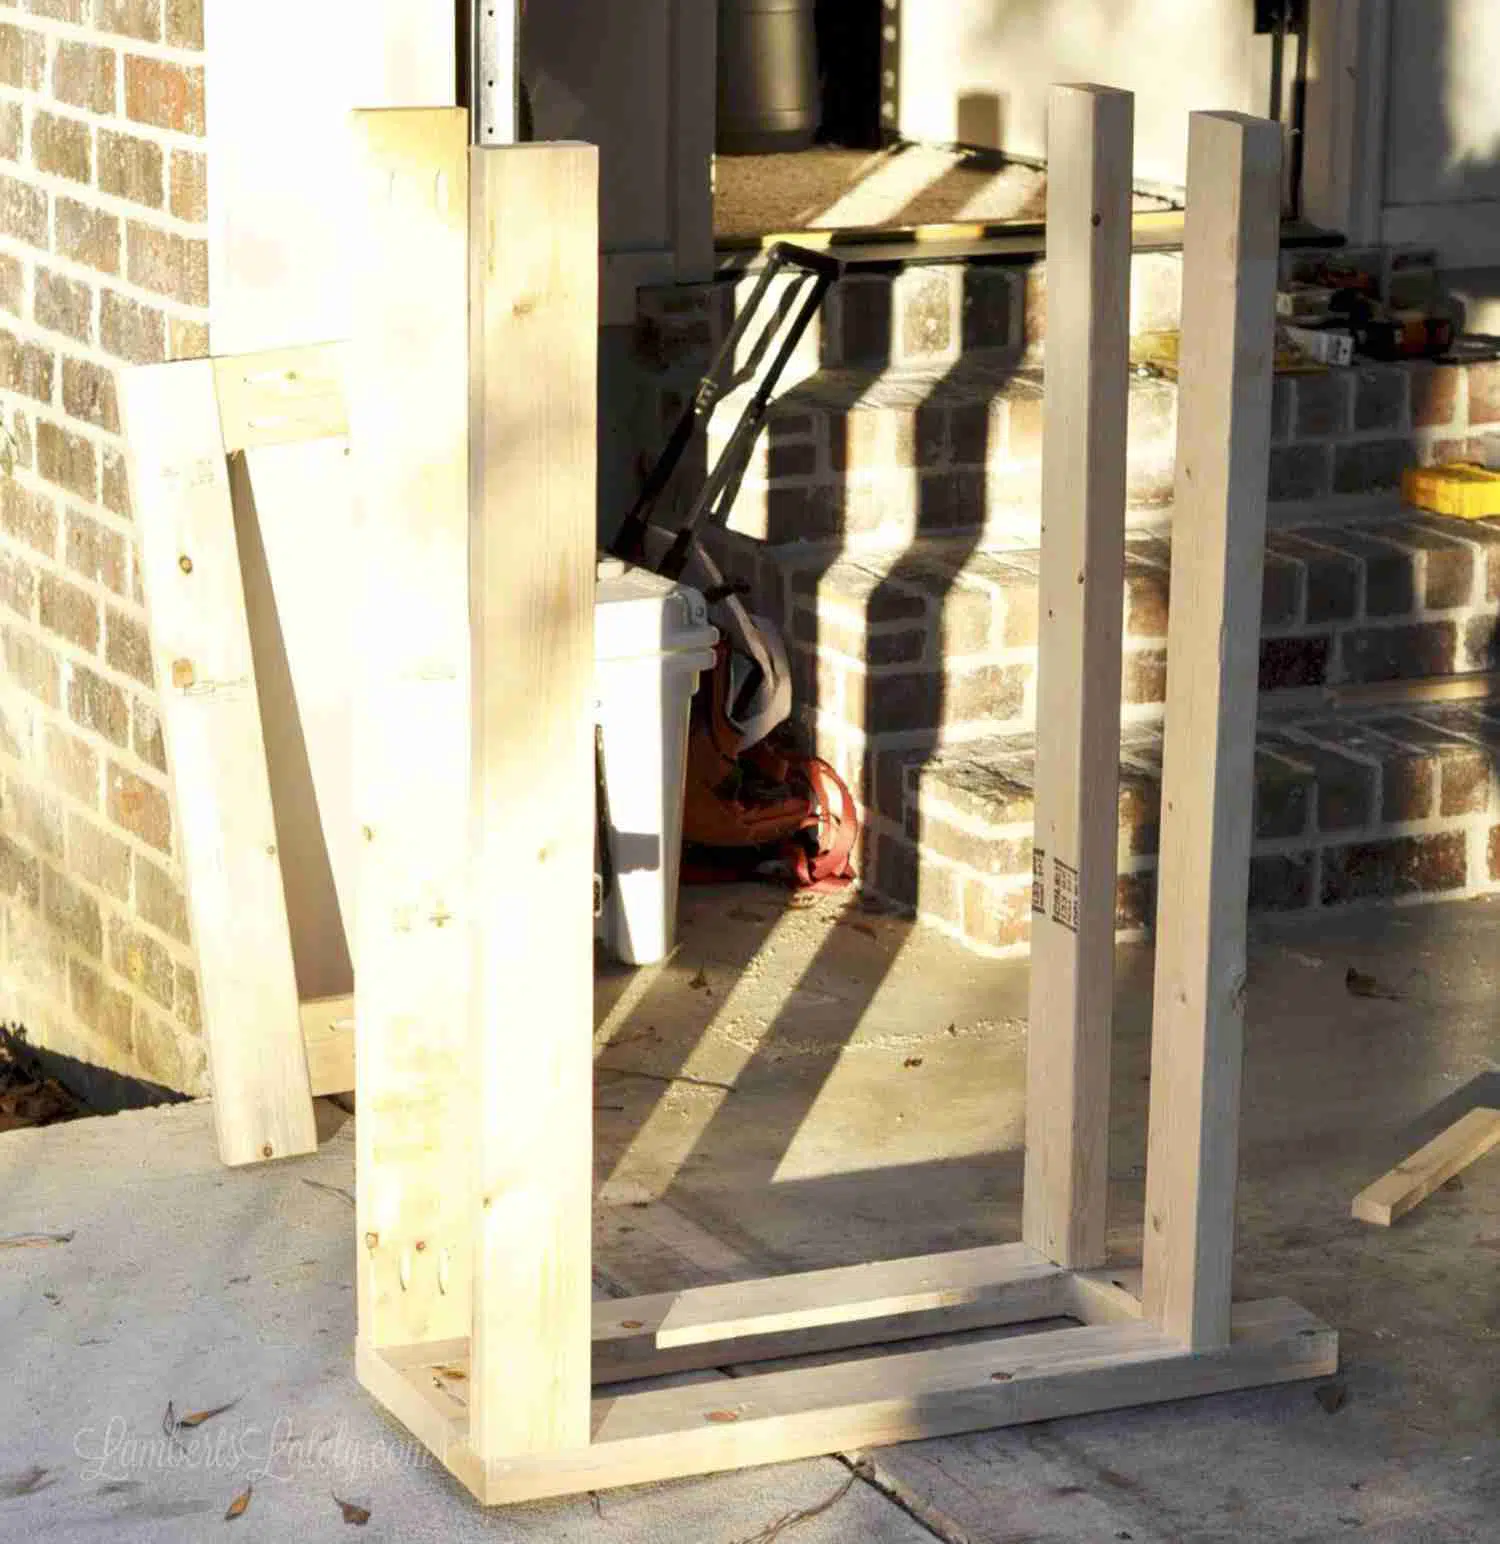
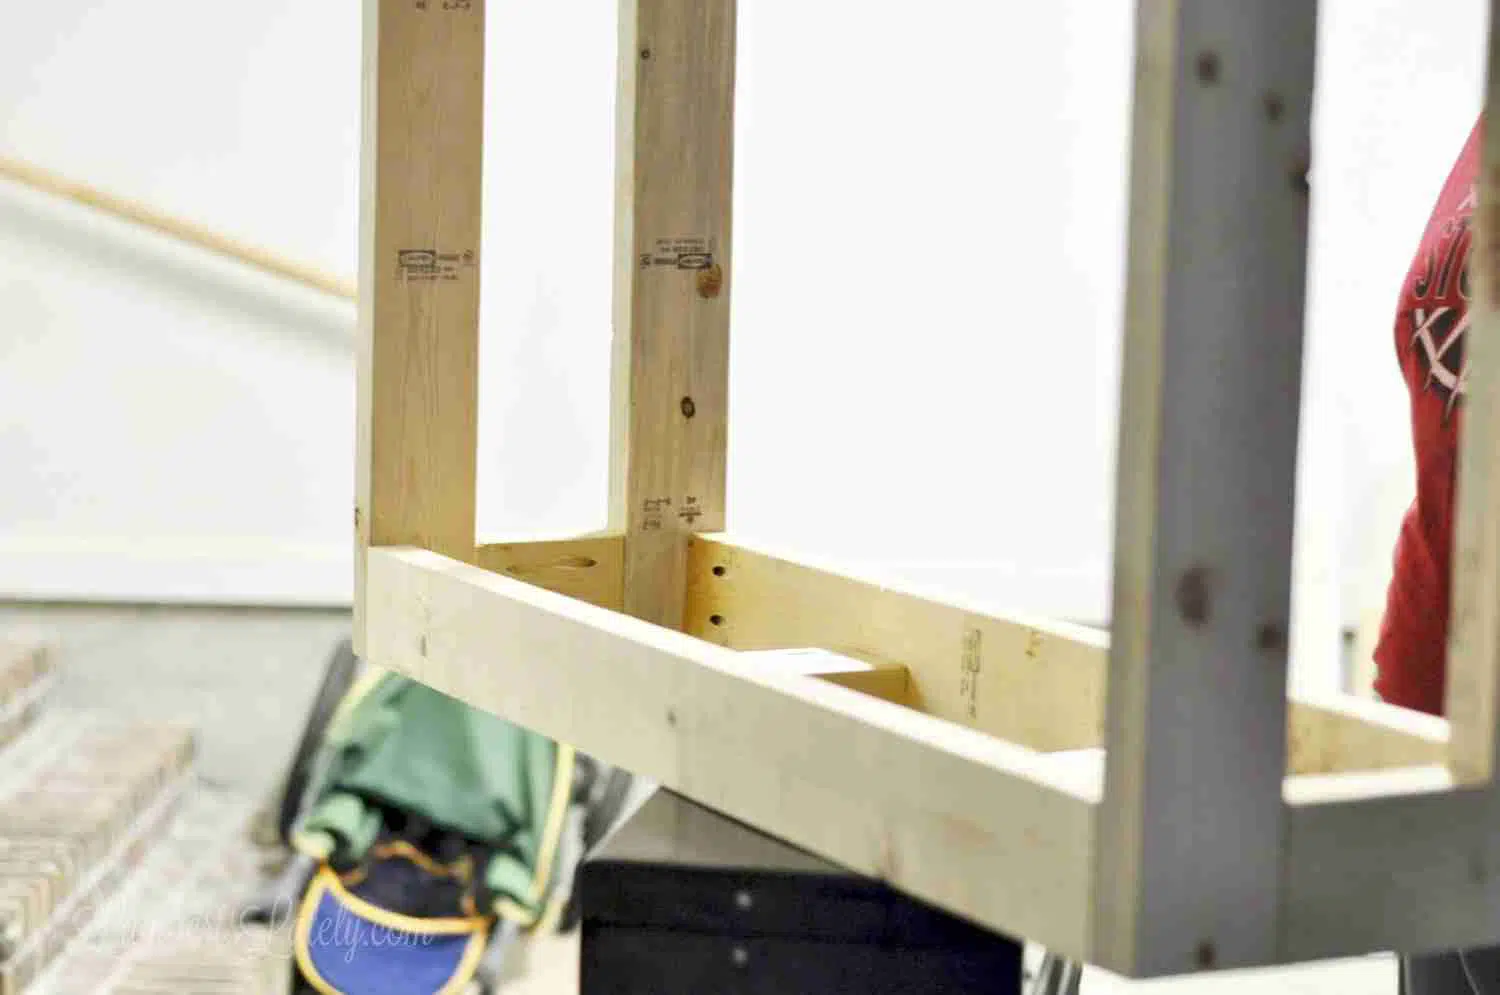
Once the two end pieces are finished, use the four 40" 2x4s to attach the ends. Looking at the image above, I have one end piece flat on the ground and the four 40" pieces sticking up.
The 2 40" pieces that will be at the top of the table are vertical and will line up with the outside corners of the end pieces. Drill the 2.5" pocket hole screws into the pre-drilled holes in the 40" pieces to attach to the first end piece.
The bottom 2 40" pieces will be horizontal. They will be flush with the top of the lower 5" piece (I hope that's not confusing; see picture to better explain). Place these 40" pieces where the pocket holes will be facing toward the ground in the final product and attach them with pocket hole screws. Once the four 40" pieces are attached, your table should look something like the picture above.
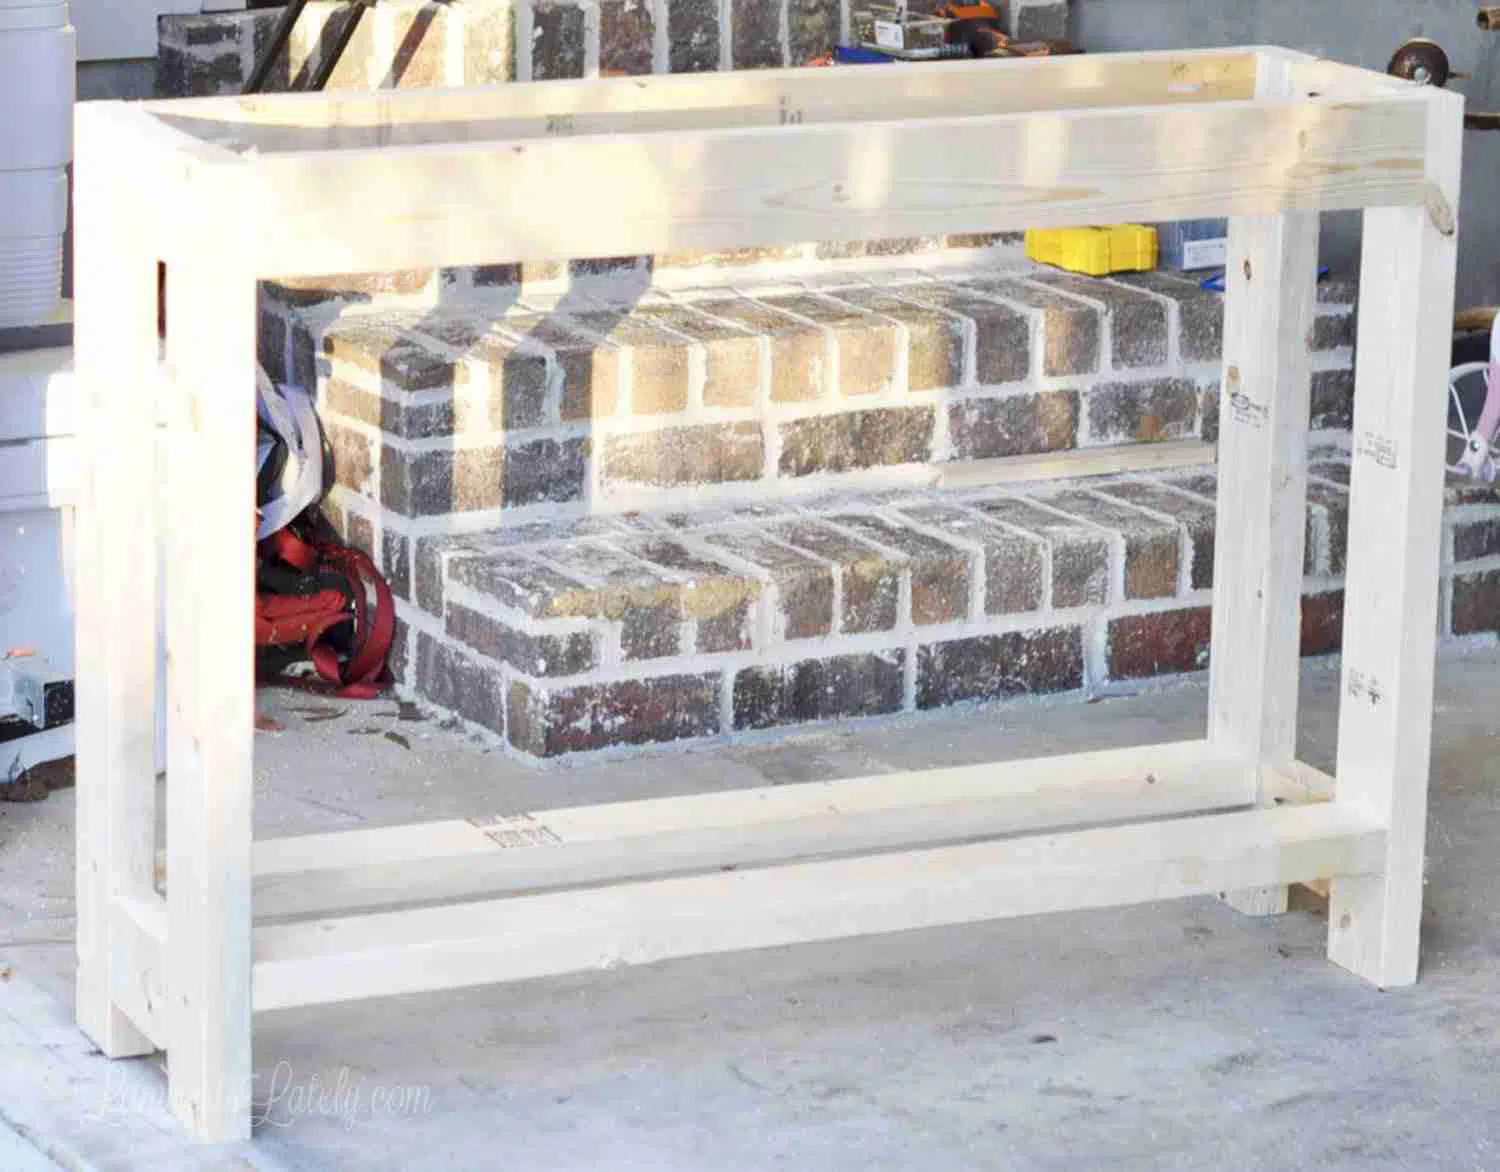
Lay the other end piece on the floor (with the outside facing the floor and pocket holes facing up), flip what you've assembled so far onto it, and line up everything just like you did on the first end piece. Drop pocket hole screws into each of the pocket holes on the 40" pieces to attach the other end. When you're finished, you should have something like what I have pictured above!
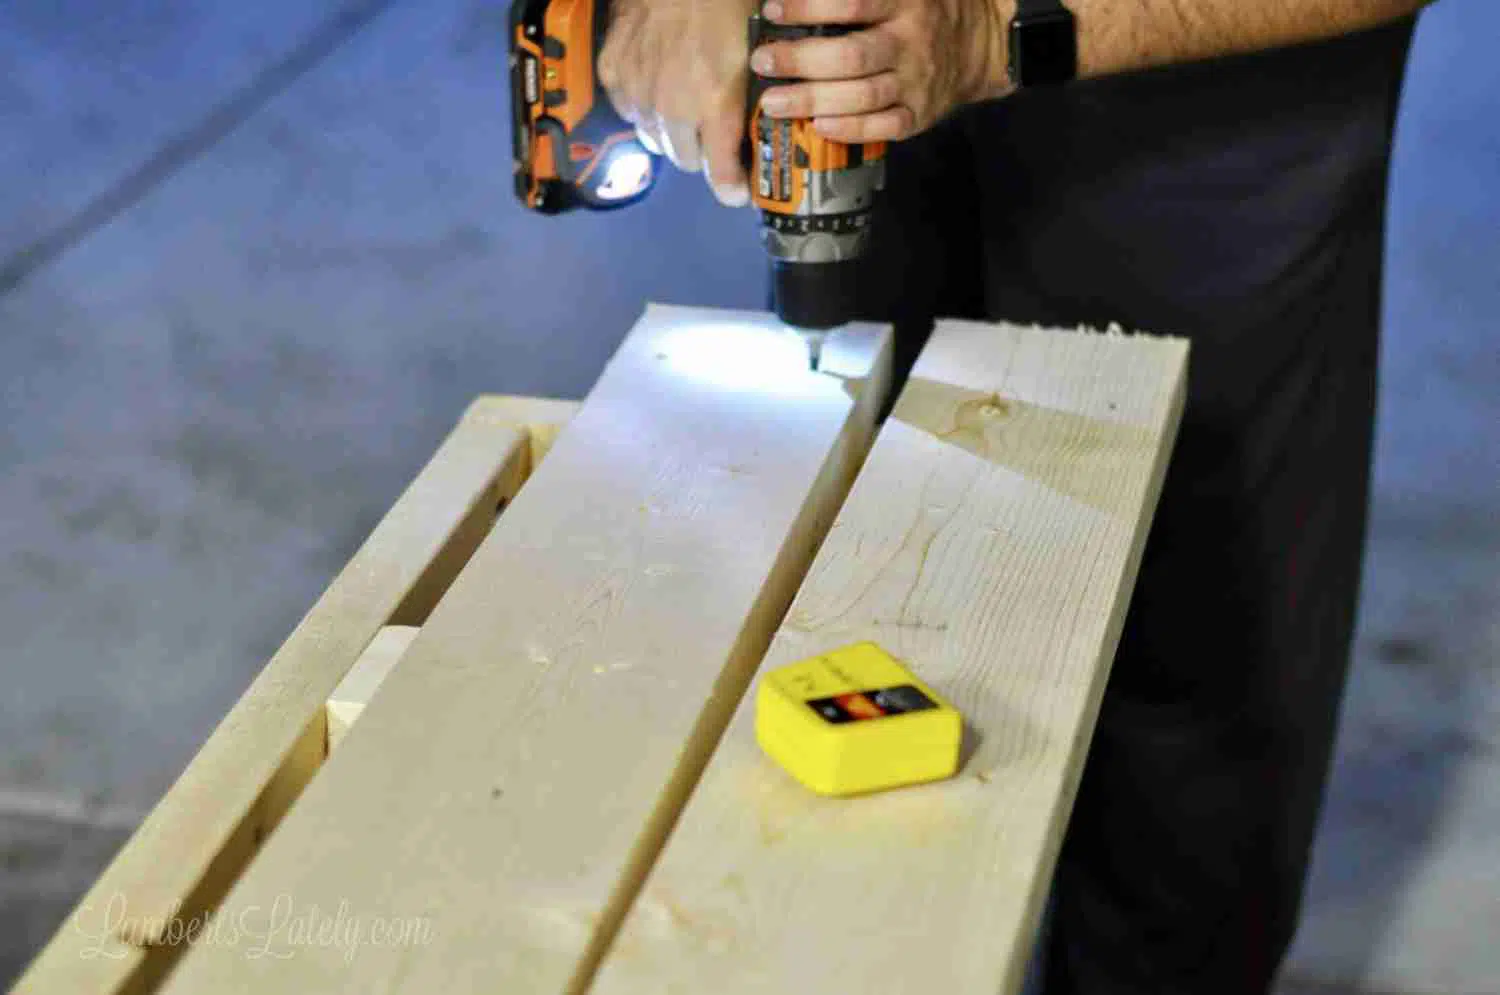
Step 3: Attach the bottom cross slats.
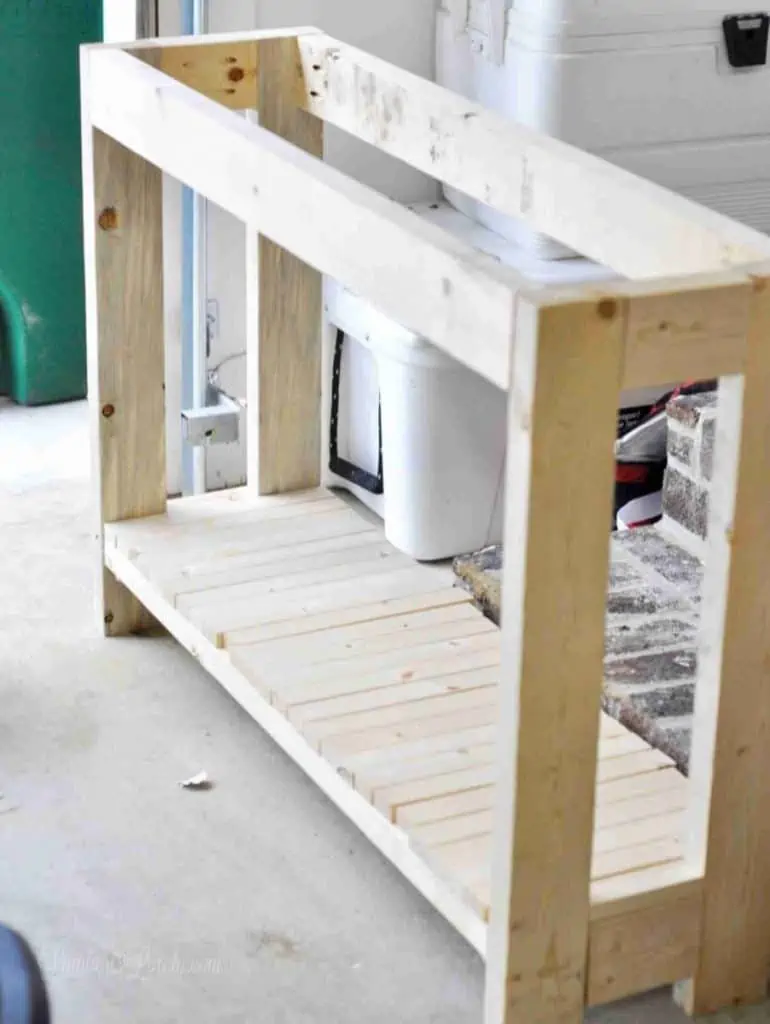
If you've already made the cuts, you should have 25 1x2" pieces. Line those up between the two end pieces with a small gap in between each (I didn't really measure these gaps, I just made sure the pieces were evenly spaced). Put the two 5" 1x2 pieces in the gaps between the end pieces to complete your bottom row.
Once these are lined up, check to make sure all of the 1x2s are the same length and adjust as needed.
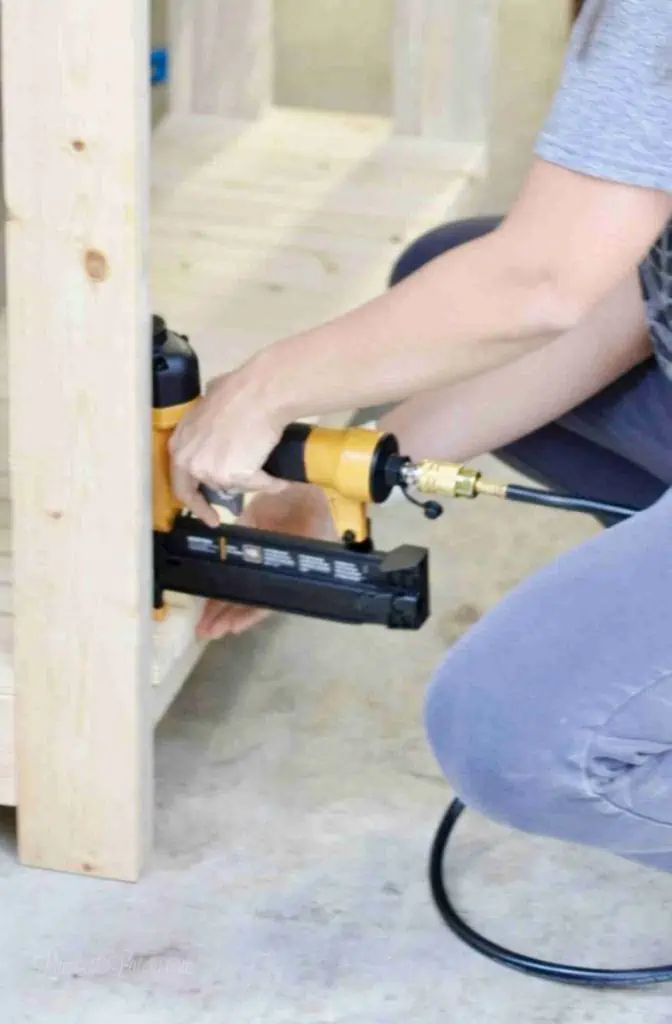
Once they're lined up and all the same length, simply nail them in place! Our air compressor made this job a hundred times easier, but this can be done with just a hammer and 1.5" nails. I put one nail in each end of each slat (2 nails per slat).
Step 4: Attach the farmhouse tabletop.
The final two 9.25" 2x4s that you haven't used yet are going to be the support braces for the tabletop.
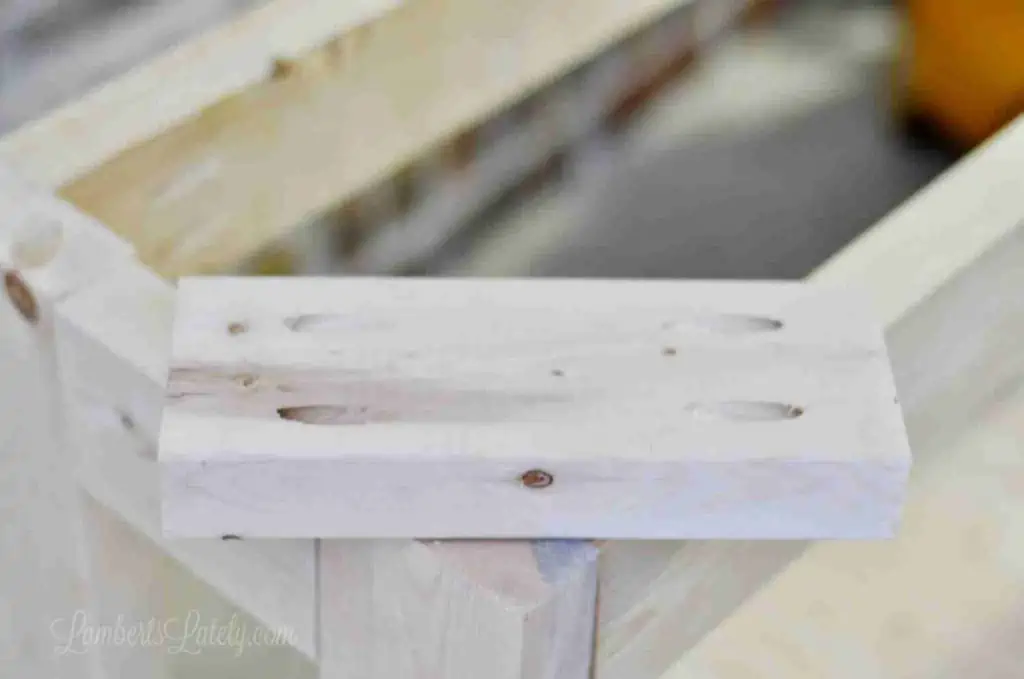
These braces should already have pocket holes in them. The easiest way to put these in place is to turn your table over onto a flat surface and lay these supports flush with the top of the table to attach them.
These don't have to be spaced perfectly; nobody will ever really see them. Just kind of divide your table into thirds and place these ⅓ of the way and ⅔ way into the length of the table. Drill 2.5" pocket hole screws into each pocket hole.
Then, center one of your 2x6" top pieces (both vertically and horizontally) on the table top and use 2 2.5" self-tapping screws on each side to attach. I also put a screw into each support brace for this one (so this center beam will have 6 total screws in it; two on each end and one in each support beam).
Once the center piece is in place, line up one of the other top pieces and attach it with a 2.5" self-tapping screw on each side (making sure you're drilling into the table when you attach) and 1 screw in each support brace. That makes for four total screws in each of the back and front pieces.
When drilling all of these, make sure to drive them in deep so the holes can be filled later.
You have a table! Now, let's make it pretty.
Step 5: Fill, sand, paint, and stain.
First, go on and fill your top screw marks in with a wood filler. This is the one I used for this project - it stained perfectly. You'd never know there were screw holes in the top.
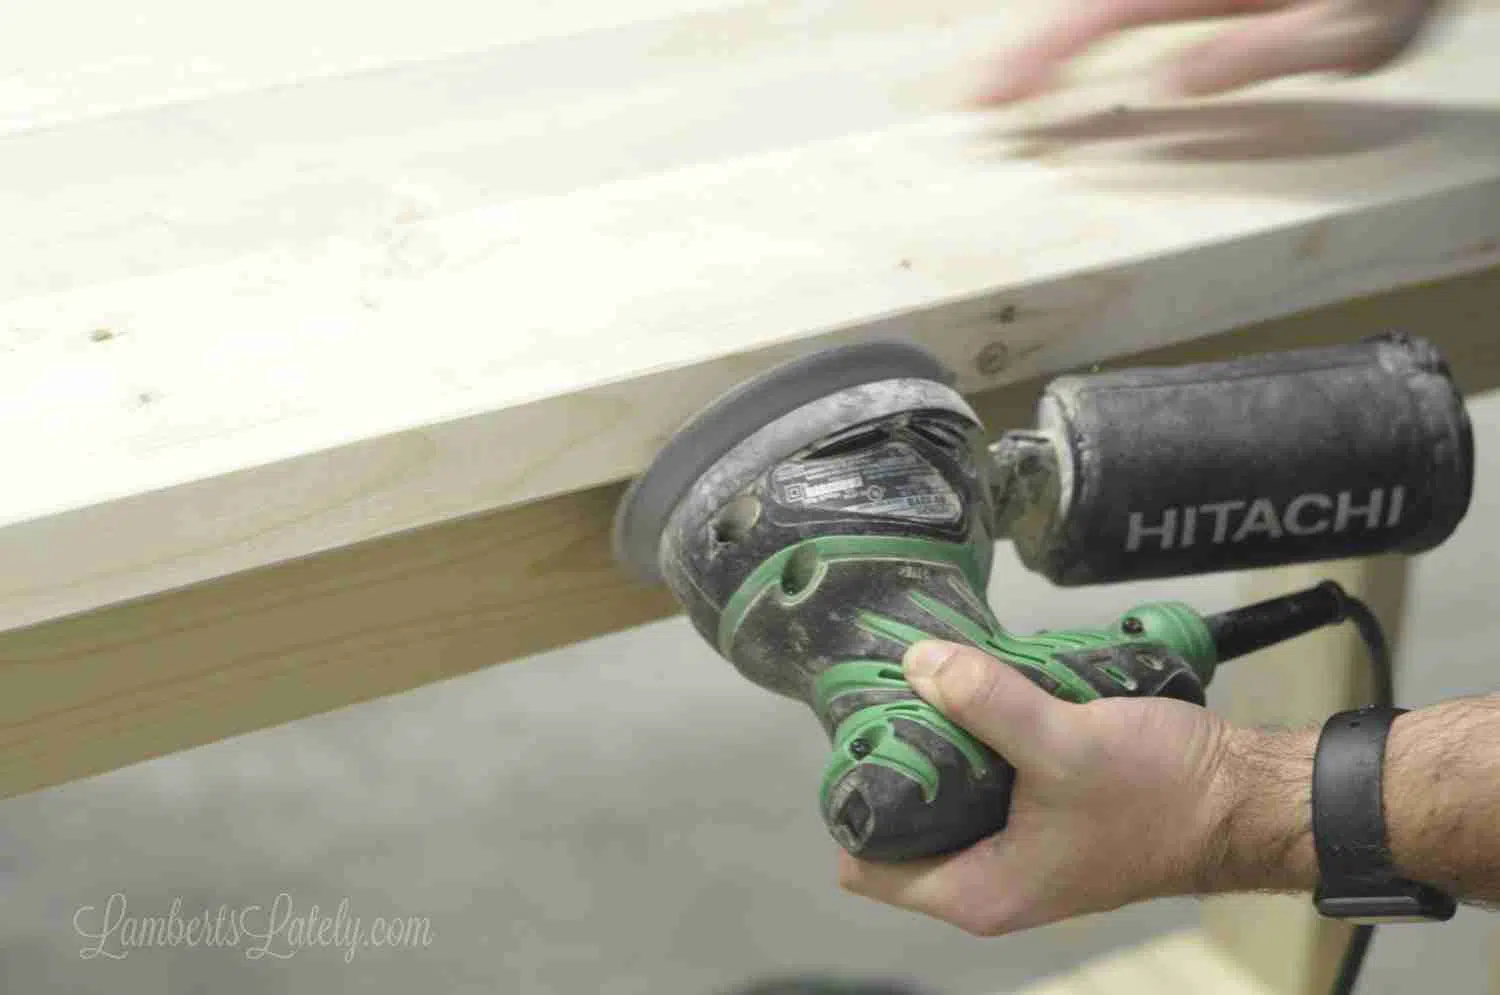
Once that is dry, give every exposed surface a good sand with an orbital sander. My edges had a little bit of a rough edge to them, so we sanded that down and took off any sharp corners to give it a slightly weathered look.
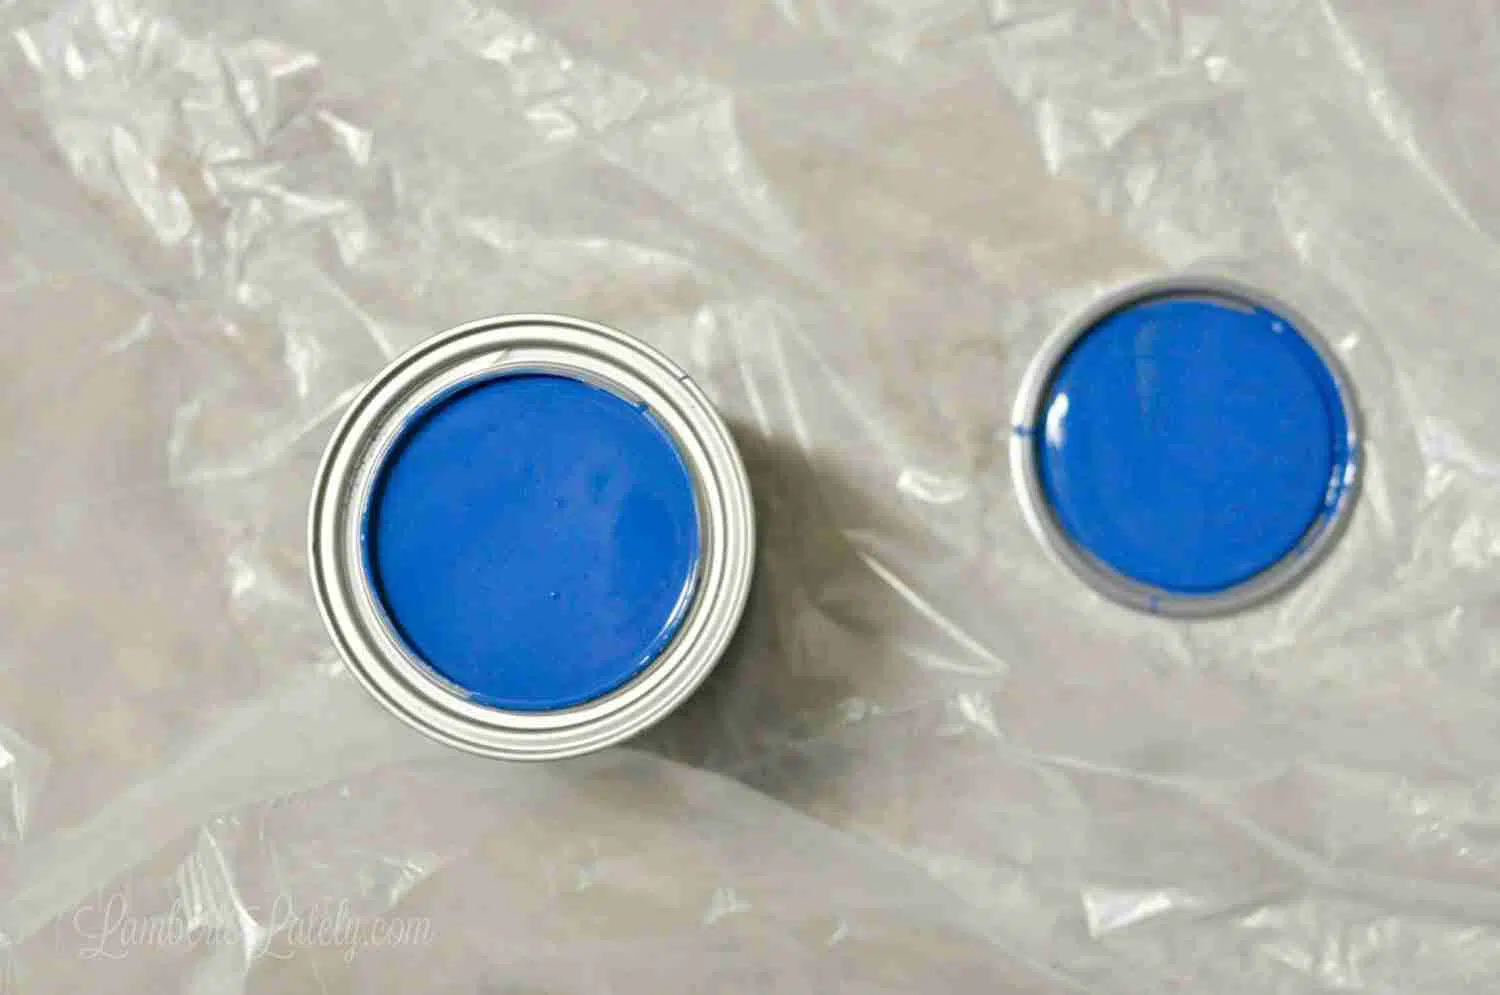
Then the fun part - paint! For my little pop of color in this project, I used Deep Sea Diving by Valspar (not available anymore, but can be matched if you google it). It only took about a quart of paint to complete the whole bottom of this table.
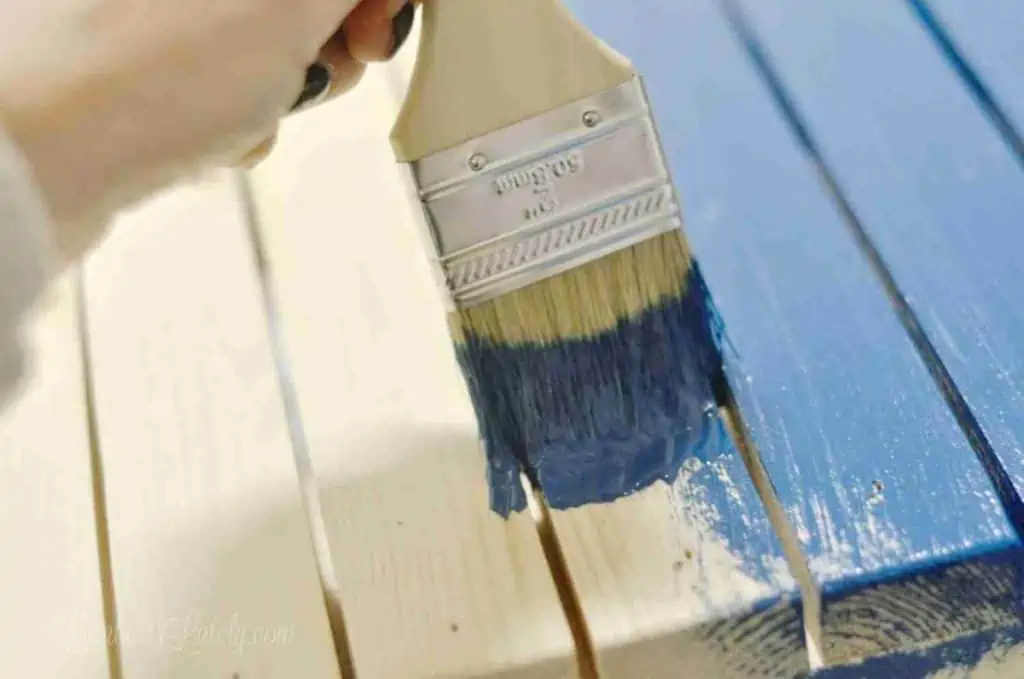
Give the bottom of the table about 2 coats to completely cover. The hardest part is getting between those bottom slats - having a bristled brush helped with that.
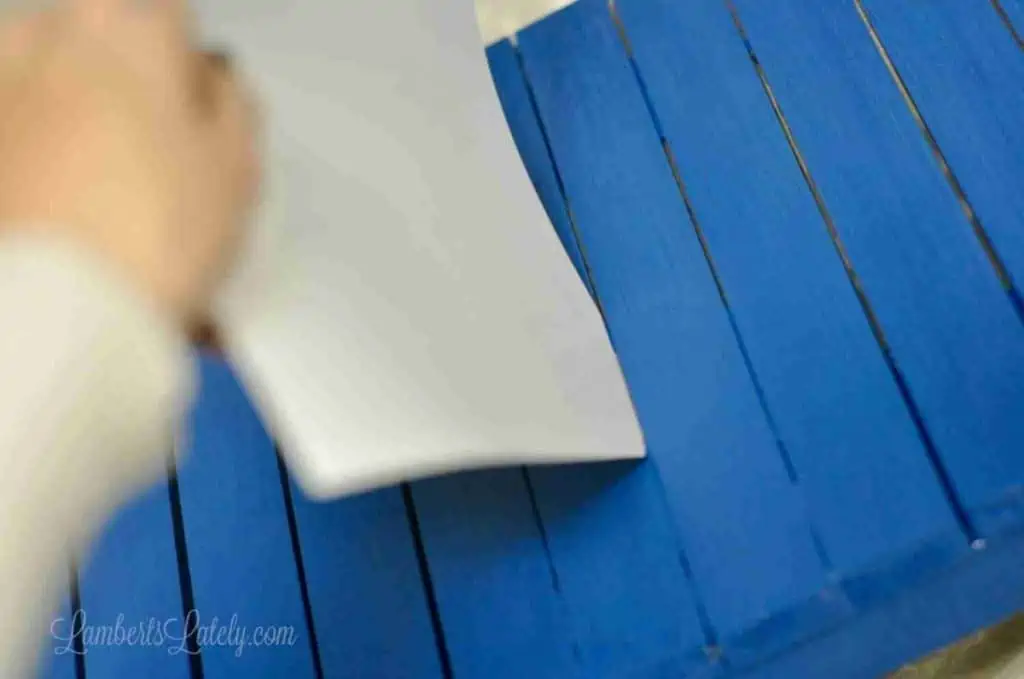
And, if/when the paint pools between those bottom slats, simply run a piece of card stock in between the pieces of wood to separate it before it dries.
While that second coat dries, go on and start staining!
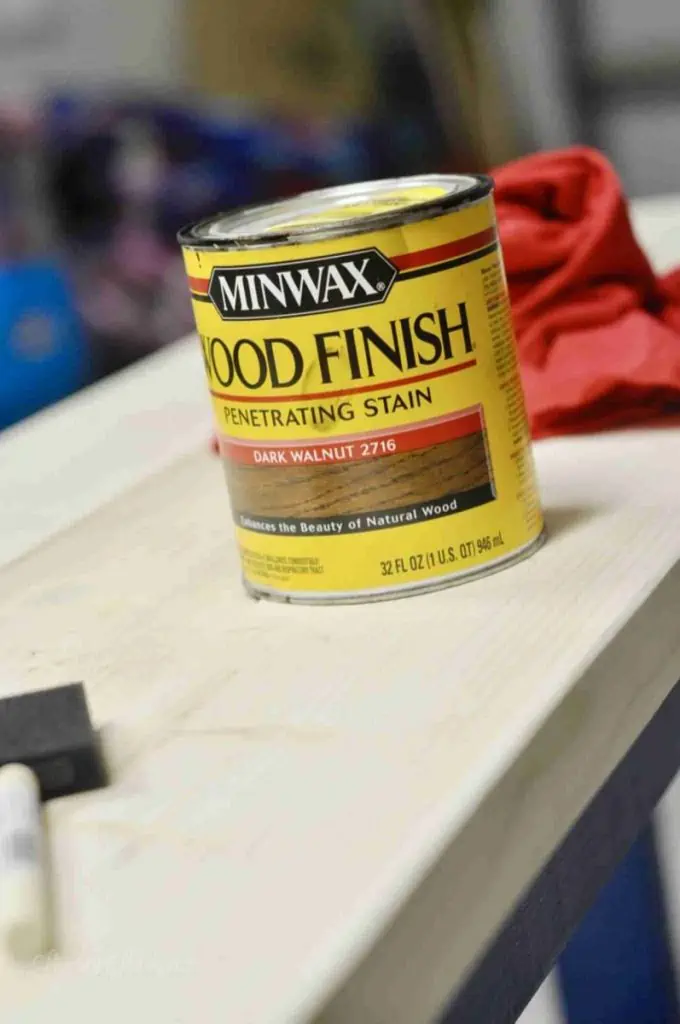
Many of you long-time readers know how much I adore Minwax Dark Walnut Stain. It's incredibly versatile. I've used it in our farmhouse kitchen table, behind the couch table, and DIY blanket ladder and was able to achieve different colors with each, depending on how heavy I put the stain on and how long I kept it on.
So, of course, I used it for this project as well!
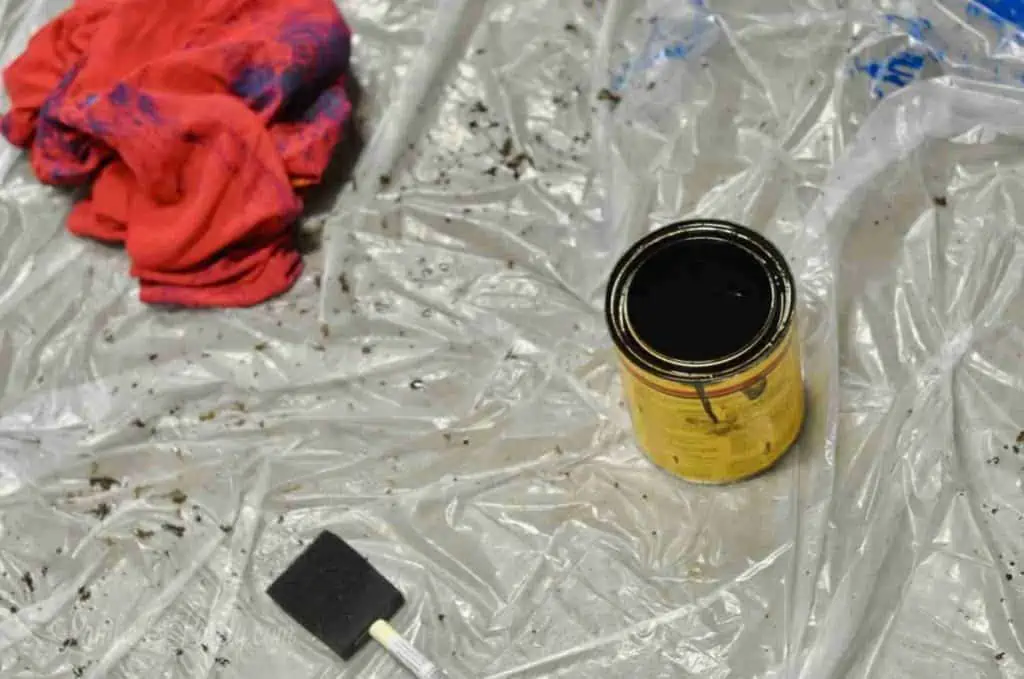
I just use a cheap sponge brush and an old t-shirt to apply stain (I saved the scraps from my DIY tee shirt quilt and have been using them for projects like this ever since). Lightly brush the stain on, let it sit on the wood for a few minutes (longer if you want a deeper stain), then wipe off the extra gunk with the old shirt. Repeat until you get the color as deep as you'd like it.
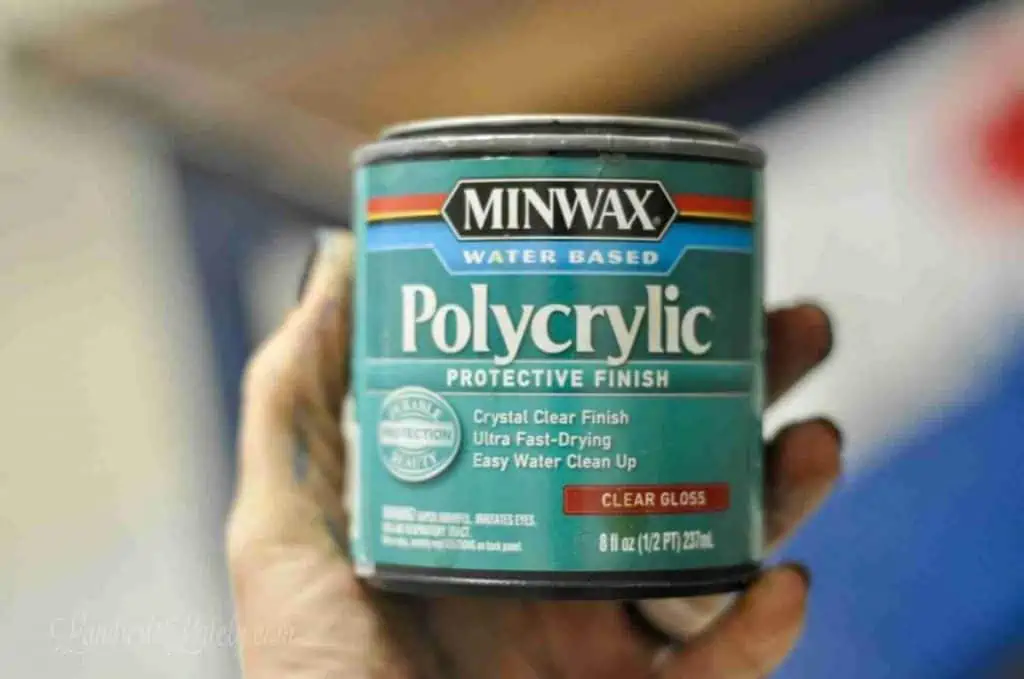
Anytime you stain, you have to seal. Let your stain dry for an hour or so before applying this. Minwax Polycrylic has been my long-time favorite polyurethane. It goes on so easily, has a quick clean-up if needed, and is incredibly durable.
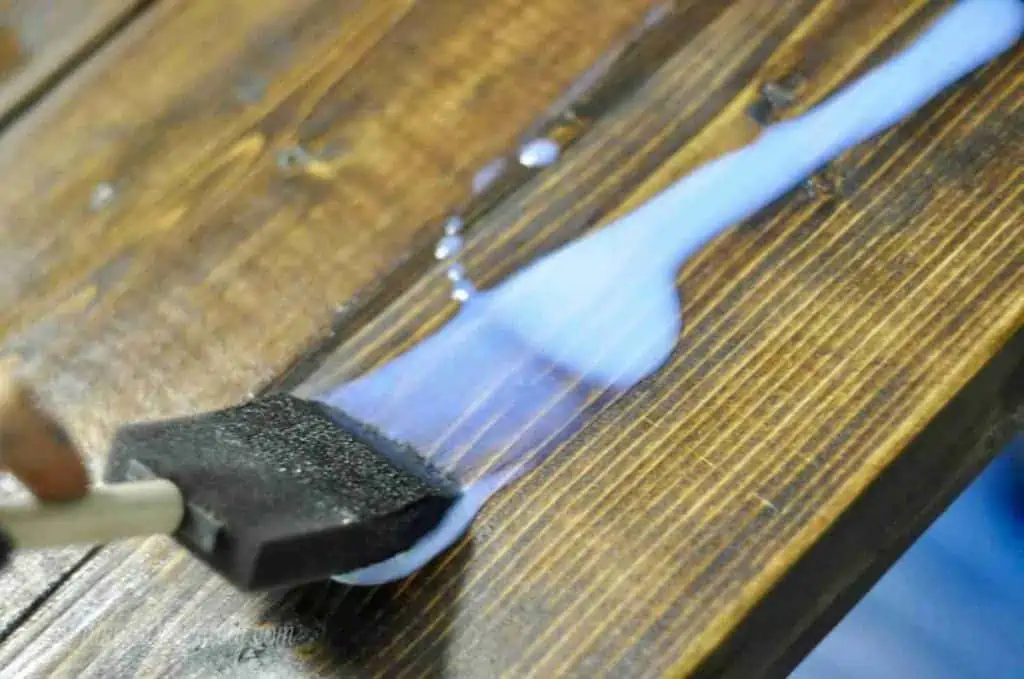
Pour a little on (it's going to look like glue, don't freak out) and spread with another sponge brush. It might have a slightly milky look to it even after you spread it. That goes away as it dries.
Make sure to get both the top and the sides of the tabletop. Anything that has been stained needs to be sealed. (It's not necessary to seal the paint.)

You want polyurethane coats to be on the thinner side. Let the first coat dry for about 30 minutes and repeat as needed. I put 2 coats on this piece since I knew it wouldn't get a ton of wear and tear; you might want as many as 5-6 if this is going to be a heavy-traffic table.
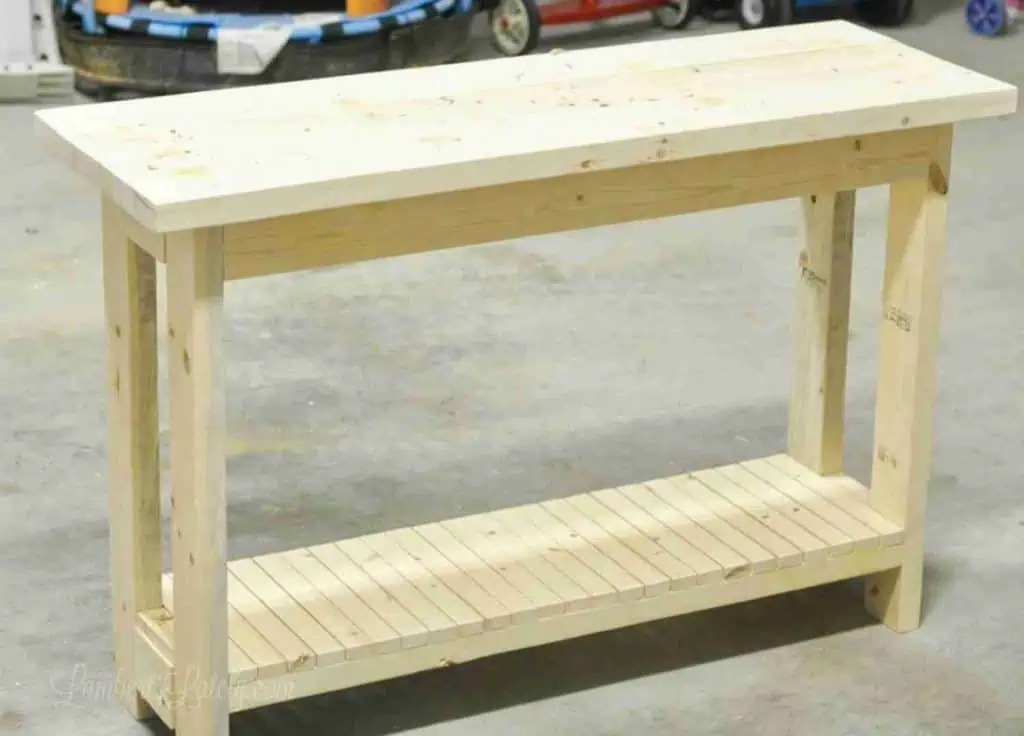
Final Results
Was this table a little bit of work? Sure it was. But this is truly something we've been able to enjoy for years and will be able to enjoy for years to come. I just love the result!
Hi Lesllie, I just built this table for my wife and I found a mistake in the length of a couple boards.
I found that the table-top supports which you have listed at 9.25" should actually be 8.75".
Other than that, the table looks great. Thank you for sharing it.
Thanks for the feedback, Doug!
In the supply list the 1x2 and 2x6’s should be 8’ not 8”
Ah, you're absolutely right. Just changed it - thanks for letting me know!
Can't wait to build this! Found this while browsing and it's exactly what I was looking for. Thank you so much for sharing.
Oh yay, I'd love to see pictures once you're done!