
See how to organize a small pantry with open shelving. Get ideas for inexpensive baskets to use, how to label food storage containers, and how to group food types.
Paid links used in this post. Read more about my link usage policies.
Welcome to a tour of our organized small pantry! I'm also sharing my organization process and a few organization tips for keeping your pantry clutter-free.
Before we moved into this house, we really never had a dedicated pantry. In our previous homes, we used extra cabinet space for food storage. Years ago, our little apartment had a small closet for the pantry. I honestly think it offered about as much (if not less) storage than the cupboards in the other two homes we had.
When we were planning this home, one of my priorities was designing a pantry space that was both organized and functional for our family.
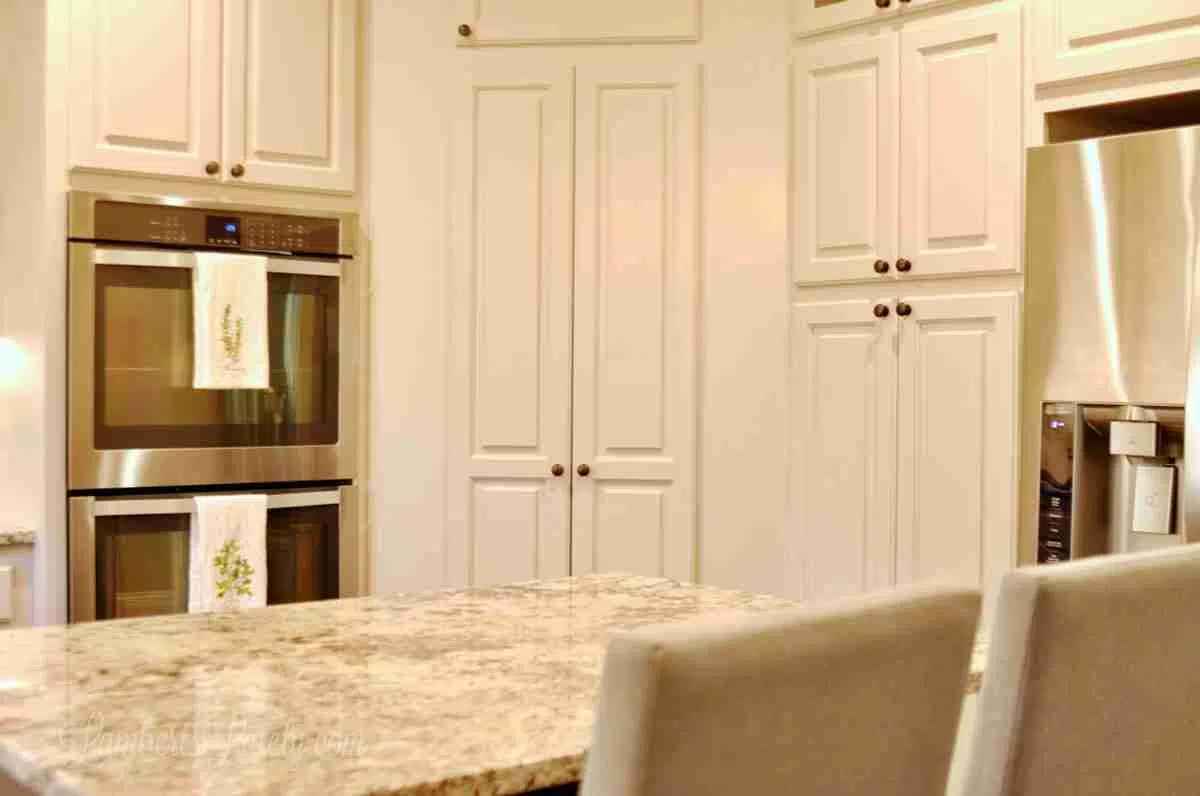
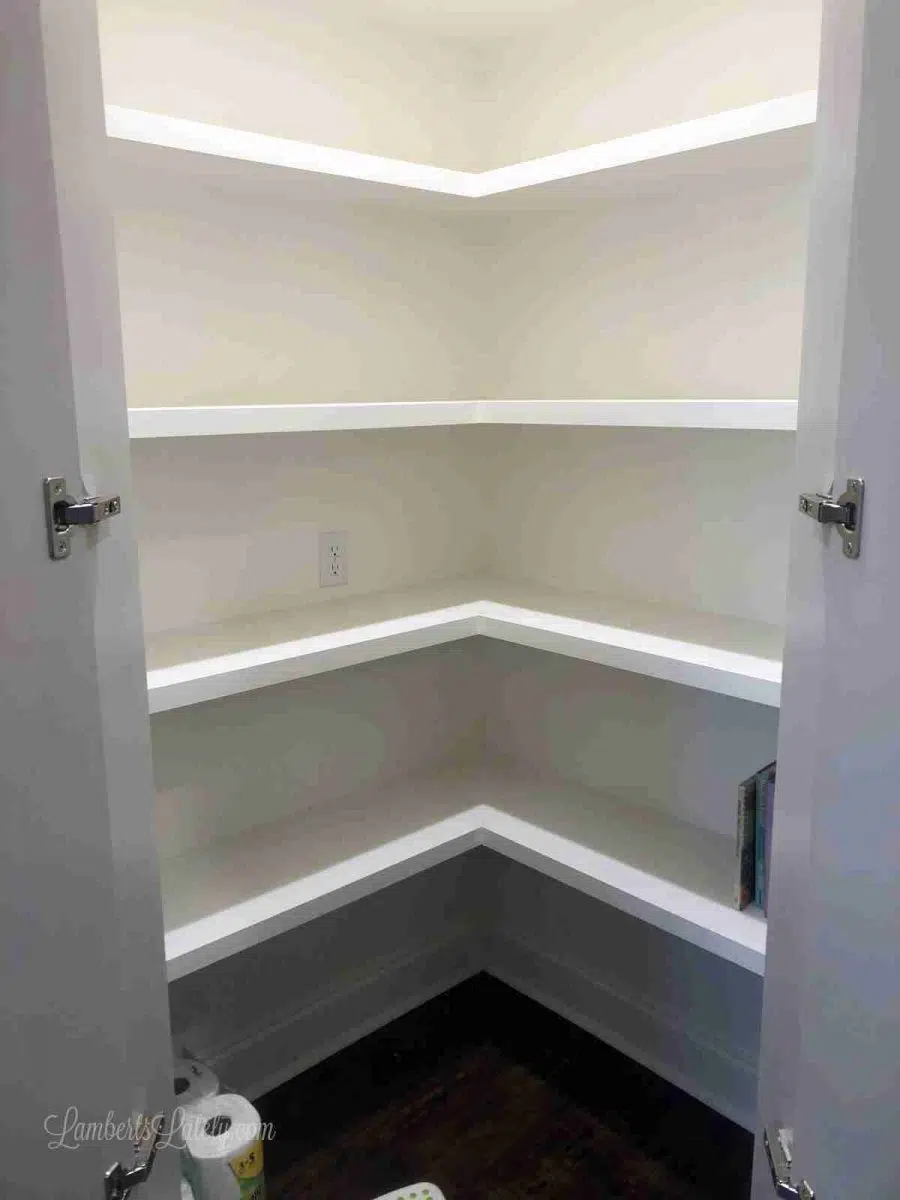
We integrated our pantry into the cabinet flow. Five years later and we're still absolutely loving the concept of our pantry doors blending in. It makes the space look so streamlined and coordinated.
But, I'm going to be honest...it hasn't been organized and pretty since the day we moved in. Not even close.
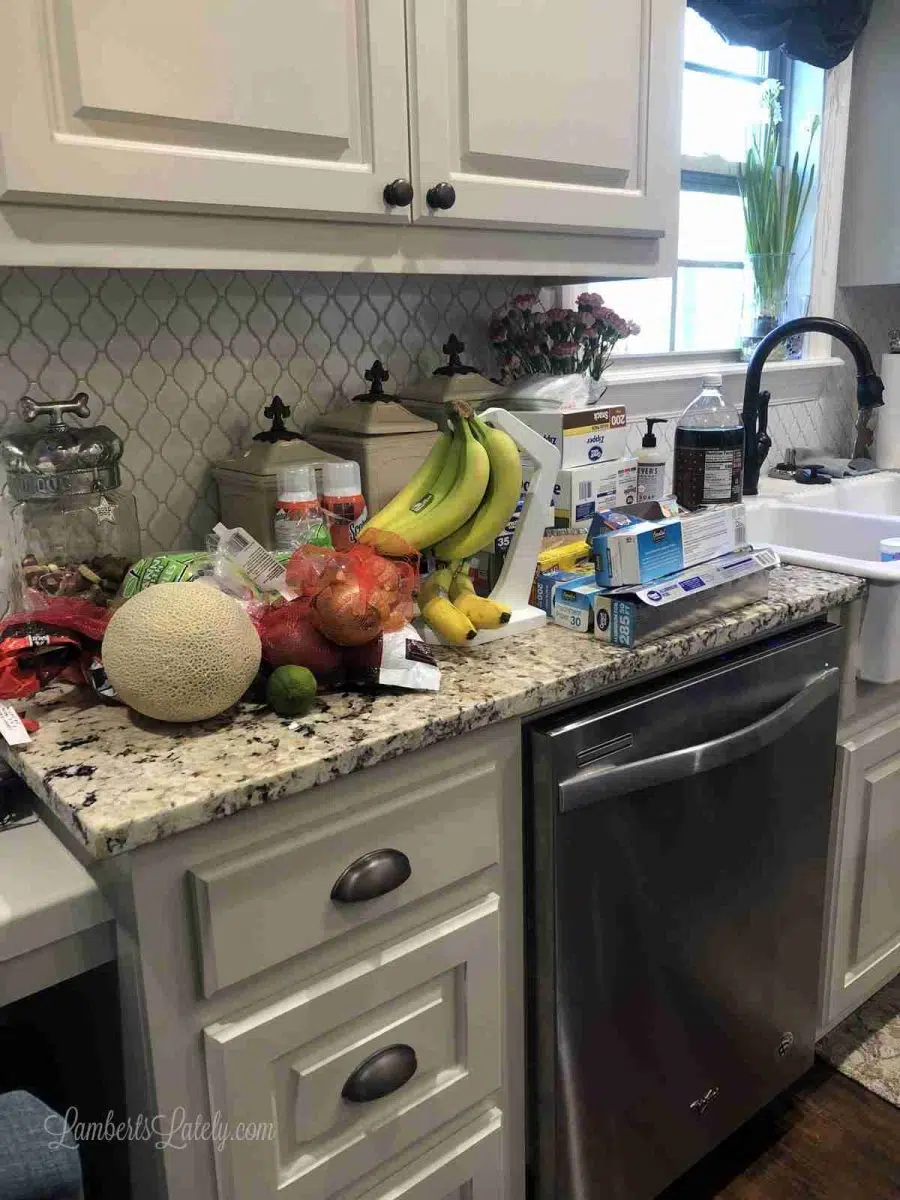
Before the Makeover
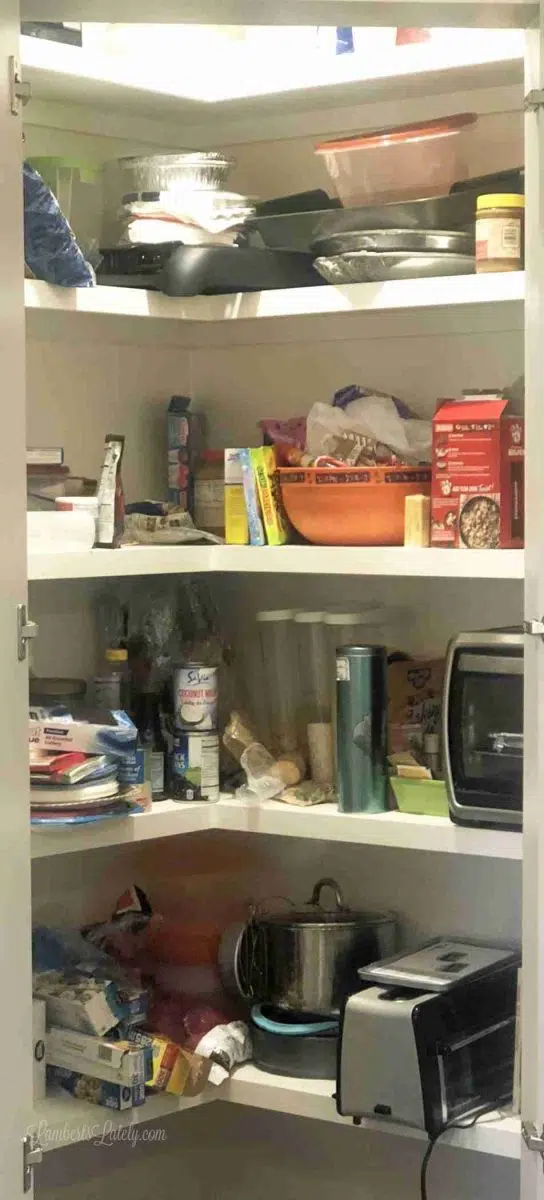
This is a little embarrassing, but this was the state of our pantry about 6 months after we moved in. Organizing this space was one of those projects I said I'd get around to after the dust of moving had settled. One weekend, I finally tackled it!
Step by Step: How to Organize a Small Pantry
You'll want to set aside a few hours one day to complete this project.
Step 1: Take out all pantry contents and clean shelves.
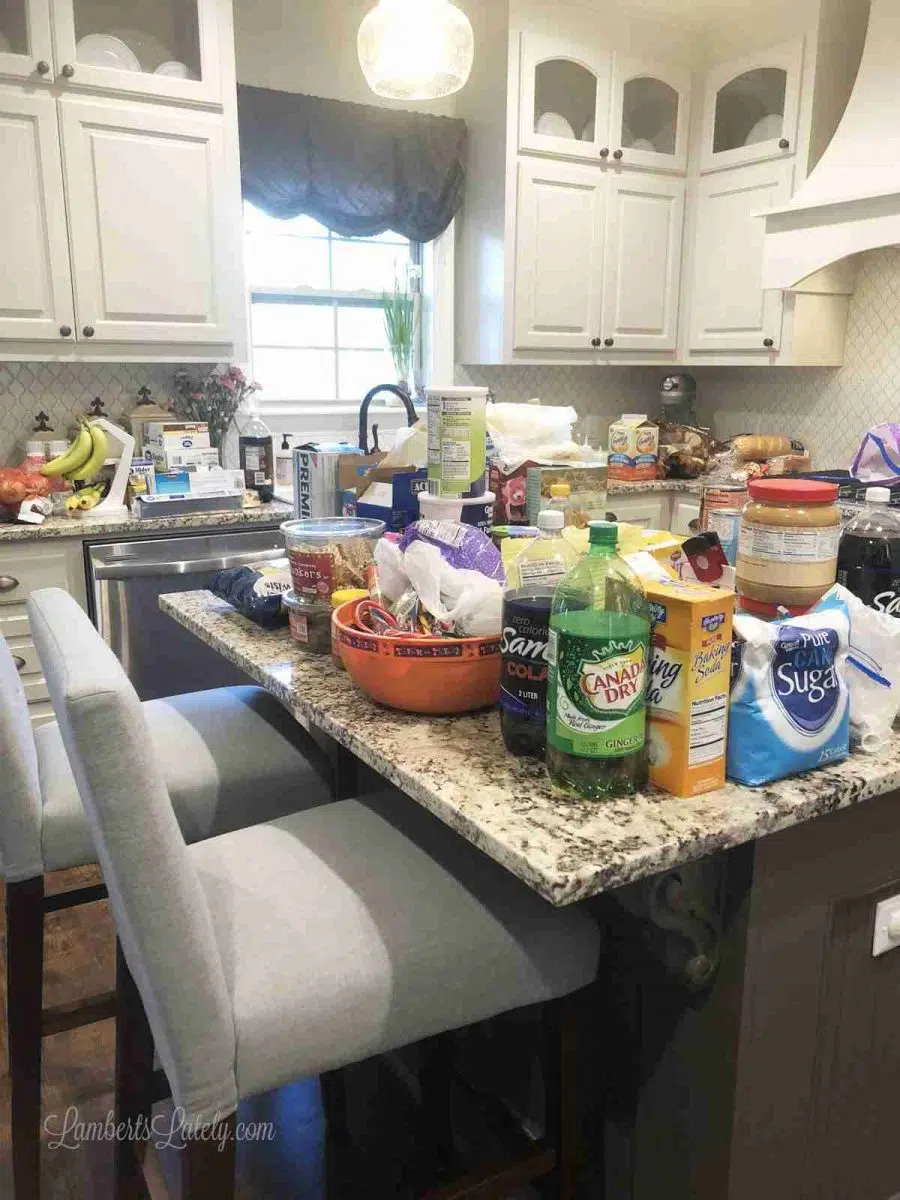
I follow pretty much the same steps each time I take on an organization project. First, take absolutely everything out of the space you're organizing and sort into like items. This will give you a good idea of any duplicates or expired items you have and will let you know what categories are most relevant to your pantry.
Plus, it just feels good to start with a clean slate! At this point, wipe down your shelving if needed. This would also be a good time to put down shelf liner if you choose to use it.
Step 2: Consolidate like foods and throw away anything that's expired or unnecessary.
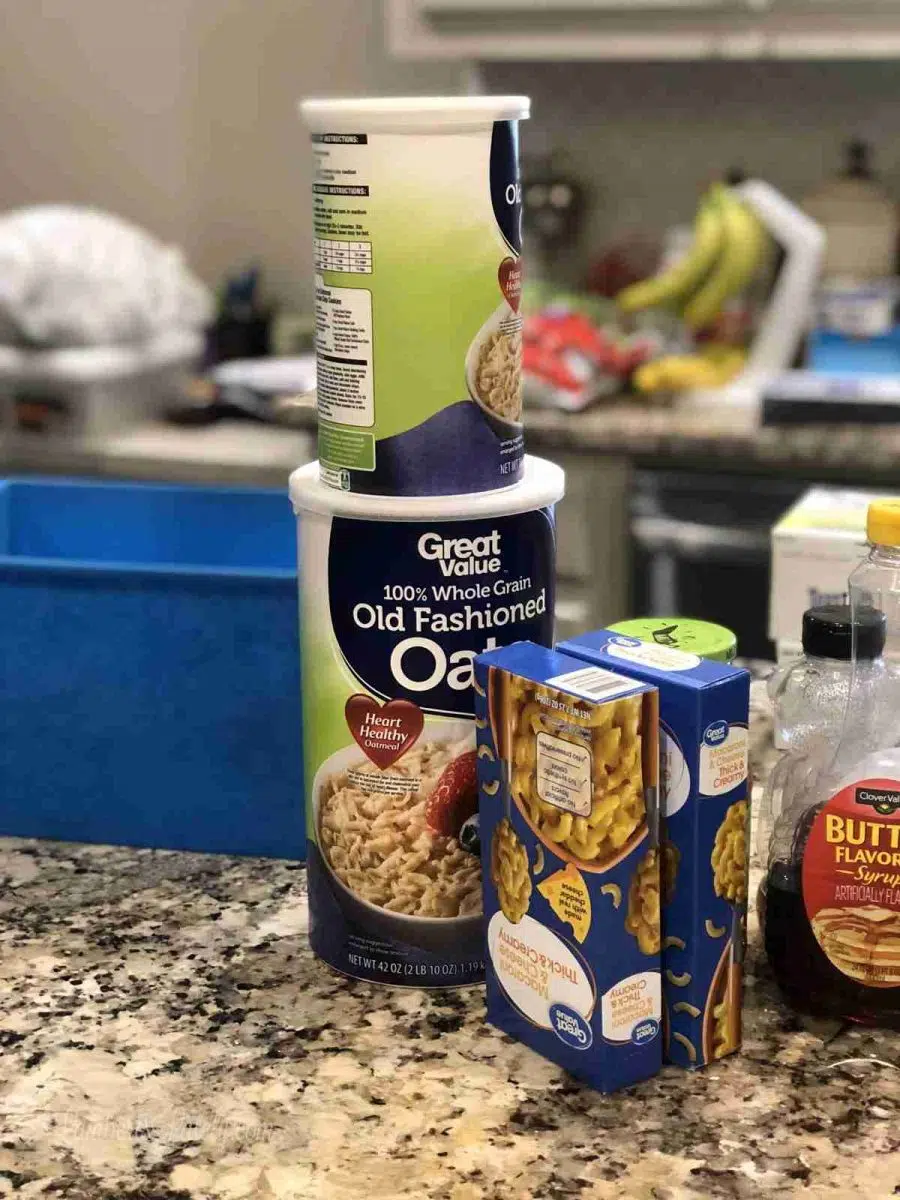
Unbeknownst to me, we had a lot of duplicates (and just plain old junk) in our pantry. We ended up throwing out an embarrassing amount of expired foods and were able to consolidate a lot of containers.
Tip
If consolidating food containers, always use the oldest container or update the expiration date.
We also donated a lot of our unused kitchen appliances. We have an entire appliance locker in our cabinets. I made a rule that if it didn't fit in there and we hadn't used it in more than 6 months, it was time to decide whether we needed it or not. We donated 5-6 old appliances, which freed up a ton of space.
Once we pared down a lot and had everything sorted, it was time to fill her back up.
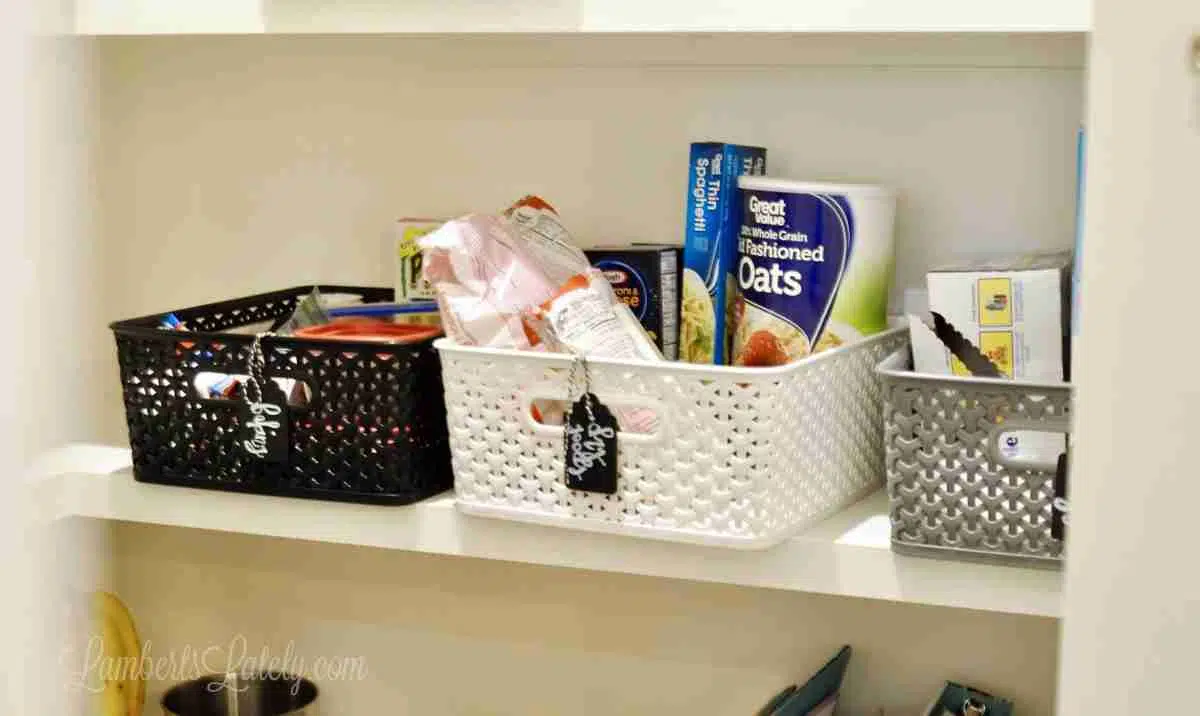
Step 3: Use containers to divide and organize your food categories.
For some reason, the containers we used in our pantry were not easy to find. I originally wanted to use wicker, but have you priced wicker baskets lately? When you need to purchase 15-20 of them, they can get expensive.
Plus, I really kind of wanted something that was easy to wipe down if needed. So that idea of wicker was out. But I couldn't get past wanting the weaved look.
I originally got a few baskets from the Dollar Tree, but if I'm being honest, they just kind of looked flimsy and cheap. Then, I searched high and low for non-cheap-looking (but cheaply-priced) baskets that would be durable and easy to clean. Not a tall order, right? 😉
Finally, I found these gorgeous Y-Weave Plastic Storage Bins from Target and absolutely fell in love. They weren't super expensive (about half the price of the cheapest wicker baskets I could find) and they are really durable for the price. They fit almost perfectly vertically in our shelf space.
We've used and loved these for five years now...they're still holding up great! I highly recommend these for those who need to organize open shelving. It's the best storage solution we've found for organizing food into groups when your shelves have little segmenting.
(I linked to the main page for the collection above, but we used just the medium-sized ones for this project.)
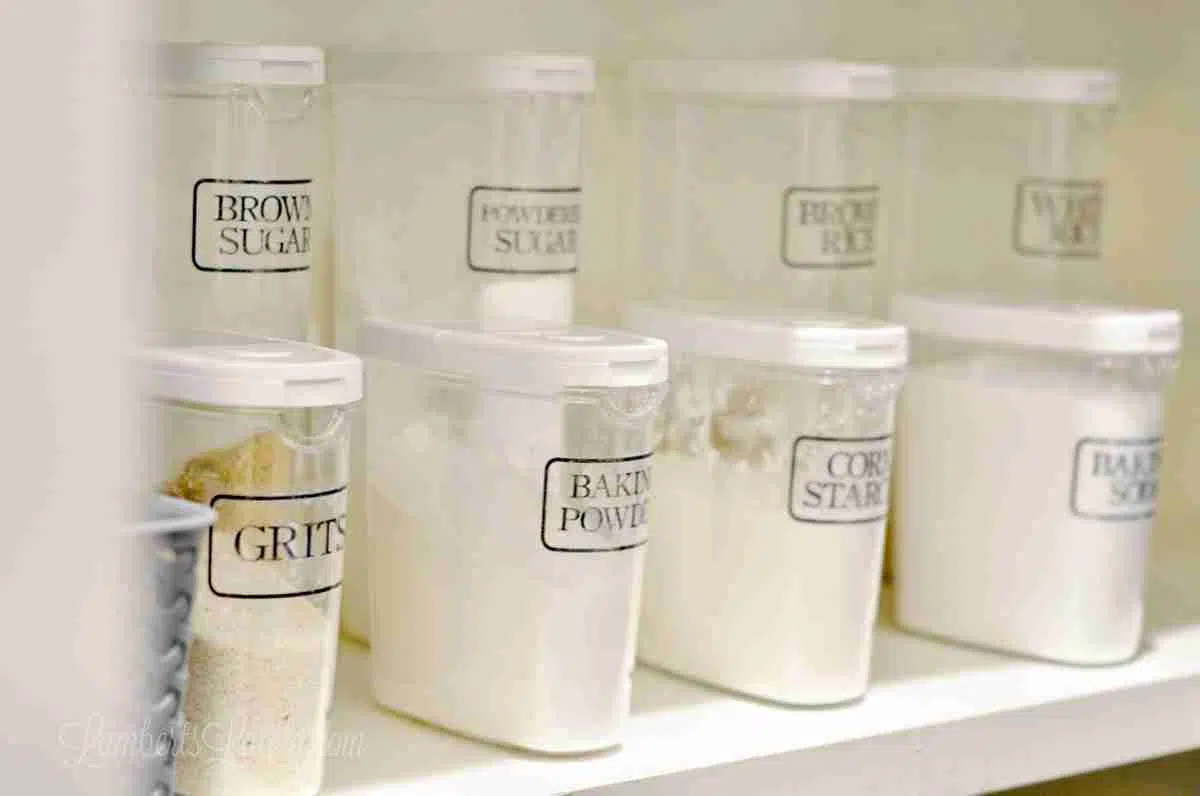
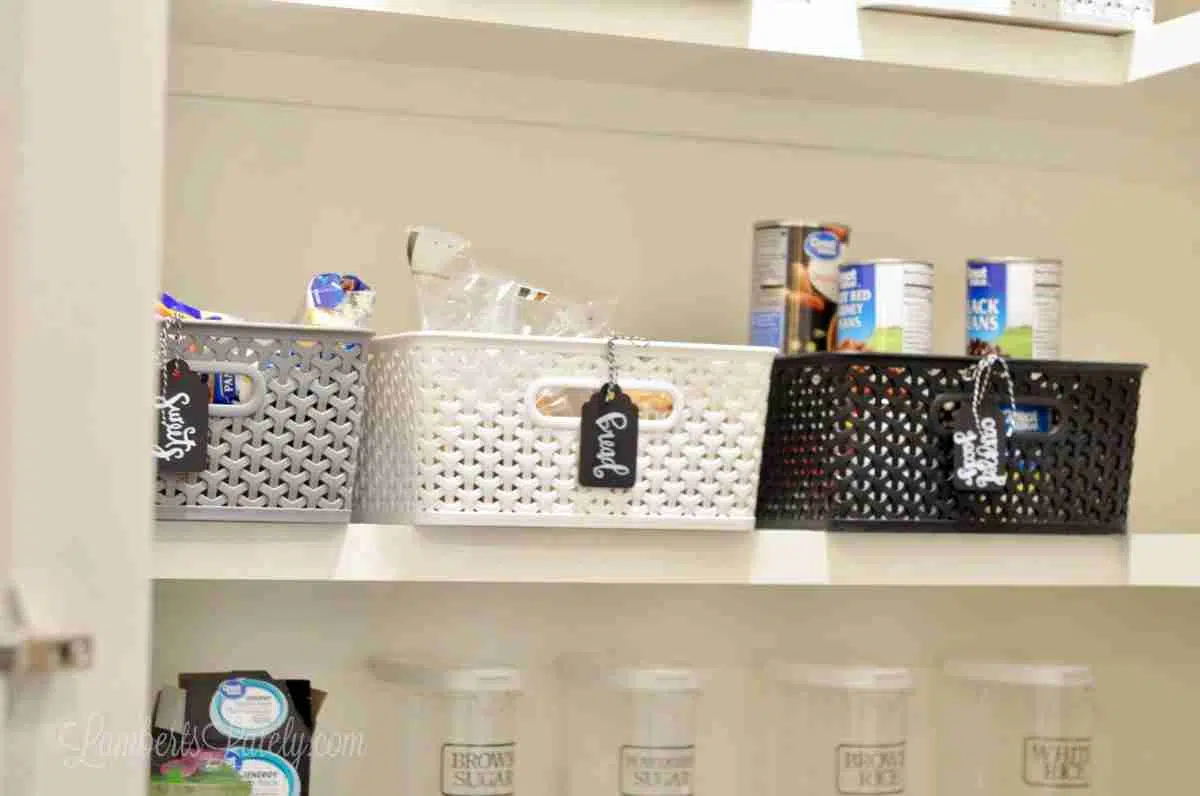
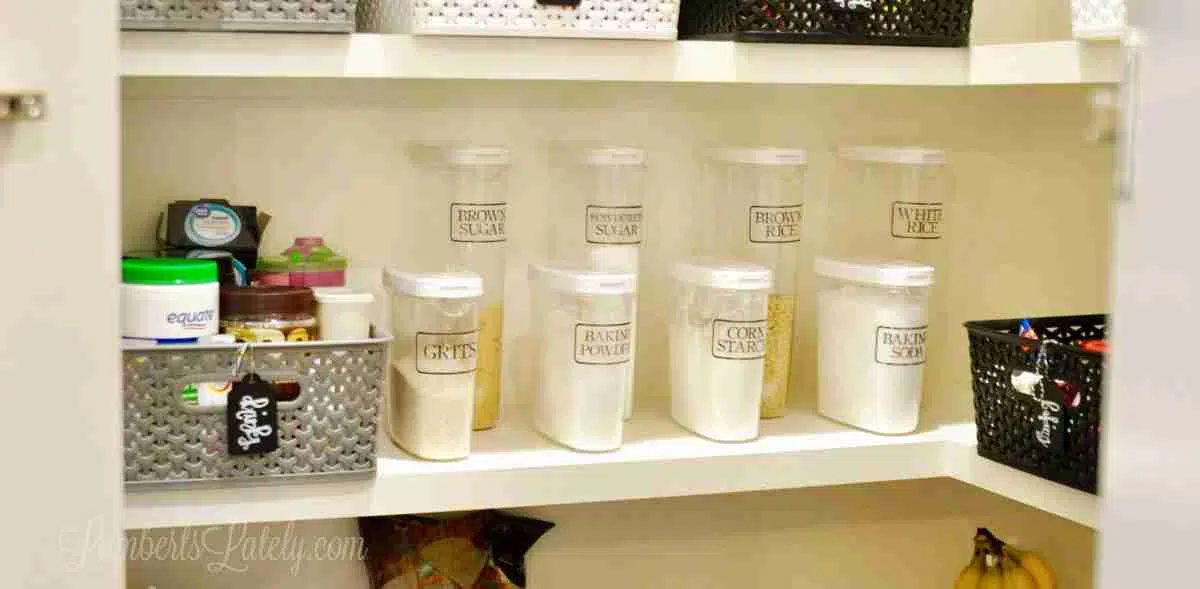
We also integrated a set of clear canisters for our more commonly-used dry ingredients. I've been buying the Ikea 365 Dry Food Jars little by little over the past year and finally have all I need. They're not incredibly expensive and so super durable.
We store the following in our clear canisters:
- Brown Sugar
- Powdered Sugar
- Brown Rice
- White Rice
- Baking Powder
- Baking Soda
- Pancake Mix
- Grits
- Corn Starch
(If you missed my post from Tuesday, here's how to label canisters.)
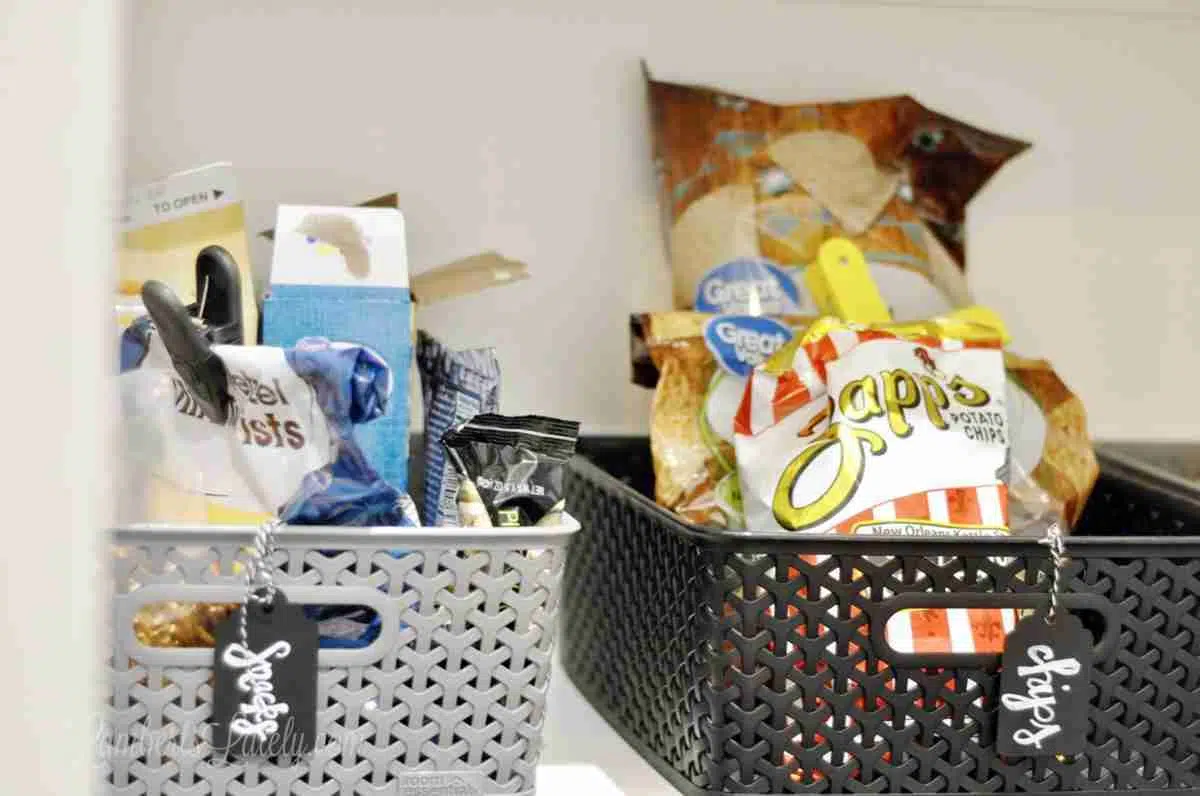
How we categorized the storage bins in our pantry
- Snacks (ex. small bags of pretzels or chips, granola bars)
- Big Bags of Chips and Snacks
- Veggies
- Fruit
- Ziploc Bags/Disposable Cutlery and Plates (3 bins total)
- Dry Goods (ex. pasta, rice, beans, and oatmeal)
- Baking (ex. flour, sprinkles, chocolate chips)
- Drinks (including coffee and drink mixes)
- Bottled or Jarred Sauces
- Canned Goods
- Bread
- Sweets
- Candy (2 bins)
So, we needed 16 bins and 9 canisters for our pantry. Of course, this is going to vary for everyone. I recommend sorting your items into categories before ordering your bins to know how many containers you'll need.
Step 4: Sort for success.
Once my items were in containers, it was time to find their place! I very intentionally sorted my bins.
Sorting Tip
Place foods you'd like to eat more of at eye level. Place the ones you'd like to avoid in inconvenient places (i.e. places you can't see or reach easily).
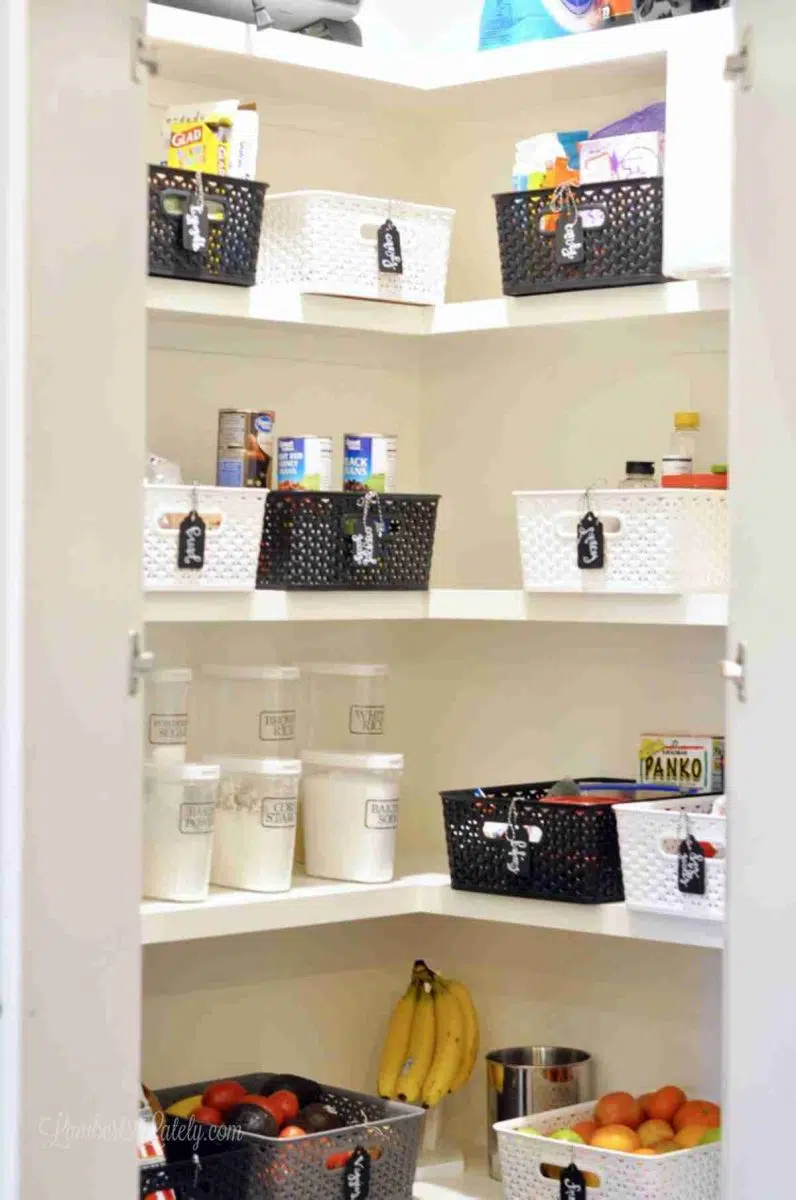
Bottom Shelf
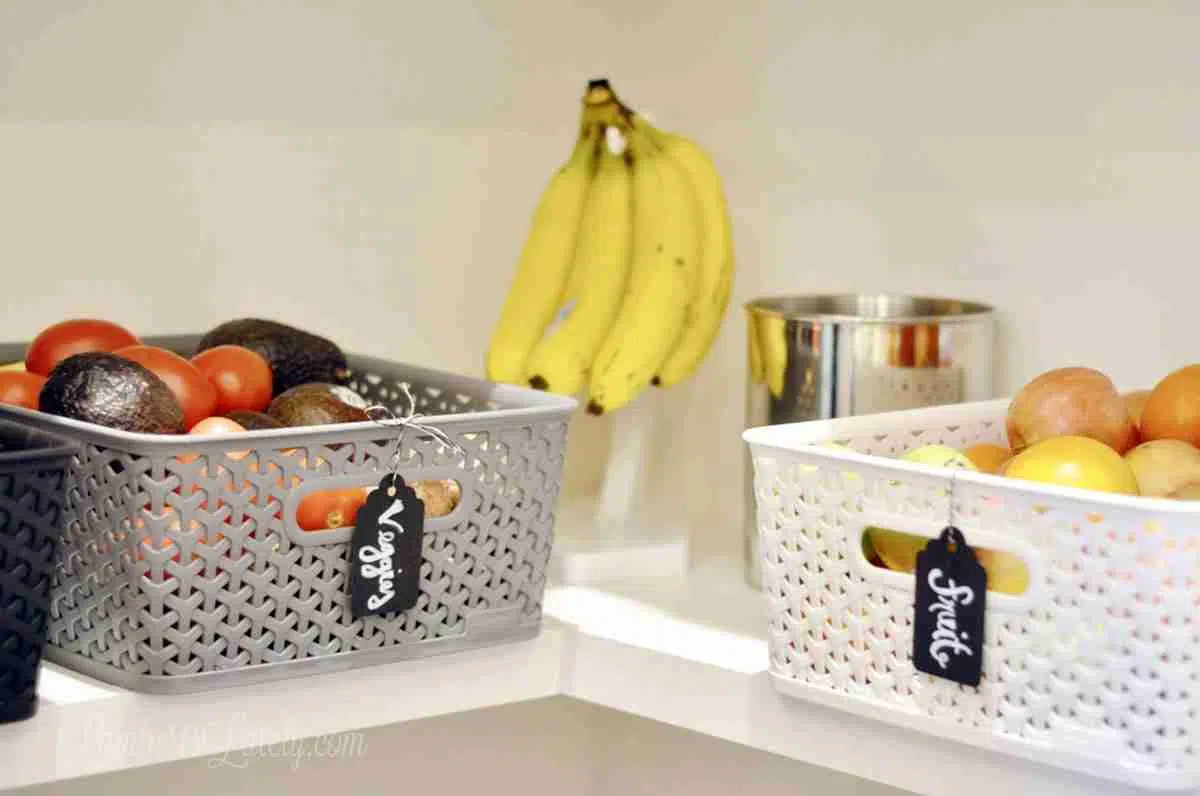
The bottom shelf holds snacks, fruit, and veggies. I wanted these at eye-level for the kids. Before we organized, I found them wanting sweets and candy way too often because they could see it as soon as they opened the pantry. Since sorting this way, they have been so much more likely to ask for fruit or a healthier snack!
Food Organization Tip
Separate onions from the rest of your produce...they will make everything else spoil faster. You can see at the bottom of the post that I have a stainless steel bin for onions in the bottom corner.
Second Shelf
The second shelf holds the items I use the most; drink mixes and baking items. I also have a few sandwich bags on this shelf that we use often.
Third Shelf
Continuing on to the third level, we have sweets, bread, canned goods...
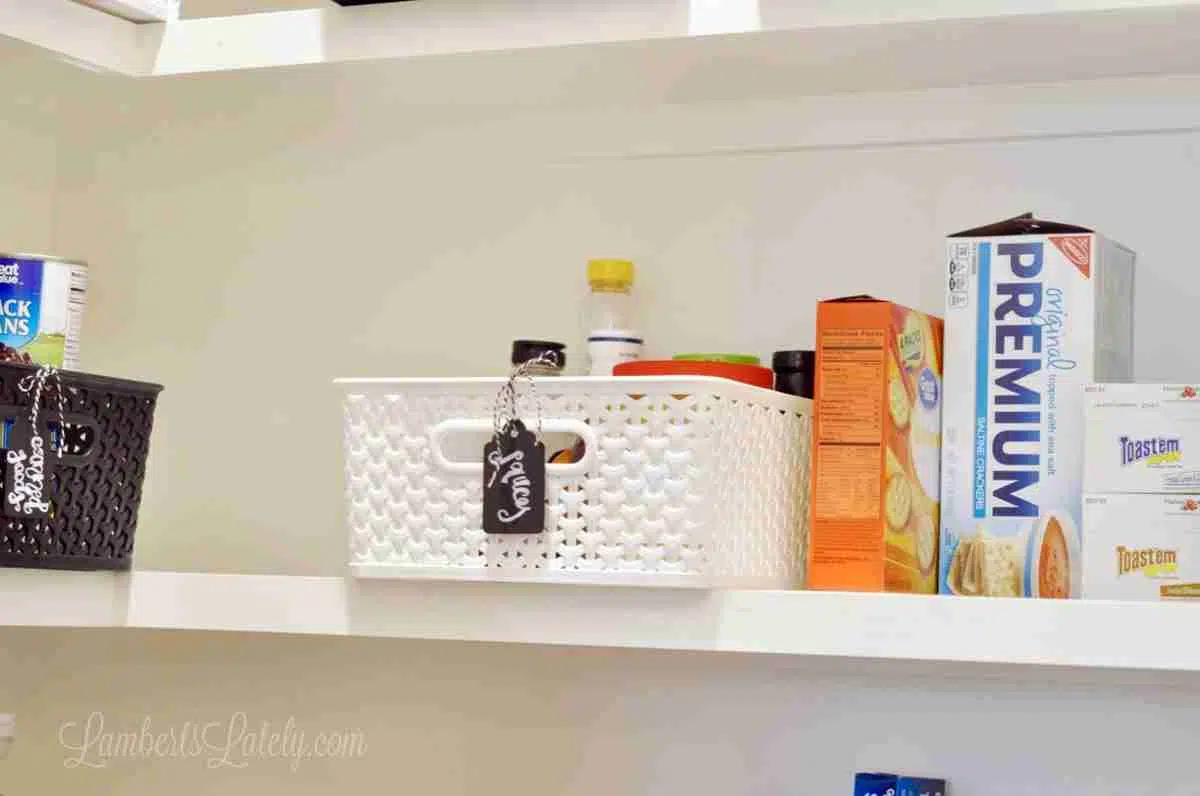
...bottled sauces, and larger boxes of food. I honestly didn't see the point of putting a bunch of big boxes in a container, so those are in the corner together (things like cereal and crackers).
Fourth Shelf
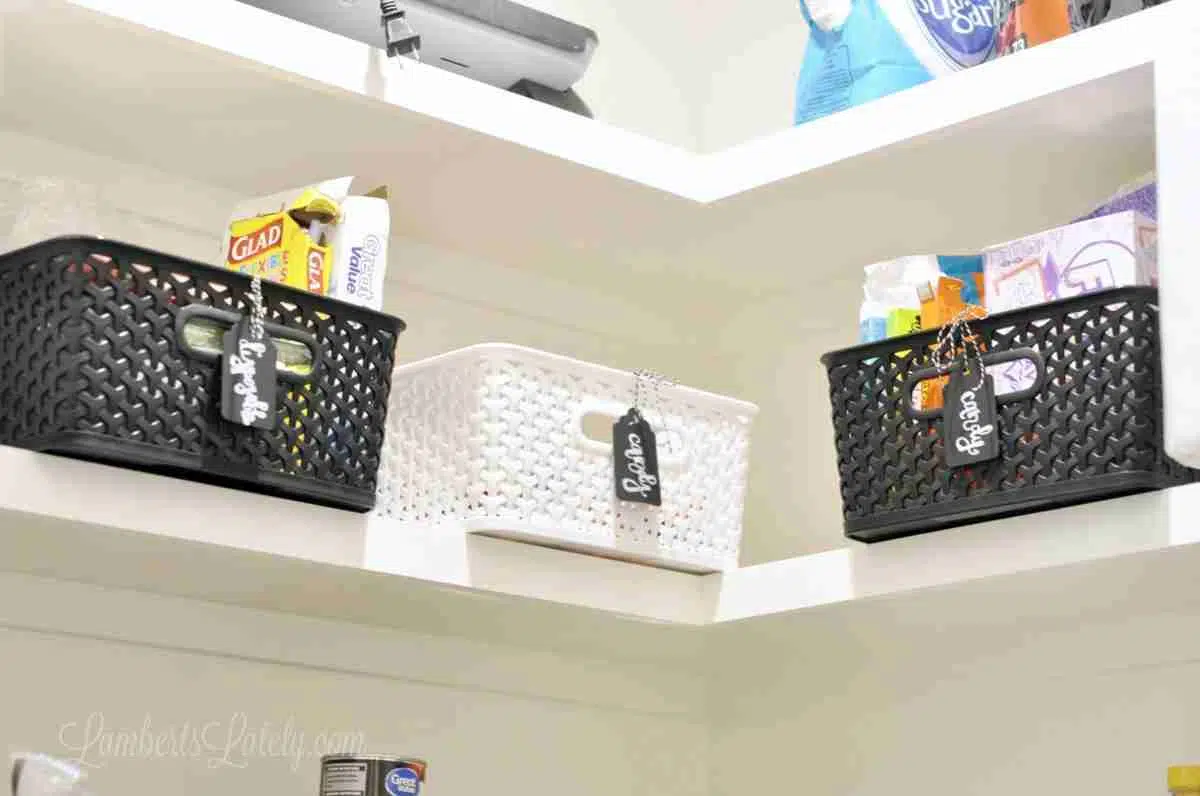
Finally, the things we use/need the least are on the fourth shelf...candy and disposable items. I try to keep the candy out of our line of vision so we think about eating it less. We just don't use disposable dishes a lot (even though we do need them around occasionally).
Top Shelf of Pantry
I didn't photograph this, but up top I have an appliance or two that are rarely used. I also keep things like my seasonal cookie cutters up there, and I have an overflow area for unopened packages that aren't needed yet.
Step 5: Don't ignore vertical storage.
If you guys have read any of my other organization posts, you know I'm a huge fan of utilizing vertical storage space. We have a couple of smaller wall spaces on either side of the pantry, so of course I had to fill those up.
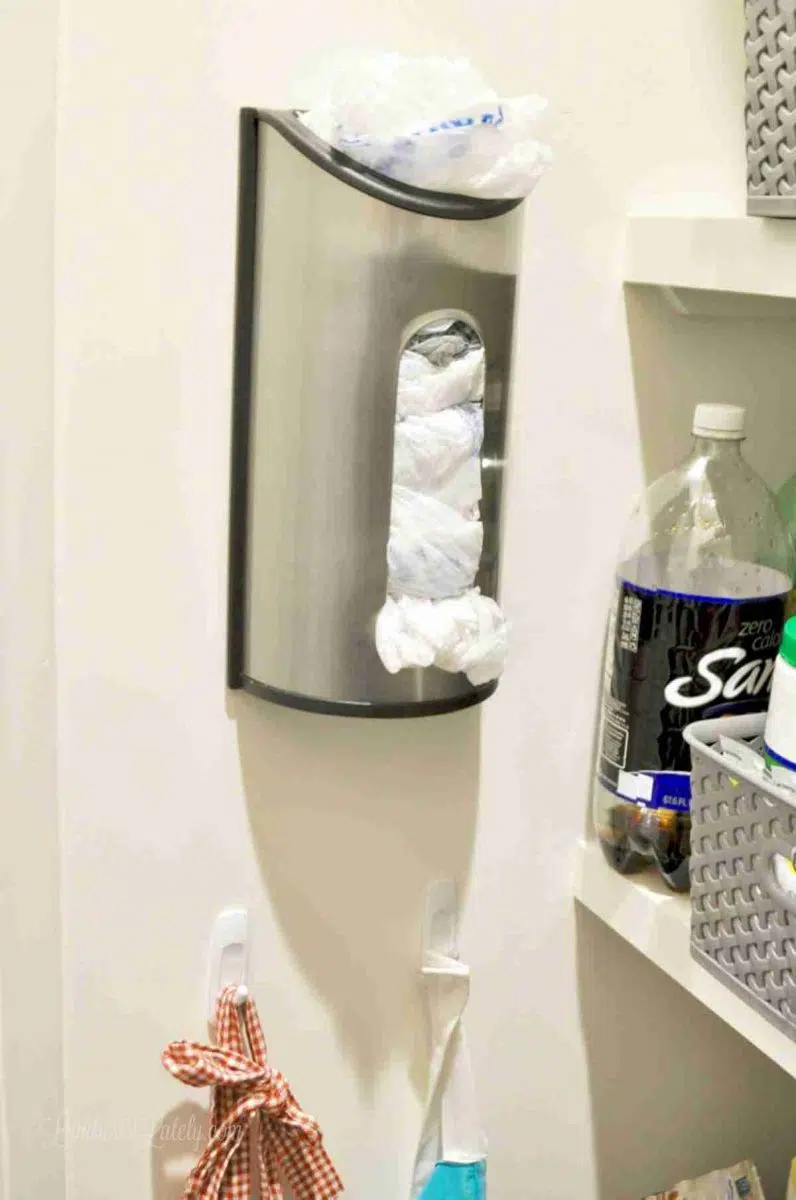
I try to recycle plastic bags for use around the house whenever possible (we use grocery pickup, so we really don't have the option to use reusable bags). I love this little bag dispenser for corralling all of those bags. It takes up much less space than storing them inside each other and makes grabbing one super easy!
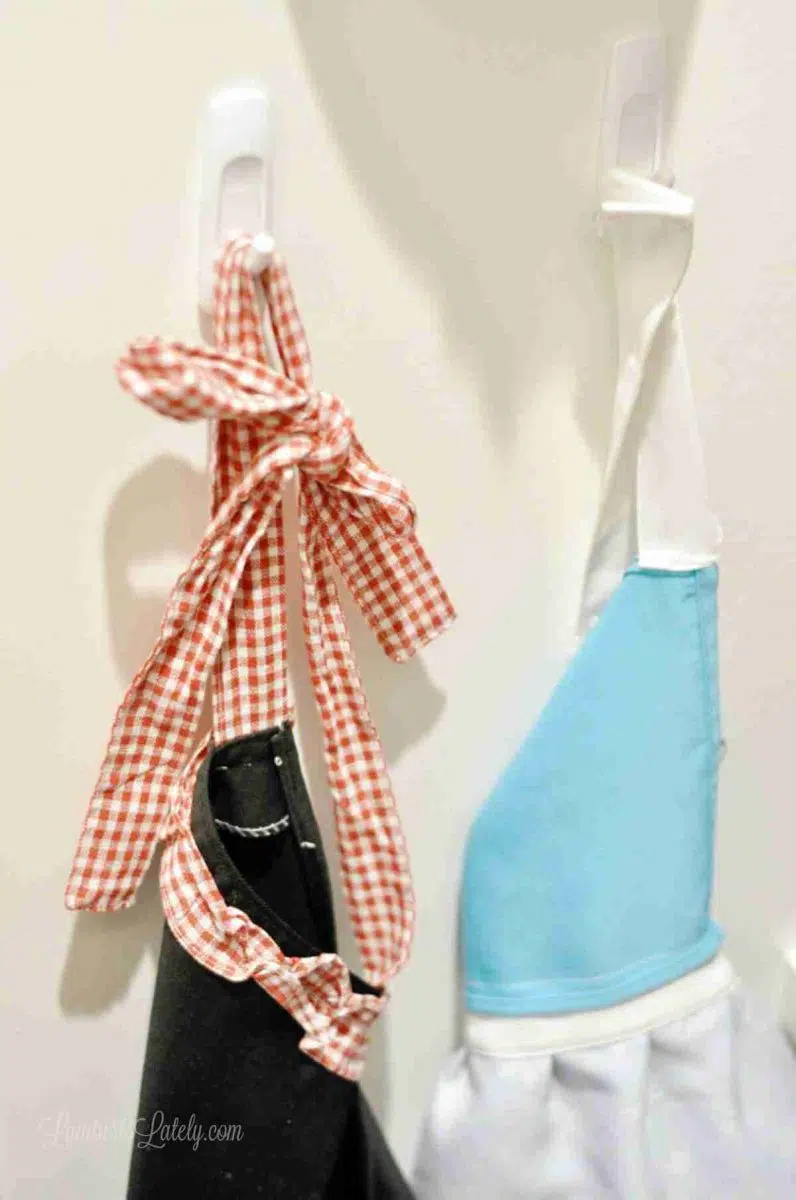
Just below that, I have our aprons hanging on command hooks. This way, the kids can grab one if they needs them in the kitchen.
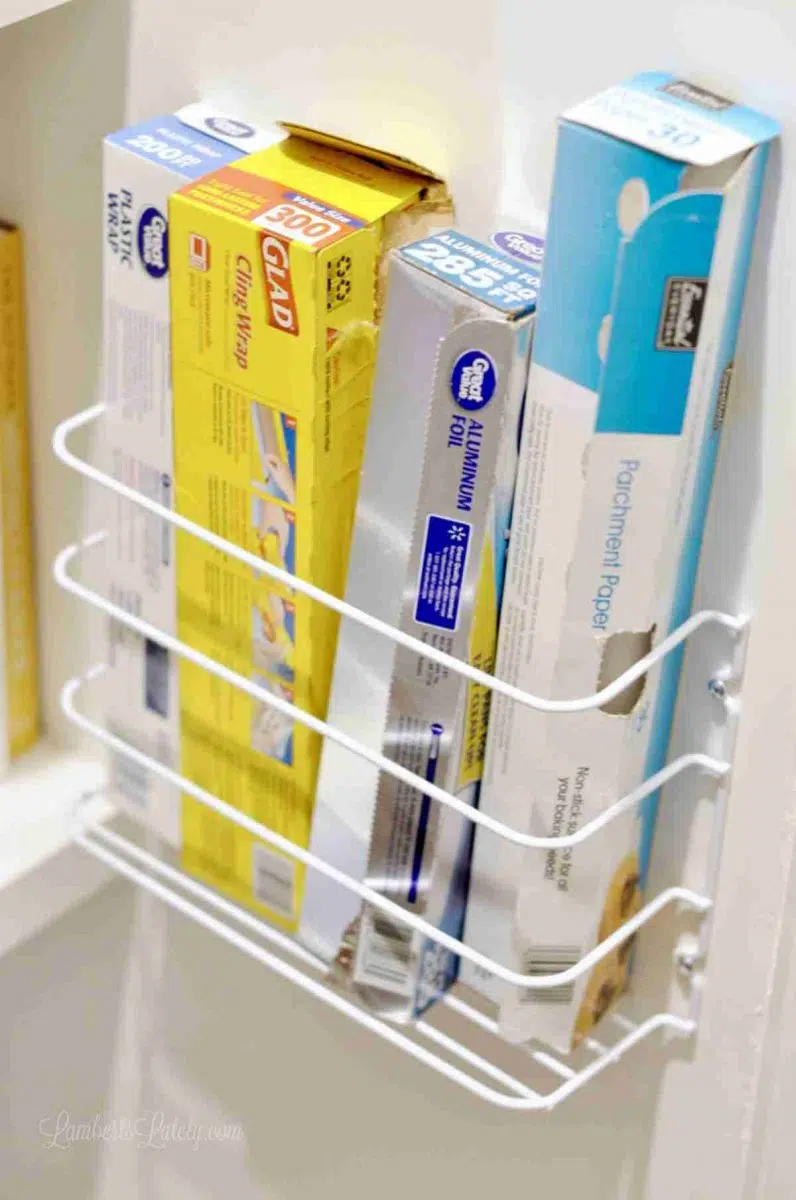
On the other small bit of wall space, I have this wrap/foil holder next to our bags. I love this thing! It's inexpensive, easy to install, and is such a great way to use vertical wall space (rather than the boxes falling all over the place each time you need them).
Step 6: Make it fun!
This is probably my favorite step of the process...making this space your own! Just because it's a pantry doesn't mean it has to be boring.

I used these cute little chalkboard tags (with this wet-erase chalk pen) to label each of our containers. (I know, don't even tell me...I have some work to do in hand-lettering.) Actually writing them out (rather than using all printable tags) really added a personal, fun touch! Of course, if you want a more uniform look, printable labels are also an option. Which leads me to...
I labeled with a complementary font on my clear bins labels. Can you believe these are made with packing tape?!
We couldn't be more pleased with how this small pantry makeover organization project turned out. We've had this space organized for a few years now, and the system is still working incredibly well! It's much easier to tell what items are needed (or not needed) at a glance, and everyone in our family quickly got used to the organization system.
Maintenance
Of course, there's a little bit of maintenance to do after the initial organizing day. I have pantry organization built into my cleaning schedule each week, so that's something I've been used to doing for awhile now. By simply taking 5 minutes to throw out old food and to organize the food you have, you can really maintain such an organized area.
We've also had to work on everyone putting food back where it goes (which can be a little bit of a challenge with kids). The key to a clean pantry isn't organizing it - it's maintaining the organization. By doing the maintenance little by little, you don't necessarily have to worry about doing some big overhaul in the future.
FAQs
Hope you picked up a few helpful tips for how to organize your small pantry! Check out more of my organization projects below.
Wow! Great job, Leslie 🙂 Really great links to the materials in this post...I want them too! <3 Corinne in Idaho
Thank you for all of your tips in organization! I’ll be doing my daughter in law cabinets in a couple of weeks love your ideas! I’ll let you know how I did! We’re did you find the chalk labels? Can’t wait to do it for her !
Oh I can't wait to hear Gail! They're from Amazon - there's a link to them in the post.
Love the organizing on the pantry. I try to go thru mine twice a year.... but I have a question about the containers with like flour, sugar and such. Do you every date something or use up all the dry goods before putting in new so the bottom doesn’t get old. I have to throw out expired foods and then put oldest to front with like cans in like groups. I have people in my house that doesn’t always help keep it organized 🙄
Hi Dana! It's a good idea to write the expiration date of dry goods on the bottom of the canister. A wet erase marker is perfect for this. Of course that becomes an issue when you mix packages in one canister; just try to use up before refilling!